Sign In
Upload
Manuals
Brands
Rabe Manuals
Farm Equipment
Kormoran PF 180
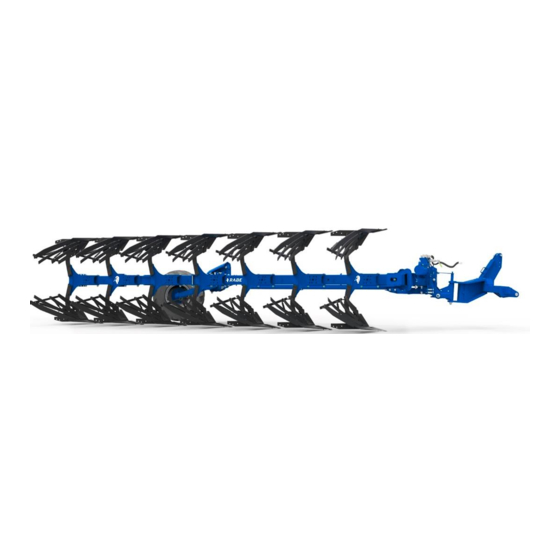
Rabe Kormoran PF 180 Tillage Machine Manuals
Manuals and User Guides for Rabe Kormoran PF 180 Tillage Machine. We have
1
Rabe Kormoran PF 180 Tillage Machine manual available for free PDF download: Operating Instructions Manual
Rabe Kormoran PF 180 Operating Instructions Manual (72 pages)
Semi-Mounted Reversible Single Wheel Plough In-Furrow Ploughing
Brand:
Rabe
| Category:
Farm Equipment
| Size: 9 MB
Table of Contents
Table of Contents
5
Introduction
7
1 Instructions
7
Product Documentation
7
Explanation of Symbols
7
Regulations and Legal Provisions
7
CE Label
7
Identification of Your Equipment
7
Type Plate
7
Location of Type Plate
7
Associated Documents
7
2 Safety Instructions and Rules
8
Safety Instructions
8
General Instructions
8
Operator Qualification
8
Hitching and Unhitching the Implement
8
Hydraulic Circuit and Couplings
8
Use of the Implement
8
Transport on the Public Highway
9
Maintenance
9
Loading and Unloading
9
Safety Stickers
10
3 Description of the Implement
12
General Views
12
Technical Specifications
13
Technical Characteristics - Solid Body
13
Technical Characteristics - Slatted Body
14
Technical Characteristics - Accumulator 0.75L
14
Technical Characteristics - Accumulator 3.5L
14
Dimensions and Weights
14
Rack and Pinion Assembly
15
Offset Compass
15
Hydraulic Weight Transfer Control (Optional)
16
The "Z" Beam
16
Extensions (Optional)
17
The Wheel Unit
17
Working Width
18
Mould Board
18
Ploughshare
19
Fin Coulter (Optional)
19
Deflector (Optional)
19
Disc Coulter [Optional]
19
Safety Devices
19
Mechanical Safety Device
19
Hydro Avant" Hydraulic Safety Device (Optional)
20
Lighting and Signals
20
4 Preparing the Tractor
21
Required Tractive Power
21
Tractor Wheels
21
Tractor Tyres
21
Tyre Spacing
21
Ballasting the Tractor
21
Length of the Lifting Links
22
Position of the Stabilisers
23
Top Link
23
5 Hitching and Unhitching
24
Hitching the Implement to the Tractor
24
Joints
24
Ball Joints
24
Releasing the Latch
24
Hitching the Top Link
25
Electrical Connection of the Signalling
25
Equipment
25
Hydraulic Connections
25
Position of Support Legs
25
Locking and Unlocking the Turnover Mechanism
26
Unhitching the Implement from the Tractor
27
Decompression Kit
27
6 Hydraulic Connections
28
Required Hydraulic Control Valves
28
Max. Hydraulic
28
Function Selector (Optional)
29
Installing the Function Selector
29
Electrical Connections of the Solenoid Valves
29
Using the Function Selector
30
Special Characteristics of the Selector
30
Preparation of the Implement before Work
31
7 Preparation of the Implement before Work
31
Locating the Adjustment Points
31
Adjustment of the Working Width of the 1St Body (Offset)
32
Wheel Angle Adjustment
32
Calibration of Non-Stop Hydraulic Safety Devices
33
Offset Adjustment
34
St Furrow)
34
Installing the Subsoiler (Optional)
35
Transport and Working Depth Adjustment Wheel
36
Tyre Pressures
36
Tightening of Wheel Studs
36
8 Changing between Transport and Working Position
36
Changing to Transport Position
36
Changing to Working Position
38
Driving on the Road
39
9 Field Adjustment
40
Use in the Field
40
First Pass
41
Opening the Offset Compass
41
Working Depth Adjustment
41
Ground Work
41
Inclination Adjustment
41
Second Pass
42
Longitudinal Levelling
42
Lateral Levelling
42
Tractor Pressure Control Adjustment
43
Offset Adjustment
43
St Furrow)
43
Adjusting the Hydraulic Compensation Cylinder (Optional)
43
Agricultural Work in the Field - Adjusting the Settings
44
Safety During Operations
44
Working Instructions
44
Adjustments While Working
44
Adjustment of the Disc Coulter (Optional)
44
Set the Working Depth with the Disc Coulter
44
Disc Coulter - Lateral Overlap Adjustment
45
Adjustment - Flat Leg
45
Adjustment - Round Leg
45
Disc Coulter - Adjust the Pivot Arm End Stop
46
Adjustment of Round Leg Skimmers (Optional)
46
Round Leg Skimmer - Adjusting the Working Depth
46
Round Leg Skimmer - Adjusting Lateral Overlap
47
Ropund Leg Skimmer - Setting the Discharge
47
Angle
47
Adjustment of Vari-Fix Skimmer (Optional)
48
Vari-Fix - Adjusting Working Depth
48
Vari Fix Skimmers - Lateral Overlap
48
Adjusting the Vari Heavy Duty Skimmers
49
Vari Heavy Duty - Adjusting the Working Depth
49
Vari Heavy Duty Skimmers - Lateral Overlap
49
Adjusting the Sub-Soiler (Optional)
50
Adjustment of Deflector (Optional)
50
11 Cleaning
51
Addition of Extra Plough Bodies
51
12 Inspection
51
Maintenance
51
10 Protection of the Environment
51
Soil Contamination
51
Worn Tyres
51
Cleaning
51
Inspection
51
Checking the Hydraulic System
51
Identification of a Hydraulic Hose
52
Lubrication and Greasing
53
13 Troubleshooting and Repair
57
Tripping the Mechanical Stone Safety Device - Replacing the Shear Bolt
57
Replacing the Shear Bolt
57
Replacing the Vari Heavy Duty (VHD) Shear Bolt
58
Replacing the Sub-Soiler Shear Bolt (Optional)
59
Adjust Undercut
60
14 Replacing Wear Parts
62
Replacing Mouldboards
62
Replace the Stripes
63
Replace the Tine
63
Replace the Tines with Reversible Points
63
Replace the Trash Board
64
Replace the Subsoiler
64
Replace the Skimmer Tines and Mouldboard
65
Replace the Disc Coulter
65
15 Replacing the Wheel
66
16 Spare Parts
67
Maintenance of Plough Bodies
68
Tightening Torques
68
Precautions for Storage
69
Placing the Sub-Soiler in the Rest Position
69
Returning to Operation and Verification
69
17 CE Declaration
70
Advertisement
Advertisement
Related Products
Rabe Packer CR
Rabe Corvus PKE 3001
Rabe Corvus PKE 4001
Rabe Corvus PKE 4501
Rabe KORMORAN PL 180
Rabe Kormoran PF HA 180
Rabe KORMORAN PL V 180
Rabe KORMORAN PL VHA 180
Rabe KORMORAN SF 180
Rabe PILOT
Rabe Categories
Farm Equipment
Food Processor
Drill
Control Unit
Seeders
More Rabe Manuals
Login
Sign In
OR
Sign in with Facebook
Sign in with Google
Upload manual
Upload from disk
Upload from URL