Advertisement
Quick Links
Flowserve Corporation
Flow Control Division
www.flowserve.com
Mechanical Installation
Installation is best performed with the NAMUR mounting kits.
These kits allow direct mounting of the Aviator™ shaft to the
actuator pinion without a coupler. The NAMUR mounting kits
will work with any actuator conforming to the NAMUR standard
for accessory mounting hole locations and pinion dimensions.
Simply attach bracket to actuator and Aviator™ to bracket with
the included fasteners. The Aviator™ shaft features an integral
alignment pin which engages the tapped pinion hole. Automax
also offers a full line of non-NAMUR kits.
Electrical Connections
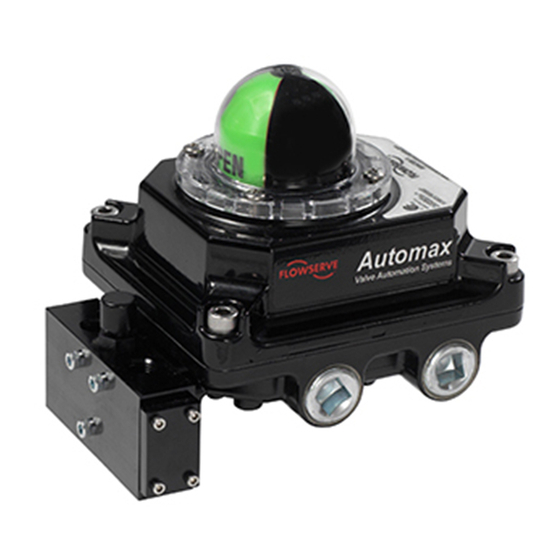
The Aviator™ features three (3)
The switches and pilot solenoid are wired to a printed circuit
board to simplify customer wiring connections. A wiring
diagram is included under the lid. Simply make desired
connections to the circuit board using the attached screw
terminal blocks. Secure a grounding wire under the green
grounding screw. Make sure the solenoid control voltage is
the same as the solenoid electrical rating.
For hazardous locations, U.L. and National Electric codes require
an approved sealing fitting within 18 inches of the switch
enclosure. Sealing fittings are not required for Division 2
non-incendive applications. Open conduit entries must be closed
after installation using a close-up plug approved for hazardous
locations. Conduit and plugs must engage a full five (5) threads.
Caution
To prevent ignition of hazardous
atmospheres, keep cover bolts tight
while circuits are live. Disconnect
supply circuit before opening.
DEMKO 02 ATEX 130947
Flameproof:
II 2 G EEx d IIB T4-T6
DEMKO 02 ATEX 0218321
Non-Incendive:
II 3 G EEx nC II T4-T6
Tamb = -25°C; T6 +55°C, T5 +70°C, T4 = 80°C
LML0002-1 (AUTO-32)
3/03
© 2003, Flowserve Corporation, Printed in U.S.A.
Installation, Operation and Maintenance Instructions
1350 N. Mountain Springs Parkway
Springville, Utah 84663-3004
Phone: 801 489 8611
Automax Aviator
1
⁄
" NPT conduit entries.
2
0518
Automax Valve Automation Systems
™
Spool and Tubing Configuration
1. For spring return actuators, a 4-way spool valve is
provided with port #2 plugged. For double acting actuators,
the same valve is provided with no plugs. Make sure the
correct spool is selected before installing tubing. (Note: the
APS2 module can be supplied on spring return actuators to
purge the spring chamber with supply air.)
2. Make sure all air pressure is removed before installing tubing.
3. Attach tubing according to Figures 1 or 2 below, depending
upon application. Attach supply tubing to Port 1 and use
3 and 5 exhaust.
4. To prolong actuator life use only clean, dry plant air.
Lubricated air is not required, although it is recommended
particularly for high cycle applications.
Figure 1
DA Actuator
Switch Setting
1. Rotate actuator to desired position.
2. Loosen five captive cover screws
and remove lid, turning slightly
while lifting.
3. To adjust the limits, lift or
depress cam against spring to
disengage splines and turn cam
until switch activates / deactivates
as desired (Figure 3).
4. Release cam, assuring that the
splines are engaged.
5. Clean base and lid flanges and
replace lid on base. Make sure wires
are NOT caught between flanges,
and tighten captive screws.
1978 Foreman Dr.
Cookeville, TN 38501
Phone: 931 432 4021
Figure 2
SR Actuator
Figure 3
Cam Adjustment
Page 1 of 2
Advertisement

Summary of Contents for Flowserve Automax Aviator
- Page 1 Make sure wires Tamb = -25°C; T6 +55°C, T5 +70°C, T4 = 80°C are NOT caught between flanges, Figure 3 and tighten captive screws. Cam Adjustment LML0002-1 (AUTO-32) 3/03 Page 1 of 2 © 2003, Flowserve Corporation, Printed in U.S.A.
- Page 2 XM0276 Manifold Block X00676 #10-24 x Varies .67 Watt Solenoid Pilot Varies Shaft Assembly X00895 O-Ring 103603 O-Ring X00894 O-Ring 101810 Snap Ring XM0292 Manifold Block LML0002-1 (AUTO-32) 3/03 Page 2 of 2 © 2003, Flowserve Corporation, Printed in U.S.A.


Need help?
Do you have a question about the Automax Aviator and is the answer not in the manual?
Questions and answers