Table of Contents
Advertisement
Quick Links
Advertisement
Table of Contents

Subscribe to Our Youtube Channel
Related Manuals for Truma E-Kit AU


Summary of Contents for Truma E-Kit AU
- Page 1 Truma E-Kit AU Installation instructions Page...
-
Page 2: Table Of Contents
................... 4 Warm air distribution ............5 Connecting duct VR 80 to the Truma E-Kit ......5 Connecting elbow BG 80 to the duct adapter ...... 5 The following will especially void warranty, Electrical connection ............5... -
Page 3: Installation Instructions
Install the Truma E-Kit so that there is a gap of at least 6 mm all round to furniture or parts of the vehicle. Only competent, trained personnel (experts) may install, start up and repair the Truma product with considera- Do not block the warm air outlets of the Truma E-Kit. -
Page 4: Preparation
Truma E-Kit Truma E-Kit Figure 6 Place the Truma E-Kit as far as possible on to the warm air outlet (2) of the Truma VarioHeat and screw the mounting bracket (1) to the floor or wall of the vehicle with two screws (5.5x25 mm). -
Page 5: Warm Air Distribution
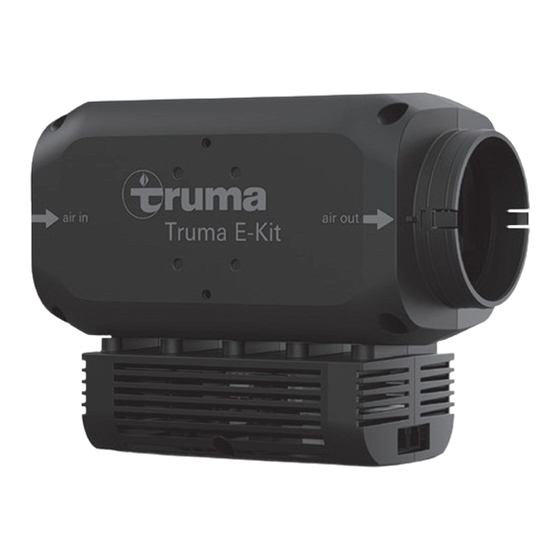
The arrows on the Truma E-Kit indicate the flow direction of the warm air. Insert duct VR 80 into the warm air outlet of the Truma E-Kit as far as it will go. The warm air duct is held in place by barbs. -
Page 6: Power Supply 12 V
Class 1 as holes on metal walls. The connector cables must not be fixed to or touch the exhaust duct (of Truma VarioHeat), the housing or the warm air ducts of the Truma E-Kit (minimum gap: 5 cm). All cables must be secured with clamps. - Page 8 In Australia, always notify Service Australia if problems are encountered; in other countries the relevant service part- ners should be contacted (www.truma.com). Having the equipment model and the serial number ready (see type plate) will speed up processing. Leisure-Tec Australia Pty. Ltd.
Need help?
Do you have a question about the E-Kit AU and is the answer not in the manual?
Questions and answers