Table of Contents
Advertisement
Quick Links
Installation
and Operating
Instructions
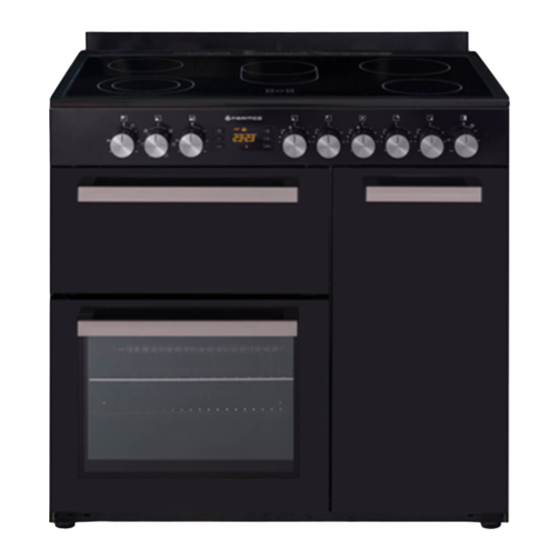
Country Style 900mm
Ceramic Cooktop & Electric Oven
For your convenience, we recommend to attach the serial number label at
the rear of this manual
As part of Parmco Appliances commitment to improving and updating product ranges,
we reserve the right to alter, change and update technical specifications and appearance
attributes of all Parmco Appliances products. E&OE.
727626032018
Advertisement
Table of Contents

Related Manuals for Parmco Country Style 900mm


Summary of Contents for Parmco Country Style 900mm
- Page 1 For your convenience, we recommend to attach the serial number label at the rear of this manual As part of Parmco Appliances commitment to improving and updating product ranges, we reserve the right to alter, change and update technical specifications and appearance attributes of all Parmco Appliances products.
- Page 2 • Normal or scheduled maintenance including blocked filters or ducting. Please retain this Warranty card together with receipt or other proof of purchase date when seeking service during the warranty period • Consumable items such as light bulbs. • Any damage to hobs caused by spills when cooking. • Any breakage or damage of glass items. • Any damage caused by non recommended product used for cleaning, Please contact Parmco at 09 573 5678 if your maintaining, lubricating or similar. appliance needs servicing under warranty. Please • Any aspect relating to the installation of the product, or damage caused have your model number and proof of purchase ready. during installation including blocked access for repair. Warranty repairs must be authorized by Parmco. • Any third party (including reseller) or consequential loss or damage (direct or indirect) however arising. Subject to updates without prior notice, please visit www.parmco.co.nz for E & O.E. 727626062017 the latest version.
- Page 3 Dear Valued Customer, Thank you and congratulations on purchasing your new Parmco appliance. All Parmco products are made to the highest quality and design standards. We are sure you will enjoy your new appliance. As a note, please read through these instructions carefully. These will assist you in gaining a complete understanding of the functions and features o ered by your appliance.
- Page 4 Dear User, Our objective is to make this product provide you with the best output which is manufactured in our modern facilities in a careful working environment, in compliance with total quality concept. Therefore, we suggest you to read the user manual carefully before using the product and, keep it permanently at your disposal.
-
Page 5: Table Of Contents
CONTENTS Important Warnings Introduction Of The Appliance Important Warnings Electrical Wiring Scheme Installation Of Your Oven Technical Features Of Your Oven Description Of Oven Using The Hobs Using Oven Section Cooking Time Table Cleaning And Maintenance Of The Oven’s Door Changing The Oven Lamp Maintenance And Cleaning Installation Of The Oven Door... -
Page 6: Important Warnings
IMPORTANT WARNINGS 1.WARNING: To avoid electrocution, ensure that the electri- cal circuit of the product is open before replacing the lamp. 2.WARNING:Before touching the connection terminals, all supply circuit should be disconnected. 3.WARNING:While operating the grill, the reachable sections can be hot. Keep the children away. 4.WARNING:Any inadvertent cooking made with fats and oils can be dangerous and cause fire. - Page 7 14.“These instructions are applicable for countries of which symbols are indicated on the appliance. If the country symbol is not available on the appliance, in order to adapt the appliance to the conditions of such country, the technical instructions should be read.” 15.Do not use steam cleaners to clean the appliance.
-
Page 8: Introduction Of The Appliance
INTRODUCTION OF THE APPLIANCE 1. Glass Top Plate 2. Control Panel 3. LHS Grill 4. LHS Main Oven 5. RHS Oven 1. LHS Gril 6. Ø140 mm Heater 2. LHS Main Oven 7. Ø120 / 180 mm Ovaldual Heater 3. LHS Main Oven Thermostat 8. -
Page 9: Important Warnings
IMPORTANT WARNINGS Electrical Connection and Security 1. Your oven requires 41 Ampere fuse according to the appliance’s pow- er. If necessary, installation by a qualified electrician is recommended. 2.Your oven is adjusted in compliance with 220-240V AC 50/60Hz. electric supply. If the mains are different from this specified value, contact your authorized service. -
Page 10: Electrical Wiring Scheme
ELECTRICAL WIRING SCHEME 220-240V~50/60Hz Neural Live Phase Earth H05 VV-F 3G 4mm² INSTALLATION OF YOUR OVEN 65mm min. 65mm min. -
Page 11: Technical Features Of Your Oven
TECHNICAL FEATURES OF YOUR OVEN Outer width 900mm Outer depth 600mm Outer height 900mm Lamp power 15-25W Grill Oven Main Oven Bottom heating element 1200W Top heating element 1000W Turbo heating element 1800W 1800W Grill heating element 1400W Supply voltage 220-240V AC 50/60Hz Total electrical consumption Type code MFR0/9052103E 13210W... -
Page 12: Using The Hobs
USING THE HOBS 1. Heating Place 140 mm 2. Heating Place 140 x 250 mm 3. Heating Place 180 mm 4. Heating Place 120/180 mm 5. Heating Place 140 mm 6. Indicator 1. You operate the hob with the ring switches on the control panel of oven. - Page 13 Using multi-segmented cooking zones Multi segmented cooking zones allows to cook with di erent size of saucepans on the same cooking the inward cooking zone turns on. 1. To change the active cooking zone diameter, turn the control knob clockwise. 2.
-
Page 14: Using Oven Section
USING OVEN SECTION which will be sourced from using the heating elements. In order to get rid of this, operate it for 45 minutes while it is empty. In order to make cooking in your oven; oven switch must have been rotated and ignition must have been made. -
Page 15: Cooking Time Table
Catalytic Walls * Catalytic walls are located on the left and the right side of cavity under the guides. Catalytic walls banish the bad smell and obtain the best performance from the cooker. Catalytic walls also absorb oil residue and clean your oven while it’s operating. -
Page 16: Cleaning And Maintenance Of The Oven's Door
CLEANING AND MAINTENANCE OF THE OVEN’S DOOR Drop-Down Door Glass Remove the profile by pressing the plastic latches on both left and right sides as shown in Figure 5 and pulling the profile towards yourself as shown in Figure 6 Then remove the inner-glass as shown in Figure 7 If required, middle glass can be removed in the same way. -
Page 17: Changing The Oven Lamp
CHANGING THE OVEN LAMP In order to avoid the possibility of an electric shock, ensure that the circuit of the appliance is open before changing the lamp. (The open-circuit is an electrical circuit that does not conduct current) 1. First of all, cut the electrical connection of the appliance and ensure that the appliance is cooled down. -
Page 18: Maintenance And Cleaning
MAINTENANCE and CLEANING 1. Disconnect the plug supplying electricity for the oven from the socket. 2. While oven is operating or shortly after it starts operating, it is extremely hot. You must avoid touching from heating elements. 3. Never clean the interior part, panel, lid, trays and all other parts of the oven by the tools like hard brush, cleaning mesh or knife. -
Page 19: Installation Of The Oven Door
INSTALLATION OF THE OVEN DOOR Figure 12 Figure 13 Figure 12.1 Figure 12.2 Figure 13.1 Figure 13.2 Completely open the Bring the hinge Afterwards, close To remove the oven door by pulling lock to the widest the oven door as to oven door, pull it it to yourself. -
Page 20: Accesories
ACCESORIES Deep Tray* Used for pastries, deep fried foods and stew recipes. In case of frying directly on the grill for cakes, frozen foods and meat dishes, it can be used of oil pick-up tray. Tray Used for pastries (cookies, biscuits etc.) and frozen foods. -
Page 21: If Your Oven Does Not Operate
IF YOUR OVEN DOES NOT OPERATE If you can not to solve the problem, to apply manufacturer-supplier Please check the plug of power supply cord has a well connection with wall socket or not. Please check the electric network. Please check the fuse. Please check power supply cord for any damage problems.
Need help?
Do you have a question about the Country Style 900mm and is the answer not in the manual?
Questions and answers