Table of Contents
Advertisement
Questions, problems, missing parts? Before returning to the store, please contact customer service at
customercare@jrhome.com or call 1-800-561-5550 7 a.m. - 4 p.m., PST, Monday – Friday
We appreciate the trust and confidence you have placed in Paramount through the purchase of this Outdoor Heater. We strive to continually create
quality products designed to enhance your home. Visit us online to see our full line of products available for your home improvement needs. Thank
USE AND CARE GUIDE
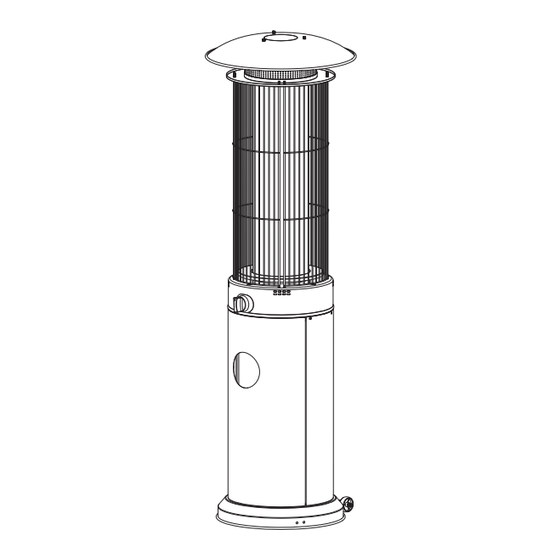
OUTDOOR SPIRAL FLAME HEATER
1-800-561-5550
WWW.PARAMOUNTATHOME.COM
you for choosing Paramount!
THANK YOU
Item #PH-F122
Model # KLD7003S/
KLD7003SS
DANGER: Carbon Monoxide
Hazard. This appliance can produce
carbon monoxide, which has no
odour. Using it in an enclosed space
can kill you. Never use this appliance
in an enclosed space such as a
camper, tent or home.
DANGER: If you smell gas
□ Shut off gas to the appliance
□ Extinguish any open flame
□ If odour persists, keep away
from the appliance and call your
gas supplier or fire department.
WARNING: For outdoor use only.
Advertisement
Table of Contents

Related Manuals for Paramount Fitness KLD7003S


Summary of Contents for Paramount Fitness KLD7003S
- Page 1 Item #PH-F122 Model # KLD7003S/ KLD7003SS USE AND CARE GUIDE OUTDOOR SPIRAL FLAME HEATER DANGER: Carbon Monoxide Hazard. This appliance can produce carbon monoxide, which has no odour. Using it in an enclosed space can kill you. Never use this appliance in an enclosed space such as a camper, tent or home.
-
Page 2: Table Of Contents
Table of Contents Table of Contents . . . . . . . . . . . . . . . . . . . . . . . . . . . . . . . . . . . 2 Assembly . -
Page 3: Pre-Installation
Pre-Installation-Tools and Hardware PLANNING INSTALLATION Before beginning assembly, be sure to empty contents of carton and make sure all parts are present. Place all parts on a soft, level surface for assembly. If any parts are missing, please contact Customer Service between 8 a.m. - 7 p.m., EST, Monday – Friday, 9 a.m. – 6 p.m., EST, Saturday. Estimated Assembly Time: 30 minutes NOTE: You will need a leak test solution. -
Page 4: Package Contents
Pre-Installation-Package Contents PACKAGE CONTENTS Part Description Quantity Emitter Screen Protection Guard Glass Tube Tank Assembly Wheels Cylinder Ring Anchoring Pins Anchoring Arms... -
Page 5: Assembly
Assembly Attaching The Wheels To The Tank Assembly NOTE: If permanently anchoring the heater to the ground or patio, skip to step 2. □ Line up holes in the wheels (F) with the corresponding holes in the base of the tank assembly (E) and insert two M8x16 screws (AA) through the holes. - Page 6 Assembly - (continued) Attaching The Anchoring Arms □ Attach one anchoring arm (I) to the base of the tank assembly (E) with two M6x12 screw s (AA) and two M6 nuts (BB) as shown. Repeat for the other 2 anchoring arms (I) so all 3 are attached to the base of the tank assembly (E).
- Page 7 Assembly (continued) Attaching The Reflector □ Insert three M8 bolts (CC) into the holes on the emitter screen (B). Tighten the bolts securely. □ Attach three M8 washers (DD) over the bolts (CC), place the reflector (A) onto the bolts and attach three M8 washers (DD) over the bolts (CC) and onto the reflector (A).
- Page 8 Assembly (continued) Placing The Emitter Screen □ Place the emitter screen assembly (B) onto the protection guards. Make sure the thread goes through the holes on the bottom of the emitter screen assembly. Tightening The Guards □ Use eight M6 nuts (BB) to tighten the protection guards (C).
-
Page 9: Assembly
Assembly (continued) Connecting The Propane Tank □ Connect the hose and regulator to a standard 20lb propane gas cylinder (sold separately). Use a standard 20Ib propane cylinder only. Use this appliance only with a propane vapor withdrawal supply system. See chapter 5 of the standard storage and handling of liquefied petroleum gas, ANS/NFPA 58. -
Page 10: Operation
Operation Pre-Operation Peforming A Leak Test CAUTION: Do not attempt to operate this appliance until you WARNING: have read and understand all Safety Information in this manual □ Perform all leak tests outdoors. and all assembly is complete and leak tests have been performed. □... -
Page 11: Lighting The Heater
Operation - (continued) When the Heater is ON, the emitter screen will become bright Lighting The Heater red due to intense heat. The color is more visible at night. The burner will display tongues of blue and yellow flame. These flames should not be yellow or produce thick black smoke, indicating DANGER: Carbon Monoxide Hazard. -
Page 12: Operational Checklist
Operation - (continued) Operational Checklist Post-Operation For a safe and pleasurable heating experience, perform this check 1. Gas control knob is in OFF position. before each use: 2. Gas tank valve is OFF. 1. I am familiar with entire owner’s manual and understand all 3. -
Page 13: Maintenance, Care & Cleaning
Maintenance, Care & Cleaning To enjoy years of outstanding performance from your heater, make sure you perform the following maintenance activities on a regular basis: Keep exterior surfaces clean. 1. Use soapy water for cleaning. Never use flammable or corrosive cleaning agents. 2. -
Page 14: Troubleshooting
Troubleshooting PROBLEM POSSIBLE CAUSE CORRECTIVE ACTION Gas valve may be off. Turn the gas valve ON. Fuel tank may be empty. Refill the LPG tank. Orifice blocked. Clean or replace the orifice. Air in supply system. Purge air from the lines. Open gas lines and depress the control knob for 2-3 minutes. - Page 15 IMPORTANT Warranty For questions, concerns or problems with our product please Si vous éprouvez des dicultés, ou si vous avez des questions ou des email our customer service department: préoccupations, prière de faire parvenir un courriel à notre Service à la clientèle customercare@jrhome.com customercare@jrhome.com DATED PROOF OF PURCHASE REQUIRED FOR WARRANTY...
- Page 16 Questions, problems, missing parts? Before returning to the store, please contact customer service at customercare@jrhome.com or call 1-800-561-5550 7 a.m. - 4 p.m., PST, Monday – Friday PARAMOUNTATHOME.COM Retain this manual for future use.
Need help?
Do you have a question about the KLD7003S and is the answer not in the manual?
Questions and answers
I need a glass replacement tube for my Paramount 7003SS spiral flame propane heater. Can not find one in Canada
The manual does not provide specific information about where to purchase a replacement glass tube. However, for parts or support, you can contact customer service at customercare@jrhome.com or call 1-800-561-5550, Monday to Friday, 7 a.m. – 4 p.m. PST.
This answer is automatically generated