Table of Contents

Related Manuals for StarTech.com 4POSTRACK12


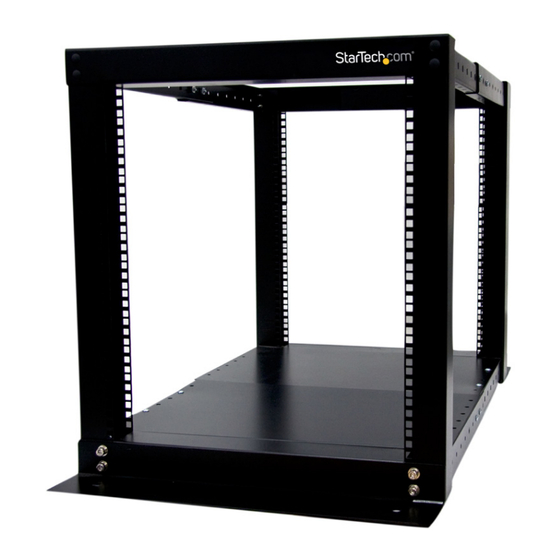
Summary of Contents for StarTech.com 4POSTRACK12
- Page 1 12U 4 Post Server Equipment Open Frame Rack Cabinet Actual product may vary from photos User Manual SKU#: 4POSTRACK12 For the latest information and specifications visit www.startech.com/4POSTRACK12 Manual Revision: 01/24/2019...
-
Page 2: Compliance Statements
This manual may make reference to trademarks, registered trademarks, and other protected names and/or symbols of third-party companies not related in any way to StarTech.com. Where they occur these references are for illustrative purposes only and do not represent an endorsement of a product or service by StarTech.com, or an endorsement of the product(s) to which this manual... -
Page 3: Safety Statements
• I cavi (inclusi i cavi di alimentazione e di ricarica) devono essere posizionati e stesi in modo da evitare pericoli di inciampo, rischi di scosse elettriche o pericoli per la sicurezza. To view manuals, videos, drivers, downloads, technical drawings, and more visit www.startech.com/support... -
Page 4: Warning Statements
• Detta skåp är extremt tungt. Försök aldrig flytta på skåpet eller lyfta det utan hjälp. • Risk för vältning! Att förlänga flera komponenter från detta skåp ökar risken To view manuals, videos, drivers, downloads, technical drawings, and more visit www.startech.com/support... - Page 5 Freien verwendet werden. • Dieses Gehäuse ist extrem schwer. Versuchen Sie niemals, dieses Gehäuse ohne Hilfe zu bewegen oder anzuheben. • Kippgefahr! Das Ausziehen mehrerer Komponenten aus diesem Gehäuse To view manuals, videos, drivers, downloads, technical drawings, and more visit www.startech.com/support...
- Page 6 • Este produto destina-se apenas a uma utilização no interior e não deve ser utilizado no exterior. • Esta caixa é extremamente resistente. Nunca tente mover ou levantar esta caixa sem assistência. To view manuals, videos, drivers, downloads, technical drawings, and more visit www.startech.com/support...
- Page 7 = 453 kg. • Dit product is alleen bedoeld voor binnengebruik en mag niet buiten worden gebruikt. • Deze behuizing is enorm zwaar. Probeer nooit deze behuizing te verplaatsen To view manuals, videos, drivers, downloads, technical drawings, and more visit www.startech.com/support...
- Page 8 本製品は、 非常に重いエンクロージャです。 絶対に一人で持ち上げたり 動かしたり しないで下さい。 • 転倒注意 ! 本製品から複数のコンポーネントが突き出した状態にしてお く とエンクロージャが転倒する恐れがあります。 転倒リスクを回避するた めに、 エンクロージャからはコンポーネントが突き出ないようにして下 さい。 • 本製品の上に何も載せないで下さい。 複数のエンクロージャを重ねて設 置しないで下さい。 • 液体物をエンクロージャに近づけないようにして下さい。 • エンクロージャ自身と中に積載する装置の総重量に耐えられるエリアに 設置して下さい。 • この製品にはアースが必要です。 アース接続をしていない状態で本製品 を使用しないでください。 To view manuals, videos, drivers, downloads, technical drawings, and more visit www.startech.com/support...
-
Page 9: Table Of Contents
Using the Bushing Caps .......................... 17 Mounting Equipment in the Rack ....................... 17 Optional Installation ................18 Securing the Rack Cabinet to a Flat Surface ..................18 Installing Casters ............................18 To view manuals, videos, drivers, downloads, technical drawings, and more visit www.startech.com/support... -
Page 10: Product Diagram
Product Diagram Front Frame Floor Plates x 2 Rear Frame Adjustable Arms x 8 To view manuals, videos, drivers, downloads, technical drawings, and more visit www.startech.com/support... -
Page 11: Product Information
Product Information Packaging Contents Front Frame Rear Frame Qty: One Qty: One Floor Plates Wide Adjustable Arms Qty: Two Qty: Four To view manuals, videos, drivers, downloads, technical drawings, and more visit www.startech.com/support... - Page 12 Narrow Adjustable Arm w/rivet Qty: Two Qty: Two Hex Key Floor Mounting Brackets Qty: One Qty: Two M8x25 Hex Socket Screws M5x15 Truss Head Screws Qty: Eight Qty: Forty two To view manuals, videos, drivers, downloads, technical drawings, and more visit www.startech.com/support...
-
Page 13: Tools Required
Bushing Caps Cage Nuts Qty: sixteen Qty: Twenty Four Cage Nut Screws Qty: Twenty Four Tools Required Phillips Head Screwdriver • Cage Nut Tool • To view manuals, videos, drivers, downloads, technical drawings, and more visit www.startech.com/support... -
Page 14: Installation
You will have four pairs of arms, two to connect the top of the Frames together and two to connect the bottom of the Frames together. To view manuals, videos, drivers, downloads, technical drawings, and more visit www.startech.com/support... - Page 15 Insert the two M5x15 Truss Screws through the Mounting Holes on the wide Adjustment Arm and into the Cage Nuts on the narrow Adjustment Arm. M5x15 Truss Screw To view manuals, videos, drivers, downloads, technical drawings, and more visit www.startech.com/support...
- Page 16 Truss Head Screws being careful not to over-tighten. Securing the Frame to the Adjustment Arm Assembly Repeat steps 8 - 10 to connect the bottom Adjustment Arm Assemblies to the Front and Rear Frames. To view manuals, videos, drivers, downloads, technical drawings, and more visit www.startech.com/support...
- Page 17 Align the Screw Holes on the second Floor Plate (with one flap) with the Screw Holes on the lower Adjustment Arm Assembly. Note: The second Floor Plate will overlap the first Floor Plate. To view manuals, videos, drivers, downloads, technical drawings, and more visit www.startech.com/support...
-
Page 18: Using The Bushing Caps
Cage Nut. - or - Use a Cage Nut Wrench to install the Cage Nuts into the Rack Cabinet. Use the M5 Screws to secure the Devices in place. To view manuals, videos, drivers, downloads, technical drawings, and more visit www.startech.com/support... -
Page 19: Optional Installation
Rack Cabinet is empty before attempting to install the Casters. Align the Mounting Holes on the Caster with the Caster Holes on the bottom of the Rack Frame. To view manuals, videos, drivers, downloads, technical drawings, and more visit www.startech.com/support... - Page 20 Insert a Caster Screw through the Caster Mounting Hole and into the Caster Holes on the bottom of the Frame. Installing the Caster Repeat steps 1 - 2 for the remaining Caster Screws. To view manuals, videos, drivers, downloads, technical drawings, and more visit www.startech.com/support...
- Page 21 Limitation of Liability In no event shall it be the liability of StarTech.com Ltd. and StarTech.com USA LLP (or their officers, directors, employees or agents) for any damages (whether direct or indirect, special, punitive, incidental, consequential, or otherwise), loss of profits, loss of business, or any pecuniary loss, arising out of or related to the use of the product exceed the actual price paid for the product.
- Page 22 StarTech.com is an ISO 9001 Registered manufacturer of connectivity and technology parts. StarTech.com was founded in 1985 and has operations in the United States, Canada, the United Kingdom and Taiwan servicing a worldwide market.
Need help?
Do you have a question about the 4POSTRACK12 and is the answer not in the manual?
Questions and answers