Subscribe to Our Youtube Channel
Summary of Contents for Furious FPV PIKO F4 OSD
- Page 1 PIKO F4 OSD Flight Controller USER MANUAL VERSION 1.0 Please contact us if you need further assistance: Tech support: tech@furiousfpv.com Sales support: sales@furiousfpv.com Website: http://furiousfpv.com/...
-
Page 2: Table Of Contents
Using with Stealth Long Range: ................... 9 Using with TBS Unify 5G8: ..................10 Connect with GPS: ........................ 11 Connection of Piko F4 OSD - Stealth Mini - ESC 4in1 Combo: ..........12 Basic Configuration ........................13 Tips ............................15 Guideline configuration OSD with betaflight ............... -
Page 3: Introduction
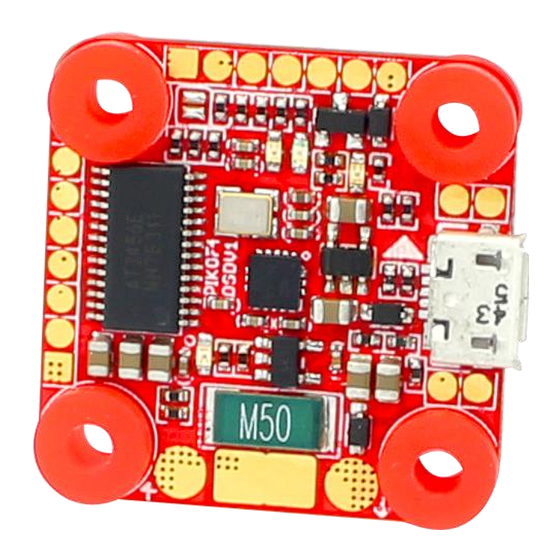
FPV bliss, ready & waiting to push your FPV to the ultimate extreme. Integrated with a built in current sensor, the PIKO F4 OSD is the 1st of its kind to offer this full size monitoring capability. Yet even with such a minimal footprint, the PIKO F4 OSD offers a massive array of functionality, such as (5) UARTS, Inrush Voltage Protection, 5V@1.5A integrated BEC, integrated driver for SBUS &... -
Page 4: Board Layout
Board Layout Dimensions... -
Page 5: Connections
Connections *WARNING: Piko F4 OSD can support up to 6S LiPo battery but make sure other devices also support it. Connect with Receiver: Using with R-XSR: Using with XSR:... -
Page 6: Using With Spd15
Using with SPD15: Using with XM+:... -
Page 7: Using With Tbs Micro Rx
Using with TBS Micro Rx: Connect with VTx: Using with Stealth Mini:... -
Page 8: Using With Innova V4
Using with Innova V4: Using with Tramp HV:... -
Page 9: Using With Stealth Race
Using with Stealth Race:... -
Page 10: Using With Stealth Long Range
Using with Stealth Long Range:... -
Page 11: Using With Tbs Unify 5G8
Using with TBS Unify 5G8:... -
Page 12: Connect With Gps
Connect with GPS: *Warning: For the first time set up and whenever you change your location. You need to leave the Wing or Airplane on the field for approximately 5 minutes so that the GPS is updated Open Betaflight Configurator Click Configuration tab Drag to GPS and configure as the picture below:... -
Page 13: Connection Of Piko F4 Osd - Stealth Mini - Esc 4In1 Combo
Connection of Piko F4 OSD - Stealth Mini - ESC 4in1 Combo:... -
Page 14: Basic Configuration
Basic Configuration Please follow carefully these next steps and always remove propellers when configuring your quad STEP 1: Connect Piko F4 OSD with the computer via USB cable and then Open Betaflight STEP 2: Configure Ports. (1) Configure with Receiver: ... - Page 15 STEP 3: Go to Configuration tab and choose ESC/Motor protocol in ESC/Motor Features STEP 4: Select Serial- based receiver in Receiver Mode If you are using SBus, iBus or a Spektrum Satellite, you will need to pick your Serial Receiver Provider. Follow this table: RX Type Serial Receiver Provider DSM2 1024bit/22ms...
-
Page 16: Tips
“JR / Spektrum / Graupner” option. Once again, click “Save”. Tips Guideline configuration OSD with betaflight Step1: Connect Piko F4 OSD into PC via USB Step2: Open Betaflight Configurator on Google Chrome Betaflight Step3: Click Connect on Betaflight interface and go to “Configuration” tab. Then,... -
Page 17: How To Open Betaflight Osd By Transmitter
Step4: After configuring OSD, please click Save to save your c+onfiguration How to open Betaflight OSD by Transmitter Stick command: THROTTLE MIDDLE + YAW LEFT + PITCH FULL + ROLL MIDDLE To navigate through menu: PITCH/ROLL sticks are used to navigate ... -
Page 18: Vtx Configuration By Transmitter
VTx configuration by Transmitter From Betaflight OSD menu use stick go to: Main menu > Features Select VTX SA if using TBS Unify Pro VTx Select VTX TR if using Tramp HV, Stealth Mini, Stealth Race, Stealth Long Range PIDs tunning on Betaflight OSD From Betaflight OSD menu use stick go to: Main menu >...


Need help?
Do you have a question about the PIKO F4 OSD and is the answer not in the manual?
Questions and answers