Table of Contents

Related Manuals for Maxx Ice MIM75


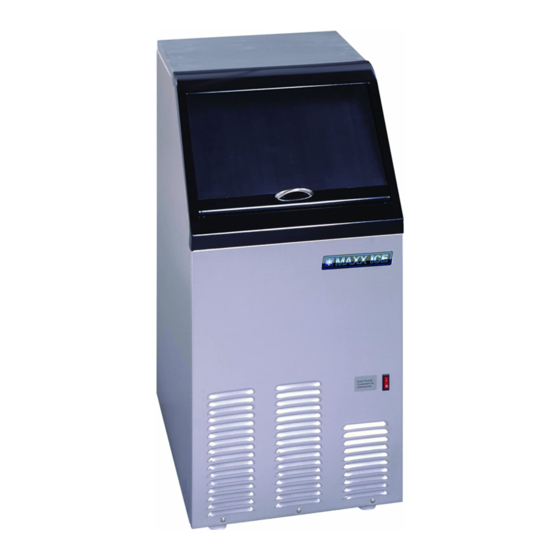
Summary of Contents for Maxx Ice MIM75
- Page 1 A U T OMA T I C I CE CU B E MA CH I N E U s e r ’ s Ma n u a l Mo d e l s : MI M7 5 / MI M1 0 0 / MI M1 3 0 * B e s u r e t h e i c e ma c h i n e h a s b e e n s t a n d i n g u p r i g h t f o r a t l e a s t 2 4 h o u r s p r i o r t o p l u g i n .
-
Page 2: Table Of Contents
TABLE OF CONTENTS Page ICE MAKER SAFETY..........................2 IMPORTANT SAFEGUARDS......................3-5 TECHNICAL INFORMATION......................5 INTRODUCTION..........................6 COMPONENT LOCATIONS.......................7 ICE MAKER INSTALLATION.......................8-16 Unpacking..........................8 Location Requirements......................9 Electrical Requirements....................11-12 Leveling the Ice Maker......................12 Water Supply and Drain Connections................13-14 Installation Types......................15-16 OPERATION..........................16-19 Final Checklist before Operation..................16 Operating Method.........................17 How the Machine Makes Ice...................17-18 Normal Sounds........................18-19... -
Page 3: Ice Maker Safety
ICE MAKER SAFETY Your safety and the safety of others are very important. We have provided many important safety messages in this manual and on your appliance. Always read and obey all safety messages. This is the Safety Alert Symbol. This symbol alerts you to potential hazards that can kill or injure you and others. -
Page 4: Important Safeguards
IMPORTANT SAFEGUARDS Before the ice maker is used, it must be properly positioned and installed as described in this manual, so read the manual carefully. To reduce the risk of fire, electrical shock or injury when using the ice maker, follow basic precautions, including the following: ... - Page 5 Code and local codes and ordinances is required. Do not kink or pinch the power supply cord between the ice maker and cabinet. The circuit breaker rating should be 15 amperes. It is important for the ice maker to be leveled in order to work properly. You may need to make several adjustments to level it.
-
Page 6: Technical Information
When moving the ice maker, be careful not to damage the power cord. Extension Cord DO NOT use an extention cord with this appliance. TECHNICAL INFORMATION Model: MIM75 MIM100 MIM130 Rated power: 120VAC~60Hz 120VAC~60Hz... -
Page 7: Introduction
UL563 and sanitation standard of NSF12. Asbury Foodservice assumes no liability or responsibility of any kind for products manufactured by Maxx Ice that have been altered in any way, including the use of any parts and/or other components not specifically approved by Asbury Foodservice or Asbury Service Warranty &... -
Page 8: Component Locations
IMPORTANT SAFETY INSTRUCTIONS WARNING: To reduce the risk of fire, electric shock, or injury when using your ice maker, follow these basic precautions: Plug into a grounded 3-prong outlet. Replace all panels before Do not remove grounding prong. operating. -
Page 9: Ice Maker Installation
ICE MAKER INSTALLATION Unpacking Excessive Weight Hazard Use two or more people to move and install ice maker. Failure to do so can result in back or other serious injury. Remove packaging materials NOTE: Do not remove any permanent instruction labels or the data label on your ice maker. Remove tape and glue from your ice maker before using. -
Page 10: Location Requirements
Location Requirements 4” To ensure proper ventilation for your ice maker, the front of the unit must be completely unobstructed. Allow at least 4” (101mm) clearance at rear, and 0.6” (15mm) at the top and sides for proper air circulation. The installation should allow the ice maker to be pulled forward for servicing if necessary. - Page 11 See the “Leveling the Ice Maker” section. A standard electrical supply, properly grounded in accordance with the National Electrical Code and local codes and ordinances is required. The MIM75 ice maker can be used as a built-in appliance too. INSTALLATION CLEARANCE TOP VIEW (1:10) (in.) 2-1/2 16.7...
-
Page 12: Electrical Requirements
completely unobstructed. Allow at least 4” (101mm) clearance at rear, and 0.6” (15mm) at the top and sides for proper air circulation. The installation should allow the ice maker to be pulled forward for servicing if necessary. When installing the ice maker under a counter, follow the recommended spacing dimensions shown. -
Page 13: Leveling The Ice Maker
equipped with a power supply cord having a NEMA 5-15P 3-prong grounded plug. To minimize possible shock hazard, the cord must be plugged into a mating NEMA 5-15R 3-pronged, wall receptacle, grounded in accordance with the National Electrical Code and local codes and ordinances. If a mating wall receptacle is not available, it is the personal responsibility of the customer to have a NEMA 5-15R wall receptacle installed by a qualified electrician. - Page 14 outlet directly behind the ice maker will make under-counter installation easier. NOTE: All installations must be in accordance with local plumbing code requirements. Professional installation is recommended. Make certain that the pipes are not pinched or kinked or damaged during installation. Check for leaks after connection.
- Page 15 1. Find the floor drain near the ice maker. The distance should be less than 10 feet (3.5M) as the length of the long drain water pipe provided with the ice maker is about 10 feet (3.5M). 2. All horizontal runs of drain lines must have a fall of ¼″ per foot (6.35mm per 30.5cm).
-
Page 16: Installation Types
Installation Types This ice maker has been designed for Mobile (free-standing), Enclosed, or Built-in (sealed) installation. Mobile installation: A mobile installation will allow you to install the icemaker free-standing in any place you desire provided you have access to a water supply and drainage facilities. -
Page 17: Operation
drain connections and the nut of the drain water hole. Tighten any connections or fittings that leak. 5. If electrical outlet for the ice maker is behind the cabinet, plug in the ice maker. 6. Push the ice maker into position. 7. -
Page 18: Operating Method
Operating Method Switch on the Power switch on the front panel. The light will be on. The maker will start working automatically and feeding water. After the first feeding of the water, the machine will automatically go to the ice making stage, and the sound of water spraying will be heard. -
Page 19: Normal Sounds
hot gas valve and water inlet valve open to warm up the freezing surface, allowing the cubes to fall into the bin. Once completed, the freeze cycle begins repeatedly until the ice has satisfied the maximum level in the bin, then the water and compressor are shut down until sufficient ice is drawn below the bin level sensor and the cycle again resumes. -
Page 20: Preparing The Ice Maker For Long Storage
The high-efficiency compressor may make a pulsating or high-pitched sound. Water running from the water bin to the evaporator plate may make a splashing sound. Water running from the evaporator to the water bin may make a splashing sound. -
Page 21: Exterior Cleaning
Periodic cleaning and proper maintenance will ensure efficiency, top performance, and long life. The maintenance intervals listed are based on normal conditions. You may want to shorten the intervals if you have pets, or the unit is used outdoors, or there are other special considerations. What shouldn't be done? Never keep anything in the ice storage bin that is not ice: objects like wine and beer bottles are not only unsanitary, but the labels may slip off and plug up the... - Page 22 Commercial grades of stainless steel are susceptible to rusting if not properly maintained. It is important that you properly care for the stainless steel surfaces of your ice machine and bin to avoid the possibility of rust or corrosion. Use the following recommended guidelines for keeping your stainless steel looking like new: 1.
-
Page 23: Condenser Cleaning
Condenser Cleaning A dirty or clogged condenser prevents proper airflow, reduces ice making capacity, and causes higher than recommended operating temperatures that may lead to component failure. Have the condenser cleaned at least once every three months. 1. Unplug the ice maker or disconnect power. 2. - Page 24 DO NOT use solvent-based cleaning agents or abrasives on the interior. These cleaners may transmit taste to the ice cubes, or damage or discolor the interior. SPRINKLER HEAD CLEANING NOTE: The sprinkler should only be cleaned when you find that some of the ice cubes are improperly shaped during ice making.
- Page 25 4. Find which water sector is not spraying correctly from the nozzle. If the slideway is the issue, adjust the position of slideway to have all the water sectors free forward to the ice mold. If the water sectors are free, but some sectors is not spraying properly, using a new tooth-brush, clean the gap of the nozzle several times.
-
Page 26: Ice Making System Cleaning
10. Reassembly the sprinkler arm, slideway and the flake covers. 11. After the Icemaker System Cleaning procedure below. Ice Making System Cleaning Minerals that are removed from water during the freezing cycle will eventually form a hard scaly deposit in the water system. Cleaning the system regularly helps remove the mineral scale buildup. -
Page 27: Ice Making System Cleaning
6. Allow 30 minutes for proper cleaning. After cleaning, shut off the power switch, and unscrew the nut of the water-draining hole. Drain off the waste water to some container, and then screw the nut on tightly when the waste water is fully drained off. -
Page 28: Control Box
1. Prepare a sanitizing solution made of 1oz (29ml) of household bleach and 2 gallons (7.5L) of hot water 95ºF (35°C) to 115ºF (46°C). Remove the flake covers and slideway from the water bin and wipe the entire bin inside and out, covering all surfaces. 2. -
Page 29: Major Function
longer. Turn the knob counter-clockwise, and the ice size will be smaller in the next cycle. NOTE: It is not a good idea to adjust the ice size often or for no good reason, because the controller may damaged. 7. If the red, green and yellow LEDs are flashing together, the machine is not working. -
Page 30: Troubleshooting
Red LED Clean Ice full Green LED Ice size adjust Ice making Yellow LED Mode Ice harvest Control box (behind Front Cover) TROUBLESHOOTING Before Calling for Service If the unit appears to be malfunctioning, read through the OPERATION section of this manual first. - Page 31 Troubleshooting Guide Problem Possible Cause Probable Correction The ice maker is unplugged. Plug the ice maker in. The fuse is blown. Replace fuse--if it happens again, call for The machine service to check for a short circuit in the ice doesn’t operate maker.
- Page 32 A few water drops fall to the Normal condensation on the door or some floor when you open the door water together with ice. Take care when you to take out ice from ice take out ice. Water is leaking storage bin.
-
Page 33: Limited Warranty
The electricity is off. Reconnect the power supply line. The room temperature is out Cut off the electricity; let the ice maker stop of the stated range. working till the temperature returns within The ice maker the stated range. stops suddenly The fuse is brown. - Page 34 Tested and certified to NSF standard 12 by NSF International...
- Page 35 MA X X I C E 3 3 5 5 E n t e r p r i s e A v e n u e , S u i t e 1 6 0 We s t o n , F l o r i d a 3 3 3 3 1 T e l : 9 5 4 - 2 0 2 - 7 4 1 9 - F a x : 9 5 4 - 2 0 2 - 7 3 3 7...
Need help?
Do you have a question about the MIM75 and is the answer not in the manual?
Questions and answers