
Related Manuals for Johnson Pump Top Wing Series


Summary of Contents for Johnson Pump Top Wing Series
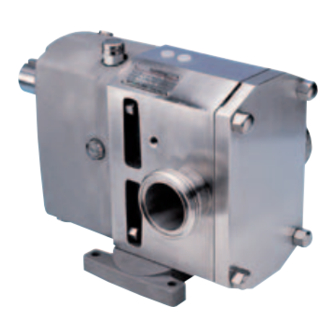
- Page 1 A-C – General, Technical, Disassembly & Assembly TopWing Rotary Lobe Pumps A.0500.301.A-C – IM-TW/10.00 BU/GB (0401)
- Page 2 The product must not be put into service until the machinery into which it is to be incorporated has been declared in conformity with the provisions of the Directive. Örebro, Sweden, 1 January 2004 Anders Larsson Managing Director of Johnson Pump AB...
-
Page 3: Table Of Contents
Contents 1.0 Introduction ..................3 General ........................3 Receipt, storage and handling ................3 1.2.1 Receipt, storage ....................... 3 1.2.2 Handling ........................3 Safety instructions ....................4 1.3.1 General ........................4 1.3.2 Pump units ....................... 6 1.3.2.1 Pump unit handling ....................6 1.3.2.2 Installation ...................... - Page 4 4.0 Disassembly and assembly instructions ........30 Tools to be used ....................30 General instructions .................... 31 O-rings and lip seals .................... 31 Shutdown ......................31 Tightening torque [Nm] for nuts and screws ............ 32 Disassembly ......................33 4.6.1 Pump cover and rotor removal ................33 4.6.2 Disassembly of seals ....................
-
Page 5: 1.0 Introduction
1.0 Introduction General The range of TopWing rotary lobe pumps are manufactured by Johnson Pump, Sweden, and are sold and marketed by a network of authorized distributors. This instruction manual contains necessary information of the TopWing pumps and must be read carefully before installation, service and maintenance. The manual must be kept easily accessible by the operator. -
Page 6: Safety Instructions
Do not exceed the pump’s maximum operating pressure, speed or temperature. Do not modify the operating parameters/system for which the pump was orginally delivered without first consulting Johnson Pump. • Pump installation and operation must always comply with prevailing health and safety regulations. - Page 7 • Caution must be taken when lifting the pump, appropriate lifting devices should be used if possible. Lifting rings fitted to the pump are only to be used for lifting the pump, not for lifting the pump with drive and/or baseplate. For baseplate mounted pumps the baseplate is to be used for all lifting purposes.
-
Page 8: Pump Units
1.3.2 Pump units 1.3.2.1 Pump unit handling Use an overhead crane, forklift or other suitable lifting device. Secure lifting slings around the If there are lifting rings on Warning front part of the pump and the both the pump and the motor Never lift the pump unit with back part of the motor. -
Page 9: Before Commissioning The Pump Unit
The pump unit must not be used with other liquids than those for which it was recommended and sold. If there are any uncertainties contact your Johnson Pump sales representative. Liquids, for which the pump is not appropriate, can damage the pump and other parts of the unit as well as cause personal injury. -
Page 10: Pump Designation
Pump designation Example: 0171- 1. Pump family name TW = TopWing 2. Size of drive assembly 1, 2, 3, 4 3/4. Hydraulics indicated with displacement volume per revolution and connection diameter Displacement Inlet diameter volume per revolution (in dm Standard pump Enlarged inlet TW1/0041 0.041... -
Page 11: Tw 2/ 0171- 40/ 06- W1 1- Gb2 1
PTFE lined O-rings Chemraz Kalrez 11. Kits for different O-ring material for seal Viton EPDM EPDM - FDA Chemraz Kalrez 12. Special execution For details please contact Johnson Pump. Position deviating from standard marked with X. A.0500.301/314.A – IM-TW/10.00 GB (0401) -
Page 12: Pump Model And Serial Number
Pump model and serial number If you require further information regarding the TopWing pumps, please contact your Johnson Pump distributor quoting the pump model and serial number. This information is stated on the name plate which is attached to the rotor case. If the name plate is damaged or missing, the serial number is also stamped on the rotor case under the endcover. -
Page 13: General Performance
The curves show the extreme limits, but for many applications the limits are tighter and therefore when changing the operating conditions of the pump please contact your Johnson Pump distributor to ensure a safe and reliable working pump. TW1/0041 TW2/0171... -
Page 14: 2.0 Function, Construction, Installation
2.0 Function, construction, installation... Operating principle The pumping action of the TopWing is achieved by the contra rotation of two Bi-Wing rotors within a rotor case. The rotors are mounted on shafts, which are supported by tapered roller bearings, integrated in the rotor case. The second shaft is driven by the drive shaft via a set of timing gears that are fixed on the shaft by means of adjustable locking elements. -
Page 15: System Design And Installation
Pumps for handling abrasive liquids (causing wear) should be selected with care. Please contact your Johnson Pump distributor for advice. Important! If it is proposed to modify the system/duty or to use the pump for transporting liquids with other characteristics than for which the pump was originally selected always consult your distributor. - Page 16 If a filter is used on the suction pipe, check pressure drop at the actual flow. This is important to avoid cavitation which can damage the pump. Please contact your Johnson Pump distributor if you require information on the pump or system NPSH characteristics.
-
Page 17: Installations With Cip-Systems, Cleaning In Place
For pumps fitted with flushed product seals check that all required services for flushing purposes are in place and connected. They must give sufficient flow and pressure for the flushing purposes. Contact Johnson Pump for advice. For seal plans, see ’’E, F, G manuals’’ respectivley. -
Page 18: Shutdown
• Check that the valves are completely open on both the inlet and outlet and that the pipelines are free from obstructions. The TopWing pumps are of the positive dis- placement type and should therefore never be operated against a closed valve, as this would result in pressure overload, damages on the pump and possibly damage on the pump system. -
Page 19: Trouble Shooting Chart
Trouble shooting chart A.0500.301/314.A – IM-TW/10.00 GB (0401) -
Page 20: Heating And Cooling Jackets
The pressure rating at the ports of the pump cover for heating/cooling is 10 bar and should not be exceeded without contacting Johnson Pump for advice. For start-up and shut-down procedures where heating/cooling devices are employed, the heating/cooling medium should circulate 20-45 minutes before start-up and/or shut- down. -
Page 21: 3.0 Technical Data
3.0 Technical data Rotor clearances Clearances for liquid temperature of max 150°C. Axial clearance rotor/pump cover Axial clearance rotor/back side rotor case Radial clearance rotor/rotor case top and side Clearance rotor/rotor Pump type A [mm] B [mm] C [mm] D [mm] TW1/0041 0.080 0.105... -
Page 22: Oil Volume In Gearboxes
Oil volume in gearboxes Recommended oils Example of typical oils Required characteristics Ambient Make Type Grade operating temp. Shell Omala EP150 -18°C to 0°C Energol GRXP EP220 0°C to 30°C Esso Spartan EP320 30°C to 150°C Oil volume Pump Horizontal connection Vertical connection 0.26 l 0.22 l... -
Page 23: Material Specification
Material specification 3.3.1 Machined parts – Pump Johnson Pump Europe Pump type Pos. Description material description W.-nr. 0010 Rotor case GX2CrNiMoN19-11-2 EN 10213-4 1.4409 A351 CF3M 0020 Rotor X3CrNiMon27-5-2 EN 10088-3 1.4460 AISI 329(L) 0030 Pump cover X2CrNiMo 17-12-2 EN 10088-3 1.4404... -
Page 24: Dimensional Drawings And Weights
Dimensional drawings and weights 3.4.1 Standard Flanges, see 3.4.3 Pump shown with seal flush. Broken line shaft shows position for bottom drive version. All dimensions in mm Pump type TW1/0041 113.5 55.5 160.5 21.5 TW1/0082 113.5 55.5 160.5 21.5 TW2/0171 TW2/0343 TW3/0537 215.5... -
Page 25: Vertical Mounting
3.4.2 Vertical mounting Flanges, see 3.4.3 2xG1/8" 4x vd Pump shown with seal flush. Broken line shaft position for LH drive version. All dimensions in mm Pump type TW1/0041 208 113.5 29 21.5 65.5 225 TW1/0082 208 113.5 29 21.5 80.5 246 TW2/0171 91.5 322... -
Page 26: Flanges
3.4.3 Flanges 1 = All thread connections (DIN, SMS, DS, BS, ISO, GAS THREAD, NPT THREAD) and all clamp connections (ISO, SMS, DIN) 2 = All flanges DIN (PN16) and ANSI (class 150) 3.4.3.1 Standard pump Pump type 1-zb 2-zb TW1/0041 TW1/0082 TW2/0171... -
Page 27: Thread And Clamp Connections
3.4.4 Thread and clamp connections Dimension table, see page 26 Thread connections DIN 11851/ ISO 2853 BS 4825 DIN 405 SMS 1145 GAS THREAD DS 722 NPT THREAD Clamp connections ISO 2852 DIN 32676 SMS 3017 A.0500.301/314.B – IM-TW/10.00 GB (0401) - Page 28 Dimensions – Thread and clamp connections THREAD CONNECTIONS TW1/0041 TW1/0082 TW2/0171 TW2/0343 TW3/0537 TW3/1100 TW4/1629 TW4/3257 Rd 52x1/6 Rd 52x1/6 Rd 65x1/6 Rd 78x1/6 Rd 78x1/6 Rd 110x1/6 Rd 110x1/6 Rd 130x1/6 DIN 11851/ DIN 405 d2 ±0.08 37.05 37.05 52.6 64.08 64.08...
-
Page 29: Din And Ansi Flanges
3.4.5 DIN and ANSI flanges nxøak TW1/0041 TW1/0082 TW2/0171 TW2/0343 TW3/0537 TW3/1100 TW4/1629 TW4/3257 22.6 22.6 37.6 48.5 48.5 97.6 PN16 ANSI Class 150 50.8 50.8 92.1 92.1 157.2 PN16 ANSI Class 150 79.4 79.4 98.4 120.7 120.7 152.4 152.4 190.5 PN16 ANSI Class 150... -
Page 30: Weights
Weights 3.5.1 Weights standard pump Pump type Standard pump Vertical mounting weight weight TW1/0041 14.5 TW1/0082 16.5 TW2/0171 38.5 TW2/0343 45.5 TW3/0537 TW3/1100 TW4/1629 TW4/3257 All weights in daN, mass is kg. A.0500.301/314.B – IM-TW/10.00 GB (0401) -
Page 31: Sound Level
Sound level TW1 – Max. rpm TW2 – Max. rpm dB(A) dB(A) Differential pressure - bar Differential pressure - bar TW4 – Max. rpm TW3 – Max. rpm dB(A) dB(A) Differential pressure - bar Differential pressure - bar A.0500.301/314.B – IM-TW/10.00 GB (0401) -
Page 32: 4.0 Disassembly And Assembly Instructions
4.0 Disassembly and assembly instructions Tools to be used Type Size Combination spanner 10 mm Combination spanner 13 mm Combination spanner 17 mm Combination spanner 19 mm Combination spanner 22 mm Combination spanner 24 mm Combination spanner 30 mm Hexagon (Allen) key 4 mm Hexagon (Allen) key 5 mm... -
Page 33: General Instructions
Insufficient or wrong assembly and disassembly can lead to the pump malfunction. Johnson Pump is not liable for accidents and damage caused by non-compliance with the guidelines. Always work in a clean surrounding. Keep all highly sensitive parts such as seals, bearings, etc. -
Page 34: Tightening Torque [Nm] For Nuts And Screws
Tightening torque [Nm] for nuts and screws Torque Torque Pos. Description Dimension [Nm] Dimension [Nm] 0250 Retainer M10 (X-3CrNiMoN27.5.2) M16 (X-3CrNiMoN27.5.2) 0450 Cap nut M8-DIN917-(A4) M10-DIN917-(A4 0455 Cap nut M6-DIN917-(A4) M8-DIN917-(A4) 0510 Screw M5x12-DIN912-(8.8) M6x12-DIN912-(8.8) 0520 Screw M5x20-DIN912-(12.9) M6x18-DIN912-(12.9) 0525 Screw M6x16-DIN912-(A4) M8x20-DIN912-(A4) -
Page 35: Disassembly
Disassembly See also sections 4.2 General instructions, 4.3 O-rings and lip seals, 4.4 Shut down and 4.5 Tightening torque for nuts and screws. 4.6.1 Pump cover and rotor removal Do not forget that liquid may still flow out of the rotor case when removing the pump cover (0030). -
Page 36: Disassembly Of Seals
4.6.2 Disassembly of seals Rotor Seal assembly Only if section 4.6.1 has been completed. 4.6.2.1 Single mechanical seal 0082 0083 1. Remove the rotating seal face and O-ring (0082) from the rotor. 2. Remove the stationary seal face together with O-ring (0083) from the rotor case. -
Page 37: Single Mechanical Seal With Flushing
0083 4.6.2.2 Single mechanical seal with flushing 0085 0082 0890 1. Remove the rotating seal face and O-ring (0082) from the rotor. 2. Remove the stationary seal face together with the O-ring (0083) from the rotor case. 3. Remove the stationary part of the seal together with the O-ring (0085), spring and lip seal (0890) from the rotor case. -
Page 38: Single O-Ring Seal
4.6.2.4 Single O-ring seal 0085 0130 1. Remove the shaft sleeve (0130) 0082 0183 from the shaft and O-ring (0082) from the rotor. 2. Remove the support ring (0097) together with O-ring (0085) and O-ring (0183) from the rotor case. The support ring can be pushed out from the backside via the access opening in the rotor case... -
Page 39: Disassembly Of Drive Assembly
4.6.3 Disassembly of drive assembly 0611 0850 0855 0120 0881 0455 0181 1. Disconnect the pump from the motor. 0875 2. Remove key (0611). 0870 3. Remove the air breather (0850) with sealing ring (0855) and plug (0870) with sealing ring (0875). Drain the oil in an appropriate reservoir. 4. -
Page 40: Disassembly Of Shaft Arrangement
4.6.4 Disassembly of shaft arrangement 0630 1. TW1 Bend the tooth straight out of the groove of the nut and remove the locking nut (0620) and remove it. 0620 TW 1 1. TW2, TW3, TW4 Loosen set screws of locking nut (0620) 0620 and remove it. -
Page 41: Disassembly Of Rotor Case
4.6.5 Disassembly of rotor case 1. Remove lip seals (0885) from rotor case. 2. If the feet have to be removed, loosen screws (0525) and remove feet. 0885 0885 Assembly See also sections 4.2 General instructions, 4.3 O-rings and lip seals and 4.5 Tightening torque for nuts and screws. - Page 42 Tool 3. Fit the external ring of bearing (0701) in the bearing holder (0121). Ensure that the axial surface of the bearing ring is 0701 pushed properly against the (external ring) ounting surface inside the bearing holder. 0121 4. Place the shaft vertical on the workbench and place the external ring of bearing (0700) and the bearing holder on the internal...
-
Page 43: Assembly Of Shafts In The Rotor Case And Setting Of The Tapered Roller Bearings
4.7.3 Assembly of shafts in the rotor case and setting of the tapered roller bearings 1. Fit both pre-assembled shafts with bearings in the rotor case and fix them with screws (0510). Tool Tool : assembly sleeve for lip seal (see chapter 5.0) 0510 TW1 M10x20... -
Page 44: Axial Adjustment Of The Rotors
• Place a block of soft material (plastic or wood) between rotor and rotor case to block the rotor against rotation • Turn locking nut (0620) in order to adjust the pre-load of the bearings according to the measured friction torque 0620 Rotor locked with plastic block Locking nut of the pre-loading... -
Page 45: Assembly Of Gears
6. Adjust the thickness of the shim by peeling of the required number of layers of 0.025 mm (coloured). 7. Remove the retainers from both shafts and take off the rotors. 8. Remove screws (0510). 9. Screw 2 bolts in the flange of the bearing holder and push the bearing holder approx. -
Page 46: Synchronization Of The Rotors
Pump Description Torque [Nm] Allen screw DIN 912 M5x20 (12.9) Allen screw DIN 912 M6x18 (12.9) Allen screw DIN 912 M8x22 (12.9) Allen screw DIN 912 M10x25 (12.9) 4.7.6 Synchronization of the rotors 4.7.6.1 Manual synchronization 1. Position the rotors by turning the drive shaft manually to the position shown in the diagram. -
Page 47: Assembly Of End Cover
4.7.6.2 Synchronization with special tools 1. Position the shafts using the Synchronization tool synchronization tool. 2. Assemble the synchronization tool as indicated on the figure, so that the shafts are well positioned. 3. Tighten the screws of the locking assembly/elements in Bush the same way as described for Ring... -
Page 48: Assembly Of Seals
0880 0881 Tool Assembly tool for V-seal Shaft position Rotor Seal assembly Dimensions in mm 4.7.8 Assembly of seals 4.7.8.1 Single mechanical seal 1. Place the stationary part of the seal in the rotor case. Ensure that the pin in the rotor case fits into the groove in the stationary part of the seal. -
Page 49: Single Mechanical Seal With Flushing
4.7.8.2 Single mechanical seal with flushing 0083 0085 0082 0890 1. Fit lip seal (0890) and O-ring (0085) in the stationary part of the seal. 2. Place the stationary part of the seal, O-ring and spring in the rotor case. Ensure that the pin in the rotor case fits into the groove in the stationary part of the seal. -
Page 50: Double Mechanical Seal
4.7.8.3 Double mechanical seal 1. Place O-ring (0087) on the atmospheric side - seal face. 0083 0086 Push the atmospheric side - 0087 0085 0082 rotating seal face with O-ring over the shaft. Ensure that the pins in the shaft are fitting into the grooves in the seal face. -
Page 51: Single O-Ring Seal
4.7.8.4 Single O-ring seal 0085 0130 0082 1. Fit O-rings (0085) and (0183) in 0183 support ring (0097). Place support ring with O-rings into the rotor case. Ensure that the pin in the rotor case fits into the groove in the support ring. -
Page 52: Assembly Of Rotors And Pump Cover
4.7.9 Assembly of rotors and pump cover 0800 0801 0450 0250 0020 0030 4.7.9.1 Assembly of rotors 1. Place the rotors (0020) on the shafts. 2. Place O-rings (0800) on the retainers (0250) and fasten the retainers. See chapter 4.5 Tightening torque for nuts and screws. 3. -
Page 53: 5.0 Special Tools
These tools can be ordered from Johnson Pump or produced in the own workshop. The article numbers for ordering are indicated in the tables under each drawing/picture together with the dimensions of the tool in question (if applicable). -
Page 54: Assembly Tool For Lip Seals
Assembly sleeve for lip seals Place: Rotor case front end Purpose: For fitting the shaft/bearing assembly into the rotor case (see section 4.7.3) Assembly sleeve TW1 1x45˚ Assembly sleeve TW2, TW3 and TW 4 Ex45˚ Article number Ø I Ø J ØK Ø... -
Page 55: Assembly Tool For Lip Seal
Assembly tool for lip seal Place: Endcover rear end Purpose: For fitting the radial lip seal (0880) into the end cover (see section 4.7.7) C x45˚ 2x45˚ 1 x 45˚ Pump type Article number Ø D Ø E Ø F 3.94943.11 38.3 28.5... -
Page 56: Tool Kit For Synchronization Of The Pump Shafts
Tool kit for synchronization of the pump shafts Purpose: To adjust the position of the shafts against each other (see section 4.7.6.2) Pump Type Article number 3.01983.01 3.01983.11 3.01983.21 3.01983.31 All dimensions in mm Tool for disassembly O-ring seal TW1 Purpose: To disassemble the support ring from the rotor case (see sections 4.6.2.4 and 4.6.2.5) Pump Type... - Page 57 Madrid: Tel. +34 91 888 79 22 AUSTRALIA Johnson Pumpen GmbH NETHERLANDS SWEDEN Tel. +49 (0)5731 480 80 Johnson Pump (Australia) Pty. Ltd. Fax +49 (0)5731 414 00 Johnson Pump Water B.V. Tel. +61 (0)7 3899 9933 Johnson Pump Svenska Tel. +46 (0)19 21 83 70 Tel.
Need help?
Do you have a question about the Top Wing Series and is the answer not in the manual?
Questions and answers