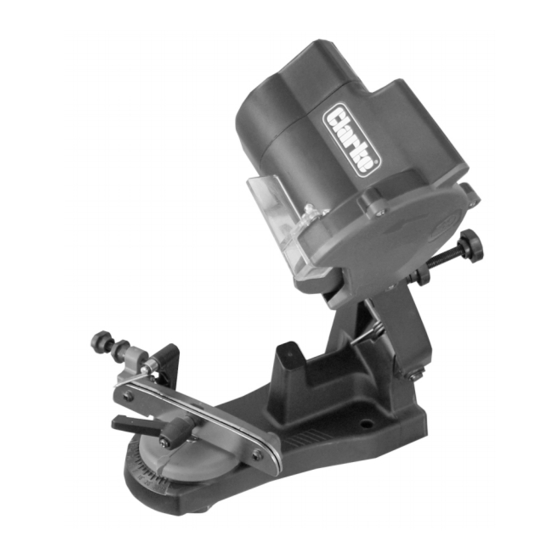
Summary of Contents for Clarke ECSS2
- Page 1 WARNING: Read these instructions before using the machine CHAINSAW SHARPENER MODEL NO: ECSS2 PART NO: 3402077 OPERATION & MAINTENANCE INSTRUCTIONS LS0611...
-
Page 2: Specifications
GUARANTEE This CLARKE product is guaranteed against faulty manufacture for a period of 12 months from the date of purchase. Please keep your receipt as proof of purchase. -
Page 3: Safety Precautions
SAFETY PRECAUTIONS WARNING: READ ALL INSTRUCTIONS. FAILURE TO FOLLOW ALL INSTRUCTIONS LISTED BELOW MAY RESULT IN ELECTRIC SHOCK, FIRE AND/ OR SERIOUS INJURY. THE TERM “POWER TOOL” IN ALL WARNINGS LISTED BELOW REFERS TO YOUR CHAINSAW SHARPENER. WORK AREA 1. Keep work area clean and well lit. Cluttered and dark areas invite accidents. - Page 4 5. Dress properly. Do not wear loose clothing or jewellery. Keep your hair, clothing and gloves away from moving parts. Loose clothes, jewellery or long hair can be caught in moving parts. POWER TOOL USE AND CARE 1. Do not force the power tool. Use the correct power tool for your application.
-
Page 5: Additional Safety Instructions For Chainsaw Sharpeners
5. Do not operate the sharpener if it does not work correctly or has been dropped. 6. Do not disassemble the sharpener and do not try to repair it yourself. Contact your Clarke customer service. ENVIRONMENTAL PROTECTION Recycle unwanted materials instead of disposing of them as waste. -
Page 6: Electrical Connections
ELECTRICAL CONNECTIONS WARNING! Read these electrical safety instructions thoroughly before connecting the product to the mains supply. Before switching the product on, make sure that the voltage of your electricity supply is the same as that indicated on the rating plate. This product is designed to operate on 230V AC 50Hz. -
Page 7: Mounting The Sharpener
OVERVIEW ASSEMBLY Insert the chain holder assembly into the base as shown and secure from below using the Locking Wheel supplied. • Make sure the pointer is positioned pointing forwards (away from the grinding wheel). MOUNTING THE SHARPENER 1. Place the base on a solid, level surface, e.g. -
Page 8: Before Use / Setup
BEFORE USE / SETUP WARNING: MAKE SURE THE SHARPENER IS NOT CONNECTED TO THE MAINS SUPPLY DURING SETUP. 1. Clean the chain before sharpening. Wash it with a non-flammable solvent. Do not use petrol. Dry the chain. FITTING THE CHAIN 2. -
Page 9: Limiting The Depth Of Cut
LIMITING THE DEPTH OF CUT 7. Lower the top housing so that the grinding wheel skims the chain tooth. 8. Hold it at that position while you tighten the depth limiter until it touches the stop on the base. • The grinding wheel will only go down to that point from now 9. -
Page 10: Sharpening A Chain
SHARPENING A CHAIN WARNING: WHEN SHARPENING, ALWAYS WEAR SAFETY GOGGLES. NOTE: Sharpen all the teeth on one side first (every other tooth) before adjusting the angle to complete the job. 1. Put on your protective goggles and make sure the immediate area is clear of bystanders. -
Page 11: Operating Hints
OPERATING HINTS • Before you sharpen the chainsaw chain check it for damage, such as: - bent or abraded chain links. - broken cutting teeth, loose rivets or broken rivet heads. If any damage is found, replace the entire chain. •... - Page 12 • Sharpening teeth to unequal lengths can cause a side drift when sawing. Parts & Service: 020 8988 7400 / E-mail: Parts@clarkeinternational.com or Service@clarkeinternational.com...
-
Page 13: Cleaning And Maintenance
• Replacement grinding disc speed must meet or exceed the RPM rating of the sharpener. • Replacement discs are available from your Clarke dealer part number (3402079) NOTE: Do not use a grinding wheel if it is chipped, cracked, or worn. -
Page 14: Parts Diagram
PARTS DIAGRAM Parts & Service: 020 8988 7400 / E-mail: Parts@clarkeinternational.com or Service@clarkeinternational.com... -
Page 15: Parts List
PARTS LIST Description Part Number No Description Part Number Screw HTCECSS201 Retaining Ring HTCECSS225 Motor Cover HTCECSS202 Lower Knob HTCECSS226 Power Cord HTCECSS203 Screw HTCECSS227 Top Housing HTCECSS204 Bolt HTCECSS228 Switch Plate HTCECSS205 Chain Saw Frame HTCECSS229 Lock Stop HTCECSS206 Square Neck Screw HTCECSS230 Grinding wheel base HTCECSS207... -
Page 16: Declaration Of Conformity
DECLARATION OF CONFORMITY Parts & Service: 020 8988 7400 / E-mail: Parts@clarkeinternational.com or Service@clarkeinternational.com...


Need help?
Do you have a question about the ECSS2 and is the answer not in the manual?
Questions and answers