Table of Contents
Advertisement
3104259
Your new tool has been engineered and manufactured to WEN's highest standards for dependability,
ease of operation, and operator safety. When properly cared for, this product will supply you years
of rugged, trouble-free performance. Pay close attention to the rules for safe operation, warnings,
and cautions. If you use your tool properly and for intended purpose, you will enjoy years of safe,
reliable service.
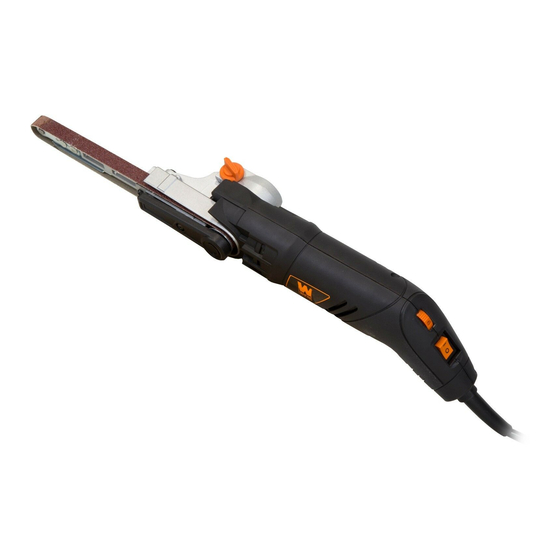
1/2 X 18 INCH
BELT SANDER
IMPORTANT:
NEED HELP? CONTACT US!
Have product questions? Need technical support?
Please feel free to contact us at:
800-232-1195
techsupport@wenproducts.com
WENPRODUCTS.COM
Model # 6307
bit.ly/wenvideo
(M-F 8AM-5PM CST)
Advertisement
Table of Contents

Summary of Contents for Wen 6307
- Page 1 3104259 IMPORTANT: Your new tool has been engineered and manufactured to WEN’s highest standards for dependability, ease of operation, and operator safety. When properly cared for, this product will supply you years of rugged, trouble-free performance. Pay close attention to the rules for safe operation, warnings, and cautions.
-
Page 2: Table Of Contents
Electrical Information Know Your Belt Sander Assembly and Adjustments Operation Maintenance Exploded View and Parts List Warranty TECHNICAL DATA 6307 Model Number: 120 V, 60 Hz, 2A Motor: Speed: 1100 to 1800 feet per minute 1/2 x 18 in. Belt Size: 55°... -
Page 3: General Safety Rules
GENERAL SAFETY RULES Safety is a combination of common sense, staying alert and knowing how your item works. SAVE THESE SAFETY INSTRUCTIONS. WARNING! Read all safety warnings and all instructions. Failure to follow the warnings and instruc- tions may result in electric shock, fire and serious injury. To avoid mistakes and serious injury, do not plug in your tool until the following steps have been read and understood. -
Page 4: Specific Safety Rules For The Sander
GENERAL SAFETY RULES 2. Check power tool for damaged parts. Check for misalignment of moving parts, jamming, breakage, improper mounting, or any other conditions that may affect the tool’s operation. Do not use the power tool if the switch does not turn ON/OFF. - Page 5 SPECIFIC RULES FOR THE SANDER 3. Securing the Workpiece Never hold the workpiece in your hand or across your legs. Small workpieces must be adequately secured so that the rotating belt doesn’t pick them up during the forward motion of the sander. Unstable support causes the belt to bind, resulting in a loss of control and possible injury.
-
Page 6: Electrical Information
ELECTRICAL INFORMATION GROUNDING INSTRUCTIONS IN THE EVENT OF A MALFUNCTION OR BREAKDOWN, grounding provides the path of least resistance for an electric current and reduces the risk of electric shock. This tool is equipped with an electric cord that has an equipment grounding conductor and a grounding plug. -
Page 7: Know Your Belt Sander
KNOW YOUR BELT SANDER 1. Power Switch 2. Speed Control 3. Handle 4. Angle Locking Screw 5. Belt Tensioning Button 6. Arm 7. Sanding Belt 8. Front Roller 9. Belt Direction Indicator 10. Dust Extraction Port ASSEMBLY CHOOSING SANDING BELTS This item includes three sanding belts, one 80-grit sanding belt (fitted on the tool), one 120-grit sanding belt and one 320-grit sanding belt. -
Page 8: Assembly And Adjustments
ASSEMBLY AND ADJUSTMENTS WARNING: To avoid injury from accidental startups, switch off the tool and unplug the power cord before adjusting, replacing accessories, cleaning or maintenance. INSTALLING THE SANDING BELT 1. Press the tip of the sander against a hard object to retract the front roller (Fig. -
Page 9: Operation
SERVICE: Preventive maintenance performed by unauthorized personnel may result in misplacing of internal wires and components, possibly causing a serious hazard. We recommend that all tool service be performed by an authorized WEN service station. CLEANING: Ventilation openings and switch levers must be kept clean and free of foreign matter. The tool may be cleaned most effectively with compressed dry air. -
Page 10: Exploded View And Parts List
EXPLODED VIEW AND PARTS LIST... - Page 11 EXPLODED VIEW AND PARTS LIST No Part Number Description Qty. No Part Number Description Qty. 6307-001 Power Cord 6307-031 Screw 6307-002 Power Cord Sleeve 6307-032 Belt Plate 6307-003 Switch 6307-033 Screw 6307-004 Screw 6307-034 Belt Housing 6307-005 PCB Board 6307-035...
- Page 12 LIMITED TWO YEAR WARRANTY WEN Products is committed to building tools that are dependable for years. Our warranties are consistent with this commitment and our dedication to quality. LIMITED WARRANTY OF WEN CONSUMER POWER TOOLS PRODUCTS FOR HOME USE GREAT LAKES TECHNOLOGIES, LLC (“Seller”) warrants to the original purchaser only, that all WEN con- sumer power tools will be free from defects in material or workmanship for a period of two (2) years from date of purchase.


Need help?
Do you have a question about the 6307 and is the answer not in the manual?
Questions and answers