
Related Manuals for Kongskilde GXS 9005


Summary of Contents for Kongskilde GXS 9005
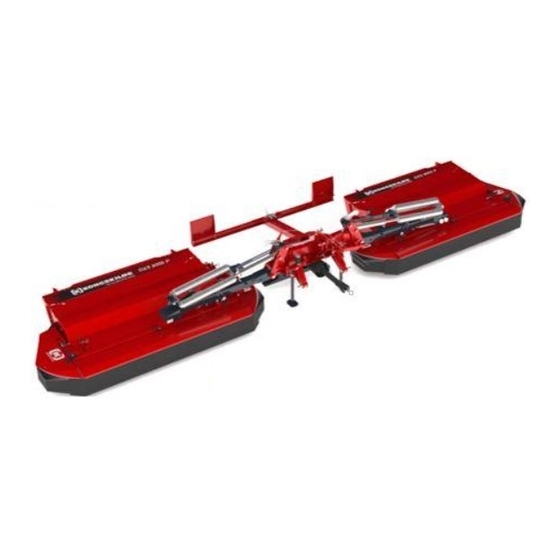
- Page 1 ORIGINAL INSTRUCTIONS - according to Directive 2006/42/EC, Annex I 1.7.4.1 OPERATOR’S MANUAL GXS 9005 GXS 9005 P Disc Mower Part number 81PIGB-183x edition English February 2018...
-
Page 3: Foreword
DEAR CUSTOMER! We appreciate the confidence you have shown to our company by investing in a KONGSKILDE product and congratulate you with your new purchase. Of course, it is our wish that you will experience complete satisfaction with the investment. -
Page 4: Table Of Contents
Adjustment of lifting height ..............38 STONE RELEASE .................... 39 WORKING IN THE FIELD ................40 Turning ....................40 Stubble height ..................40 Securing against overload ..............41 CONDITIONER....................42 EQUIPMENT FOR WIDE SPREADING (TOP DRY) ........43 PIGB-183X 04 GXS 9005 / P 0218... - Page 5 CUTTERBAR ....................61 Replacement of hubs ................61 WINTER STORAGE ..................63 6. MISCELLANEOUS ....................... 64 DRIVING TIPS AND FAULT-FINDING ............. 64 SPARE PARTS ORDER ................... 65 MACHINE DISPOSAL ..................65 7. WARRANTY ........................66 PIGB-183X 04 GXS 9005 / P 0218...
-
Page 6: Introduction
1. INTRODUCTION 1. INTRODUCTION This instruction manual deals with GXS 9005 and GXS 9005 P. The front machine has its own instruction manual. INTENDED USE KONGSKILDE disc mowers are developed for agricultural work. They should only be connected to tractors and driven by the PTO of the tractor. -
Page 7: Safety
1. INTRODUCTION SAFETY The safety of persons and machines is an integral part of KONGSKILDE’s development work. However, damage can occur as a consequence of misuse and insufficient instruction. We wish to ensure the safety of you and your family in the best possible way, but this also requires an effort on your part. -
Page 8: General Safety Instructions
Do not change the guards or work with the machine when a guard is missing or defective. 10. Always drive with the statutory lights and safety marking during transport on public road and at night. PIGB-183X 04 GXS 9005 / P 0218... - Page 9 17. Never use the machine for other purposes than what it has been constructed for. 18. Do not allow any children to be near when you are working with the machine. 19. Never stand between the tractor and the machine during connection and disconnection. PIGB-183X 04 GXS 9005 / P 0218...
-
Page 10: Special Safety Instructions
12. Even though the power transmission has stopped, the revolving parts have a momentum. Therefore, always wait until the revolving parts have come to a complete stop before getting near the cutting unit. 13. If in doubt, always contact the nearest dealer. PIGB-183X 04 GXS 9005 / P 0218... -
Page 11: Choice Of Tractor
Always choose a tractor with a closed cabin when working with a disc mower. CONNECTION AND DISCONNECTION Always make sure that nobody is standing between the tractor and the machine during connection and disconnection. An unintentional manoeuvre with the tractor may cause serious injury. PIGB-183X 04 GXS 9005 / P 0218... -
Page 12: Pto Drive Shaft
To ensure all the air has been expelled from the oil in the hydraulic cylinders, test all the functions after the hydraulic connections are connected to the tractor. Especially before you enter or drive on public roads. PIGB-183X 04 GXS 9005 / P 0218... -
Page 13: Adjustments
Loose stones and foreign matter in the field might get in contact with the revolving parts and get thrown out again at a very high speed. Therefore, all guards must always be correctly mounted and intact when you are working with the machine. PIGB-183X 04 GXS 9005 / P 0218... -
Page 14: Parking And Maintenance
Always make sure that the used spare parts are mounted correctly and that screws are tightened to the correct torque. Before you carry out any repair or maintenance work you should: Park the machine safely and disconnect the tractor. PIGB-183X 04 GXS 9005 / P 0218... -
Page 15: Machine Safety
Be careful when using high pressure cleaners, particularly near bearings and seals. MACHINE SAFETY At Kongskilde Industries A/S all revolving parts are balanced by means of a special machine with electronic sensors. If it turns out that a part still has an unbalance, small counterweights should be mounted. - Page 16 1. INTRODUCTION PIGB-183X 04 GXS 9005 / P 0218...
-
Page 17: Safety Decals
11. Stop PTO PTO must be stopped before the machine is swivelled into transport position. PIGB-183X 04 GXS 9005 / P 0218... - Page 18 1. INTRODUCTION PIGB-183X 04 GXS 9005 / P 0218...
-
Page 19: Technical Data
Window open 84.5 dB Machine Window closed 76.5 dB tractor dis- cabin Window open 78.0 dB conneted We reserve the right to change the construction and specification details without notice. PIGB-183X 04 GXS 9005 / P 0218... -
Page 20: Connection And Test Driving
Fig. 2.1 Fig. 2.1 GXS 9005 (P) is connected to the link arms and top link of the tractor. The hitch pins are intended for category III. Adjust the link arms to the same height and connect to the machine. Adjust and lock sideways so that the machine is suspended centred behind the tractor and there is no play sideways. - Page 21 In working position the height of the link arms is adjusted so that the PTO shafts are as close to horizontal as possible. If you work with GXS 9005 (P), the link arms are lowered in transport position to obtain a transport height of less than 4 m.
-
Page 22: Hydraulic Connections
2. CONNECTION AND TEST DRIVING HYDRAULIC CONNECTIONS The GXS 9005 (P) hydraulic system can be operated with either two or just one single-acting outlet. If only one outlet is used the cutting units are lifted at the same time and they cannot be lifted separately. - Page 23 DANGER: The hydraulic components must not be exposed to a higher pressure than 210 bar as a higher pressure may cause parts to be damaged. Hereby a serious risk of personal injury occurs. PIGB-183X 04 GXS 9005 / P 0218...
-
Page 24: Mounting Of Pto Drive Shaft
2. CONNECTION AND TEST DRIVING MOUNTING OF PTO DRIVE SHAFT All GXS 9005 (P) machines are as standard delivered with a PTO shaft with friction clutch and free wheel. The PTO shaft is mounted with the clutch towards the machine side and the other end towards the tractor. - Page 25 Adjust the PTO shaft so that it has the biggest possible overlapping in no position has less overlapping than 200 mm. is not compressed more than the prescribed 30 mm in order not to bottom the shaft. PIGB-183X 04 GXS 9005 / P 0218...
- Page 26 Shorten all 4 tubes equally. The ends of the profile tubes must be rounded off and burrs must be removed carefully. WARNING: Grease the tube carefully before it is reassembled as it will otherwise be exposed to big friction forces. PIGB-183X 04 GXS 9005 / P 0218...
-
Page 27: Test Driving
Then the number of RPM can be increased. At the correct number of RPM, check if there are any noticeable vibrations. (Check the guards for unusual vibrations). PIGB-183X 04 GXS 9005 / P 0218... - Page 28 CAUTION: If the machine has been checked and you wish to test it for a long time, close the rear window or wear hearing protector! PIGB-183X 04 GXS 9005 / P 0218...
-
Page 29: Driving On Public Road
3-point linkage must be lowered so that the transport height is below 4 metres. The exact transport height for the individual machines is stated under technical data. PIGB-183X 04 GXS 9005 / P 0218... - Page 30 Fig. 2.8 Fig. 2.8 The GXS 9005 (P) is equipped with 2 transport safety devices which must be safely engaged when the machine is transported vertically. The left picture shows the hook which connects the boom with the suspension. The right picture shows the transport safety device which in vertical transport position blocks the pendulum movement between the cutting unit and the boom.
-
Page 31: Disconnection Of The Machine
GXS 9005 (P) should, if possible, always be disconnected in the working position. In this way the machine is parked safely. If you wish to save space when parking the machine, GXS 9005 (P) can also be parked in transport position. This should take place on steady and even ground in a place where the machine is protected against wind and weather. -
Page 32: Driving And Operation
3. DRIVING AND OPERATION CONSTRUCTION AND FUNCTION GXS 9005 (P) is a rear mounted Triple-mower. In order to use the machine it must be combined with a front mower. We recommend that the front mower has a working width of minimum 3 m. -
Page 33: Transport Position
VERTICAL TRANSPORT POSITION Before transport the GXS 9005 (P) is placed in vertical transport position. Fig. 3.2 Fig. 3.2 Folding to vertical transport position takes place hydraulically with the lifting cylinder by activating the tractor’s hydraulic outlet. - Page 34 7. Close all hydraulic stop cocks and check that the transport safety device is engaged. WARNING: Lowering of the 3-point suspension When the machine is lowered in the 3-point suspension, it must be checked, that the machine does not touch parts on the tractor. PIGB-183X 04 GXS 9005 / P 0218...
-
Page 35: Working Position
9. Deactivate the transport safety device. Fig. 3.3 Fig. 3.3 On plane ground the link arms are raised/lowered so that the pin on the boom is in the middle of the oblong hole of the transport safety device. PIGB-183X 04 GXS 9005 / P 0218... -
Page 36: Relief Of Cutterbar
Therefore the correct adjustment of the relief is an important factor if you wish to obtain a good result. On GXS 9005 each cutting unit is relieved by two strong spiral springs. On GXS 9005 P each cutting unit is relieved by three springs. -
Page 37: Headland Position
If the cutting unit is going to be lifted higher than the headland position, the valve can be oversteered by pulling the cord for the transport safety device. PIGB-183X 04 GXS 9005 / P 0218... -
Page 38: Adjustment Of Lifting Height
Pull the cord for the transport safety device, if necessary. 2. Loosen the screw T and turn the cam track until the ball bearing of the arm is in the notch of the cam track. 3. Tighten the screw again. PIGB-183X 04 GXS 9005 / P 0218... -
Page 39: Stone Release
The two springs of the stone release system can be adjusted so that the system releases at a suitable power. KONGSKILDE recommends that you tighten the bolt until the springs are tightened, and then tighten further 2 mm. The stone release only works when driving forwards. -
Page 40: Working In The Field
The stubble height is adjusted by changing the length of the top link. Fig. 3.8 Fig. 3.8 When the suspension is horizontal the cutter bar has a forward inclination of 3°. This results in a theoretical stubble height of 38 mm. PIGB-183X 04 GXS 9005 / P 0218... -
Page 41: Securing Against Overload
In this case, the friction clutch will slip and you should disconnect the PTO immediately and let the machine “rest”. PIGB-183X 04 GXS 9005 / P 0218... -
Page 42: Conditioner
3. DRIVING AND OPERATION CONDITIONER GXS 9005 P is equipped with a conditioner rotor with PE fingers. The conditioner rotor rotates at 860 rpm. Fig. 3.10 Fig. 3.10 The degree of conditioning can be varied by changing the distance between the conditioner plate B and the conditioner fingers C. -
Page 43: Equipment For Wide Spreading (Top Dry)
During wide spreading the crop is thrown from the conditioner rotor against the plate which leads the crop towards the ground. Thereby the crop is laid in the full width of the conditioner. PIGB-183X 04 GXS 9005 / P 0218... -
Page 44: Greasing
4. GREASING 4. GREASING Greasing chart for GXS 9005 (P) Below grease points must be greased after every 40 hours of operation, however at least once a year. PIGB-183X 04 GXS 9005 / P 0218... -
Page 45: Grease
If you neglect to grease the profile tubes sufficiently it will result in high axial forces which will damage the profile tubes and in time also connecting shafts and gearboxes. Lubricate via external lubricating nipple in the protective tube. PIGB-183X 04 GXS 9005 / P 0218... -
Page 46: Oil Change
4. GREASING OIL CHANGE: CUTTERBARS Oil content per cutterbar: GXS 9005 (P) 3.00 l OIL LEVEL The oil in the cutterbar is very thick, especially when it is cold. Therefore, wait minimum 15 minutes if the oil is cold and minimum 3 minutes it the oil is warm before checking the oil level. -
Page 47: Oil Change
Never fill with more or less oil than prescribed. Too much oil as well as too little oil in the cutterbar may cause unintentional overheating which in the long term will damage the bearings. PIGB-183X 04 GXS 9005 / P 0218... -
Page 48: Bevel Gearbox Above The Cutter Bar
Oil level: Check the oil level after every 80 hours of operation. Oil change: First oil change after 50 working hours and then after every 600 working hours or at least once a year. PIGB-183X 04 GXS 9005 / P 0218... -
Page 49: Bevel Gearbox At The Headstock
Oil level: Check the oil level after every 80 hours of operation. Oil change: First oil change after 50 working hours and then after every 600 working hours or at least once a year. PIGB-183X 04 GXS 9005 / P 0218... -
Page 50: Maintenance
M 16 M 16x1,5 M 18 M 20 M 20x1,5 M 24 1100 M 24x1,5 1175 M 30 1300 1800 2300 Fig. 5.1 Fig. 5.1 Torque moment M (if nothing else has been stated). PIGB-183X 04 GXS 9005 / P 0218... -
Page 51: Friction Clutch
Fig. 5.3 The nuts 3 are tightened equally whereby the friction discs are relieved. Turn the clutch all the way round. The nuts 4 are turned back to the end of the thread. PIGB-183X 04 GXS 9005 / P 0218... -
Page 52: Control Of Balance
In the long run unbalance will cause fatigue fractures and serious damage. All machines manufactured by Kongskilde Industries A/S are tested and checked for vibrations with special tools. The first time you start the machine pay attention to vibrations and noise to have a standard of comparison later. -
Page 53: Discs And Blades - Q
IMPORTANT: Damaged blades, discs and blade holders must be replaced by original KONGSKILDE spare parts to obtain a safe operation. WARNING: When replacing blades, both blades on the disc in question must be replaced in order not to create an unbalance. -
Page 54: Blades
The diameter of the blade pin is less than 15 mm. IMPORTANT: This must especially be checked after collision with foreign matter, after replacement of blades and the first time you use the machine. PIGB-183X 04 GXS 9005 / P 0218... -
Page 55: Replacement Of Blades
An arrow is stamped in the blade showing the right direction. If blades are not placed correctly, it will result in cutting problems. PIGB-183X 04 GXS 9005 / P 0218... - Page 56 Fig. 5.9 Fig. 5.9 When the replacement tool has been pushed forward in the oblong hole B it is situated between the stop C and the blade holder D as shown. PIGB-183X 04 GXS 9005 / P 0218...
- Page 57 WARNING: Replace the blade with your free hand. Do not let go of the handle since the spring power of the blade holder can make the tool spring back with considerable power. PIGB-183X 04 GXS 9005 / P 0218...
- Page 58 A (in the spare parts package). IMPORTANT: When the gauge A can get over the blade pin B it MUST be replaced immediately. When mounting blades this is done in reverse order. PIGB-183X 04 GXS 9005 / P 0218...
-
Page 59: Replacement Of Discs
REMEMBER: The blades can be used on both sides. REPLACEMENT OF DISCS 90° Fig. 5.14 Fig. 5.14 If discs have been dismounted they must be mounted again staggered 90° in relation to each other. PIGB-183X 04 GXS 9005 / P 0218... - Page 60 WARNING: After replacement of blades, blade bolts, discs and the like check that no tools have been left on the machine and that the guards have been placed correctly. PIGB-183X 04 GXS 9005 / P 0218...
-
Page 61: Cutterbar
Fig. 5.16 A cutterbar is used on which each hub C below the discs is easily replaced from above (Top Service cutter bar). The hubs with bearing housing are dismounted by loosening the bolts that fix it to the cutterbar. PIGB-183X 04 GXS 9005 / P 0218... - Page 62 WARNING: After replacement of blades, blade bolts, discs and the like check that no tools have been left on the machine and that the guards have been placed correctly. PIGB-183X 04 GXS 9005 / P 0218...
-
Page 63: Winter Storage
Spray the machine with a coat of rust-preventing oil. This is especially important on the parts polished with use and the hydraulic cylinder piston rods. Change the oil in the cutter bar and the gearboxes. Store the machine in a ventilated engine house. PIGB-183X 04 GXS 9005 / P 0218... -
Page 64: Miscellaneous
Crop and dust under the discs Stop the tractor engine. Dismount the discs and clean cutter bar and discs. Check if the friction clutch is intact. String or wire is wrapped around a disc. Remove the foreign matter. PIGB-183X 04 GXS 9005 / P 0218... -
Page 65: Spare Parts Order
Disassemble the machine and separate the individual parts, e.g. tyres, hydraulic hoses, hydraulic valves etc. Hand over the usable parts to an authorised recycling centre. The large scrapping parts are handed over to an authorised breaker's yard. PIGB-183X 04 GXS 9005 / P 0218... -
Page 66: Warranty
It is prohibited to carry out any modifications to the machine unless specifically authorized, in writing, by a NEW HOLLAND representative. PIGB-183X 04 GXS 9005 / P 0218... - Page 67 Alljärgnevaga deklareerib, et/ Izjavljamo, da je/ Με το παρόν δηλώνω ότι/ Abaixo declara que / Jiddikjaraw li / Apstiprinu, ka Maskine: La máquina: Masin: Maschine: Maszyna: Stroj: Машината: Η μηχανή: Machine: Machine: Gép: Máquina: Model/Type: GXS 9005 P La macchina: Stroj: Il-magna: Mašina: Mašīna: Machine: Designation: Mower Maskin: Stroj: Serial: Maşina: Laite: - er i overensstemmelse med Maskindirektivets bestemmelser (Direktiv 2006/42/EF) og hvis relevant også...
- Page 68 - est conforme aux dispositions de la Directive relatives aux machines 2006/42/CE et également aux dispositions de la Directive sur la Directive EMC 2014/30/UE. - é in conformita' con la Direttiva Macchine 2006/42/CE e, se pertinente, anche alla Direttiva alla Direttiva EMC 2014/30/UE. - in overeenstemming is met de bepalingen van de Machine richtlijn 2006/42/EG en wanneer relevant ook met de bepalingen van de EMC richtlijn 2014/30/EU.
- Page 70 Kongskilde dealer. © 2018 CNH Industrial Belgium N.V. All Rights Reserved. Kongskilde is a trademark registered in the United States and many other countries, owned by or licensed to CNH Industrial N.V., its subsidiaries or affiliates. Any trademarks referred to herein, in association with goods and/or services of companies, other than owned by or licensed to...
Need help?
Do you have a question about the GXS 9005 and is the answer not in the manual?
Questions and answers