Table of Contents
Advertisement
Quick Links
- 1 Table of Contents
- 2 Summary of Dr Summary of Drawings (Appendix) Awings (Appendix) / Notes Notes to the Instruction Notes to the Instruction
- 3 Directives for Installation, Connection and Use
- 4 Compressor (nur bei Kl20E)
- 5 Electrical Connection
- 6 Maintenance / Service
- 7 Service Parts
- Download this manual
Technical Manual
Technical Manual
Technical Manual
Technical Manual
for KONVEKTA
for KONVEKTA
for KONVEKTA
for KONVEKTA
Air Conditioning Unit
Air Condition
Air Condition
Air Condition
- KL20
KL20
KL20 facelift
KL20
- - - - KL20E
KL20E facelift
KL20E
KL20E
Contains information on:
Contains information on:
Contains information on:
Contains information on:
-
-
-
ID#: BEA- - - - KL2
ID#: BEA
KL2E132AA
E132AA
ID#: BEA
ID#: BEA
KL2
KL2
E132AA
E132AA
Version: A01 1 1 1
Version: A0
Version: A0
Version: A0
facelift
facelift
facelift
With ABS cover
With ABS cover
With ABS cover
With ABS cover
facelift
facelift
facelift
with ABS cover
with ABS cover
with ABS cover
with ABS cover
Installation
Installation
Installation
Installation
Operation
Operation
Operation
Operation
Maintenance / Service
Maintenance / Service
Maintenance / Service
Maintenance / Service
ing Units s s s
ing Unit
ing Unit
with cover plate
with cover plate
with cover plate
with cover plate
Konvekta AG
Konvekta AG
Konvekta AG
Konvekta AG
Am Nordbahnhof 5
34613 Schwalmstadt
Germany
¥
+49 ( 0 ) 66 91 / 76 – 0
+49 ( 0 ) 66 91 / 76 - 200
Info@konvekta.com
www.konvekta.com
Advertisement
Table of Contents

Subscribe to Our Youtube Channel
Related Manuals for KONVEKTA KL20 facelift


Summary of Contents for KONVEKTA KL20 facelift
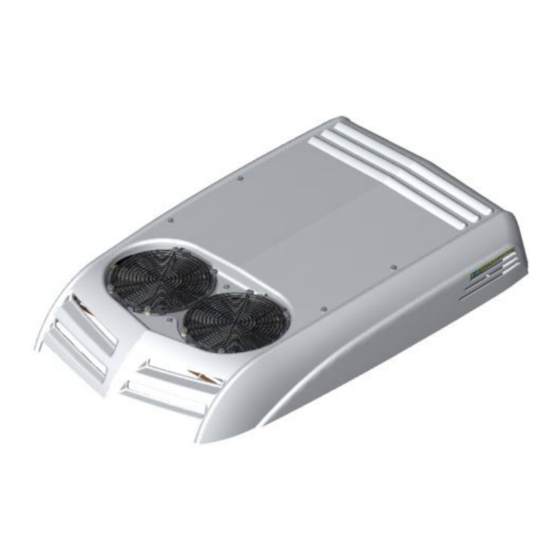
- Page 1 Air Conditioning Unit ing Units s s s Air Condition Air Condition ing Unit ing Unit - KL20 KL20 KL20 KL20 facelift facelift facelift facelift With ABS cover With ABS cover With ABS cover With ABS cover with cover plate...
-
Page 2: Table Of Contents
Contents Contents Contents Contents Page: / Notes Notes to the instruction to the instruction ................3 Notes Notes to the instruction to the instruction Summary of dr Summary of dr Summary of dr Summary of drawings (appendix) awings (appendix) awings (appendix) awings (appendix) •... -
Page 3: Summary Of Dr Summary Of Drawings (Appendix) Awings (Appendix) / Notes Notes To The Instruction Notes To The Instruction
KONVEKTA -Service-Station will always be at disposal for informing you about correct operation. In the course of further developments we reserve the right to technical modifications without prenotice. Guarantee and liability conditions of KONVEKTA AG’s general business conditions are not enlarged by the above notes. -
Page 4: Introduction Introduction
KONVEKTA will annul without prenotice all obligations concerning guarantee, service contracts etc. re- gardless if granted by KONVEKTA or its distributors in case other than original KONVEKTA spare parts or parts bought from KONVEKTA AG have been used for maintenance and repair. This operating instruction contains all necessary information to operate your air conditioner. -
Page 5: Directives For Installation, Connection And Use
1. 1. 1. 1. Directives for Installation, Connection and Use Directives for Installation, Connection and Use Directives for Installation, Connection and Use Directives for Installation, Connection and Use Please read carefully the following instructions before installing, connecting and operating the device. We assume no liability for incorrect handling and usage. -
Page 6: Technical Data Air Conditioning Units
Installation location from vertical position max. 90° pivoting to both sides Weight approx. 7,5 kg Note: Note: Note: Note: At KL20 facelift (bus and cabin) the layout of the compressor is depending on the vehi- cle. EAKL2E132AA Edition: 26.04.2012 Page: 6/18... -
Page 7: Allgemeine Beschreibung
At the units KL20 facelift and KL20E facelift the optimum air quantity is adjustable via the fan switch • in three levels. At the unit KL20 facelift the refrigerant pipes have to be passed from the a/c unit to the compres- • sor. -
Page 8: General Information On Air Conditioning Unit
We indicate emphatically, that corrosion is not subject to warranties for defects. KONVEKTA does not take over any warranties for defect, nei- ther for corrosion nor for consequential damage resulting there from, nor for damages caused by clean- ing the systems with highly compressed or corrosion advancing substances 4.2. -
Page 9: Installation Preparation At The Vehicle
! ! ! ! Source of supply: KONVEKTA AG KONVEKTA AG KONVEKTA AG KONVEKTA AG, P.O. Box 2280, D-34607 Schwalmstadt The way of installation is depending on the vehicle type, the instructions of the manufacturer have to be ! ! ! ! considered... -
Page 10: Installation Of Air Distribution Plate
5.1. 5.1. Installation of air distribution plate Installation of air distribution plate 5.1. 5.1. Installation of air distribution plate Installation of air distribution plate Before installation of the air distribution p Before installation of the air distribution plate, the object has to be prepared as follows: late, the object has to be prepared as follows: Before installation of the air distribution p Before installation of the air distribution p... -
Page 11: 5.1.1. Installation Of Fan Switch In The Air Distribution Plate
5.1.1. Installation of fan switch in the air distribution plate Close one of the two existing holes in the air distribution plate with the rubber nozzle, Art. No.: H14-000- 260, label the other one with the label H25-001-063 for the fan switch. H14-000-260 H25-001-063 Attention:... -
Page 12: Installation Of Blower Switch In The Instrument Panel (Bel-260Sta003)
5.1.2. Installation of blower switch in the instrument panel (BEL-260STA003) For the installation of the blower switch in the instrument panel additional extra items (BEL-260STA003) are needed. Procedure Procedure: : : : Procedure Procedure Detach the blower switch from the original wiring harness and remove the 5 blade terminal sockets from the blade terminal housing with a removal tool. -
Page 13: Installation Of The Air Distribution Plate In The Vehicle
5.2. 5.2. 5.2. 5.2. Installation of the air distribution plate in the vehicle Installation of the air distribution plate in the vehicle Installation of the air distribution plate in the vehicle Installation of the air distribution plate in the vehicle Tighten the air distribution plate with the 12 delivered screws 5,5x22 / ISO7049 in the interior. -
Page 14: Positioning Of The Air Conditioning Components
6. 6. 6. 6. Positioning of the air conditioning components Positioning of the air conditioning components Positioning of the air conditioning components Positioning of the air conditioning components Driving direc c c c tion Driving dire tion Driving dire Driving dire tion tion Evaporator coil... -
Page 15: Maintenance / Service
We recommend having all works and modifica- a- a- a- tions carried out at an authorized KONVEKTA Service Station tions carried out at an authorized KONVEKTA Service Station . The same applies to the reg . The same applies to the regu u u u lar... -
Page 16: Check Refrigerant Level
Contact Contact Contact Contact KONVEKTA Service Station KONVEKTA Service Station KONVEKTA Service Station KONVEKTA Service Station ! ! ! ! refill refrigerant – check a/c unit for leakages – Free of bubbles! Amount of refrigerant is o.k.. -
Page 17: Compressor (Only With Kl20E Facelift)
V-belt replace V-belt Loud noise at V-belt slack V-belt retighten V-belt >service< On our website www.konvekta.com in category you will find a survey of contact details of all our service partners close to your location. EAKL2E132AA Edition: 26.04.2012 Page: 17/18... -
Page 18: Warranty Conditions
9. 9. 9. 9. Warranty Conditions Warranty Conditions Warranty Conditions Warranty Conditions The current „General Warranty Conditions” KONVEKTA AG“ will apply. A copy will be furnished by the warranty department. Please contact: gwl@konvekta.com gwl@konvekta.com gwl@konvekta.com gwl@konvekta.com Waste disposal in accordance with legal provisions...
Need help?
Do you have a question about the KL20 facelift and is the answer not in the manual?
Questions and answers