Electrolux TW SL6 E User Manual
Condenser dryer with heat pump
Hide thumbs
Also See for TW SL6 E:
- User manual (52 pages) ,
- User manual (60 pages) ,
- User manual (44 pages)
Table of Contents
Advertisement
Available languages
Available languages
Advertisement
Table of Contents

Related Manuals for Electrolux TW SL6 E


Summary of Contents for Electrolux TW SL6 E
- Page 1 Kondensationstrockner mit Wärmepumpe Sèche-linge à condensation avec pompe à chaleur Asciugabiancheria a condensa con pompa di calore Condenser dryer with heat pump TW SL6 E...
-
Page 2: Wichtige Sicherheitshinweise
2 electrolux Electrolux. Thinking of you. Mehr zu unserem Denken finden Sie unter www.electrolux.com Wichtige Sicherheitshinweise Wichtig! Lesen Sie zu Ihrer Sicherheit und für unerfahrene Personen können zu Verletzungen und schweren Funktionsstörungen führen. eine optimale Nutzung des Geräts vor der Installation und dem ersten Gebrauch die Wenden Sie sich an Ihren lokalen Kundendienst. - Page 3 3 Aufstellen • Textilien, die mit flüchtigen Erdölerzeugnissen in Kontakt gekommen sind, dürfen nicht in dem • Dieses Gerät ist schwer. Vorsicht beim Trans- Gerät getrocknet werden. Wenn flüchtige Reini- port. gungsflüssigkeiten verwendet wurden, müssen • Überzeugen Sie sich beim Auspacken, dass das diese Flüssigkeiten ausgewaschen werden, be-...
- Page 4 4 electrolux – die in der Programmtabelle aufgeführten Füll- material in den dafür vorgesehenen Behältern der mengen einhalten, kommunalen Müllentsorgung. – auf gute Raumbelüftung achten, Wichtig! Die Wärmepumpe Ihres Trockners ist – den Mikrofein- und den Feinfilter nach jedem mit einem geschlossenen Kältekreislauf Trockengang reinigen und ausgestattet, der FCKW-freies Kältemittel enthält.
- Page 5 5 2. Ziehen Sie das Klebeband von der Trommel in der Maschine ab. 3. Entfernen Sie den Folienschlauch und den Po- lystyrolblock aus dem Gerät. Elektrischer Anschluss Angaben über Netzspannung, Stromart und die erforderliche Absicherung sind dem Typenschild zu entnehmen. Das Typenschild ist neben der Ein- Die Abdeckplatten D von der Gerätefrontseite...
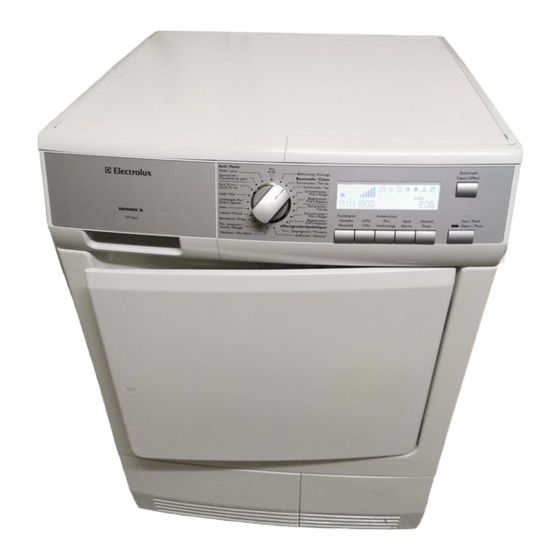
- Page 6 6 electrolux Schublade fungiert als zusätzlicher Stauraum (z. Lesen Sie aufmerksam die dem Bausatz beilie- B. für Wäsche). gende Aufstellanweisung. Gerätebeschreibung Bedienblende Einfülltür (Türanschlag wechselbar) Wasserbehälter Wärmetauschertür, Flusenfilter, Wärmetau- scher Trommelbeleuchtung Taste zum Öffnen der Sockeltür Feinflusenfilter Lüftungsschlitze Grobflusenfilter Einstellbare Füße...
- Page 7 7 Bedienblende Bedienblende Maximaler Trockengrad Schleuderdrehzahl-Standard Minimale Schleuderdrehzahl Schleuderdrehzahlbereich (in Schritten von 200 U/min) Maximale Schleuderdrehzahl Programm-Wahlschalter und Ein-/Ausschalter Bügeltrocken (Trockenpha- Funktionstasten senanzeige) Start/Pause Taste Leicht trocken (Trockenpha- Zeitvorwahl Taste senanzeige) Betriebsanzeige Schranktrocken (Trocken- Display-Anzeige phasenanzeige) Display-Anzeige Sehr trocken (Trockenpha-...
-
Page 8: Vor Der Ersten Inbetriebnahme
8 electrolux Vor der ersten Inbetriebnahme Warnung! Lassen Sie das Gerät vor dem Reinigen Sie die Trommel des Trockners mit einem Netzanschluss und vor der ersten feuchten Tuch oder führen Sie ein kurzes Trocken- Inbetriebnahme 12 Stunden stehen, falls es nicht programm (ca. -
Page 9: Täglicher Gebrauch
9 Pfle- Max. Bela- Programme Textilien/Wäscheart Optionen kenn- dung zei- chen Mix-pro- Zum Trocknen von Textilien aus Baumwolle und Alle außer 3 kg gramm Kunstfasern bei niedriger Temperatur. Zeitwahl Bettwäsche (Einzel-/Doppelbettlaken, Kopfkis- Alle außer Bettwäsche 3 kg sen, Bettbezüge, Tagesdecken). - Page 10 10 electrolux Wäsche einfüllen - Standard-Trockengrad. U/Min Verkürzen Sie den Trockengang entsprechend der Schleuderdrehzahl, mit der die Wäsche zuvor in der Waschmaschine geschleudert wurde. Je hö- her die Schleuderdrehzahl war, desto kürzer die Trockendauer. Verfügbare Schleuderdrehzahlen (U/min): von (in Schritten zu 200 U/min) Mit dieser Option sparen Sie Zeit und Energie.
-
Page 11: Reinigung Und Pflege
11 Kindersicherung einstellen Wenn Sie den Programm-Wahlschalter während des Programmablaufs trotzdem auf ein anderes Die Kindersicherung soll ein versehentliches Star- Programm drehen, beginnen die Programmab- ten, Verändern oder Löschen eines Programms lauf-Anzeige und die Wartungsanzeige zu blinken. verhindern. Die Kindersicherung sperrt alle Tasten Wird eine Zusatzfunktion gewählt (es sei denn, der... - Page 12 12 electrolux Vorsicht! Benutzen Sie den Trockner nie ohne oder mit beschädigtem oder verstopftem Flusenfilter. Reinigen des Wärmetauscherfilters Wichtig! • Benutzen Sie den Trockner nie ohne Flusenfilter. • Verstopfte Filter erhöhen den Energieverbrauch, da sie den Trockengang verlängern, und führen zu Schäden am Trockner.
- Page 13 13 Was tun, wenn... Kleine Störungen selbst beheben Mögliche Ursache Abhilfe Problem Netzstecker in die Steckdose stecken. Trockner nicht an der Stromversorgung Sicherung der Hausinstallation kontrollie- angeschlossen. ren. Trockner läuft nicht. Einfülltür offen. Schließen Sie die Tür des Trockners.
-
Page 14: Technische Daten
14 electrolux 3) Siehe den Abschnitt Reinigung und Pflege . 4) Siehe den Abschnitt Programmiermöglichkeiten . 5) (Nur bei Trocknern mit LCD-Display.) 6) Hinweis: Nach etwa 5 Stunden wird der Trockengang automatisch abgebrochen (siehe den Abschnitt Ende des Trockenprogramms ). - Page 15 15 1,4/ 106 (7 kg, vorgeschleudert mit 1.000 U/Min) BAUMWOLLE BÜGELTROCKEN 0,59/ 48 (3 kg, vorgeschleudert mit 1.200 U/Min) MISCHGEWEBE SCHRANKTROCKEN 1) In einigen Ländern können die Angaben zur Füllmenge aufgrund unterschiedlicher Messmethoden abweichen. 2) gemäß EN 61121 3) Hinweise für Prüfinstitute: Programm ist nach EN 61121 zu prüfen.
-
Page 16: Avertissements Importants
16 electrolux Electrolux. Thinking of you. Partagez notre imagination sur www.electrolux.com Avertissements importants Important Pour des raisons de sécurité et bourrés de caoutchouc mousse ne doivent pas être séchés dans un sèche-linge. dans le but de garantir un usage correct de l'appareil, nous vous invitons à... - Page 17 17 • Aérez suffisamment la pièce pour éviter le reflux • Ne séchez pas en machine les articles entrés en de gaz provenant d'appareils utilisant d'autres contact avec des détachants volatiles. Si de tels combustibles. détachants ont été utilisés, il faudra attendre que le produit se soit évaporé...
-
Page 18: Installation
18 electrolux Où aller avec les appareils usagés? Informations liées à la protection de Partout où des appareils neufs sont vendus, l'environnement mais aussi dans un centre de collecte ou une Les matériaux d'emballage respectent l'environ- entreprise de récupération officiels SENS. - Page 19 19 Retrait des protections de transport 3. Retirez les plaques de revêtement B . Pour ce faire, insérez un tournevis plat dans les fentes, Attention comme indiqué sur l'illustration, puis poussez un peu vers le bas pour enlever les plaques.
-
Page 20: Description De L'appareil
20 electrolux Kit d'installation qui permet de vidanger direc- Disponible auprès du service après-vente de tement dans l'évier ou un siphon l'eau de con- votre magasin vendeur densation qui se forme pendant chaque cycle Pour placer le sèche-linge à une hauteur opti- de séchage. -
Page 21: Bandeau De Commandes
21 Bandeau de commandes Bandeau de commandes séchage maximum vitesse d'essorage par défaut vitesse d'essorage minimum vitesse d'essorage (par palier de 200 tr/min) vitesse d'essorage maximum Sélecteur de programmes et touche Marche/ prêt à repasser (voyant du cy- Arrêt cle de séchage) -
Page 22: Avant D'utiliser Le Sèche-Linge Pour La Première Fois
22 electrolux Avant d'utiliser le sèche-linge pour la première fois Avertissement Si l'appareil a été transporté Afin d'éliminer tout résidu éventuellement généré en position inclinée, laissez-le pendant 12 en cours de production, avant la première utilisa- heures en position verticale avant de le brancher, tion de votre sèche-linge, essuyez le tambour à... - Page 23 23 Eti- Char- quet- Program- Utilisation/propriétés Options d'en- max. tretien toutes à l'ex- Pour les tissus fins, polyester et polyamide, ne Microfibres 1 kg ception de nécessitant pas de repassage. Temps toutes à l'ex- Textiles Mé- Pour le séchage à basse température de textiles...
-
Page 24: Utilisation Quotidienne
24 electrolux Utilisation quotidienne Mise sous tension de l'appareil/Eclairage du Humidité Résiduelle tambour Augmente le degré de séchage du linge jusqu'au Tournez le sélecteur de programmes sur n'importe quel programme ou sur Éclairage. L'appareil est niveau sélectionné : . Cette mis sous tension. -
Page 25: Entretien Et Nettoyage
25 Après le départ du programme, il n'est plus départ différé s'affiche, par ex. si le pro- possible de modifier le programme directe- gramme doit démarrer 12 heures plus tard. ment. Si vous tournez le sélecteur de programmes 3. Pour activer le départ différé, appuyez sur la sur un autre programme lorsque l'appareil est en touche Départ/Pause. - Page 26 26 electrolux 4 2b Avertissement L'eau de condensation n'est pas potable et ne doit pas être utilisée Attention N'utilisez jamais votre sèche-linge pour la préparation des aliments. sans avoir installé les filtres ou avec des filtres Si le programme s'est interrompu parce que endommagés ou obstrués.
-
Page 27: Dépannage
27 En cas d'anomalie de fonctionnement ... Dépannage Cause possible Solution Anomalie Branchez l'appareil sur le secteur. Vérifiez Le sèche-linge n'est pas raccordé au le fusible dans la boîte à fusibles (installa- secteur. Le sèche-lin- tion domestique). ge ne démarre La porte est ouverte. -
Page 28: Caractéristiques Techniques
28 electrolux Durée affichée La durée restante jusqu'à la fin est calcu- à l'écran anor- Processus automatique ; il ne s'agit pas lée sur la base du type, du volume et de malement lon- d'un défaut de l'appareil. l'humidité du linge. -
Page 29: Réglages De L'appareil
29 Tension 220 - 230 V Fusible requis Puissance totale 1 050 W Classe d'efficacité énergétique Consommation d'énergie (7 kg de coton, préala- 1,9 kWh blement essoré à 1 000 tr/min) Consommation d'énergie annuelle moyenne 126,2 kWh Utilisation de l'appareil Domestique Température ambiante autorisée... - Page 30 30 electrolux Réglage Opérations à effectuer 1. Placez le sélecteur de programmes sur n'importe quel programme. Dureté de l'eau 2. Appuyez simultanément sur les touches Humidité Résiduelle et Temps et maintenez-les appuyées pendant environ 5 secondes. Le réglage actuel s'affiche : –...
- Page 31 31 Electrolux. Thinking of you. Per conoscere meglio il nostro modo di pensare, visitate il sito www.electrolux.com Informazioni importanti per la sicurezza Importante Per la vostra sicurezza e per possono causare seri danni o malfunzionamenti. garantire un impiego corretto, prima di Contattare il Centro di assistenza locale.
-
Page 32: Tutela Dell'ambiente
32 electrolux rante il trasporto. In caso di dubbi, non utilizzarlo di petrolio. Se si utilizza uno smacchiatore o un e rivolgersi al Centro di assistenza. detergente volatile, attendere che il prodotto sia • Disimballare completamente l'apparecchiatura completamente evaporato prima di introdurre i prima dell'installazione. -
Page 33: Installazione
33 – centrifugare accuratamente la biancheria pri- da CFC (Cloro-Fluoro-Carburi). Il circuito ma dell'asciugatura. refrigerante della pompa di calore non deve essere danneggiato. Il consumo energetico dipende dalla velocità di centrifuga impostata nella lavabiancheria. Avvertenza Se l'apparecchio non è più... - Page 34 34 electrolux 3. Togliere le pellicole e le protezioni in polistirolo. Svitare le piastre di copertura D nella parte an- teriore della macchina e riavvitarle sul lato op- Collegamento elettrico posto, con una rotazione di 180°. I particolari sulla tensione di rete, sul tipo di cor- 8.
-
Page 35: Descrizione Del Prodotto
35 Descrizione del prodotto Pannello comandi Porta (reversibile) Serbatoio acqua di condensa Sportello scambiatore di calore, filtro, scam- biatore di calore Luce del cestello Pulsante di apertura dello sportellino nello zoc- Microfiltro colo Filtro a maglie larghe Griglia di ventilazione... -
Page 36: Preparazione Al Primo Utilizzo
36 electrolux Display carico centrifuga massima pronto stiro (spia fase di asciugatura) asciugatura leggera (spia fase di asciugatura) normale (spia fase di asciu- gatura) forte (spia fase di asciugatura) extra asciutto (spia fase di asciugatura) tempo residuo / messaggio di errore... - Page 37 37 Tabella dei programmi Sim- Carico bolo massi- Programmi Impiego / Caratteristiche Opzioni sull’eti chetta Cotoni (Baumwolle) Asciugatura completa di biancheria spessa o Tutti tranne Extra (Extra- 7 kg multistrato, ad es. asciugamani in spugna, ac- Asciug. a tem- trocken) cappatoi.
-
Page 38: Utilizzo Quotidiano
38 electrolux Sim- Carico bolo massi- Programmi Impiego / Caratteristiche Opzioni sull’eti chetta Tutti tranne Biancheria Biancheria (lenzuola singole o doppie, federe, 3 kg Asciug. a tem- (Bettwäsche) copriletti, copripiumini). po (Zeitwahl) Tutti tranne Viscosa (Vi- Per tessuti sottili, viscosa e poliestere, che non 1 kg Asciug. - Page 39 39 Come caricare la biancheria - impostazione automatica grado di asciu- gatura. Carico centrif. a (U/Min) Abbrevia il ciclo di asciugatura proporzionalmente alla velocità di centrifuga a cui è stata sottoposta la biancheria nella lavatrice. Quanto maggiore era la velocità di centrifuga, tanto più breve il ciclo di asciugatura.
-
Page 40: Pulizia E Cura
40 electrolux 3. Per attivare la partenza ritardata, premere il ta- Una volta avviato, il programma non può più sto Avvio/Pausa (Start/Pause). Il tempo man- essere modificato. Se si tenta di modificare il cante alla partenza scorre nel display. programma girando la manopola, il display e i led lampeggiano. - Page 41 41 Pulizia del filtro dello scambiatore di calore Importante • Non mettere in funzione l'asciugatrice senza i filtri. • I filtri intasati comportano un maggiore consumo di energia (prolungamento del ciclo di asciuga- tura) e causano danni all'asciugatrice. • Se la pompa di calore non viene pulita, deve es- sere sottoposta a costose operazioni di pulizia.
- Page 42 42 electrolux Cosa fare se ... Risoluzione dei problemi Possibile causa Rimedio Problema Inserire la spina nella presa di rete. Con- L'asciugatrice non è collegata all'alimen- trollare il fusibile nella scatola elettrica (in- tazione di rete. stallazione domestica). L'asciugatrice non funziona.
-
Page 43: Caratteristiche Tecniche
43 4) vedere il capitolo Impostazioni della macchina 5) solo per le asciugatrici con display LCD 6) Nota: Dopo 5 ore, il ciclo di asciugatura termina automaticamente (vedere la sezione Ciclo di asciugatura completato ). 2. Sostituire la lampadina difettosa. -
Page 44: Impostazioni Della Macchina
44 electrolux 1,9 / 135 (carico 7 kg pre-centrifugato a 1000 giri/ min) 1,7 (carico 7 kg pre-centrifugato a 1200 giri/min) COTONI NORMALE 1,65 (carico 7 kg pre-centrifugato a 1400 giri/min) 1,42 (carico 7 kg pre-centrifugato a 1800 giri/min) 1,4 / 106 (carico 7 kg pre-centrifugato a 1000 giri/... -
Page 45: Important Safety Information
45 Electrolux. Thinking of you. Share more of our thinking at www.electrolux.com Important safety information Important! In the interest of your safety and extra amount of detergent before being dried in the tumble dryer. to ensure the correct use, before installing and first using the appliance, read this user •... - Page 46 46 electrolux • If the machine is situated on a carpeted floor, • Never use the tumble dryer if the power supply please adjust the feet in order to allow air to cir- cable, the control panel, the working surface or culate freely under the appliance.
- Page 47 47 Warning! When a unit is no longer being • Dispose of the door catch. This prevents chil- used: dren from trapping themselves inside and en- • Pull the plug out of the socket. dangering their lives. • Cut off the cable and plug and dispose of them.
- Page 48 48 electrolux 11. On the other side, insert cover F and allow snap-in button to lock into place. 12. Insert loading door and hinges into recesses on the front of the machine and screw down. Note regarding contact protection: The ma- chine is only secure for operations again once all plastic parts have been inserted.
-
Page 49: Product Description
49 Product description Control panel Loading door (reversible) Water reservoir Heat exchanger door, fluff filter, heat exchang- Drum light Button for opening door in plinth Fine fluff filter Ventilation grille Course fluff filter Adjustable feet Fluff filter Rating plate... -
Page 50: Before First Use
50 electrolux Display maximal spin speed iron dry (drying phase indica- tor) light dry (drying phase indica- tor) cupboard dry (drying phase indicator) strong dry (drying phase indi- cator) extra dry (drying phase indi- time to end / error message... -
Page 51: Programme Chart
51 Programme chart max. Pro- Care Application/properties Options grammes mark load Cottons (Baumwolle) all except Extra Dry (Ex- Thorough drying of thick or multi- layered fab- 7 kg Time (Zeit- tratrocken) rics, e.g. terry towelling items, bathrobes. wahl) all except Intensive Dry Thorough drying of thick fabrics, e.g. -
Page 52: Daily Use
52 electrolux max. Pro- Care Application/properties Options grammes mark load all except For thin fabrics, viscose, and polyester, which Viscose 1 kg Time (Zeit- are not ironed. wahl) For leisure clothing, such as jeans, sweat-shirts, all except Jeans 7 kg etc., of different material thicknesses (e.g. - Page 53 53 Use force to push against the loading door from creases. Laundry can be removed at any time (push point) during the anti-crease phase. 2. Load your laundry (do not force it in). Buzzer (Signal) Caution! Do not jam laundry in between the Audible confirmation of: loading door and rubber seal.
-
Page 54: Care And Cleaning
54 electrolux Starting the programme dash. If the buzzer option has been set, an acoustic signal sounds intermittently for about one minute. Press the Start/Pause button (6). The programme is started. The drying cycles (except for the Wool (Wolle) The programme progress is shown in LCD by ap- programme) are automatically followed by an propriate set of icons. - Page 55 55 4 2b Caution! Never operate the dryer without fluff filters or with damaged or blocked fluff filters. Cleaning heat exchanger filter Important! • Never operate the dryer without the fluff filters. • Clogged filters cause higher energy consump- tion (drying cycle elongation) and dryer damage.
-
Page 56: What To Do If
56 electrolux What to do if ... Troubleshooting by yourself Possible cause Remedy Problem Plug in at mains socket. Check fuse in Dryer not connected to mains supply. fuse box (domestic installation). Dryer does not work. Loading door opened. Close loading door The START PAUSE button not pressed. -
Page 57: Technical Specifications
57 Warning! Do not use standard bulbs! These 2. Replace defective bulb. develop too much heat and may damage the 3. Screw cover back down. machine! Check the correct positioning of o-ring gasket be- Before replacing the bulb, disconnect the mains fore screwing back the door light cover. -
Page 58: Machine Settings
58 electrolux Machine settings Setting Implementation Buzzer permanent 1. Turn the programme selector to any programme. on/off 2. Press simultaneously the Dryness (Trockengrad) and Spin Speed (U/Min) buttons and hold down for approx. 5 seconds. 3. The buzzer is by default always off. You can use the buzzer option to activate or deactivate sound but the machine does not memorise your selection. - Page 59 59...
- Page 60 Für Gerätezubehör und Ersatzeile besuchen Sie unseren Web Shop: www.electrolux.ch Pour les accessoires et le pièces détachées visité notre Web Shop: www.electrolux.ch Per gli accessori e i pezzi di ricambio vogliate visitare il nostro Web Shop: www.electrolux.ch 136910790-00-112009...
Need help?
Do you have a question about the TW SL6 E and is the answer not in the manual?
Questions and answers