Table of Contents
Advertisement
Advertisement
Table of Contents

Related Manuals for Best Fitness BFINVER10


Summary of Contents for Best Fitness BFINVER10
- Page 1 010809 BFINVER10 O w N E R ’ s M a N u a l...
-
Page 2: Before You Begin
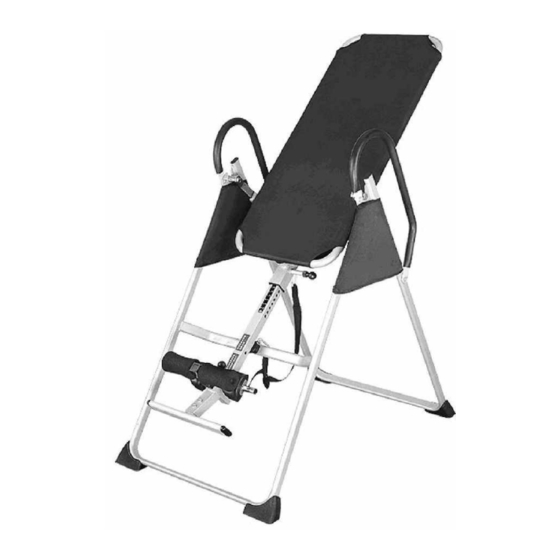
BEFORE YOu BEgIN Thank you for purchasing the Best Fitness BFINVER10. This inversion table is part of the Best Fitness quality strength training machines, and was designed and built for optimum safety. To maximize your use of the equipment please study this Owner’s Manual thoroughly. -
Page 3: Important Safety Instructions
1900 S. Des Plaines Ave. Forest Park, IL 60130 USA damaged the equipment. • Assemble and operate the BFINVER10 on a solid, level surface. Locate the unit a few feet from the walls or furniture to provide easy access. Retain this Owner’s Manual for future reference. -
Page 4: Safety Guidelines
saFEtY guIdElINEs Successful resistance training programs have one prominent feature in common...safety. Inversion table training has some inherent dangers, as do all physical activities. The chance of injury can be greatly reduced or completely removed by using correct lifting techniques, proper breathing, maintain- ing equipment in good working condition, and by wearing the appropriate clothing. -
Page 5: Assembly Instructions
INstRuctIONs Assembly of the BFINVER10 takes professional installers about 1/2 hour to complete. If this is the first time you have assembled this type of equipment, plan on significantly more time. rofessional installers are highly recommended However, if you acquire the appropriate tools, obtain assistance, and follow the assembly steps sequentially, the process will take time, but is fairly easy. - Page 6 s t E p Be careful to assemble all components in the sequence they are presented. Set all parts in a clear area on the floor and remove the packing materials. Stand the base of the machine up by separating the U-Frames (1 & 2). Pull Front U-Frame (1) and Rear U-Frame (2) as far apart from each other as possible.
- Page 7 s t E p...
- Page 8 s t E p Be careful to assemble all components in the sequence they are presented. Slide Protective Covers (37) onto each side of the base. Pull down on Protective Covers (37) until the bottom of the covers are slightly lower than Folding Arms (8).
- Page 9 s t E p...
- Page 10 s t E p Be careful to assemble all components in the sequence they are presented. Attach one Heel Holder Bracket (7) and one Heel Holder (31) to one end of Rod (9). Slide Rod (9) through the large round hole on the side of Adjustable Boom (3) as shown. Attach the remaining Heel Holder Bracket (7) and Heel Holder (31) to the other end of Rod (9).
- Page 11 s t E p...
- Page 12 s t E p Be careful to assemble all components in the sequence they are presented. Pull out Large Spring Knob (18) and slide Adjustable Boom (3) into the square bracket on the bottom of Bed Frame (4) as shown. Slide Adjustable Boom (3) upward until the desired height on Height Scale (44) is just below the bracket on Bed Frame (4).
- Page 13 s t E p...
- Page 14 s t E p Be careful to assemble all components in the sequence they are presented. Attach Nylon Strap (32) to Strap Lock (34) by inserting the end of the strap up through the bottom of the strap lock. Loop Nylon Strap (32) over Pre-assembled Strap (33) and then bring it down through Strap Lock (34).
- Page 15 s t E p Toll Free (800) 833-1227 • Phone (708) 427-3555 Fax (708) 427-3556 Hours: M-F 8:30-5:00 CT...
- Page 16 OpERatION & adjustMENts djusting the Adjustable Boom (3) can be adjusted in order to accommodate the height of the inversion table user. To adjust the Boom: • Loosen Knob (30) . • Pull out Large Spring Knob (18). • Slide Adjustable Boom (3) up or down until the desired height on the scale decal is positioned just below Square Bushing (26).
- Page 17 OpERatION & adjustMENts djusting the ivot The Pivot Arms (5) can be adjusted to allow for a greater or lesser degree of inversion. To adjust the Pivot Arms: • Pull on Pivot Arms (5) until the post is out of the hole. •...
- Page 18 OpERatION & adjustMENts djusting the nkle older While standing upright with your back against the bed and your hands lowered at your sides: • Pull up on Small Spring Knob (17) then slide Adjustable Ankle Holder (6) completely out of Adjustable Boom (3). •...
- Page 19 OpERatION & adjustMENts ocking the rAme When the inversion table rotates past the vertical inverted position Bed Frame (4) becomes locked and will not return to the upright position in the usual way. The locked position allows you to hang straight upside-down, completely free of the bed. This position allows you to enjoy all of the benefits of a handstand with none of the discomforts.
- Page 20 OpERatION & adjustMENts olding the nversion ABle For your storage convenience, the inversion table has been designed to be foldable. The inversion table may be placed against a wall, under a bed, or in any storage area. To fold the inversion table: •...
- Page 21 OpERatION & adjustMENts sing the nversion ABle • Start by lying fully back on Bed Frame (4) with your hands at your side, or resting on your thighs. • While keeping your hands close to your body, begin to raise your arms slowly allowing the table to rotate backward.
-
Page 22: Hardware List
HaRdwaRE lIst PART# DESCRIPTION Front U-Frame Rear U-Frame Adjustable Boom Bed Frame Pivot Arm Adjustable Ankle Holder Heel Holder Bracket Folding Arm M8x25 Hex Head Bolt M6x47 Hex Head Bolt M6x32 Phillips Screw M8 Washer Round Plate M8 Lock Nut M6 Lock Nut Small Spring Knob Large Spring Knob... -
Page 23: Exploded View Diagram
ExplOdEd VIEw dIagRaM... - Page 24 1900 S. Des Plaines Ave. Forest Park, Il 60130 1 (800) 556-3113 Hours: M-F 8:30 - 5:00 CST www.BestFitness.com Copyright 2003. Body-Solid. All rights reserved. Body-Solid reserves the right to change design and specifications when we feel it will improve the product. Body-Solid machines maintain several patented and patent pending features and designs.
Need help?
Do you have a question about the BFINVER10 and is the answer not in the manual?
Questions and answers