Table of Contents
Advertisement
Quick Links
Download this manual
See also:
User Manual
Advertisement
Table of Contents

Related Manuals for FLIR Duo Pro R


Summary of Contents for FLIR Duo Pro R
- Page 1 FLI R Duo P ro R Us er Gui de Of�icial Publication Date: December 2017 Duo Pro R User Guide Version 1.0 Duo Pro R User Guide, Rev. 1.0 Informa�on on this page is subject to change without no�ce...
-
Page 2: Table Of Contents
1 INTRODUCTION ..............................4 1.1 SCOPE ................................4 1.2 REVISION HISTORY .............................4 2 RESOURCES ................................5 2.1 FLIR WEBSITE / TECH SUPPORT INFORMATION ..................5 2.2 FLIR SYSTEMS DOCUMENTS ........................5 2.3 EXTERNAL DOCUMENTS ...........................5 2.4 ABBREVIATIONS / ACRONYMS ........................6 3 WHAT’S IN THE BOX ............................7 3.1 UNPACKING YOUR CAMERA ........................8... - Page 3 6.3.1 14-bit (RJPEG) ............................40 6.3.2 14-bit (TIFF)............................40 6.3.3 8-bit (H264) .............................41 6.4 Recommended Application Links ........................42 7 Care of FLIR Duo Pro R ............................43 Appendix A - Software and Firmware Update ......................44 Appendix B - MAVLink Implementation ........................46 Figures List of Figure 1.
-
Page 4: Introduction
Table 3. Thermal Image Formats Recorded on microSD Card ................38 1 INTRODUCTION Designed for professional use, FLIR’s Duo Pro R camera system is more than a thermal camera. It is 1.1 SCOPE a thermal measurement instrument and data recorder that adds tremendous value to sUAS operations and services. -
Page 5: Resources
Here is a sample of some of the resources that can be found: 2 RESOURCES In several locations throughout this document, FLIR’s Duo Pro R website are referenced as a source 2.1 FLIR WEBSITE / TECH SUPPORT INFORMATION of additional information. This website can be accessed via the following URL: http://www.�lir.com/suas... -
Page 6: Abbreviations / Acronyms
On Screen Display Phase Alterna�ng Line Pulse Width Modula�on RoHS Reduc�on of Hazardous Substances Region of Interest To Be Determined Uniform Resource Locator Duo Pro R User Guide, Rev. 1.0 Informa�on on this page is subject to change without no�ce... -
Page 7: What's In The Box
15.7% and a BFL of 10.02mm. The LWIR core is based on FLIR’s Tau2 camera core. It has a 17um pixel pitch and comes in either a 336x256 or 640x512 pixel array. Lens options and their corresponding �ields of view are listed in Table 1. -
Page 8: Unpacking Your Camera
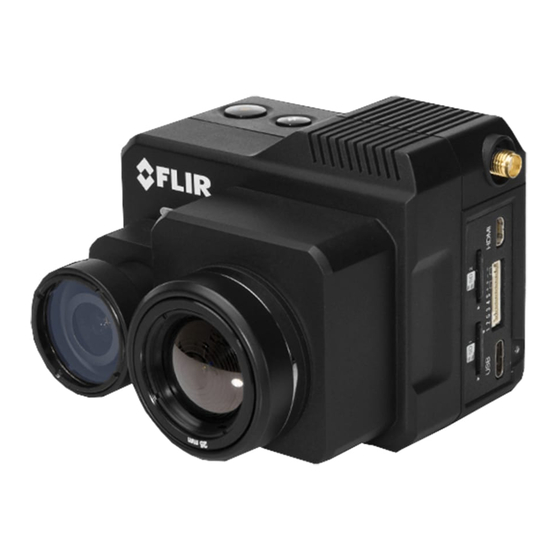
3.1.1 FLIR Duo Pro R Camera Figure 1. Duo Pro R The Bench Cable connects to the Duo Pro R via the 10-pin accessory port, and is designed for 3.1.2 Bench Cable benchtop testing prior to installing the camera on an airframe. The cable comprises an XT60 connector for power, an analog video RCA connector, and three servo-style connectors for PWM signals. -
Page 9: Microsd Cards
RAW Thermal video �iles (14-bit (RJPG) and 14-bit (TIFF) �iles) are recorded to SD Card 1. All other data are recorded on SD Card 2. See Section 6 for more details on �ile formats. Duo Pro R User Guide, Rev. 1.0 Informa�on on this page is subject to change without no�ce... -
Page 10: Integration Cable
FLI R Duo P ro R Us er Guide The Integration Cable is for connecting the FLIR Duo Pro R to a MAVLink-compatible autopilot 3.1.4 Integra�on Cable and/or standard R/C PWM outputs. The MAVLink interface operates at a default data rate of 57.6 kbps. -
Page 11: Gps Antenna
The antenna included with the Duo Pro R is a Taoglas AA.162.301111. There is also a small square of double-sided adhesive included with the Duo Pro R, which can be used to attach the antenna body to your airframe. -
Page 12: Usb Type-C Cable
FLI R Duo P ro R Us e r Guide The Duo Pro R includes a Type-C to Type-A USB cable, which can be used to transfer �iles from the 3.1.6 USB Type-C Cable SD cards inserted in the camera to a computer. -
Page 13: Connecting To The Camera
4.1 MECHANICAL INTERFACE The overall size of the Duo Pro R is 69mm (h) x 87mm (w) x 82mm (d) (2.72 x 3.43 x 3.23 inches), 4.1.1 SIZE / WEIGHT including the lens but excluding cables. Weight is between 325 and 375 grams, depending on lens con�iguration. -
Page 14: Electrical Interface
For initial bench testing, connect the 10-pin Accessory Port connector on the Bench Cable (see 4.2.1 Bench Tes�ng Section 3.1.2) to the Accessory Port on the Duo Pro R camera. Connect the RCA plug on the Bench Cable to an analog video monitor, or use the microHDMI video feed with a compatible monitor. -
Page 15: Accessory Port
Duo P ro R Us er Gui de Figure 5. HDMI Port Pinout The accessory port provides access to the majority of functions of the Duo Pro R. See Table 2 for 4.2.4 Accessory Port detailed information on each function. -
Page 16: Software Interface
When this happens, Bluetooth becomes enabled. FLIR Duo Pro R beeps three times and the Record LED goes from off to solid green. (If the FLIR Duo Pro R is connected to a computer, or if no SD card is inserted, the Record LED blinks yellow.) -
Page 17: Figure 7. Led Description
�lying while Bluetooth is enabled. FLIR Duo Pro R is now ready for use. Press the Record button on the camera or in the App, to start recording, or use PWM signals setup on the autopilot. The Record LED will continuously blink red while recording video, or blink red each time a still image is captured. - Page 18 Note: The �irst time the camera is powered up, FLIR recommends verifying it has the latest �irmware revision. Please see Appendix A for update instructions.
-
Page 19: The Flir Uas App
Duo P ro R Us er Gui de 5 The FLIR The FLIR UAS App is the primary control interface available for the Duo Pro R camera. It is compatible with many mobile devices equipped with Bluetooth LE running iOS 9.0 or later and Android v4.3 or above. -
Page 20: View Mode
FLI R Duo P ro R Us er Gui de The Duo Pro R streams analog or HDMI video from the output ports. Selection of the display video 5.1.1 View Mode mode toggles between a Visible stream only, thermal infrared (IR) stream only, and a Picture-In- Picture (PiP) stream that shows a full-screen visible stream with a thermal stream displayed in an inset window. -
Page 21: Scene Presets
FLI R Duo P ro R Us er Gui de Figure 10. Scene Presets The Duo Pro R camera includes the following Scene presets: 5.1.2.1 Scene Presets 1. Linear 2. Default 3. SeaOrSky 4. Outdoor 5. Indoor 6. Custom1 7. Custom2 Scene Algorithms have been tuned for each preset. -
Page 22: Dde
Scene preset can be further optimized using the manual control sliders. Record the desired settings by hitting the Save button. The Duo Pro R detects and images long wave infrared radiation. Within the camera, this radiation 5.1.3 IR Pale�e is mapped (as determined by the Scene Preset selected) to a range of 255 colors. -
Page 23: Figure 11. Color Palettes
Duo P ro R Us er Gui de Figure 11. Color Palettes There are four main types of palettes offered in the Duo Pro R camera: 1. Linear: Scene radiation is mapped to pixel values where color is uniformly distributed from one shade to another as pixel intensity increases. -
Page 24: Msx
A user may �ind recalibrating prior to taking critical measurements will ensure best performance. Duo Pro R cameras have up to 4x digital zoom (slider setting of 400%) on the IR output, with 5.1.6 Zoom associated on-screen symbology. For example, a Duo Pro R 336 in NTSC uses the center 320 x 240 pixels of the sensor for analog video. -
Page 25: Measure
Error! Reference source not The Capture menu is used to con�igure the Duo Pro R’s data bus for recording either still images or 5.1.8 Capture live video. Users can select between single frame, multiple frame, or video recording. The Record button is used to start and stop all �ile captures. -
Page 26: Capture
The Settings button, located in the upper right-hand corner of the Home screen, is used to con�igure 5.2 Se�ngs the operational parameters of the Duo Pro R camera. Figure 13. Settings Button The Capture tab can be used to access image capture settings. It can also be used to access camera 5.2.1 Capture... -
Page 27: Radiometry
Provides access to the Radiometry tab where users can con�igure all the temperature 5.2.1.3 Radiometry measurement functions and settings available on the Duo Pro R. See FLIR’s UAS Radiometry Tech Note (see Section 2.2 for the link) for a detailed discussion on how to obtain accurate temperature readings for UAS applications. -
Page 28: Figure 15. Spot Meter
There is approximately 1 second of latency to process the scene which can lead to some lag and should be considered during use. Spot Meter and Scene Meter cannot be enabled at the same time. Duo Pro R User Guide, Rev. 1.0 Informa�on on this page is subject to change without no�ce... -
Page 29: Isotherm
The feature can also be disabled by setting it to Off. Scene Meter must be enabled for this feature to be available. Isotherm is a unique FLIR feature that allows users to highlight speci�ic temperatures ranges in their 5.2.1.4 Isotherm thermal imagery. -
Page 30: Video Output
HDMI: Select the format of the video that is output to the HDMI port. Options are 720p60 (1280x720 60Hz), 1080p30 (1920x1080 30Hz), and 1080p60 (1920x1080 60Hz) formats. Duo Pro R User Guide, Rev. 1.0 Informa�on on this page is subject to change without no�ce... -
Page 31: Controller
The Controller tab provides access to the serial protocol settings. 5.2.2 Controller PWM: Using the accessory port on the Duo Pro R and the included Integration Cable (see Section 3.1.4), camera functions can be controlled directly from the sUAS �light controller via PWM signals (refer to the controller manual for con�iguration instructions, as every brand of... -
Page 32: Figure 19. Controller Settings
FLI R Duo P ro R Us er Gui de Figure 19. Controller Settings Figure 20. PWM Functions Duo Pro R User Guide, Rev. 1.0 Informa�on on this page is subject to change without no�ce... - Page 33 For Still images, the signal is high during the capture of individual frames. During Video and Timelapse the signal is high for the duration of capture. Frame Sync is not available as an input to the Duo Pro R. To enable Frame Sync, select “Frame Sync” as the function for PWM3 through the UAS App.
-
Page 34: Figure 21. Mavlink Settings
FLI R Duo P ro R Us er Gui de Figure 21. MAVLink Settings The following MAVLink 3.0 commands are currently supported by the Duo Pro R FW 1.0.0: Command MAVLink ID R/S(Receive/Send) Notes HEARTBEAT If Duo Pro R has... -
Page 35: Camera
If all available �light controller ports are full, you may need to investigate using a splitter cable to attach additional devices to a single port. Duo Pro R can operate in a receive only con�iguration much like an OSD, and therefore does not require the TX pin from the camera to be connected to the RX pin on a �light controller. -
Page 36: Figure 22. Camera Tab
APP running on the handset. Bluetooth Power: Adjusts the Bluetooth transmitter power and affects the maximum range at which the Duo Pro R camera can connect to the mobile device. Power values are expressed in percent. Turn Off Camera Bluetooth: Powers down the Bluetooth radio on the camera. The camera will normally disable the Bluetooth after two minutes of inactivity (unless Persistent Bluetooth is enabled). -
Page 37: Figure 23. Firmware Upgrade
App Version - Version of software currently loaded on the mobile device. App Upgrade Version – If the mobile device is connected to the Internet, the Duo Pro R app will automatically search for any available app updates. If one exists, the user will have the option to update by following the link to the FLIR web page. -
Page 38: File Formats
FLI R Duo P ro R Us er Gui de The Duo Pro R can save image data in a number of �ile formats, each with unique characteristics. 6 File Formats Table 3 gives a summary of the different �ile types. Read this section for more detailed explanations of the available data types for still images and recorded video. -
Page 39: Tiff
This is why FLIR generally recommends the RJPEG �ile format. The 14-bit TIFF �ile format of the Duo Pro R camera contains temperature information in the form of pixel intensities. These pixel values can be converted into temperature using the following formulas: [counts@High Resolution] * 0.04 –... -
Page 40: 8-Bit Jpg
Duo P ro R Us er Gui de Figure 24. Using ResearchIR to convert pixel values The 8-bit JPG format of the Duo Pro R is exclusively a compressed image as seen on the video output, 6.2.3 8-bit JPG and has no thermal data available for post processing. The 8-bit image has user Scene and Palette processing applied, as well as Spot / Scene Meter if enabled. -
Page 41: 8-Bit (H264)
GPS coordinates, and altitude. It is only recommended for basic use-cases where temperature information is not important, and not post-processing is required. Duo Pro R User Guide, Rev. 1.0 Informa�on on this page is subject to change without no�ce... -
Page 42: Recommended Application Links
Matlab: h�p://www.mathworks.com/products/matlab/ When using Matlab it is recommended that the FLIR Atlas SDK is installed to expose the full metadata set available from FLIR radiometric JPEG files: h�p://support.flir.com/resources/atlas-matlab So�ware Developers can access full metadata from FLIR radiometric JPEGs by integra�ng the Atlas SDK: h�ps://flir.custhelp.com/app/answers/detail/a_id/1043/kw/atlas%20sdk... -
Page 43: Care Of Flir Duo Pro R
Duo P ro R Us er Gui de 7 Care of FLIR Duo Pro R Power the FLIR Duo Pro R with a regulated 5-26 Vdc power source. Using more than 26 Vdc will damage the camera and void the warranty. -
Page 44: Appendix A - Software And Firmware Update
3. With power off, insert the uSD card into Slot 1 of the Duo Pro R. 4. Power on Duo Pro R. Power on the Duo Pro R and wait for it to complete the boot cycle (you’ll hear the three beeps and see the Bluetooth light go steady blue and the Record light go steady red). -
Page 45: Figure 25. Firmware Upgrade Prompts
7. Restore User Settings. From your notes in Step 1 recon�igure any custom settings that have been reset to factory default. You can also delete the �irmware update �ile from your microSD card. Duo Pro R User Guide, Rev. 1.0 Informa�on on this page is subject to change without no�ce... -
Page 46: Appendix B - Mavlink Implementation
Timestamp of the master clock in microseconds since UNIX epoch. set to the device. Time Boot uint32_t Timestamp of the component clock since boot �me in milliseconds. Ignored Duo Pro R User Guide, Rev. 1.0 Informa�on on this page is subject to change without no�ce... - Page 47 Compass heading in degrees * 100, 0.0..359.99 degrees. If unknown, set to: UINT16_MAX Meta = GPS Track GLOBAL_POSITION_INT_COV (63) Field Name Type Official Descrip�on FLIR Implementa�on Duo Pro R User Guide, Rev. 1.0 Informa�on on this page is subject to change without no�ce...
- Page 48 GPS velocity in cm/s in EAST direc�on in earth-fixed NED frame Ignored int16_t GPS velocity in cm/s in DOWN direc�on in earth-fixed NED frame Ignored Duo Pro R User Guide, Rev. 1.0 Informa�on on this page is subject to change without no�ce...
- Page 49 Pitch angle (rad, -pi..+pi) Meta = Roll (camera) Target System uint8_t Yaw angle (rad, -pi..+pi) Ignored Target Component uint8_t Roll angular velocity (rad/s) Ignored Duo Pro R User Guide, Rev. 1.0 Informa�on on this page is subject to change without no�ce...
- Page 50 This product is protected by patents, design patents, patents pending, or design patents pending. If you have q u e s t i o n s that are not covered in this ma n ua l , or need service, contact FLIR Commercial Systems Technical Support at SBA-Cores@�lir.com...
Need help?
Do you have a question about the Duo Pro R and is the answer not in the manual?
Questions and answers