
Related Manuals for Promega Maxprep AS9100


Summary of Contents for Promega Maxprep AS9100
- Page 1 Maxprep™ Liquid Handler Operating Manual Instructions for use of AS9100, AS9101, AS9200 and AS9201 TM509 Revised 1/19...
-
Page 3: Table Of Contents
Table of Contents 1 Introduction ..................5 1.1 Maxprep™ Liquid Handler ................5 1.2 Product Use .....................6 1.3 Product Use Limitations ................6 1.4 Maxprep™ Liquid Handler Features ............6 1.5 Maxprep™ Liquid Handler Specifications ..........7 1.6 Product Components ................9 1.7 Precautions ....................10 1.8 Safety Symbols and Marking ..............11 1.9 Environmental Requirements (Operating, Shipping and Storage Conditions) ................13 2 Hardware Overview ................15... - Page 4 Table of Contents 4 Maxprep™ Software .................25 4.1 ‘Home’ Screen ..................25 4.2 Software Settings ...................28 4.3 Administrator Settings ................31 5 Operating the Maxprep™ Liquid Handler ...........53 5.1 Maintenance ...................53 5.2 Methods ....................55 5.3 Starting a Method ...................56 5.4 Error Recovery ..................64 5.5 Reports ....................67 5.6 Accessing Reports..................70 6 Cleaning the Maxprep™...
- Page 5 Table of Contents 9 Warranties, Service Agreements and Related Products ....83 9.1 Warranty ....................83 9.2 Warranty and Service Agreement Options ..........83 9.3 Related Products ..................86 10 Certificate of Decontamination ............87 11 Appendix: Configuring the PC ............89 11.1 Maxprep™ Liquid Handler and PC ............89 11.2 Glossary ....................90 11.3 Adjusting Volume Settings ..............92 11.4 Configuring Date and Time Settings ............92...
- Page 6 Table of Contents Maxprep™ Liquid Handler | TM509 | Revised 1/19...
-
Page 7: Introduction
USB drive for transfer to a separate computer. Sample tracking and run-specific information can also be tracked in the Promega Portal software to facilitate information transfer between the Maxprep™ Liquid Handler and the Maxwell ®... -
Page 8: Product Use
RSC kit being used. Post-processing methods provided with ® the Maxprep™ Liquid Handler are tested for use with Promega reagents. It is the responsibility of the end-users to internally verify/validate that these methods perform to their needs with reagents from other vendors. -
Page 9: Maxprep™ Liquid Handler Specifications
EN and IEC standards. The product bears the CE mark on its label as evidence of compliance, and an EU Declaration of Conformity for the product is available from Promega on request. Maxprep™ Liquid Handler | TM509 | Revised 1/19... - Page 10 Introduction 1.5 Maxprep™ Liquid Handler Specifications (continued) Pipetting Specifications Liquid Level Detection Capacitive Liquid Level Detection Independent Channels Pressure Liquid Level Detection Shaking 3mm Orbit Up to 2500rpm Temperature range ambient to 105°C Pipetting Disposable Accuracy Precision Specifications for Tips Size Volume (%CV) Channels...
-
Page 11: Product Components
Introduction 1.6 Product Components P R O D U C T C AT. # Maxprep™ Liquid Handler, RSC Carriers AS9100 Maxprep™ Liquid Handler, RSC Carriers w/ UV Light AS9101 Maxprep™ Liquid Handler, RSC 48 Carriers AS9200 Maxprep™ Liquid Handler, RSC 48 Carriers w/UV Light AS9201 Cat.# AS9100 and AS9101 are provided with Maxwell RSC-compatible 16-position deck tray carriers. -
Page 12: Precautions
Use only Promega-supplied consumables (tips, troughs, preprocessing plates). • Do not reuse cartridges, plungers or elution tubes. • If the equipment is used in a manner other than that specified by Promega, the protection provided by the equipment may be impaired. -
Page 13: Safety Symbols And Marking
Introduction 1.8 Safety Symbols and Marking Important Safety Instructions. Save these instructions. Safety Symbols and Markings Warning. Risk of personal injury to the operator or a safety hazard to the instrument or surrounding area. Warning. Hot surface. Burn hazard. 5295MA.eps Warning. - Page 14 Sunnyvale, CA 94085 USA 250V, 2.5A 3456789 Time-lag, 5x20mm 249469 050-9800 Rev. D 40 VAC Consult your local Promega Representative regarding Made in instrument disposal WEEE Directive (European Community 2.5A directive 2002/96/EC on Waste Electrical and Electronic Equipment) 20mm 249469 050-9800 Rev.
-
Page 15: Environmental Requirements (Operating, Shipping And Storage Conditions)
• Do not place near other electrically sensitive instruments. Allow at least 6 inches (15.25cm) on all sides of the Maxprep™ Liquid Handler. • Connect the Maxprep™ Liquid Handler and PC to a power outlet. Promega recommends that you plug the instrument and PC into an uninterruptible power supply. - Page 16 Introduction Notes Maxprep™ Liquid Handler | TM509 | Revised 1/19...
-
Page 17: Hardware Overview
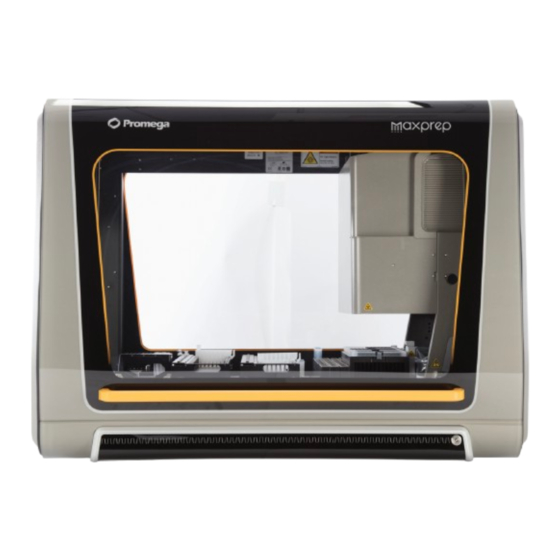
Hardware Overview The Maxprep™ Liquid Handler (Figure 1) is a fully enclosed four-channel pipetting system designed to automate sample preprocessing and deck tray preparation for a variety of Maxwell ® RSC chemistries and post-processes for storage, normalization, and analysis of nucleic acid eluates. -
Page 18: Hardware Features
Hardware Overview 2.1 Hardware Features The gantry system on the Maxprep™ Liquid Handler has four independently controlled pipetting channels, which can support a 1µl to 1ml volume range using 50, 300 and 1000µl disposable tips (Figure 2). These channels are capable of both pressure and capacitive liquid level sensing. The pipetting channels of the instrument can retrieve tools to perform other tasks including transferring Maxwell RSC plungers to Maxwell... -
Page 19: Uv Light (Optional)
UV sanitization can only be performed with the instrument door closed. If necessary, always replace the UV lights on the system with Maxprep™ UV Lamp bulbs from Promega (Cat.# AS9310). Maxprep™ Liquid Handler | TM509 | Revised 1/19... -
Page 20: Labware Carriers
Hardware Overview 2.3 Labware Carriers Provided with the Maxprep™ Liquid Handler are a variety of carriers that hold the labware needed to perform preprocessing and post-processing methods (Figure 4). The configuration of the carriers on the instrument is designed to be consistent amongst Maxprep™ Liquid Handler methods. - Page 21 Hardware Overview Track Carrier Type Number Provided Positions Function Maxprep™ 13, 20, 21 Removable reagent reservoir carriers hold Reagent Carriers reagents required for each method run. These carriers have four sites and each site can hold either a Maxprep™ Reagent Reservoir, 50ml, or Maxprep™...
- Page 22 Hardware Overview 2.3 Labware Carriers (continued) Figure 4. Internal components of the Maxprep™ Liquid Handler. The hardware components inside the Maxprep™ Liquid Handler. Carriers on the instrument can hold primary sample tubes (10mm diameter, 12–13mm diameter or 15–17mm diameter), Maxwell deck trays (Maxwell RSC 16-position deck trays [2], or Front and Back Maxwell ®...
- Page 23 Waste bags are provided with the system to line the plastic waste bin and collect Used tips should be disposed of used tips. Reorder Maxprep™ Waste Bags, Clear, from Promega (Cat.# AS9305). When appropriately removing the waste bin, lift it out toward the right while angling up the right side of the bin to according to avoid hitting the tip eject bar.
- Page 24 Hardware Overview Notes Maxprep™ Liquid Handler | TM509 | Revised 1/19...
-
Page 25: Setting Up The Maxprep™ Liquid Handler
Setting Up the Maxprep™ Liquid Handler 3.1 Installing the Maxprep™ Liquid Handler The Maxprep™ Liquid Handler will be installed by a trained Promega representative. Prior to installation, identify a location for the instrument that conforms to the environmental requirements in Section 1.9 and the Maxprep™ Site Preparation Document sent by Promega. -
Page 26: Switching On The Maxprep™ Liquid Handler
Setting Up the Maxprep™ Liquid Handler 3.2 Switching On the Maxprep™ Liquid Handler The Maxprep™ Liquid Handler has two power switches: a rocker switch that is located next to the power cable connection behind the right access hatch, and a power button located on the right front side of the instrument. -
Page 27: Maxprep™ Software
Maxprep™ Software 4.1 ‘Home’ Screen The ‘Home’ screen is the main launching pad for interaction with the functionalities built into the Maxprep™ User Interface. The ‘Home’ screen (Figure 7) contains four buttons: Start Pressing the Start button on the ‘Home’ screen will begin the process of preparing a method run on the Maxprep™... - Page 28 Administrator Settings). Figure 7. Maxprep™ software ‘Home’ screen. On the Maxprep™ ‘Home’ screen are buttons to Start a method, view Results, run Maintenance methods, and adjust software Settings. Promega Spectrum CE System Maxprep™ Liquid Handler | TM509 | Revised 1/19...
- Page 29 Maxprep™ Software The instrument name appears in the title bar of the user interface. The following navigation buttons are displayed across the top of the user interface screen: Home From any screen other than the ‘Home’ screen, touch this icon to return to the ‘Home’ screen. When active, pressing the Back button will return Back the interface to the screen accessed prior to the...
-
Page 30: Software Settings
Maxprep™ Software 4.2 Software Settings Within the Maxprep™ software it is possible for all users to access instrument-specific information and export log files. In addition, users with Administrator-level access to the Maxprep™ software can modify software options to tailor the behavior of the software to the needs of their laboratory. - Page 31 Maxprep™ Software Instrument Info Touch the Instrument Info button to display software and instrument-specific information for this Maxprep™ instrument on an ‘About Maxprep™’ screen (Figure 9). The information shown on this screen includes: • Maxprep™ Software Version: the Maxprep™ software version installed on the PC •...
- Page 32 Instrument logs will be exported as a zip file to the path that was specified by the operator. The zip file of the logs should be retrieved from the specified location and sent to a Promega Technical Services representative for further troubleshooting.
-
Page 33: Administrator Settings
Maxprep™ Software 4.3 Administrator Settings Software settings for the Maxprep™ software can be accessed by Windows user accounts ® with administrator-level access to the Maxprep™ software using the Administrator button on the ‘Settings’ screen. From the ‘Settings’ screen press the Administrator button to open the ‘Administrator’... - Page 34 Maxprep™ Software 4.3 Administrator Settings (continued) 2. If the current operator logged into the PC has administrator access rights within the Maxprep™ software, the ‘Settings’ screen (Figure 12) displays an Administrator button. Note: If the On the ‘Settings’ screen select the Administrator button to proceed to the ‘Administrator’ Administrator screen (Figure 13).
- Page 35 Maxprep™ Software Methods View the methods currently installed in the Maxprep™ software on the ‘Methods’ screen (Figure 14) by touching the Methods button from the ‘Administrator’ screen (Figure 13). Figure 14. ‘Methods’ screen. This screen displays a list of the methods installed in the Maxprep™...
- Page 36 Importing Methods Only Administrators can add new methods, update, or delete existing methods. Administrators can download new or updated methods from the Promega web site (www.promega.com/resources/software-firmware/maxprep-liquid-handler-methods/) Methods are provided as files with a .package extension. Follow the instructions below to import a method into the Maxprep™...
- Page 37 Maxprep™ Software Figure 15. Method import file selection. Use the ‘Methods’ file browser to navigate to the location of a method (.package) file. Valid import files are shown on the right side of the file browser as blue rectangles (yellow when selected). 5.
- Page 38 Maxprep™ Software 4.3 Administrator Settings (continued) Variant Methods Each of the methods on the Maxprep™ Liquid Handler can be customized by the administrator to meet the processing needs of the laboratory. The administrator can create variants of the default method that specify new default values, set minimum and maximum ranges and determine whether values can be changed by users at run time for a variety of processing options.
- Page 39 Min/Max: The range of values that are acceptable for this variable. Each method will have an absolute Min/Max range that is set by Promega. The administrator can narrow this range if desired to meet laboratory needs. The software will check that the entries conform to the following conditions: i.
- Page 40 Maxprep™ Software 4.3 Administrator Settings (continued) 6. Once all changes have been applied, touch the OK button to save the variant method. New variant methods will be added to the list of variant methods in the folder (Figure 17). Figure 17. Appearance of variant methods. Administrator ‘Methods’ screen showing an expanded method folder with a variant method.
- Page 41 Maxprep™ Software Deleting Methods To delete a method or variant method from the Maxprep™ software, press the X on the right Note: When side of the method list entry to delete it. A ‘Warning’ screen will be shown asking whether the file deleting a default should be permanently deleted.
- Page 42 Importing Labware Only Administrators can import new labware into the Maxprep™ software. Administrators can request new labware from Promega Technical Services (techserv@promega.com). Labware definitions are provided in files with a .labware extension. Follow the instructions below to import a labware import file into the Maxprep™ software.
- Page 43 Maxprep™ Software 5. Within the ‘Labware Import’ file selection screen, navigate to the location at which you saved the labware (.labware) file. The current path will be shown in yellow boxes along the top of the window. Select any aspect of the path to navigate to the desired folder. Press the Drive\ button to select the drive in which to search.
- Page 44 Maxprep™ Software 4.3 Administrator Settings (continued) Figure 20. ‘Labware Import’ Selection Screen. Use the check boxes on this screen to determine which items will be imported and which labware files will be overwritten on import. A red triangle with white exclamation point indicates that the specified labware already exists in the Maxprep™...
- Page 45 Maxprep™ Software Preferences Administrators can view additional preferences available in the Maxprep™ software by pressing the Preferences button on the ‘Administrator’ screen. The ‘Preferences’ screen displays a set of four tabs that can be used by the administrator to adapt the functionality of the software to the needs of the laboratory.
- Page 46 Maxprep™ Software 4.3 Administrator Settings (continued) A prompt to save or discard changes made to the preferences is displayed when you navigate away from the ‘Preferences’ screen. Figure 21 ‘Common Settings’ tab on the ‘Preferences’ screen. From the ‘Common Settings’ tab the administrator can allow use of expired kits, require entry of Maxwell kit lot ®...
- Page 47 Maxprep™ Software ‘Alarm Settings’ Tab The ‘Alarm Settings’ tab on the ‘Preferences’ screen (Figure 22) provides administrators the ability to specify whether the software will provide audible alarms for completed method runs and error states. Available options are: • Play sound when extraction is completed: Check this box to have the PC generate a sound when a method run is completed.
- Page 48 Maxprep™ Software 4.3 Administrator Settings (continued) ‘E-mail Settings’ tab The ‘E-mail Settings’ tab on the ‘Preferences’ screen (Figure 23) is where e-mail server details are specified and administrators can determine when and to whom e-mail notifications will be sent. It is necessary to fill out the user and server information on the ‘E-mail Settings’ tab in order to use e-mail notifications.
- Page 49 Maxprep™ Software Figure 23. ‘E-mail Settings’ tab on the ‘Preferences’ screen. From the ‘E-mail Settings’ tab the administrator can specify e-mail server settings, under what conditions e-mail notifications should be sent, and the distribution list to which e-mails should be sent. Use the Test Connection button to check the settings entered on this screen.
- Page 50 Maxprep™ Software 4.3 Administrator Settings (continued) ‘Portal’ tab The ‘Portal’ tab (Figure 24) presents settings for use of the Portal software to connect multiple instrument modules for the purposes of sample tracking and data sharing. Information on this tab will determine whether your system communicates with the Portal software and define the server information necessary to connect to the Portal software.
- Page 51 Maxprep™ Software Once the Portal software information has been entered, press the Test Connection button to determine whether the Maxprep™ software can successfully connect to Portal using the information supplied. A message is displayed, indicating whether the connection was successful. If unsuccessful, confirm that the connection information was correctly entered and try again.
- Page 52 Maxprep™ Software 4.3 Administrator Settings (continued) 4. If you do not wish to save any changes to the instrument name, press the Cancel button to return to the ‘Administrator’ screen. Figure 25. ‘Instrument Name’ screen. Use this screen to enter a name for this Maxprep™ Liquid Handler.
- Page 53 Maxprep™ Software 3. Once the desired file path has been specified, press the OK button to export audit records or press the Cancel button to cancel any changes. After pressing either OK or Cancel you will be returned to the ‘Administrator’ screen. Figure 26.
- Page 54 Maxprep™ Software Notes Maxprep™ Liquid Handler | TM509 | Revised 1/19...
-
Page 55: Operating The Maxprep™ Liquid Handler
Operating the Maxprep™ Liquid Handler 5.1 Maintenance Maintenance is critical to ensuring performance of the Maxprep™ Liquid Handler over the life of the instrument. Press the Maintenance button on the ‘Home’ screen (Figure 28) of the Maxprep™ software to access the ‘Maintenance’ screen (Figure 29). Listed on the ‘Maintenance’... - Page 56 Operating the Maxprep™ Liquid Handler 5.1 Maintenance (continued) Figure 29. ‘Maintenance’ screen. The ‘Maintenance’ screen lists the available maintenance methods that can be run for the Maxprep™ Liquid Handler. Daily and Weekly Maintenance Daily Maintenance and Weekly Maintenance should be performed at their specified frequency, and if the Administrator has chosen to enforce maintenance, the Daily and Weekly Maintenance must be run at their specified frequency before any other methods can be run.
-
Page 57: Methods
Operating the Maxprep™ Liquid Handler UV Sanitization (Optional) If you have a Maxprep™ Liquid Handler with the optional UV light you can run the UV Sanitization method to perform a UV treatment for an amount of time designated in the administrator preferences (see Section 4.3, Administrator Settings). -
Page 58: Starting A Method
Operating the Maxprep™ Liquid Handler 5.3 Starting a Method From the ‘Home’ screen (Figure 30) select the Start button to begin the process of running a method. Figure 30. Maxprep™ software ‘Home’ screen. Selecting the Start button begins the process of running a method on the Maxprep™ Liquid Handler. Maxprep™... - Page 59 Operating the Maxprep™ Liquid Handler The ‘Methods’ screen displays the list of methods installed in the Maxprep™ Software (Figure 31). The following information is displayed for each method: Mark this method or variant method as a favorite for filtering purposes. When the folder icon appears in an entry it indicates that variant methods have been created for this entry.
- Page 60 When there is no corresponding method for a kit based on the bar code entry, the software will display a warning of the issue. Check the Promega web site (www.promega.com/ resources/tools/maxprepmethod) to see if a method has been released for the kit.
- Page 61 Operating the Maxprep™ Liquid Handler Figure 32. Kit label indicating bar code to scan. Shown in the blue box is the bar code to Note: The method run will abort scan on the kit label for starting a purification run. immediately if the door of the Once the bar code is correctly entered and the desired method or variant has been selected,...
- Page 62 • Normalization, Dilution and Transfer Methods for the Maxprep™ Liquid Handler Technical Manual #TM530. Details for specific methods can be found in the method-specific Technical Manuals on the Promega web site (www.promega.com). Close the door of the Maxprep™ Liquid Handler when prompted after deck setup is complete (Figure 34).
- Page 63 Operating the Maxprep™ Liquid Handler Figure 34. ‘Final Setup’ Screen. This is the last user interface screen displayed before the Maxprep™ Liquid Handler starts processing samples. Close the instrument door before pressing the Next button. While the method runs, the method run screen will update with information regarding the current step in the method and display a progress bar indicating progress through the method.
- Page 64 Operating the Maxprep™ Liquid Handler 5.3 Starting a Method (continued) If for any reason you need to pause the instrument during a run, press the Pause button. The instrument will finish the current step, and the door will unlock, allowing you access to the inside of the instrument.
- Page 65 Passing results from the Weekly Maintenance indicate that the instrument is clear to run again. If processed samples. Weekly Maintenance produces failing results, contact Promega Technical Service (techserv@ promega.com) to schedule a service visit. Figure 36. Message after a method is aborted. If a method is aborted either by the user or an instrument error, the ‘Manual System Recovery’...
-
Page 66: Error Recovery
4. Check to see if there is any visible damage to the pipetting channels of the Maxprep™ according to Liquid Handler. If there is visible damage, contact Promega Technical Services (techserv@ your institution’s procedures for promega.com) to schedule a service visit prior to running the system again. - Page 67 Operating the Maxprep™ Liquid Handler Figure 37. Squeeze Drive. Turn the squeeze drive in the direction indicated to release any tools or pipette tips from the pipetting channels. Maxprep™ Liquid Handler | TM509 | Revised 1/19...
- Page 68 Weekly Maintenance has passed, you are clear to run further methods on the system. 10. If the Weekly Maintenance method does not complete, or the report indicates that Weekly Maintenance has not passed, contact Promega Technical Services (techserv@promega.com) to troubleshoot the issue and determine whether to schedule a service visit before running the system again.
-
Page 69: Reports
Operating the Maxprep™ Liquid Handler 5.5 Reports Running a method results in the creation of a local report of sample tracking and run-specific information. Reports will be automatically exported to an administrator-defined drive location if Auto Export functionality has been enabled (see Section 4.3, Administrator Settings). Local reports provide a mechanism for viewing information about method runs on a per method basis. - Page 70 Operating the Maxprep™ Liquid Handler 5.5 Reports (continued) Figure 40. ‘Export Result’ screen. When the Export button is pressed the user is asked to navigate to the folder in which the report files should be saved. Press the Export button to navigate to the file location where the report should be exported, and then press the OK button.
- Page 71 Operating the Maxprep™ Liquid Handler You can use the tab-delimited format file (*.txt) with Laboratory Information Management Systems (i.e. LIMS). An example of the tab-delimited format file is shown in Figure 41. Figure 41. Example of an exported text file in the tab-delimited format. Maxprep™...
-
Page 72: Accessing Reports
Operating the Maxprep™ Liquid Handler 5.6 Accessing Reports From the ‘Home’ screen of the Maxprep™ software, press the Results button to access method reports and system maintenance reports. The ‘Results’ screen displays a listing of the reports for the methods that have been run (Figure 42). You can filter reports by selecting the buttons on the left side to view reports for runs completed Today, This Month, the past Six Months, This Year or All Maxprep™... - Page 73 Operating the Maxprep™ Liquid Handler Figure 43. Method report. An example of the sample tracking information present in a method run report. The second tab on the report displays variables set during the run. Maxprep™ Liquid Handler | TM509 | Revised 1/19...
- Page 74 Operating the Maxprep™ Liquid Handler Notes Maxprep™ Liquid Handler | TM509 | Revised 1/19...
-
Page 75: Cleaning The Maxprep™ Liquid Handler
Do not autoclave the tip waste bin. according to 6. Line the waste bin with a new waste bag. Reorder Maxprep™ Waste Bags, Clear, from your institution’s Promega (Cat.# AS9305). Return the waste bin to the system. procedures for hazardous and biohazardous waste. - Page 76 Cleaning the Maxprep™ Liquid Handler 6.1 Weekly Cleaning (continued) 7. Perform the following instructions for each of the carriers that have a handle on the front. a. Remove the carrier from the deck of the Maxprep™ Liquid Handler. To remove carriers, grasp the handle on the carrier and pull it straight out toward you, supporting the bottom of the carrier as you remove it from the system.
-
Page 77: Dealing With Spills
Cleaning the Maxprep™ Liquid Handler 6.2 Dealing with Spills Wipe up any spills immediately. If any material spills in the instrument, wipe up the material with a cloth dampened with 70% ethanol. Note that the reagents contain hazardous materials; therefore, dispose of the cleaning materials according to your institutional guidelines. Wipe well Bleach reacts once visible material is removed. - Page 78 Cleaning the Maxprep™ Liquid Handler Notes Maxprep™ Liquid Handler | TM509 | Revised 1/19...
-
Page 79: Troubleshooting
Troubleshooting For questions not addressed here, please contact your local Promega Branch, Office or Distributor. Contact information available at: www.promega.com. E-mail: techserv@promega.com Symptoms Causes and Comments PC touch screen does not appear Verify that the power cords are securely connected to the PC and to be working monitor. -
Page 80: Errors And Warnings
PC has finished rebooting, Restart the Maxprep™ software. 7.1 Errors and Warnings Error Explanation Initialization Failure: Access Denied, not a valid Promega User is not set up correctly in Windows ® Promega User, Please contact your system Operating System. Consult the Appendix of this administrator Technical Manual and/or contact your administrator/IT personnel to resolve this issue. -
Page 81: Using A Usb Flash Drive
Troubleshooting Error Explanation An error during method initialization. Unable to ping The Maxprep™ software is unable to communicate instrument. with the Maxprep™ Liquid Handler. Make sure the Maxprep™ Liquid Handler is on and wait until the green light on the gantry bar code scanner is visible. Shut down and restart the Maxprep™... - Page 82 Troubleshooting Notes Maxprep™ Liquid Handler | TM509 | Revised 1/19...
-
Page 83: Instrument Service
Visit the Promega Web site at: www.promega.com for the contact information for the Promega branch or distributor nearest you. If further action is required, repair options will be presented and an on-site service visit may be scheduled. - Page 84 Instrument Service Notes Maxprep™ Liquid Handler | TM509 | Revised 1/19...
-
Page 85: Warranties, Service Agreements And Related Products
Standard Warranty. The Standard Warranty covers all parts and labor. After the warranty period is over, the customer can continue to receive the same comprehensive service and support from Promega as when the system was under warranty by purchasing one of the Warranty and Service Agreement options listed in Section 9.2. - Page 86 This service product must be delivered by a Promega representative who is certified to perform the Installation Qualification. The service product involves a site visit to perform: •...
- Page 87 Promega agrees, as its sole responsibility under this Warranty, and upon prompt notice of a defect, to repair or replace (at Promega’s discretion) any instrument discovered to be defective within the term of this Warranty. This Warranty does not include repair or replacement necessitated by accident, neglect, misuse, unauthorized repair or modification of the instrument.
-
Page 88: Related Products
Warranties, Service Agreements and Related Products 9.3 Related Products P R O D U C T S I Z E C AT. # Maxwell RSC Instrument 1 each AS4500 ® Maxwell RSC 48 Instrument 1 each AS8500 ® Bar Code Reader, Maxwell Systems 1 each AS3200... -
Page 89: Certificate Of Decontamination
Certificate of Decontamination Disinfection and decontamination are required prior to shipping any instrument accessories for repair. Returned items must be accompanied by a signed and dated Certificate of Decontamination, which must be provided in the shipping box. To disinfect and decontaminate: Wipe exposed surfaces of the accessories using a cloth dampened with 70% ethanol. - Page 90 Certificate of Decontamination Notes Maxprep™ Liquid Handler | TM509 | Revised 1/19...
-
Page 91: Appendix: Configuring The Pc
Appendix: Configuring the PC 11.1 Maxprep™ Liquid Handler and PC The Maxprep™ Liquid Handler is controlled by Maxprep™ software on a PC and touchscreen monitor that are provided with the system. This appendix describes the setup and configuration options for the PC provided with the Maxprep™ Liquid Handler. Your IT department or site Administrator should configure the PC according to the IT rules and IT procedures pertinent to your site. -
Page 92: Glossary
Appendix: Configuring the PC 11.1 Maxprep™ Liquid Handler and PC (continued) The first time you use the Maxprep™ Liquid Handler and PC, you should check the configuration of the following options. Settings can be changed later, if required, by following these instructions again. - Page 93 Appendix: Configuring the PC Figure 45. The ‘Desktop’ screen. At the bottom of the ‘Desktop’ screen is the Task bar. Access to the options and settings referenced in this document is provided by the Start and Search buttons on the left side of the Taskbar. Swipe upward from the bottom of the screen to expose the Task bar.
-
Page 94: Adjusting Volume Settings
When your Maxprep™ Liquid Handler arrives, the PC will be configured with a Windows user ® account called Maxprep. This account is password protected (Default Password = Promega) and is configured with Windows administrator access rights as well as Maxprep™ Liquid ®... - Page 95 Appendix: Configuring the PC Creating Local Windows User Accounts ® If the Maxprep™ Liquid Handler system is run as a stand-alone device (i.e., not connected to your site domain), you can create local Windows user accounts on the PC for each user of the ®...
- Page 96 Appendix: Configuring the PC 11.5 Managing Local Windows User Accounts (continued) ® 3. Click the Accounts button on the ‘Windows Settings’ screen to open the ‘Accounts’ ® screen (Figure 48). Figure 48. ‘Accounts’ screen. Settings related to Windows user accounts can be ®...
- Page 97 Appendix: Configuring the PC 4. From the list on the left side of the screen, click the Family & other people button to display account settings for this PC (Figure 49). Figure 49. Managing accounts. Windows user accounts can be created, removed and ®...
- Page 98 Appendix: Configuring the PC 11.5 Managing Local Windows User Accounts (continued) ® 7. The new user account should now be listed under the Other people heading on the ‘Accounts’ screen. 8. By default, the new user account will have user access level rights within the Windows ®...
- Page 99 Maxprep™ Liquid Handler software unless they have been added to one of the Promega access groups (Section 11.6). Do not use these instructions to remove an account from the PC if accounts on your company domain are used to access the PC.
- Page 100 Appendix: Configuring the PC 11.5 Managing Local Windows User Accounts (continued) ® Figure 53. Account information popup. Accessed from the Start menu, the Account information popup displays the Windows user accounts on the PC and indicates which ® accounts are signed in. 3.
- Page 101 Appendix: Configuring the PC Figure 54. The ‘Windows Settings’ screen. The ‘Windows Settings’ screen provides access to multiple functions that can be used to configure options and settings for the Tablet 6. Click the Accounts button on the ‘Windows Settings’ screen to open the ‘Accounts’ screen (Figure 55).
- Page 102 Appendix: Configuring the PC 11.5 Managing Local Windows User Accounts (continued) ® 8. Under the Other people heading, click the user account you wish to remove to open options for that user (Figure 56). Figure 56. Removing an account. Click any of the listed Windows user accounts to ®...
- Page 103 Figure 57. Creating a Maxprep™ software icon. Panel A. Identify the Maxprep™ icon in the Promega folder shown in the list of installed items on the PC. Right-click the Maxprep™ icon to open the options popup. Panel B. After clicking Pin to Start, the Maxprep™ icon will appear to the right of the installed items in the Start menu.
-
Page 104: Managing Maxprep™ Access Levels For A Windows ® User Account
The instructions below detail the steps involved in adding a Windows user account (whether ® local or domain) to one of the Promega access-level groups on the PC. All Windows user ® accounts that will have access to the Maxprep™ Liquid Handler software must be added to either the PromegaUsers or PromegaAdministrators groups. - Page 105 Appendix: Configuring the PC 3. Select the ‘Search’ text box, and enter the text lusrmgr.msc (Figure 58, Panel A). Under the Best match header an item called lusrmgr.msc should appear; touch this item to open the ‘Local Users and Groups (Local)’ screen (Figure 58, Panel B). Figure 58.
- Page 106 Enter the object names to select: type the username(s) of the account(s) that you wish to add to the selected group. Figure 60. Adding users to a Promega group. Panel A. The ‘PromegaAdministrators Properties’ or ‘PromegaUsers Properties’ screen lists the Windows user accounts currently ®...
- Page 107 Appendix: Configuring the PC 11. The username(s) that you have assigned to the specified group should now be capable of running the Maxprep™ Liquid Handler software with the specified access level. 12. Restart the PC for new account access levels to take effect. To do this, click the Start button in the lower left corner of the screen, and then click the Power icon and select the Restart item (Figure 61).
- Page 108 Removing an Account from a Promega Access-Level Group Access levels within the Maxprep™ Liquid Handler software are controlled by assigning a Windows user account to a Promega access-level group. The instructions below detail the ® steps involved in removing a Windows user account from one of the Promega access-level ®...
- Page 109 Appendix: Configuring the PC 1. Close the Maxprep™ Liquid Handler software if it is open. Click the X in the upper right corner of the screen, and then confirm that you want to exit. 2. From the ‘Desktop’ screen, click the Search icon on the right side of the Task bar. 3.
- Page 110 ® level group, and then click the Remove button. 8. Click the Remove button to remove this user from this Promega access group. 9. Click OK on the ‘Properties’ screen to accept the changes or click Cancel to discard the changes.
- Page 111 Appendix: Configuring the PC Figure 66. Power options popup. Clicking the Power button from the Start menu opens the Power options popup. This popup presents options for managing the PC power state. Maxprep™ Liquid Handler | TM509 | Revised 1/19...
-
Page 112: Managing The Current Active Account
Appendix: Configuring the PC 11.7 Managing the Current Active Account To correctly annotate functions in the Maxprep™ software with the user performing the function, Windows users need to switch to their accounts between sessions on the Maxprep™ ® software. Windows user accounts that are password-protected will need to sign in to the ®... -
Page 113: Shutting Down And Restarting
Appendix: Configuring the PC 11.8 Shutting Down and Restarting Occasionally you will need to shut down or restart the PC. The instructions below detail the process of shutting down or restarting the PC. 1. Close the Maxprep™ software if it is open. Click the X in the upper left corner of the screen, and then confirm that you want to exit. -
Page 114: Connecting To A Network
Appendix: Configuring the PC 11.9 Connecting to a Network The Maxprep™ PC can connect to local networks through a wired eithernet connection. If you want to connect the PC to a site network, follow the instructions below. Note: Consult your site IT department when connecting to the network so that the rules and regulations regarding network access for your site are followed. -
Page 115: Adding A Network Printer
Appendix: Configuring the PC 11.10 Adding a Network Printer From the Maxprep™ software, you can print reports using a network printer. The printer you wish to use with the Maxprep™ software needs to be located on your network, and the PC should be connected to your network. - Page 116 Appendix: Configuring the PC 11.10 Adding a Network Printer (continued) 4. Click the Devices button on the ‘Windows Settings’ screen to open the ‘Devices’ screen (Figure 70). Figure 70. ‘Devices’ screen. Connecting to a network printer can be performed from the ‘Devices’...
- Page 117 Products may be covered by pending or issued patents or may have certain limitations. Please visit our Web site for more information. All prices and specifications are subject to change without prior notice. Product claims are subject to change. Please contact Promega Technical Services or access the Promega online catalog for the most up-to-date information on Promega products.
- Page 118 PROMEGA CORPORATION 2800 WOODS HOLLOW ROAD MADISON, 53711-5399 TELEPHONE 608-274-4330 • • • www.promega.com ©2017 PROMEGA CORPORATION ALL RIGHTS RESERVED PRICES AND SPECIFICATIONS SUBJECT TO CHANGE WITHOUT PRIOR NOTICE TM509 REVISED 1/19 • • • • •...
Need help?
Do you have a question about the Maxprep AS9100 and is the answer not in the manual?
Questions and answers