VeriFone Omni 5 series Installation Manual
Hide thumbs
Also See for Omni 5 series:
- Installation manual (51 pages) ,
- Installation manual (43 pages)

Related Manuals for VeriFone Omni 5 series


Summary of Contents for VeriFone Omni 5 series
- Page 1 Omni 5xxx and V 5xx/V Installation Guide VeriFone Part Number 23216, Revision C...
- Page 2 VeriFone, Inc. The information contained in this document is subject to change without notice. Although VeriFone has attempted to ensure the accuracy of the contents of this document, this document may include errors or omissions. The examples and sample programs are for illustration only and may not be suited for your purpose.
-
Page 3: Table Of Contents
ONTENTS ........5 R E F A C E Audience. - Page 4 VeriFone Cleaning Kit ........
-
Page 5: Preface
5xx/V 610 terminal. Chapter VeriFone Service and Support. Provides information on contacting your local VeriFone representative or service provider, and information on how to order accessories or documentation from VeriFone. Chapter Troubleshooting Guidelines. Provides troubleshooting guidelines, should you encounter a problem in terminal installation and configuration. -
Page 6: Related Documentation
REFACE Related Documentation Related To learn more about the V 5xx/V 610 series of terminals, refer to the following set Documentation of documents: For V 510: VPN 23218 Omni 5100/5150 and V 510, Omni 3730 Certifications and Regulations VPN 23219 Omni 5100/5150 and V 510 Quick Installation Guide VPN 23268... -
Page 7: Conventions And Acronyms
You must install a roll of thermal- book titles or emphasis. sensitive paper in the printer. The courier type face is Courier http://www.verifone.com used while specifying onscreen text, such as text that you would enter at a command prompt, or to provide an URL. - Page 8 Definitions Light Emitting Diode Merchandise Return Authorization MSAM Micromodule-Size Security Access Module PIN-Entry Devices Personal Identification Number RJ45 Registered Jack 45 RS-232 Recommended Standard 232 Security Access Module VeriFone Part Number Wi-Fi Wireless Fidelity 610 I XXX AND NSTALLATION UIDE...
-
Page 9: Hapter
Omni 37xx design. The V 510 and V 610 serve as the entry point to VeriFone’s acclaimed multi- application platform—with the capability to securely support payment and value- added applications on a single terminal—while the V 570 is perfect for those customers who need more. -
Page 10: Features And Benefits
ERMINAL VERVIEW Features and Benefits VeriFone ships variants of the V 5xx/V 610 terminals for different markets. Your NOTE terminal may have a different configuration. The following devices may or may not be present: a smart card reader, or zero or three MSAM cardholders. -
Page 11: Countertop Performance In A "Hand-Over" Design
The integrated PINpad offers added convenience to handle PIN-based applications. • The V 5xx/V 610 series of terminals ensures uncompromising reliability from VeriFone, the worldwide leader in e-payment. True Multi- • 510 and V 610 terminals offer 3 MB or 6 MB of memory and the dynamic Application... - Page 12 ERMINAL VERVIEW Features and Benefits 610 I XXX AND NSTALLATION UIDE...
-
Page 13: Hapter
HAPTER Terminal Setup This chapter describes the terminal setup procedure. You will learn about: • Selecting Terminal Location. • Unpacking the Shipping Carton. • Examining Terminal Features. • Establishing Telephone Line Connections. • Installing the Paper Roll in the Printer. •... -
Page 14: Electrical Considerations
610 terminal comes equipped with tamper-evident labels. If a label or component appears damaged, please notify the shipping company and your VeriFone representative or service provider immediately. Save the shipping carton and packing material for future repacking or moving the terminal. -
Page 15: Examining Terminal Features
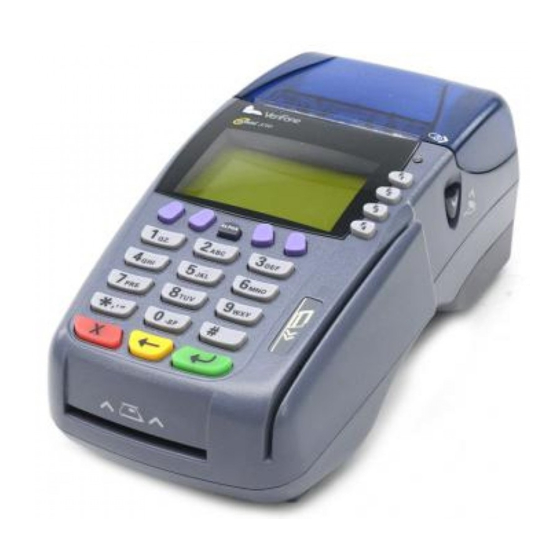
ERMINAL ETUP Examining Terminal Features Examining Before you continue the installation process, notice the features of the Terminal 5xx/V 610 terminal (see Figure Features INTERNAL THERMAL PRINTER COVER RELEASE PRINTER GREEN INDICATOR LED SERRATED METAL STRIP MAGNETIC CARD READER TERMINAL DISPLAY ATM-STYLE FUNCTION KEYS ALPHA KEY PROGRAMMABLE FUNCTION... -
Page 16: Connection Ports
The V 5xx/V 610 terminal contains MSAM cardholders to support multiple stored-value card programs or other merchant card requirements. VeriFone ships variants of the V 5xx/V 610 terminal for different markets. Your NOTE terminal may have a different configuration. The following devices may or may not be present: a smart card reader, or zero or three MSAM cardholders. - Page 17 ERMINAL ETUP Examining Terminal Features Figure 3 shows the connection port for the V 570 terminal. Figure 3 570 Connection Ports (Back View) Figure 4 shows the connection ports for the V 610 terminal. Figure 4 610 Connection Ports (Bottom and Side Views) WARNING Do not connect the terminal to the power supply until all the peripherals are attached.
-
Page 18: Establishing Telephone Line Connections
ERMINAL ETUP Establishing Telephone Line Connections Establishing Connect the telephone cord to the communication port on the terminal, then route Telephone Line it directly to a telephone wall jack (see Figure Figure 6, and Figure 7). This is a Connections direct connection and the line is dedicated to the terminal. -
Page 19: Installing The Paper Roll In The Printer
Poor-quality paper can jam the printer and create excessive paper dust. To order CAUTION high-quality VeriFone paper, refer to Accessories and Documentation. Store thermal paper in a dry, dark area. Handle thermal paper carefully: impact, friction, temperature, humidity, and oils affect the color and storage characteristics of the paper. - Page 20 ERMINAL ETUP Installing the Paper Roll in the Printer To Install a Paper Roll Press down on the button located on the side of the terminal to unlatch the paper roll cover, then lift the cover up and back (see Figure Figure 8 Opening the Printer Cover...
- Page 21 ERMINAL ETUP Installing the Paper Roll in the Printer Drop the paper roll into the printer tray. Figure 10 Loading Paper Roll Pull paper up past the glue residue. Close the paper roll cover by gently pressing directly on the cover until it clicks shut, allowing a small amount of paper past the glue residue to extend outside the printer door.
-
Page 22: Installing/Replacing Msam Cards
MSAM cards or you may need to replace old cards. Cards CAUTION Observe standard precautions when handling electrostatically sensitive devices. Electrostatic discharges can damage this equipment. VeriFone recommends using a grounded anti-static wrist strap. To Install/Replace Remove the power cord and/or battery (see... - Page 23 ERMINAL ETUP Installing/Replacing MSAM Cards Figure 14 Opening V 610 MSAM Compartment Door Remove any previously installed MSAM card by sliding the card from the MSAM cardholder. Install an MSAM card by aligning the card and carefully sliding it within the guides on the cover until it is fully inserted (see Figure 15).
-
Page 24: Connecting Optional Device(S)
Different terminals support different devices, so for more information about optional devices, please contact your VeriFone distributor. RS-232-type devices do not work on the PINpad port. PINpad-type devices do not NOTE work on the RS-232 port. - Page 25 Connecting the Check Reader to the V or V The V 5xx terminal supports the CR 600 and CR 1000i check readers. Contact your VeriFone representative or visit the online store a www.store.verifone.com information on these devices. Figure 17 provides an example of a peripheral connection to the RS-232 port.
-
Page 26: 610 Optional Device Connections
610 terminal is powered via the corded power supply, the terminal NOTE provides 400 mA at 9V DC to the side port. This power will drive most VeriFone accessories. Contact your local VeriFone representative for more information. Insert the RJ45-type connector on the end of the PINpad or smart card reader into the port on back of the peripheral device. -
Page 27: External Printers Supported
5xx/V 610 terminal supports the VeriFone P250, P350, P900, and P950 external printers. Contact your VeriFone representative or visit the online store at www.store.verifone.com for information on these devices. External printers connect through the RS-232 port and require a separate power supply. -
Page 28: Connecting The Terminal Power Pack
ERMINAL ETUP Connecting the Terminal Power Pack Connecting the When you have finished connecting optional peripheral(s), you are ready to Terminal Power connect the V 5xx/V 610 terminal to the provided power source. Pack Using an incorrectly rated power supply may damage the terminal or cause it not CAUTION to work as specified. - Page 29 When the terminal has power, the terminal lights are activated and the green LED indicator remains lit. If an application is loaded in the terminal, it starts after the initial VeriFone copyright screen and usually displays a unique copyright screen. If no application...
-
Page 30: 610 Battery Behavior (No Power Cord)
When the terminal has power, the terminal lights are activated and the green LED indicator remains lit. If an application is loaded in the terminal, it starts after the initial VeriFone NOTE copyright screen and usually displays a unique copyright screen. If no application... -
Page 31: Installing The Privacy Shield
ERMINAL ETUP Installing the Privacy Shield Installing the The privacy shield protects the customers’ PIN entry from being seen by the Privacy Shield cashier or other customers. 510/V 610 Privacy To install the V 510/V 610 privacy shield: Shield Align the privacy shield with the V 510/V 610 terminal and carefully insert the shield. -
Page 32: 570 Privacy Shield
ERMINAL ETUP Installing the Privacy Shield 570 Privacy To install the V 570 privacy shield: Shield Remove the sticker (identified by the magnetic card reader icon) located on the right hand side of the telephone-style keypad. Figure 26 Remove the sticker Align the privacy shield with the V 570 terminal and carefully insert the shield. -
Page 33: Installing The V 610 Smart Battery
ERMINAL ETUP Installing the V 610 Smart Battery Installing the 610 wireless terminals use Li-ion smart batteries (see Accessories and 610 Smart Documentation for ordering information). The internal logic of the smart battery Battery prevents both overcharging and undercharging (a fault condition in which the battery level goes well below the minimum acceptable charge and the battery becomes unusable). -
Page 34: Removal
6 hours. Failure to do so may result in inaccurate battery status messaging. VeriFone also recommends that the smart battery receive a periodic full discharge. To ensure a full discharge, use the unit until the battery is fully drained. -
Page 35: Using The V X 610 Spare Battery Charger
ERMINAL ETUP Using the V 610 Spare Battery Charger Using the V The V 610 spare battery charger can charge two batteries at a time. The LED Spare Battery indicator allows you to see the initial battery condition as well as the charging Charger condition. -
Page 36: Using The V X 610 Power Cradle
ERMINAL ETUP Using the V 610 Power Cradle Using the V The power cradle serves both as a docking station and a battery charger for the Power Cradle 610 terminal. To Connect the Power Turn the cradle upside down and then insert round barrel connector into the Cradle power port. -
Page 37: (Gsm/Gprs Models)
ERMINAL ETUP Installing/Replacing the SIM Card (GSM/GPRS Models) Place the terminal onto power cradle. Figure 36 Placing the V 610 Terminal Onto the Power Cradle Installing/ The SIM (Subscriber Identity Module) card is a smart card inserted in the V Replacing the GSM/GPRS terminal that contains your GSM/GPRS radio account information. - Page 38 ERMINAL ETUP Installing/Replacing the SIM Card (GSM/GPRS Models) Detach the GSM/GPRS sled module from the terminal. Figure 38 Remove GSM/GPRS Sled Module Insert the SIM into the cardholder at the back of the GSM/GPRS sled module. Figure 39 Insert SIM Card Into GSM/GPRS Sled Module The SIM cardholder has a notch on one corner to ensure the SIM card is NOTE positioned correctly and for easy orientation in the cardholder.
- Page 39 ERMINAL ETUP Installing/Replacing the SIM Card (GSM/GPRS Models) Replace the GSM/GPRS sled module in the terminal. Figure 40 Replace GSM/GPRS Module Tighten the retaining screw. Figure 41 Tighten Retaining Screw 610 I XXX AND NSTALLATION UIDE...
-
Page 40: Connecting The V X 610 External Antenna
ERMINAL ETUP Connecting the V 610 External Antenna Connecting the VeriFone provides an external wireless antenna for some V 610 terminals. This 610 External connection allows communication with your service provider to upload transaction Antenna data from the terminal and download system upgrades to the terminal. Radio service is activated by your service provider. -
Page 41: Orientation
ERMINAL ETUP Connecting the V 610 External Antenna Screw the barrel nut finger tight to retain the antenna. Figure 43 Tighten Antenna Barrel Nut Orientation To establish good wireless communication (uplink), vertically align the antenna with respect to ground and sky. -
Page 42: Conducting Wireless Transactions
ERMINAL ETUP Conducting Wireless Transactions Conducting To conduct a wireless transaction: Wireless • Ensure the terminal is in an optimal position for transmitting. Transactions • Follow the on-screen instructions provided with your application. Using the Smart The smart card transaction procedure may vary from one application to another. Card Reader Verify the procedure with your application provider before performing a smart card transaction. - Page 43 ERMINAL ETUP Using the Magnetic Card Reader Swipe the card through the magnetic card reader. Figure 45 Using the Magnetic Card Reader 610 I XXX AND NSTALLATION UIDE...
- Page 44 ERMINAL ETUP Using the Magnetic Card Reader 610 I XXX AND NSTALLATION UIDE...
-
Page 45: Specifications
HAPTER Specifications This chapter discusses power requirements, dimensions, and other specifications of the V 5xx/V 610 series of terminal. Power 5xx/V 610 terminal: 9 V DC; 4.0 A DC Power Pack UL, ITE listed, Class 2 power supply: Input rated: 100 - 240V AC, 50/60 Hz Output rated: 8.6 - 9.4V DC 4.0 A Barrel connector polarity: Temperature... -
Page 46: Sar Compliance
PECIFICATIONS SAR Compliance For V 610 Terminals with External Antenna: • Length: 214.2 mm (8.4 in) • Width: 102 mm (4.0 in) • Depth: 72 mm (2.8 in) 610 I XXX AND NSTALLATION UIDE... -
Page 47: Maintenance
Smart Card Do not attempt to clean the smart card reader. Doing so may void any warranty. Reader For smart card reader service, contact your VeriFone distributor or service provider. 610 I XXX AND... - Page 48 AINTENANCE Smart Card Reader 610 I XXX AND NSTALLATION UIDE...
-
Page 49: Verifone Service And Support
If the list of serial numbers is long, you can fax the list, along with the information gathered in Step 1, to the MRA department at 727-953- 4172 (U.S.). Address a fax to “VeriFone MRA Dept.” with the model and part number(s) • Include a telephone number where you can be reached and your fax number. -
Page 50: Accessories And Documentation
One MRA number must be issued for each V 5xx/V 610 terminal you return to VeriFone, even if you are returning several of the same model. Describe the problem(s). Provide the shipping address where the repaired or replacement unit must be returned. -
Page 51: Verifone Cleaning Kit
ERVICE AND UPPORT Accessories and Documentation VeriFone Cleaning 02746-01 Cleaning Kit Telephone Line 00124-17 2.1-meter (7-foot) telephone line cord, black, with Cord modular RJ11-type connectors Swivel Stand 23050-01 510 Swivel Stand Documentation For V 510, V 570, and V 610 Terminals... - Page 52 ERVICE AND UPPORT Accessories and Documentation 610 I XXX AND NSTALLATION UIDE...
-
Page 53: Troubleshooting Guidelines
610 contains no user serviceable parts. Do not, under any circumstance, attempt to disassemble the terminal. Perform only those adjustments or repairs specified in this guide. For all other services, contact your local VeriFone service provider. Service conducted by parties other than authorized VeriFone representatives may void any warranty. -
Page 54: Printer Paper Jam
Printer. • If the problem persists, it may be due to poor paper quality. Install a new roll of higher-quality paper. WARNING Poor-quality paper may jam the printer. To order high-quality VeriFone paper, refer to Accessories and Documentation. Keypad Does... -
Page 55: Printer Does Not Print
If they are not experiencing difficulties with their line, contact the telephone company and have your line checked. • If the telephone line works, contact your local VeriFone representative for assistance. Printer Does Not If the printer does not work properly: Print •... -
Page 56: Terminal Display Does Not Show Correct/Readable Information
• Verify that the printer roller and paper roll dust cover are properly installed. • If the problem persists, contact your VeriFone distributor or service provider. 610 I XXX AND NSTALLATION UIDE... -
Page 57: Index
NDEX environmental factors external printers accessories RS-232 port connection documentation external printers supported ordering VeriFone external printers power packs swivel stand telephone line cord installation thermal printer paper connecting a check reader to V 510 or V VeriFone cleaning kit... - Page 58 VeriFone troubleshooting returning a battery for repair or replacement peripherals returning a terminal for repair or replacement check readers telephone line connections installation telephone line cords...
- Page 59 NDEX terminals VeriCentre Appliance Management Suite simultaneous downloads 5xx/V multi-application capability starting on battery power troubleshooting 610 startup battery mode wireless connection CDMA GSM/GPRS Wi-Fi wireless transactions 610 I XXX AND NSTALLATION UIDE...
- Page 60 VeriFone, Inc. 2099 Gateway Place, Suite 600 San Jose, CA, 95110 USA Tel: (800) VeriFone (837-4366) www.verifone.com Omni 5xxx and V 5xx/V Installation Guide VeriFone Part Number 23216, Revision C...
Need help?
Do you have a question about the Omni 5 series and is the answer not in the manual?
Questions and answers
What is TAMPER?
Tampering in the VeriFone Omni 5 series refers to any unauthorized alteration or interference with the terminal. The device is a secure product, and any tampering may cause it to stop functioning properly. The terminal comes with tamper-evident labels, and if these labels or any components appear damaged, users should notify the shipping company and their VeriFone representative or service provider immediately.
This answer is automatically generated