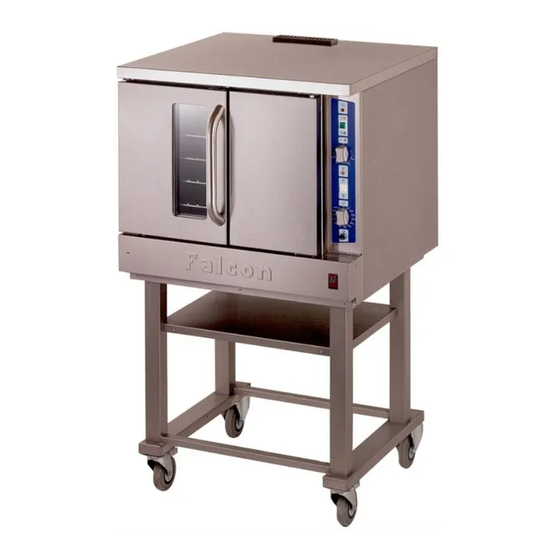
Falcon E7204 Installation And Servicing Instructions

Forced convection ovens

Advertisement

E7204, E7208 and E7211
Forced Convection Ovens
CAUTION: Read the instructions before
using the appliance.
INSTALLATION and SERVICING
INSTRUCTIONS
IMPORTANT
The installer must ensure that the installation of the appliance is in conformity with these
instructions and National Regulations in force at the time of installation. Particular attention
MUST be paid to –
BS7671 IEE Wiring Regulations
Electricity at Work Regulations
Health And Safety At Work Act
Fire Precautions Act
This appliance has been CE-marked on the basis of compliance with the Low Voltage and EMC
Directives for the voltages stated on the Data Plate
WARNING -THIS APPLIANCE MUST BE EARTHED
On completion of the installation these instructions should be left with the Engineer-in-Charge for
reference during servicing. Further to this, The Users Instructions should be handed over to the
User, having had a demonstration of the operation and cleaning of the appliance.
IT IS MOST IMPORTANT THAT THESE INSTRUCTIONS BE CONSULTED BEFORE
INSTALLING AND COMMISSIONING THIS APPLIANCE. FAILURE TO COMPLY WITH THE
SPECIFIED PROCEDURES MAY RESULT IN DAMAGE OR THE NEED FOR A SERVICE
CALL.
PREVENTATIVE MAINTENANCE CONTRACT
In order to obtain maximum performance from this unit we would recommend that a Maintenance
Contract be arranged with SERVICELINE. Visits may then be made at agreed intervals to carry
out adjustments and repairs. A quotation will be given upon request to the contact numbers
below.
WEEE Directive Registration No. WEE/DC0059TT/PRO
At end of unit life, dispose of appliance and any replacement parts in a safe
manner, via a licensed waste handler.
Units are designed to be dismantled easily and recycling of all material is
encouraged whenever practicable.
Falcon Foodservice Equipment
Head Office and Works
Wallace View, Hillfoots Road, Stirling. FK9 5PY. Scotland.
Serviceline
PHONE : 01438 363 000
Warranty Policy Shortlist
Warranty does not cover :-
Correcting faults caused by incorrect installation of a product.
Where an engineer cannot gain access to a site or a product.
T100683 Ref.5

Advertisement

Table of Contents
loading
Need help?

Need help?

Do you have a question about the E7204 and is the answer not in the manual?

Questions and answers

Summary of Contents for Falcon E7204

  • Page 1 E7204, E7208 and E7211 Forced Convection Ovens CAUTION: Read the instructions before using the appliance. INSTALLATION and SERVICING INSTRUCTIONS IMPORTANT The installer must ensure that the installation of the appliance is in conformity with these instructions and National Regulations in force at the time of installation. Particular attention MUST be paid to –...
  • Page 2 Repeat commission visits. Replacement of any parts where damage has been caused by misuse. Engineer waiting time will be chargeable. Routine maintenance and cleaning. Gas conversions i.e. Natural to Propane gas. Descaling of water products and cleaning of water sensors where softeners/conditioners are not fitted, or are fitted and not maintained.
  • Page 3: Section 1 - Installation

    UNLESS OTHERWISE STATED, PARTS WHICH HAVE BEEN PROTECTED BY THE MANUFACTURER ARE NOT TO BE ADJUSTED BY THE INSTALLER 1.1 MODEL NUMBER, NETT WEIGHTS and DIMENSIONS MODEL WIDTH mm DEPTH mm HEIGHT mm WEIGHT kg E7204 1015 1470 E7208 1000 1070 1525 E7208/2...
  • Page 4: Electrical Rating

    Note When connecting to a single phase supply, the three line terminals must be connected together using the wire links provided. It is important that the links and incoming supply cable are connected exactly as shown in the following diagram. 1.4 ELECTRICAL RATING The electrical loadings are as stated on the appliance data plate.
  • Page 5: Commissioning The Appliance

    With doors open and switch set to Cool Down, turn thermostat knob clockwise to switch fan on. d) Check fan rotates anti-clockwise. E7204/E7208 models only e) Push oven light switch to observe oven light(s) operate. 2.2.2 System Operational Checks...
  • Page 6: Section 3 - Servicing

    b) Allow oven to heat up. Amber neon will go out when desired temperature is reached. Check that centre oven temperature corresponds to setting. The temperature will cycle around set point and the thermostat will switch the elements on and off to maintain setting. c) Check fan stops when doors are opened, this should also cut power to elements.
  • Page 7 b) Remove electrical connections, noting positions. c) Unclip component by levering lower edge catch downward. d) Replace in reverse order. 3.8 COOK THERMOSTAT a) Open control panel as detailed in Section 3.1. b) Disconnect electrical leads. c) Remove knob and undo fixings which secure thermostat to panel. d) Undo capillary tube securing clip fixing.
  • Page 8 Oven baffle is not symmetrical, fixings have been offset to ensure correct relocation. 3.15 OVEN LAMPS To Replace Bulb a) Undo lens cover fixings. b) Undo bulb and replace. c) Refit lens cover and ensure seal is not damaged. To Replace Assembly a) Remove LH outer side panel.
  • Page 9 c) Lift door up slightly, ease sideways to clear bottom bracket and withdraw from top hinge pin. 3.21 DOOR LINKAGE SPROCKET a) Remove door. (See Section 3.20) b) Slacken turnbuckles to allow chain to be slipped from sprocket. c) Push out roll pin which holds sprocket upon lower hinge pin. Push out roll pin holding door switch cam if RH sprocket is being removed.
  • Page 10: Section 4 - Spares

    Replace new component(s). Take care to re-assemble in correct order. d) Replace top panel. 3.26 DOOR WINDOW (E7204 & E7208 ONLY) a) Remove door as described in Section 3.20. b) Remove all top and bottom door flange fixings plus those that secure sealing strip to side flange.
  • Page 11 732920055 Thermostat Oven Safety Klixon 535420015 Thermostat Oven Safety EGO 732920130 Buzzer White 535500035 Buzzer Black 734510130 Cooling Fan 735400360 Door Seal E7204 531930526 Door Seal E7208 532930043 Door Seal E7211 531940099 Neon Red 730962010 Neon Amber 730962040 Cool/Heat Switch...

This manual is also suitable for:

E7211E7208/2E7211 rackE7211 trolleyE7208

Table of Contents