Table of Contents
Advertisement
Quick Links
A S S E M B LY I N S T R U C T I O N S
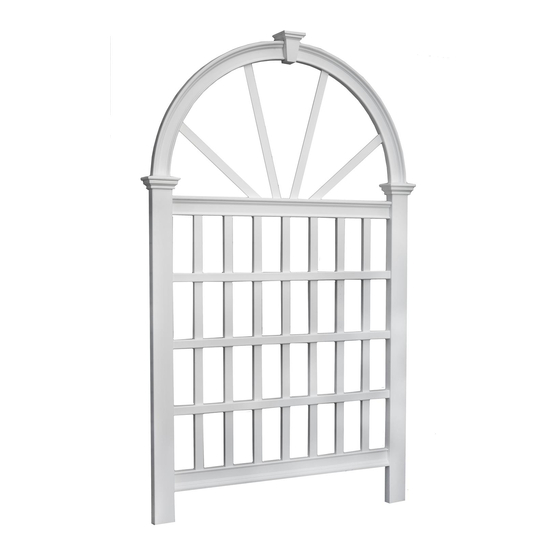
The Vienna Trellis
Please read through before starting assembly.
IMPORTANT: CHECK THE INSIDE OF YOUR POSTS FOR ALL MATERIALS.
Check Box for These Contents
In the event of missing or defective parts please call our customer service dept. at
1 800 282 9346 (Mon. to Fri. 8:00 AM to 4:00 PM EST).
(UK Tel: (44) 2038 687160 (Mon. to Fri. 1:00 PM to 10:00 PM GMT).
1. Keystone Lid (1) -
10668-1
2. Keystone Insert (1) -
10837
3. Keystone Body (1) -
10836
4. Keystone Bottom Plate (1) -
5. Arch Spindle - Long (2) -
10878
6. Arch Spindle - Short (2) -
10879
7. Arches (2) -
Left 10880 , Right 10881
8. Post Caps (2) -
Left 10673-1 , Right 10674-1
9. Top Rail (1) -
10882
10. Posts (2) -
Left 10883 , Right 10884
11. Vertical Spindles (7) -
10885
12. Horizontal Spindles (3) -
10886
13. Bottom Rail (1) -
10887
14. Ground Mounting Extensions (2) -
15. 1 1/2" [38 mm] Self-Auguring Stainless Steel Screws (20) -
Tools You Will Need
• Cordless Drill
• Hammer
• Tape Measure
• Level
• Shovel
General Information
• Read Instructions through carefully before beginning assembly.
• When assembling components, place on a non-abrasive surface (i.e. shipping box) to avoid scratching.
• We recommend an area approx 5'x 8' (1.5 m x 2.4 m) for unobstructed assembling.
• You should not need to use excessive force when assembling component.
83.75 in
(212.7 cm)
10666-1
10888
20005
42 in (106.7 cm)
49 in (124.5 cm)
1
2
3
4
5
6
7
8
9
10
11
12
14
15
Not to Scale
13
www.newenglandarbors.com
www.newenglandarbors.co.uk
49 in
(124.5 cm)
2 in
6 in
(5.1 cm)
(15.2 cm)
V1.4/072717
1
Advertisement
Table of Contents

Summary of Contents for New England Arbors Vienna
- Page 1 A S S E M B LY I N S T R U C T I O N S The Vienna Trellis www.newenglandarbors.com www.newenglandarbors.co.uk 83.75 in (212.7 cm) 49 in (124.5 cm) 2 in 6 in 42 in (106.7 cm) (5.1 cm)
- Page 2 Note that the pre-drilled holes are located on the back side of the trellis. Proceed with the other post. Flip the trellis over and using the provided screws, fasten the posts to the top and bottom rails in place as shown. The Vienna Trellis www.edenarbors.com...
- Page 3 Using two of the provided screws, fasten the arches into the keystone insert as shown. Drive two more screws to the underside of the keystone. Snap the top and bottom lid to complete the arch assembly. Insert first Sticker Sticker The Vienna Trellis...
- Page 4 Starting on one end, guide the arch assembly and arch spindles into the pre-routed holes as shown. Fasten the arch assembly to the posts using four screws (2 per post) provided. Long Long Short Short The Vienna Trellis...
- Page 5 Mounting Into the Ground Trellises must be well secured in the event of high winds, etc. We have provided two ground mounting extensions for securing the trellis either into the ground or into a concrete footing. If you are installing your trellis directly to the wall of your home, or on a wood deck or concrete surface, please see your hardware store for the appropriate galvanized bracket hardware.


Need help?
Do you have a question about the Vienna and is the answer not in the manual?
Questions and answers