Table of Contents
Advertisement
Quick Links
Advertisement
Table of Contents

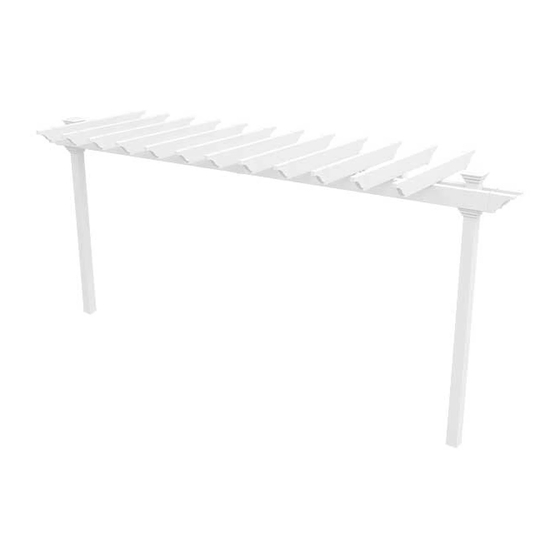
Summary of Contents for New England Arbors Hammock Stand
- Page 1 ASSEMBLY GUIDE Hammock Stand VER 1.8 11/14/18...
- Page 2 GETTING STARTED First off, allow us to say thank you for the investment you have made in our fine hammock stand. This hammock stand is designed to be assembled and installed ideally by two people with basic carpentry knowledge and tools. Do not attempt alone, especially during the installation stage.
-
Page 3: Table Of Contents
IN THIS GUIDE ADDITONAL MATERIALS LIST MATERIALS OVERVIEW MATERIALS BREAKDOWN DISTANCE BETWEEN WOOD POST WOOD POST INSTALLATION MAIN SUPPORT BEAM ASSEMBLY RAFTER ASSEMBLY ATTACHING MAIN SUPPORT BEAM & POST CAP ATTACHING U-CLIPS TO MAIN SUPPORT BEAM ATTACHING RAFTERS TO U-CLIPS WWW.NEWENGLANDARBORS.COM WWW.NEWENGLANDARBORS.CO.UK... -
Page 4: Additonal Materials List
ADDITIONAL MATERIALS PROVIDED 20006 - 4” (10CM) 20000 - 1 1/2 OZ 20005 - 1 1/4” (3.175CM) 20016 -5/8” (1.58CM) ADDITIONAL MATERIALS TO BE PURCHASED 4x4x12 Ft (10x10x365cm) Pressure Treated Wood. Purchase at local building centre. QUANTITY: x2 2x6x16 Ft (4x15x487cm) Pressure Treated Wood. To be cut down too 188” (477cm). Purchase at local building centre. QUANTITY: x2 Purchase at your local building centre. -
Page 5: Materials Overview
MATERIALS OVERVIEW 60 IN (152CM) 10820 - Beam Joiner (x2) 10564 - Main Support Beam 10829 - Beam End Caps (x28) 2x6x94 (x4) 10293 - Post 4x4x94 (x4) 10536 - U-clip (x24) 10737-1 - Post Trim (x2) 10564 - Rafter Beam 2x6x40 10735-1 - Post Cap (x2) (x12) 168 IN... -
Page 6: Materials Breakdown
MATERIALS BREAK DOWN 10820-BEAM 10829-BEAM AND RAFTER 10737-1 POST JOINER (X2) END CAPS (X28) TRIM (X2) 10564 - MAIN SUPPORT BEAM (X4) 10735-1 - POST CAP (X2) 10536 - U-CLIP (X24) 10564 - RAFTER BEAM (X12) 10293 - POST (X2) 4X4X94 2X6X40 (10X10X238CM) -
Page 7: Distance Between Wood Post
Step 1 DISTANCE BETWEEN WOOD POSTS Determine the area you want to start building your pergola. At one end of the desired area, hammer one wooden stake into the ground, tie a piece of string around it and measure to a length of 168in (426cm). This is where your second wood stake needs to be hammered into the ground. -
Page 8: Wood Post Installation
Step 2 INSTALL WOOD SUPPORTING POSTS DIRECTLY INTO THE GROUND Post location and placement is the most critical step in the overall installation process. Please double check for the possibility of any underground utilities such as sprinkler, gas or telephone lines. 94 IN 3”... -
Page 9: Main Support Beam Assembly
Step 3 MAIN SUPPORT BEAM ASSEMBLY Cut 2x6x16 Ft pressure treated wood to 188.” Insert pressure treated wood into one 2x6x94 in (4cmx15cmx238cm) main support beam followed by one joiner as illustrated. 1 1/4” - X4 Insert second main support beam until they both butt up tight inside the joiner. -
Page 10: Rafter Assembly
Step 4 RAFTER ASSEMBLY First apply four small glue amounts on the inside corners of two rafter end caps and insert over on either side of a 2x6x40 in (4cmx15cmx101) rafter beam. Hold for 30 sec, secure in place. Repeat step for other 11 rafters. -
Page 11: Attaching Main Support Beam
Step 5 ATTACHING MAIN SUPPORT BEAM & POST CAP Place your first assembled main support beam infront of your posts and measure down 11,” mark this measurement. This will be where the bottom of the beam sits. Evenly space the over hang of the beam on each side to aproximatley 6”... -
Page 12: Attaching U-Clips To Main
Step 6 ATTACHING U-CLIPS TO MAIN SUPPORT BEAM Place u-clip on top of beam beside joiner. Measure 2 inches from joiner to u-clip base, this is where your first u-clip will sit. Repeat for other 3 u-clips and screw into place with 1 1/4” (38mm) screws. -
Page 13: Attaching Rafters To U-Clips
Step 7 ATTACHING RAFTERS TO U-CLIPS Place each rafter assembly in-between the U-clip. Measure 16 inches between left side of U-clip to the back of rafter end and screw into place with 5/8” (38mm) screws. Repeat for 11 other rafter assemblies and screw into place with 5/8” (38mm) screws. - Page 14 We’re here for you. If you have any questions at all, don’t hesitate to contact us. NORTH AMERICA TOLL FREE 1-800-282-9346 UNITED KINGDOM (44) 2038 687160 Visit our website to chat with a support technician. WWW.NEWENGLANDARBORS.COM WWW.NEWENGLANDARBORS.CO.UK VER 1.8 11/14/18...


Need help?
Do you have a question about the Hammock Stand and is the answer not in the manual?
Questions and answers