Table of Contents

Subscribe to Our Youtube Channel
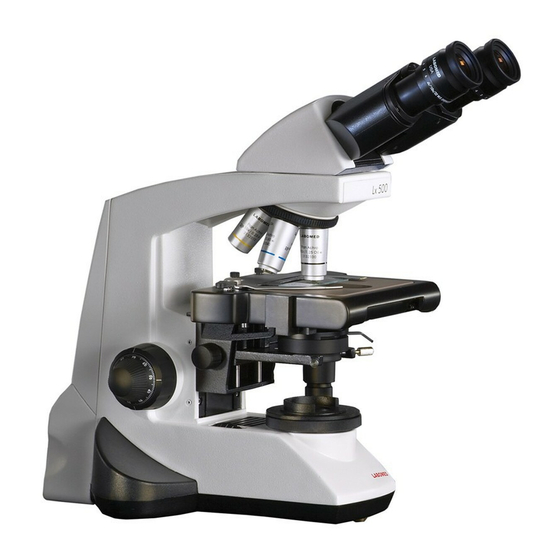
Related Manuals for Labomed Lx 500


Summary of Contents for Labomed Lx 500
- Page 1 Lx 500 User Manual Research Microscopy To ensure proper use of this instrument as well as to avoid injury while operating instrument, understanding this manual completely before use is highly recommended. 9144000-795 Lx 500 Issue 1.3...
- Page 2 Lx 500 Lx 500 is a trade name for LABOMED Products. LABOMED is a registered trademark of Labo America, Inc. All other trademarks are the property of their respective owners. The information contained in this document was accurate at the time of publication. Specifications are subject to change without notice.
-
Page 3: Table Of Contents
Lx 500 List Of Contents Introduction Safety Information Lx 500 Binocular Lx 500 Trinocular Lx 500 Ergonomic Standard Components Optional Accessories 12-13 Initial Setup Assembly 15-16 Summary of Brightfield Observation Procedure Detailed Observation Procedure 18-22 Troubleshooting Guide 23-24 Specifications... -
Page 4: Introduction
Lx 500 INTRODUCTION The Lx 500 is a research microscope with a modern design and the latest in optical and mechanical advancements. Designed for professionals as well as clinicians, the microscope offers many features and functions for a diverse set of applications. Here are some of the benefits of the Lx 500. -
Page 5: Safety Information
5. Always ensure that the grounding terminal of the microscope and that of the wall outlet are properly connected. If the unit is not grounded, LABOMED cannot warrant electrical safety. 6. Never allow metallic objects to penetrate the air vents of the microscope frame as this could result in user injury or damage to the microscope. - Page 6 Lx 500 Caution If the microscope is used in a manner not specified by this manual, the safety of the user may not be warranted. In addition, the equipment may be damaged. Always use the equipments as outlined in this instruction manual.
- Page 7 Lx 500 • 3. Care and Maintenance Your microscope has been engineered for a long and safe operational life with minimal maintenance required. In general, routine maintenance consists of keeping the microscope's working parts lubricated and optics clean. Always cover the microscope with a dust cover when not in use.
-
Page 8: Lx 500 Binocular
Lx 500 Lx 500 BINOCULAR Binocular viewing tube, 30° inclined Eyepieces Observation tube clamping screw Revolving nosepiece Objectives Specimen holder Mechanical stage Aperture iris diaphragm ring Abbe condensor Coarse and fine focus knob D lens & Filter holder Lamp housing... -
Page 9: Lx 500 Trinocular
Lx 500 Lx 500 TRINOCULAR Trinocular Port Trinocular viewing tube, 30° inclined Eyepieces Observation tube clamping screw Revolving nosepiece Objectives Specimen holder Mechanical stage Aperture iris diaphragm ring Abbe condensor Coarse and D lens & Filter holder fine focus knob... -
Page 10: Lx 500 Ergonomic
Lx 500 Lx 500 ERGONOMIC BINOCULAR Eyepieces Ergonomic Binocular viewing tube, 0° to 25° inclined Observation tube clamping screw Revolving nosepiece Objectives Specimen holder Mechanical stage Aperture iris diaphragm ring Coarse and Abbe condensor fine focus knob Filter holder D lens &... -
Page 11: Standard Components
Lx 500 STANDARD COMPONENTS After removing your microscope from its packaging, you may observe the following contents. Please note that the contents of your microscope may vary as the configuration, contrasting method or viewing body ordered may not be of the standard configuration highlighted here. -
Page 12: Optional Accessories
Lx 500 OPTIONAL ACCESSORIES • System Diagram Of Optional Accessories Video adapter1/2"&1/3" Digital camera adapter iVu 3100 iVu 5100 iVu 7000 Binocular head Trinocular head Ergonomic head WF 10x WF 16x WF 20x RP 4x RP 10x RP 20x RP 40x (SL) - Page 13 Lx 500 • Installation and Operation of Optional Accessories 1. iVU Camera Module System 1.Mount the video adapter 1/2” (part # 3143300-912) on Trinocular observation head. 2. Mount iVu Camera Module System on video adapter. Fig 4 2. Optional Eyepieces 10X eyepieces are provided.
-
Page 14: Initial Setup
Lx 500 INITIAL SETUP 1. Objectives Objectives are factory set. They are par-centered and parfocalized during assembly. All Objectives have been secured for a tight fit to prevent them from coming loose during transit. To remove an objective, rotate it counter clockwise while holding it with a rubber grip to avoid any slippage. -
Page 15: Assembly
3. Replace the lamp house cover. Always use the designated bulb. Using bulbs other than those specified by LABOMED may lead to a fire hazard and decentering of light. Note: Finger prints or stains on the lamp bulb reduce its life. - Page 16 3. Detach connector of connecting wires (4). 4. Remove two screws (6) provided on battery clamp with phillips screw driver. 5. Replace existing battery with new battery from Labomed (refer part no. below). 6. Reverse steps 5 to 1, to complete the process.
-
Page 17: Summary Of Brightfield Observation Procedure
Lx 500 SUMMARY OF BRIGHTFIELD OBSERVATION PROCEDURE Flip the main switch to “ON” Place the specimen on the stage. On/Off Engage the 10X objective in the light path. A/C Inlet Bring the specimen in focus. Adjust the observation tube and eyepieces Adjust the interpupillary distance. -
Page 18: Detailed Observation Procedure
Lx 500 DETAILED OBSERVATION PROCEDURE 1. Turning the Lamp ON 1. Flip the main switch to “I” (ON) as shown in Figure 13. 2. Rotating the light intensity adjustment knob in Figure 14 (1) in the direction of the arrow increases brightness and rotating knob in the opposite direction decreases brightness. - Page 19 Lx 500 Cover Glass This is the glass plate placed on the specimen. For optimum optical performance, the cover glass thickness, which is the distance from its top surface to the Cover glass specimen surface, should be 0.17 mm. Slide Glass This glass plate should ideally have a length of 76 mm, width of 26 mm ±...
- Page 20 Lx 500 4. Adjusting the Interpupillary Distance (IPD) The inter-pupilary distance adjustment consists of moving the two eye pieces to align with both eyes pupils so that you can observe a single microscopic image through two eye pieces in stereo vision. This greatly helps to reduce fatigue and discomfort during observation.
- Page 21 Lx 500 6. Centering the Condenser There is a possibility of having the condenser de-centered during shipping. It is mandatory to check the centering before observing the specimen as it is required to distribute even light to the specimen. For models with Koehler illumination: 1.
- Page 22 The designated immersion oil should be in contact with the cover lens of 100X immersion objective. If not, the specimen will apear distorted and dull. It is recommended that LABOMED immersion oil is always used. Immersion Process: 1. Bring the specimen in focus using first the 10x, then 40x objective.
-
Page 23: Troubleshooting Guide
Under certain conditions, performance of the unit may be adversely affected by factors other than defects. If problems occur, please review the following list and take corrective action as needed. If problem persists, please contact LABOMED or your local LABOMED dealer. Observation... - Page 24 The left and right eyepieces are of same magnification. LABOMED does different magnification not recommend using third party eyepieces in conjuction with LABOMED microscopes. Set the specimen correctly with the The specimen slide is upside down cover glass facing upwards Use a cover glass with thickness of 0.17...
-
Page 25: Specifications
Lx 500 SPECIFICATIONS 1. Illumination Built-in illumination system Halogen 2. Focusing mechanism Stage height adjustment mechanism Fine adjustment scale: 0.003μm per graduation Fine adjustment stroke: 0.3mm per turn Toal stroke: 12.7 mm Co-axial coarse and fine focusing on ball drive 3. - Page 26 Fremont, CA 94538 LABOMED and Lx500 are registered trademarks of Labo America, Inc. With a policy of continuous development, Labo America, Inc. reserves the right to change design and specifications without prior notice. © 2016 Labo America, Inc. | 9144000-990A 02-2009...
Need help?
Do you have a question about the Lx 500 and is the answer not in the manual?
Questions and answers