SteppIR 2 Element Yagi Instruction Manual
Antenna system
Hide thumbs
Also See for 2 Element Yagi:
- Instruction manual (42 pages) ,
- Instruction manual (54 pages) ,
- Instruction manual (55 pages)
Table of Contents
Advertisement
Quick Links
Download this manual
See also:
Instruction Manual
Advertisement
Table of Contents

Related Manuals for SteppIR 2 Element Yagi


Summary of Contents for SteppIR 2 Element Yagi
- Page 1 Yagi Dipole Vertical (Patented) 2 Element Yagi Instruction Manual SteppIR Antennas 2112 -116th Ave NE, Suite 2-5 , Bellevue, WA 98004 Tel: 425-453-1910 Fax: 425-462-4415 Tech Support: 425-891-6134 Revised 2/22/08 www.steppir.com...
-
Page 2: Abbreviations
SteppIR Antennas - 2 Element Abbreviations Element Support Tube Element Housing Unit Fiberglass Telescoping Pole Quick Disconnect Boot (rubber) SteppIR Antenna Information Web Sites(as of 4/09/07) http://steppir.com/ http://groups.yahoo.com/group/steppir/... -
Page 3: Steppir "Why Compromise
SteppIR to be a commercially feasible product. The current and future SteppIR products should produce the most potent single tower antenna systems ever seen in Amateur Radio! We thank you for using our SteppIR antenna for your ham radio endeavors. -
Page 4: Steppir Design
Optimal perform- ance is then possible on all frequencies with a lightweight, compact antenna. Also, since the SteppIR can control the element lengths, a long boom is not needed to achieve near optimum gain and front to back ratios on 20 - 10 meters. -
Page 5: Table Of Contents
SteppIR Antennas - 2 Element Table of Contents Topic Page Abbreviations SteppIR “Why Compromise” SteppIR Design Table of Contents 2 element Yagi Installation Boom Assembly Element Spacing and Installation Layout Connect the Boom to the Mast Plate Determining the Direction of the Antenna... - Page 6 SteppIR Antennas - 2 Element...
-
Page 7: Element Yagi Installation
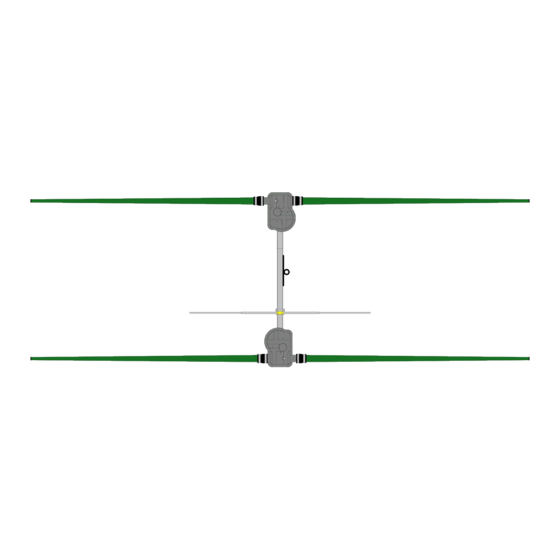
2 Element Yagi Installation The 2 element SteppIR Yagi boom consists of two sections of aluminum tubing that are 57 inches long x 1-3/4” OD x 1/8” wall, along with two aluminum antenna housing brackets as shown in Figure 1. The ele- ment housing brackets are pre-installed at the factory. -
Page 8: Element Spacing And Installation Layout
SteppIR Antennas - 2 Element 2E Without 40m-30m Dipole Kit 2E With 40m-30m Dipole Kit (not to scale) (not to scale) Figure 9 3 0 i n . F r o m c e n t e r o f... -
Page 9: Connect The Boom To The Mast Plate
Determining the Direction of the Antenna The SteppIR Yagi has three “directions” in which it can be used. Normal, 180 degree and bi- directional. When the antenna is installed on its mast the passive element should be facing the direction the rotator indicates. -
Page 10: Attaching The Element Housings To The Element Bracket
SteppIR Antennas - 2 Element Attach the Element Housing to the Element Bracket Place the flat side of the element housing unit (EHU) on top of the element to boom brackets (Figure 17). The housing without the SO-239 coax connector is the director, the one with the SO-239 connec- tor is the driven element (the balun is on the inside of this housing). -
Page 11: Connect The Wiring And Secure It To The Boom
You will need to connect all three of these to the single terminal strip (Figure 27, Figure 25). WARNING: While the 2 element Yagi has only 8 wires that are used, it is still extremely important that you hook up the remaining 4 wires. Even though these wires are not used, they still have power being supplied to them, so hooking them to the terminal strip will eliminate the chance of shorting. - Page 12 SteppIR Antennas - 2 Element Figure 25 Figure 27 When the connections have been secured, you will want to position the cables so that they are parallel with the 12 position terminal strip (Figure 29). The 12 conductor cable will be at one side, and the 2 four conductor cables will be at the other.
-
Page 13: Attach The Wiring Enclosure & Control Cable To The Boom
SteppIR Antennas - 2 Element Attach the Wiring Enclosure and Control Cable to the Boom Position the plastic enclosure in a convenient position on the boom or mast (the terminal housing mounting location is not critical) making sure that the groove in the cap is facing downward. We do not seal the cap so that in the event there is water accumulation inside the enclosure from condensa- tion, it will be able to escape. -
Page 14: Preparing Telescoping Fiberglass Poles (Est)
SteppIR Antennas - 2 Element Prepare the Fiberglass Telescoping Poles Locate: Four dark green fiberglass telescoping poles (Figure 37) ● Four quick disconnect boots (rubber) with clamps ● One roll of black electrical tape ● Rolls of black silicone self-curing tape (20 ft total) * ●... - Page 15 SteppIR Antennas - 2 Element Warning: Make sure to remove the black rubber plug from the base section of each of the fiberglass telescoping poles. This is a shipping plug for handling convenience and will seriously damage the copper-beryllium tape and drive mechanisms if not removed.
- Page 16 SteppIR Antennas - 2 Element Recommended Lengths for Silicone Tape Wrapping 18 in / 46 cm 16 in / 41 cm 11 in / 28 cm Figure 43 Next, you will weatherproof and UV protect each joint with the black self-curing silicone tape see Fig- ure 41.
-
Page 17: Install The Telescoping Fiberglass Poles (Est)
SteppIR Antennas - 2 Element Installing the Fiberglass Telescoping Poles (FTP) The butt ends of the green fiberglass telescoping poles may vary slightly in outside diameter. Some of them may have been sanded, while others were not. The colors at the ends will be either natural, or black. -
Page 18: Optional 6 Meter Passive Element Installation
SteppIR Antennas - 2 Element Optional 6 Meter Passive Element The 6 meter passive element comes in 3 pieces. The main body with a 1/2” x 58” element section at- tached to it, and two 3/8” element sections (Figure 53). The overall length of the element is approxi- mately 114”... -
Page 19: Steppir Warranty
(2) years from date of sale. Do not modify this product or change physical construction without the written permission of SteppIR Antennas Inc. This limited warranty is automatically void if the following occurs: improper installation, unauthorized modifications, physical abuse or damage from severe weather, beyond the manufacturer's control. - Page 20 Yagi Dipole Vertical...
Need help?
Do you have a question about the 2 Element Yagi and is the answer not in the manual?
Questions and answers