Table of Contents
Advertisement
Quick Links
Advertisement
Table of Contents
Troubleshooting

Related Manuals for PerkinElmer TORION T-9


Summary of Contents for PerkinElmer TORION T-9
- Page 1 GC/MS ® ORION Gas Chromatograph/Mass Spectrometer (GC/MS) User’s Guide...
- Page 2 The information contained in this document is subject to change without notice. Except as specifically set forth in its terms and conditions of sale, PerkinElmer makes no warranty of any kind with regard to this document, including, but not limited to, the implied warranties of merchantability and fitness for a particular purpose.
- Page 3 Council Directive 2000/14/EEC amended by Directive 2005/88/EC (June 17, 2006) about noise limits and labeling requirements machines intended for use outdoors. The Technical Construction File required by this Directive is maintained at the PerkinElmer, 732 East Utah Valley Drive, Suite 120, American Fork, Utah 84003.
- Page 4 . Torion T-9 User’s Guide...
-
Page 5: Table Of Contents
Cleaning the Instrument ................. 26 System Overview ..................... 27 What is solid phase microextraction (SPME)? ............28 What is the Torion T-9 GC/MS? ................29 About the Power Supply and Battery ............... 30 What is the Custodion SPME syringe? ..............31 What is low thermal mass (LTM) gas chromatography? ......... - Page 6 Using Alerts for Hazardous Compounds ............76 Viewing Spectra of a Specific Scan .............. 76 Review the Results of an Analysis................. 82 Viewing the Results on the Torion T-9 GC/MS System........82 Previous Results ..................82 Quantitative Analysis ..................85 Exporting Files ....................
- Page 7 Table of Contents . 3 Target Library ................... 134 Hazard Levels .................... 134 Method Menu ...................... 137 Creating a New Method .................. 138 Load and Delete Methods ................140 Importing a Method ..................141 Saving a Method .................... 142 Save Method As ..................... 142 Rename Method .....................
- Page 8 Removing/Replacing the SD Card ................. 263 Troubleshooting ....................265 Troubleshooting Guide..................266 Torion T-9 GC/MS will not turn on ..............266 Torion T-9 GC/MS will not turn off ..............266 Torion T-9 GC/MS cannot maintain vacuum ............. 266 GC baseline is noisy, or drifts upward .............. 266...
- Page 9 Torion T-9 GC/MS fails to identify a compound ..........271 Torion T-9 GC/MS falsely identified a compound ..........271 Torion T-9 GC/MS fails to reach set temperatures..........271 Torion T-9 GC/MS is unable to run on battery power ........272 Torion T-9 GC/MS suddenly powers down ............272...
- Page 10 6 . Torion T-9 User’s Guide...
-
Page 11: Introduction
I ntroduction... -
Page 12: Overview
The Custodion is used to introduce the sample into the Torion T-9 GC/MS. After injecting a sample into the Torion T-9 GC/MS it is separated into its chemical components. Resolved components are characterized by retention time from the gas chromatograph (GC) and mass spectral fingerprint from the toroidal ion trap mass spectrometer (TMS). - Page 13 Overview . 9 W e use the term CAUTI ON to inform you about situations that could result in serious damage to the instrument or other CAUTION equipm ent. Details about these circum stances are in a box like this one. Caution (Achtung) Bedeutet, daß...
- Page 14 10 . Torion T-9 User’s Guide W e use the term W ARNI NG to inform you about situations that could result in personal injury to yourself or other persons. Details about these circum stances are in a box like this one.
-
Page 15: Safety Practices
Safety P ractices... -
Page 16: Overview
This advice is intended to supplement, not supersede, the normal safety codes in the user's country. It is also a supplement to the PerkinElmer standard Safety and Health Policy. The information provided does not cover every safety procedure that should be practiced. Ultimately, maintenance of a safe laboratory environment is the responsibility of the analyst and the analyst's organization. -
Page 17: Precautions For The Instrument
Precautions for the Instrument . 13 Precautions for the I nstrum ent Be sure that all instrum ent operators read and understand the precautions listed below . I t is advisable to post a copy of the precautions near or on the instrum ent shelf. Assurez-vous que tous les opérateurs d'instrum ents lisent et WARNING com prennent les précautions indiquées ci-dessous. - Page 18 14 . Torion T-9 User’s Guide • Do not block the side vents (if they are open) or rear vents and ports on the instrument to prevent potential damage to the electronics or mechanical pumping systems. If there is blowing dust or rain, make sure that the side and top covers are closed.
-
Page 19: Precautions For Customers
Precautions for Customers . 15 Precautions for Custom ers The laboratory m anager is responsible for w arning operators of this instrum ent about biohazardous m aterials that are processed in this instrum ent and about w astes that result from the operation of this instrum ent. -
Page 20: General Operating Conditions
16 . Torion T-9 User’s Guide General Operating Conditions The Torion T-9 is field portable has been designed and tested in accordance with PerkinElmer specifications and in accordance with industry safety requirements. This equipment requires no specified inspection or preventive maintenance to ensure the continuous functioning of its safety features. -
Page 21: Environmental Conditions
Environmental Conditions . 17 Environm ental Conditions I f the instrum ent is used in a m anner not specified herein, the protection provided by the instrum ent m ay be im paired. Si l'instrum ent est utilisé d'une m anière non spécifiée ici, la WARNING protection fournie par l'instrum ent peut être altérée. -
Page 22: Electrical Safety
The instrument can also run on a 30V, 6.8 Ah Lithium Ion rechargeable battery. Using a battery powered run time of 5 minutes there can be ≤ 2.5 hours of continuous run time. This translates into 15-25 runs per battery charge depending on whether the Torion T-9 GC/MS is turned off between analyses. -
Page 23: Electrical Requirements
Electrical Safety . 19 Electrical R equirem ents Voltage 85 -264V AC Frequency 47-63 Hz Power Max 160 VA The AC Line Cord Do not disconnect or defeat safety ground on the power cord. Ground is necessary for safe operation of the instrument and proper functioning of the electronic circuitry. - Page 24 20 . Torion T-9 User’s Guide...
-
Page 25: Electromagnetic Compatibility (Emc)
All information concerning EMC standards is in the Declaration of Conformity, and these standards may change as the European Union adds new requirements. PerkinElmer instruments have been designed and manufactured, having regard to the state of the art, to ensure that: the electromagnetic disturbance generated does not exceed the level above which radio and •... -
Page 26: Warning Labels
22 . Torion T-9 User’s Guide W arning Labels The following labels are on the instrument. Caution: Hot Surface Attention: Surface Chaude Hot surface by injection port Emergency power off, emergency reset, SD card slot, USB port and LAN port. Located under the cover on top of the instrument. - Page 27 Warning Labels . 23 Carrier gas vent, helium inlet, power connection and minim USB port located on back of instrument Product Label located on bottom of instrument...
-
Page 28: Warning Signs On The Instrument
24 . Torion T-9 User’s Guide W arning Signs on the I nstrum ent Caution: Risk of electric shock. ATTENTION: risque de choc électrique. Indicates alternating current Indicates the OFF position of the main power switch Indicates the ON position of the main power switch Indicates the protective conductor terminal Caution: Risk of danger. -
Page 29: Weee Instructions For Perkinelmer Products
For Customer Care telephone numbers select “Contact us” on the web page. Products from other manufacturers may also form a part of your PerkinElmer system. These other producers are directly responsible for the collection and processing of their own waste products under the terms of the WEEE Directive. -
Page 30: Decontamination
(Brussels) 0800 90 66 42 (Monza) If you are located outside of these regions, please call your local PerkinElmer sales office for more information. Cleaning the I nstrum ent Exterior surfaces may be cleaned with a soft cloth, dampened with a mild detergent and water... -
Page 31: System Overview
System Overview... -
Page 32: What Is Solid Phase Microextraction (Spme)
Rather than thicker sorbent, longer fibers may be used to increase sensitivity; however, longer fibers may not be used on the Torion T-9 GC/MS, the instrument is not designed to accept them and they may break inside the injection port. Sorbents with greater selectivity to the target chemicals will improve sensitivity;... -
Page 33: What Is The Torion T-9 Gc/Ms
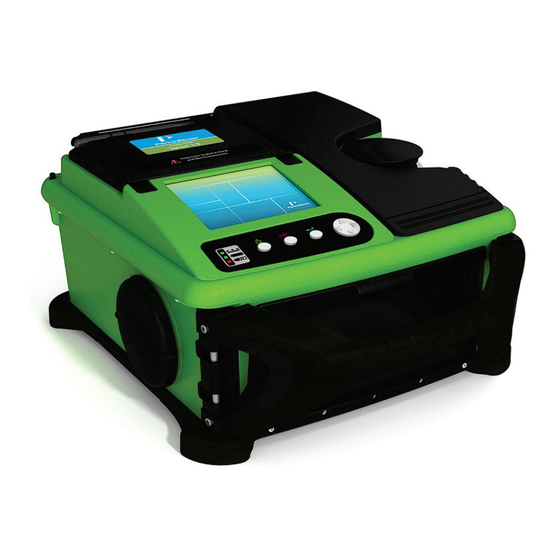
W hat is the Torion T-9 GC/ M S? The Torion T-9 GC/MS is an easy to use, hand-portable system. The primary purpose of the Torion T-9 GC/MS is to allow rapid chemical analysis and detection on-site so that informed decisions based on chemical analysis can be made as quickly as possible. -
Page 34: About The Power Supply And Battery
The following image shows the battery indicator lights on the Torion T-9 GC/MS. • If the top indicator light is lit the Torion T-9 GC/MS is connected to line power and there is not battery installed. If the second indicator light is lit then the Torion T-9 GC/MS is operating from battery power •... -
Page 35: What Is The Custodion Spme Syringe
W hat is the Custodion SPM E syringe? The SPME syringe designed for the Torion T-9 GC/MS is called the Custodion. The Custodion triggers the injection and analysis to start on the Torion T-9 GC/MS without having to push a “start analysis” button. -
Page 36: What Is Low Thermal Mass (Ltm) Gas Chromatography
32 . Torion T-9 User’s Guide W hat is low therm al m ass (LTM ) gas chrom atography? In microcolumn gas chromatography (GC), volatile chemicals separate as they travel through a capillary column. Separation is dependent upon the equilibrium distribution of each chemical between a liquid coating on the capillary wall and the carrier gas flowing through the capillary. - Page 37 The low thermal mass of this column heating arrangement allows for much smaller instrumentation and lower operating power as well as faster heating and cooling of the column. The GC in the Torion T-9 GC/MS is an LTM GC.
-
Page 38: What Is Toroidal Ion Trap Mass Spectrometry (Tms)
(e.g., abstraction of hydrogen or addition of hydrogen or other species). Hard ionization processes yield fragments of the chemicals. The following is an example of a mass spectrum obtained by the Torion T-9 GC/MS showing the mass-to- charge (m/z) of ionized fragments of diethyl phthalate. - Page 39 TMS combines many advantages of larger non-toroidal ion traps, such as simplicity, pressure tolerance, and comparable ion storage volume. The miniature TMS operates at less than 2.5 kV, compared to 15 kV for the larger alternative portable ion trap. The following figure is a top view of the Torion T-9 GC/MS.
- Page 40 36 . Torion T-9 User’s Guide...
-
Page 41: Basic Custodion Operations
Basic Custodion Operations... -
Page 42: Prepare The Custodion Spme Syringe For Sampling
Insert the syringe needle (with the fiber retracted) of the Custodion syringe into the injection port of the Torion T-9 GC/MS or other GC (heated to at least 250ºC). Depress the plunger to extend the SPME fiber and allow the fiber to desorb contaminants for 30–60 seconds or longer if necessary. -
Page 43: Using The Custodion
Using the Custodion . 39 Using the Custodion Detection of target chemicals by the Torion T-9 GC/MS depends on adsorption to (extraction) and desorption from (injection) the SPME fiber. Adsorption depends on the partition coefficient of the target chemical between the fiber coating and the sample matrix. Detection also depends on the volatility and molecular mass of the target chemical (45–500 amu). -
Page 44: Sample Gases
40 . Torion T-9 User’s Guide Sam ple Gases Vapors in air or other gas samples can be sampled directly or from a gas sampling container using the Custodion syringe. The steps for vapor headspace analysis (as discussed above) should be followed when applicable. -
Page 45: Sample Solids
Dépositaire à travers le septum de l'échantillon. Prior to injection on the Torion T-9 GC/MS, extend the SPME fiber out of the Custodion syringe needle and shake off residual sample droplets that may have been taken up in the syringe needle during sampling. - Page 46 42 . Torion T-9 User’s Guide L iquid Unknown S ample T ake heads pace of s ample in environment If s ample detection is too low If s ample detection is too high Increase expos ure time T ake heads pace with s horter expos ure time P lace s ample into a vial and take heads pace R educe the time of expos ure in injector port.
- Page 47 Using the Custodion . 43 S olid Unknown S ample T ake heads pace of s ample in environment If s ample detection is too low If s ample detection is too high Increase expos ure time T ake heads pace with s horter expos ure time P lace s ample into a vial and take heads pace R educe the time of expos ure in injector port H eat vial (warm with hand or other means...
-
Page 48: Performing An Injection With The Custodion Syringe
Perform ing an I njection w ith the Custodion Syringe When performing an injection with the Custodion Syringe on the Torion T-9 GC/MS make sure the gold rings on the Custodion Syringe touch the contact points on the GC injection port. When the contact points connect with the Custodion Syringe the instrument automatically starts a run. -
Page 49: Basic Operation
Basic Operation... -
Page 50: Overview
To launch the software double-click on the GC-MS icon. The Torion T-9 GC/MS™ system is equipped with a touch screen interface. It also has a USB port and a USB mouse can be connected directly to the instrument. The functionality of the touch screen is the same as for a mouse. -
Page 51: Startup
50-60 Hz AC. The following figure shows the power supply connected to the back of the instrument. Connect the lab helium to the external helium port located at the rear of the Torion T-9 GC/MS. The fitting that connects to the Torion T-9 GC/MS is a quick connection type of fitting that attaches to 1/16”... - Page 52 48 . Torion T-9 User’s Guide The following figure shows the Torion T-9 GC/MS rear connection ports: (1) 24VDC Adapter connection and (2) Helium external port. P rior to the nex t step, regulate the ex ternal gas pressure to a m inim um of 80 psi.
- Page 53 ® software icon. Use the stylus to double tap the GC-MS icon to start the Torion T-9 GC/MS operating system. As soon as the software starts, the instrument will enter the pump down state automatically. Once a vacuum is established then the instrument will initialize the heated zones to the method set points.
-
Page 54: Home Screen
50 . Torion T-9 User’s Guide Hom e Screen The Home screen is used to initialize all operations. In addition, this is the screen that the instrument returns to whenever the Home button is selected from any other screen. In the middle section of the status bar, the name of the activated method is displayed. In this example the method name is Target rev7A. -
Page 55: Using The Custodion Syringe
NOTE: If the system is connected to an external helium source and a helium cartridge is not installed in the Torion T-9 GC/MS system, the icon will indicate that the amount of helium left is zero (0). The last icon shows the status of the instrument. - Page 56 52 . Torion T-9 User’s Guide a. The gold rings on the SPME syringe holder must contact the points indicated on the GC injection port. The following figures show (1) SPME Syringe Gold Rings and (2) GC Injection Port Contacts.
- Page 57 Startup . 53 You should follow the on-screen instructions to remove the SPME. Immediately depress the plunger on the SPME syringe to retract the fiber into the Custodion needle and remove the syringe. Ensure the SP M E fiber is com pletely w ithdraw n inside the syringe needle, before rem oving the Custodion from the injector port.
- Page 58 54 . Torion T-9 User’s Guide When the GC-MS analysis of the sample is complete, the following screen will appear. This screen displays the chromatogram and library hits. Table 5-1 Screen Table Descriptions Heading Description The chromatographic Retention Time. Identification The name of the compound.
- Page 59 Startup . 55 The Waiting icon in the status bar will appear and the Start Run button will be gray while the column temperature is returning to the initial temperature setting in preparation for the next analysis. To run another sample press the Start Run button and follow the on-screen instructions.
-
Page 60: Performing A System Blank Run
SPME syringe. NOTE: Neither type of blank run is used for a background subtraction by the Torion T-9 GC/MS. However, the chromatographic and mass spectrometric data from a blank run may help identify contamination in the instrument or on the SPME fiber. - Page 61 Performing a System Blank Run . 57 The file name is in a date and time stamp format. The default Data File Name will show System Blank plus the date and time. However, a specific file name can be assigned to the run by selecting the current name in the field and entering the specific name.
- Page 62 58 . Torion T-9 User’s Guide A screen similar to the following is displayed after the system blank is performed and analyzed. NOTE: Blank runs should look like the following chromatogram (only a small single peak is present at approximately 1.0 on the X-axis). If additional peaks are observed in the chromatogram and do not go away after 7 system blanks, contact PerkinElmer.
- Page 63 Performing a System Blank Run . 59 The following screen is an example of a contaminated System Blank run. As shown in the text at the top of the screen an actual System Blank was run, but there were contaminant peaks. The peaks were either identified or listed as unknown compounds by the library.
-
Page 64: Spme Blank
60 . Torion T-9 User’s Guide When finished, press the Home button to return to the home screen. From the results screen choose Home to continue running the instrument. On completion, press the Home button to return to the Home screen. - Page 65 Performing a System Blank Run . 61 Without placing a sample on the SPME syringe select the Start Run button on the Home screen. The injection instructions will appear. The system will automatically start a run. Follow the instructions on the screen to complete the injection process.
- Page 66 62 . Torion T-9 User’s Guide NOTE: Blank runs should look like the chromatogram shown above (only a single small peak is present at approximately 1.0 on the x-axis). Sometimes if a SPME fiber is contaminated, it will take a few injections to clean.
-
Page 67: Performance Validation
Performance Validation . 63 Perform ance Validation Refer also to the Performance Validation section located in the Chromion software chapter. Purpose of a Performance Validation (PV): To calibrate the instrument to display the correct masses. To calibrate the retention times of the peaks for better unknown compound detection. ... - Page 68 64 . Torion T-9 User’s Guide Expose the fiber for 30 seconds in the CALION vial. Depress the plunger to retract the fiber into the syringe needle and remove the syringe from the CALION vial. Check that the SP M E fiber is retracted into the Custodion syringe needle, before inserting the needle into the injection port on the instrum ent.
- Page 69 Performance Validation . 65 The gold rings on the Custodion SPME syringe must contact the points on the GC injection port. The instrument will NOT start an analysis if the Custodion syringe does not come in contact with these contact points. (1) SPME syringe gold rings (2) GC injection port contacts NOTE: It is important to be sure the plunger is not depressed until the SPME syringe is fully inserted.
- Page 70 66 . Torion T-9 User’s Guide When prompted retract the fiber and remove the syringe needle. Be sure the SP M E fiber has been retracted into the syringe CAUTION needle, before rem oving the needle from the injection port.
- Page 71 To view and export the report, press View Details then View Report. If you have not achieved a PASS after 13 attempts, contact PerkinElmer. Press View Report to examine the details of the failures. Pressing the Up or Down and Left...
- Page 72 68 . Torion T-9 User’s Guide To export the data to a USB drive press the Export button. Insert a USB drive into the slot under the Utility Cover. Press Export Files. A window displays with the SD card file structure on the instrument.
-
Page 73: Sample Concentration
Performance Validation . 69 Press OK to export the data files. On completion a confirmation message displays a successful export. Press the Back button to return to the Performance Validation Results screen. Sam ple Concentration When the instrument is being run, the split flow settings in the GC method are used automatically. Occasionally users may see samples with very low concentrations to very high concentrations where the split flow should change, but the method does not need to be changed. - Page 74 70 . Torion T-9 User’s Guide Table 5-2 Split Valve Flow Ratios Split 50 to1 • High Concentration_Open = 0 • VOC-Low Concentration_Open = 10 • SVOC-Low Concentration_Open = 10 • High Concentration_Closed = 30 • VOC-Low Concentration_Closed = 30 •...
-
Page 75: Sample Analysis
To edit the displayed file name, click in the Data File Name field to open the on-screen keyboard and enter the changes. NOTE: An external keyboard may also be plugged into Torion T-9 GC/MS’s USB port for entering sample names. - Page 76 72 . Torion T-9 User’s Guide Be sure the face of the Custodion syringe (the red disc w ith the gold rings) m akes good contact w ith the contact points on the instrum ent as soon as the syringe is inserted.
- Page 77 Sample Analysis . 73 The analysis may take several seconds to minutes depending on the injection type used to complete. Retract the fiber when prompted and remove the Custodion SPME syringe. Be sure the SP M E fiber has been retracted into the syringe needle, before rem oving the needle from the injection port.
- Page 78 74 . Torion T-9 User’s Guide a. With the Split View option selected during a run, the total ion chromatogram (TIC) is plotted at the top of the screen and the mass spectra are shown on the bottom plot. b. The spectra plot shows the most recently collected spectra.
- Page 79 Sample Analysis . 75 If the Cancel Run button is pressed during the data processing step, the software will stop processing the data and no results will be saved for that sample. NOTE: If VN C is being used to navigate the instrument and it becomes necessary to stop the processing of a sample or performance validation run clicking the ESC key on the computer keyboard will abort the run process if the buttons Stop R un and Cancel Run are not visible for use on the VNC window.
-
Page 80: Using Alerts For Hazardous Compounds
76 . Torion T-9 User’s Guide Using Alerts for Hazardous Com pounds If an Alert has been programmed into the method for a specific compound or multiple compounds the hazard level text will appear in the Alert column on the instrument results window at the end of a run. - Page 81 Sample Analysis . 77 Place the cursor at the location where the spectra are required. The following image shows the spectra of the compound peak selected in the image. Clicking Split View displays the spectra of the selected scan in the lower pane. Click and drag the cursor to form a square around the peaks to zoom in on the chromatograph.
- Page 82 78 . Torion T-9 User’s Guide The spectra plot can now be viewed more clearly using the zoom functionality. The following image shows the zoom functionality being used in the chromatogram section of the run results. Clicking on the x-axis opens an options list.
- Page 83 Sample Analysis . 79 Selecting Enable Annotations will place the compound name on the peaks. When selecting Enable Annotations the compound name will appear on the peak in the TIC graph. After zooming in on either the TIC plot or the spectra plot tap the bottom axis area of the plot with the stylus.
- Page 84 80 . Torion T-9 User’s Guide Selecting the More Options button displays a popup with additional functions. Details When clicking Details for the selected compound in the results list information will be retrieved from the NIOSH database which is located on the SD card.
- Page 85 Sample Analysis . 81 Export to USB… - This option can be used to export .RES file to the USB drive. This file contains the RAW data, method information, .CDF file and the report file. The .TXT includes the summary of the analysis report. Export Report (Wireless) - Used to export a report containing the analysis report using the wireless modem to a remote PC that is equipped with a wireless modem.
-
Page 86: Review The Results Of An Analysis
This section explains how to view the results of an analysis after the run has been completed. The results may be viewed on the Torion T-9 GC/MS system or on a PC using the Chromion software. The results of an analysis include: •... - Page 87 Review the Results of an Analysis . 83 Highlight and double-touch the desired folder. A list of all the data files within the chosen folder will be displayed. Touch the data file to be viewed from the list. You can move through the Results list by either using the arrows and sliders on the edge of the results window or by using the Up and Down buttons.
- Page 88 84 . Torion T-9 User’s Guide Touch the View button to view on the instrument the results of the data file. The following screen is displayed while the instrument loads the data file. After the data file has been loaded into the window the previous results of the run will be...
-
Page 89: Quantitative Analysis
Review the Results of an Analysis . 85 Quantitative Analysis To activate the Quantitative Analysis: From the Advanced menu, select Method. The Methods window displays. Select a method that has been set up for quantitative analysis in the Chromion software. Press Activate. - Page 90 86 . Torion T-9 User’s Guide Enter an appropriate Multiplier if the actual sampling conditions are different from what is specified in the Method. For example, if the Method specifies sample collection of 1.0 L of air, but you were only able to collect 0.5 L, you would enter a multiplier of 2.00 (1.0 L / 0.5 L).
-
Page 91: Exporting Files
Review the Results of an Analysis . 87 Ex porting Files There are two ways to export files from the instrument SD card to a USB storage device. From the Home screen choose the Previous Results button, and then select a file for exporting. - Page 92 88 . Torion T-9 User’s Guide The following screen will be displayed. The Windows CE directory for the Torion T-9 GC/MS system is displayed on the left. The Hard Disk is the storage device plugged into the USB port. You should navigate to and highlight the location where the data files are to be exported.
- Page 93 Review the Results of an Analysis . 89 Hazard database information is displayed for selected chemicals in the Details results list. Used to export .cdf .res and .txt files to the USB drive. • .cdf contains the processed GCMS data analysis Export to USB •...
-
Page 94: Advanced Menu
Procedure (SOP). A Procedure consists of a series of pre-programmed steps (like a macro language) that are automatically executed to guide you in the operation of the Torion T-9 GC/MS system. Contact PerkinElmer for more details on how to create Procedures. -
Page 95: Ending A Procedure
Pressing the View button allows you to view the contents of a Procedure. If there is interest in creating proprietary custom Procedures based on the Standard Operating Procedures developed locally for use on the Torion T-9 system, contact PerkinElmer for more information. -
Page 96: Selecting A Different Procedure
92 . Torion T-9 User’s Guide Pressing End SOP (see the above screen) displays an intermediate screen that indicates the current procedure has ended. Pressing Restart Procedure restarts the current (just ended) Procedure from the beginning. Pressing Activate Last Method allows you to continue running samples using the currently activated Method. -
Page 97: Status/Diagnostics
Advanced Menu . 93 Status/ Diagnostics Selecting Status/Diagnostics displays the following screen, under which the following tabs are available: Gas Chromatography, Mass Spectrometry, Versions, Status, Edit and Current Problems. Gas Chrom atography Tab This tab shows the actual temperatures and pressures of the various components of the GC. It also shows the Split/Splitless Settings for the currently active method. -
Page 98: Versions Tab
94 . Torion T-9 User’s Guide Versions Tab With the Versions tab selected all build numbers of software can be viewed. This information is helpful when determining the correct control software has been activated on the instrument. Status Tab This screen shows the percent of Battery life remaining, as well as other data on instrument... -
Page 99: Edit Tab
As soon as the field is touched with the stylus or with the mouse when using VNC a screen will open in which to enter the password which is required to make a change. Enter the password and then click Continue. Contact a PerkinElmer Service Representative for the T-9 password. The fields are now editable. - Page 100 96 . Torion T-9 User’s Guide As soon as the values have been changed click on the Home button. The changes will be saved and the home screen will display. These changes tak e effect im m ediately (even in the m iddle of a run) and should only be adjusted by ex perienced users.
- Page 101 Advanced Menu . 97 Enter in the system password using the floating keyboard or the mouse and keyboard if VNC is being used and click Continue. Click the button marked Exit Software again. A confirmation dialog will display with three options. Shutdown Normally - This option will shutdown the pumps and the heaters.
-
Page 102: Current Problems Tab
98 . Torion T-9 User’s Guide Current Problem s Tab This window displays any active (unresolved) problems with the system. You would use this screen if a problem were reported by a Warning or Error message that was displayed during operation of the instrument. -
Page 103: Manage Files
Advanced Menu . 99 M anage Files The Manage Files tool is used to rename, delete or copy files from the SD Memory Card on the instrument to a USB flash drive. From the home screen press the Advanced button and then Manage Files. Click the expand icon next to the Storage Card folder. -
Page 104: Methods
100 . Torion T-9 User’s Guide Select one of the files and click OK displays a different view in which to select the files to be copied, deleted, or renamed. Selecting the Home button will return the display to the home screen. - Page 105 Advanced Menu . 101 Move through the method list by either using the scroll bar or the Up and Down buttons. Select a method then press the Activate button. This action loads the method on the instrument for all runs until changed to a different method.
- Page 106 102 . Torion T-9 User’s Guide Data Analysis - This screen displays the name of the library that is part of the selected method. Click on the Activate button to load the selected method which will be used by the •...
-
Page 107: System Settings
Advanced Menu . 103 System Settings The following screen shows the System Settings. From the home screen press the Advanced button and then click System Settings. Setting the Date and Tim e Press the Set Date/Time button to display the Date/Time Settings screen in which the date, time, and time zone can be adjusted on the instrument. -
Page 108: Password
104 . Torion T-9 User’s Guide Passw ord Select the Password option from the System Settings screen to open the Change Password screen. This screen is used to change the system password. Enter the Old Password using the stylus on the floating keyboard. -
Page 109: Network Settings On The Instrument
PC. If the Torion T-9 GC/MS is going to be connected through a network, the instrument can be set to either get its IP address from the network using the DHCP protocol or it can be set to a compatible static IP address. -
Page 110: Power Management
Ensure that the Chromion computer is using the same DHCP server and has a matching IP address and Subnet mask before opening the software. Setup the IP address on the Torion T-9 GC/MS instrument using a Static IP address: Follow the instructions above to access the Network adapter settings. - Page 111 Advanced Menu . 107 Enter an integer value between 0 and 24 hours if you need to change it. If it is set to any value above 0, the instrument will shut down in that amount of hours after the last button input was pressed.
-
Page 112: Shutdown
NOTE: The Helium Cartridge should be vented and removed before shipping the system or transporting the Torion T-9 GC/MS system on a commercial aircraft. In most situations, the helium cartridge does not need to be vented during the shutdown process. -
Page 113: Exiting The Software
Shutdown . 109 time. After the button is no longer active the venting process will continue and the shutdown process cannot be aborted. Cancel Shutdown is the second button that becomes available on the shutdown screen. Pressing it will stop the shutdown process and restore the pumping system and the heaters. The home screen will display when the system is ready to run samples again. - Page 114 110 . Torion T-9 User’s Guide Contact a PerkinElmer A window will display in which the system password must be entered. Service Representative for the T-9 password. Using the stylus tap in the letters/numbers in the Enter Password field and press Continue.
- Page 115 Shutdown . 111 An Exit Software dialog will appear asking “Are you sure you want to exit the software?” with three options. Shutdown Normally - This option will shutdown the pumps and the heaters. It will be • the same process as the first procedures discussed in this section. Exit Now - This option will exit the current GUI application and return the user to the •...
- Page 116 112 . Torion T-9 User’s Guide...
-
Page 117: Software
Softw are... -
Page 118: Software Programs
Torion T-9 GC/MS instrument. TightVNC View er This software is used to monitor and control the Torion T-9 GC/MS from a PC. The viewer functions as a ‘Remote Desktop’ to view and interact with the touchscreen interface on the Torion T-9 GC/MS from the PC. -
Page 119: Chromion Installation And Operation
M ethods created w ith Chrom ion Version 1 RC4 and before are not properly configured to run perform ance validation on the Torion T-9 instrum ent. To m ak e them com patible open a m ethod in Chrom ion and then open P erform ance Validation. -
Page 120: Chromion Main Screen
116 . Torion T-9 User’s Guide Chrom ion M ain Screen This image shows the initial screen that appears when opening the Chromion software. There are many ways to navigate within Chromion. The main functionality is accessible from the navigation pane on the left side of the window. - Page 121 Chromion Main Screen . 117 The navigation pane on the left side of the screen provides centralized navigation to easily access the Chromion forms which are bundled in different categories such as; Method, Tools, and Hardware. When using a laptop it can be useful to hide the navigation pane in order to increase the viewable area of the screen.
-
Page 122: Connecting Chromion To A Networked Instrument
118 . Torion T-9 User’s Guide Connecting Chrom ion to a Netw orked I nstrum ent A list of instruments on the same network as the computer will become available when clicking on the vertical expand/collapse arrows located to the right of the Hardware category. - Page 123 Chromion Main Screen . 119 Connect Instrument opens a connection between the computer and the selected • instrument. If the instrument is already connected to a different computer an error message will be displayed. Disconnect Instrument disconnects the selected instrument from Chromion, if it is •...
- Page 124 120 . Torion T-9 User’s Guide Double-clicking on a selected instrument will also connect and disconnect the instrument from Chromion. The icon next to the instrument name will change to a blue connector when connected and to an instrument icon when not connected. The following image shows the instrument named Metallica connected to Chromion.
- Page 125 Chromion Main Screen . 121 Upon clicking Static Instruments… the Instrument Setup dialog will open. Click on the green button with a white plus sign to add an instrument. By moving the cursor over the green icon a name will appear Add Instrument. By clicking on the icon a dialog will be displayed in which the instrument name and IP address can be entered.
- Page 126 122 . Torion T-9 User’s Guide By selecting the newly added static instrument and clicking on the Ping Instrument icon which is the icon with an image of a clock the connectivity of the instrument can be checked When a static instrument is no longer required it can be deleted from the Instrument Setup dialog.
- Page 127 Chromion Main Screen . 123 The icon for the instrument with the static IP address will be different than an instrument on the network. The icon will appear as a user. After connecting to the instrument the icon will change to the blue connector.
-
Page 128: Chromion Menu Bar
124 . Torion T-9 User’s Guide Chrom ion M enu Bar The following menu items (File, Edit, Method, and Help) are always present on the menu bar. Some of the contents of these menus change as needed for a specific open form. -
Page 129: Edit Menu
Chromion Menu Bar . 125 Edit M enu Preferences The Preferences… option is located in the Edit drop-down menu of the menu bar. This option allows setting changes of functional preferences for different sections of Chromion. The functions will be described throughout this section of the manual and will only make sense when placed in context of the software section. - Page 130 126 . Torion T-9 User’s Guide The Y Axis Display tab contains options that can be used to modify the information appearing in the Data Review graphs on the Y axis. The Mode option is a toggle between Absolute and Percent for the Mass •...
- Page 131 Chromion Menu Bar . 127 The Settings tab of the Data Review preferences contains several options that can be enabled/disabled. Mass Fragments allows the user to set the display to filter out mass fragments that • have a relative percent response below the value set in the Exclude under box. When Ion Select Mode is set to On the selected mass in the Mass Spectrometer graph •...
- Page 132 128 . Torion T-9 User’s Guide The Compound Peak Labeling tab offers several automatic labeling options for the TIC graph in Data Review. When running deconvolution on a RES file the results of the known and unknown compounds can be labeled in one of two different viewing preferences, either Vertical or Horizontal which can be selected using the toggle for both known or unknown compounds.
-
Page 133: Real Time Plots Tab
Chromion Menu Bar . 129 R eal Tim e Plots Tab The Real Time Plots tab has settings that control the way the plots are updated and displayed in the Real Time Plots form in the Tools category of Chromion. The Refresh Rate is used to control the update rate of the data. - Page 134 130 . Torion T-9 User’s Guide The Results and Data folders located in the Calibration folder store autocal files generated from Performance Validation runs on the instrument. These files can be used to tune the instrument using Chromion. The Data folders store the files generated from the blank and sample runs on the instrument.
- Page 135 Chromion Menu Bar . 131 NOTE: It is recommended the P reference option for File Manager Show all folders on instrum ent remain unselected to avoid inadvertent deletion of necessary files. Notice in the image above the folder highlighted in blue. The contents of the folder are displayed in the lower right quadrant.
- Page 136 132 . Torion T-9 User’s Guide NOTE: When a change to P references for File M anager is implemented a notification dialog will be displayed indicating that File Manager must first be closed and then reopened for the changes to take effect.
-
Page 137: Nist Tab
Chromion Menu Bar . 133 NIST Tab The NIST tab in Preferences is used to enter the search path and spectra filename used when attempting to search the NIST library also known as the National Institute of Science and Technology reference materials library from within Data Review. When clicking on the Find NIST…... -
Page 138: Target Library
The following option appearing in Edit of the menu bar is Hazard Levels… which is used to configure safety information that will be displayed on the Torion T-9 when target compounds have been identified. The following image shows the Hazard Level List dialog box. - Page 139 Any numerical value can be entered into the Hazard Level column. Compounds assigned to numeric values 50 and above will appear highlighted in red on the Torion T-9 results screen. Compounds assigned to numeric values 49 or less will appear highlighted in orange.
- Page 140 136 . Torion T-9 User’s Guide Paste Compound… This option is used to paste a compound to another list from the • target list. However, if Target Library Editor is closed and when the Data Review window is active the available options will change relative to functionality used in Data Review: Overlay Files…...
-
Page 141: Method Menu
Import… This option allows importing a previously exported method. This is a • convenient way to move information like target compound lists and GC parameters from one Torion T-9 to another Torion T-9 system. When a Method is loaded into Chromion there are eight options available on the Method menu. -
Page 142: Creating A New Method
Chromion software or to delete a method from the database. Import … This option allows importing of a previously exported method. This is a convenient way to move information like target compounds lists and GC parameters from one Torion T-9 to another Torion T-9 system. - Page 143 Method Menu . 139 Type a Method name and then click OK. By clicking the OK button a new method is created in the database. After entering a method name and clicking OK two verification dialogs display. The first message that displays is: “The Performance Validation (calibration) data in this method is not valid.
-
Page 144: Load And Delete Methods
140 . Torion T-9 User’s Guide A Method contains a lot of information. In most cases it is easier to open an existing method and under the Method menu select Save As… and give the open method a new name. -
Page 145: Importing A Method
I m porting a M ethod If a connection is made to a Torion T-9 instrument when clicking the Import… option which is available from the Method drop down menu or by clicking on the Import Method icon in the method toolbar the Import Method dialog will open. -
Page 146: Saving A Method
142 . Torion T-9 User’s Guide Method Currently Loaded On Instrument loads the active method on the instrument • into the Chromion software. If there is no instrument connected this option will not be available. From Local File allows you to navigate to a file location on the computer where an •... -
Page 147: Export Method
Method Menu . 143 The original method name will appear in the field. The name can be revised or replaced by entering another name. After entry of the name click the OK button to close the dialog. Ex port M ethod When selecting Export…... - Page 148 If the attempt to send the method continues to fail restart the instrument and re-establish communication. If the file cannot be sent, contact PerkinElmer for assistance.
-
Page 149: Help Menu
When clicking Diagnostics… on the Help menu a window opens that allows entry of a command that will return various information helpful when troubleshooting issues in Chromion and on the instrument. Should the need arise a PerkinElmer support representative will instruct the user of commands to enter. -
Page 150: Gas Chromatograph
146 . Torion T-9 User’s Guide Gas Chrom atograph Gas Chromatograph is the first form that appears in the Method section of the navigation pane. The instrument’s operational parameters for Gas Chromatograph can be altered in Chromion. Many of the parameters interact directly with important instrument functions. -
Page 151: Gas Chromatograph Mini Toolbar
Gas Chromatograph . 147 Gas Chrom atograph M ini Toolbar Besides the Method toolbar which resides directly above the Method group title in the navigation pane, Gas Chromatograph has a mini toolbar with icons which activate according to the selected tab and required functionality. The mini toolbar displays to the right of the method toolbar. -
Page 152: Gc Settings Tab
In order for the instrument to work well the starting temperature should be at least 5°C above ambient if the side vents on the Torion T-9 GC/MS-9 are open and at least 10°C above ambient if they are closed. The instrument has been tested and can run reliable at ambient temperatures as high as 40°C with a... -
Page 153: Split Injection
This allows the pressure to be set to a plus or minus offset during pre-injection conditions. NOTE: Pre-injection conditions are set and held during the time after the start button on the Torion T-9 GC/MS has been pressed and before an injection is made. These conditions are maintained for 1 minute. -
Page 154: Sample Introduction
150 . Torion T-9 User’s Guide Sam ple Introduction The Sample Introduction section contains settings that are used to control the way the Torion T- 9 GC/MS responds during sample injection. The Desorption time is the time that either a SPME or Needle Trap is left injection port. Longer times maybe needed for less volatile compounds. -
Page 155: Retention Time Calibrations Tab
Gas Chromatograph . 151 R etention Tim e Calibrations Tab The Retention Time Calibration tab is used to set up the instrument to determine retention index values. Using retention index times makes it easier to transfer methods between instruments. In addition, using retention indexes allows you to modify the GC method without losing peak identification information. - Page 156 152 . Torion T-9 User’s Guide This section includes the following functions: Manual Calibration Data allows manual entry of values in the calibration table. This • allows entry of a retention index value for a specified retention time. Auto Calibration Data (Read Only) uses the auto-calibration function to automatically •...
-
Page 157: Target Library Editor
Target Library Editor . 153 Target Library Editor Target Library Editor is the second form appearing in the Method section of the navigation pane used for modification of methods used on the instrument. Target Library Editor includes seven tabs: Target List Setup, Deconvolution Parameters, Quant Overrides, Quant Concentration, Quant Files, Quant Review, and Groups. - Page 158 154 . Torion T-9 User’s Guide Import Target List from File - This icon opens the normal Windows Open dialog • box and allows importing of a previously exported Target Library Editor for the current method. This icon is available from all Target Library Editor tabs.
- Page 159 Target Library Editor . 155 Using this functionality in the Target List Setup tab the option to propagate the same value to all compounds in the target list for the Compound Type, Hazard Levels, or Reference Compounds columns can occur. Using this same feature to propagate values can also be used in the Quant Concentrations tab.
- Page 160 156 . Torion T-9 User’s Guide The concentration units can be any label typically consistent with the standard used. Examples might be mg/M , ppm, ppb, % or v/v. This label will be display on the instrument and in the text reports used in Chromion.
-
Page 161: Target List Setup Tab
Target Library Editor . 157 Target List Setup Tab The Target List Setup is a subset library used to target compounds of particular interest to you. It is different from the unknown library because it contains specific information that is influenced by some of the instrument settings. - Page 162 158 . Torion T-9 User’s Guide Clicking the right mouse button on a mass displays the Delete Mass option to use to delete a specific mass. If a mass is deleted by accident exit the Target Library Editor without saving the method, when prompted to save the method select No.
- Page 163 Target Library Editor . 159 The main table displayed is the actual Target List. The Target List contains the following columns: a) The Compound Name column is where the name of a target compound is entered. This column can accept any typed in name. b) A CAS number can manually be entered into the CAS column.
- Page 164 160 . Torion T-9 User’s Guide None indicates that the method will not attempt to calculate a quantitation value • for the compound. Target Compound indicates that the method is meant to calculate a concentration • for the compound. Internal Standard indicates that the compound is an internal standard to be used •...
- Page 165 Target Library Editor . 161 Placing the cursor in the area of the Target List and right clicking will display a popup menu • with options specific to the Target List. a) Add Compound allows for the addition of a compound to the Target List which will appear at the bottom of the listing.
-
Page 166: Deconvolution Parameters Tab (Target Library Editor)
162 . Torion T-9 User’s Guide h) More Quant Info… will display quant information for the compounds. All compounds are set to the same quant parameters. See additional information on quant settings in Quant Overrides of this chapter. Deconvolution Param eters Tab (Target Library Editor) Within the Chromion software there are two Deconvolution Parameters tabs, one in Target Library Editor and one in Performance Validation. -
Page 167: Target List Search
The current settings are set to provide optimum performance for deconvolution and should not be changed. Changing these settings will affect the deconvolution process. They should only be changed by personnel that have been properly trained in the functionality. Contact PerkinElmer for more information. -
Page 168: Unknown Identification
All of the remaining settings are used to adjust the unknown search routine. The current settings are optimized to provide optimum performance for identifying unknown peaks. NOTE: Changing these setting will affect the identification process. They should only be changed by personnel that have been trained in the functionality. Contact PerkinElmer for more information. -
Page 169: Unknown Libraries
Target Library Editor . 165 Unknow n Libraries The Search Library 1, Search Library 2, Search Library 3, and Search Library 4 allow specific unknown libraries to be search. The search will be conducted by looking in the first library then in each successive library until the best match is found. These libraries will be stored on the Storage Card (SD card) on the instrument. -
Page 170: Quant Overrides Tab
166 . Torion T-9 User’s Guide Quant Overrides Tab Quant information for the compounds can be controlled using Quant Overrides. Quant parameters can be set for Quant type, Response type, Curve type, and Response handling. Definitions of the quant parameters are listed below. After changing a specific parameter click the Apply button or all of the parameters can be changed and then click Apply All. -
Page 171: Quant Concentrations Tab
Target Library Editor . 167 Linear non-weighted derives the equation of the line by use of linear regression. The goodness of fit is the R value for the line. Linear force through zero derives the equation of the line by linear regression ... - Page 172 168 . Torion T-9 User’s Guide The first column shows the Compound names. These names are automatically populated from the Target List Setup tab. The software allows the use of up to ten concentration Levels to build a curve. The concentration of a compound is entered at each level.
-
Page 173: Quant Files Tab
Target Library Editor . 169 Quant Files Tab When clicking on the icon Select Data Files to Process in the mini toolbar a Windows file dialog box will open with which to locate the files to be used for developing a calibration curve by adding them to the Quant Files tab. -
Page 174: Quant Review Tab
170 . Torion T-9 User’s Guide The Quant Files tab has four columns: Concentration Level is used to specify which concentration profile is associated with the • file. This value can be entered by selecting a value from the drop down menu or by typing in a value. -
Page 175: Groups Tab
Target Library Editor . 171 The graph shows the data points and the curve. Different types of curve fits can be selected from the Curve drop-down menu to see how the curve fits the data graphically. A point in the curve can be turned on or off by clicking on the point with the mouse pointer. The change to the equation of the line and goodness of fit are displayed. - Page 176 172 . Torion T-9 User’s Guide A New Group window opens. Enter a Group Name that could be the name of the target substance. Click in the Include check box to include the known compounds that could be found in the substance.
- Page 177 Target Library Editor . 173 By clicking More Options on the instrument and then selecting Switch View Mode the results of Groups which was created in Chromion will appear as in the image below. If, however, while in Chromion the option Groups is selected on the Groups tab the view displayed after running a sample run will be the group view as seen in the image above.
- Page 178 174 . Torion T-9 User’s Guide The group can be edited by clicking Modify… on the Groups tab. The method must be saved and resent to the instrument before running the sample again. The group can be deleted simply by selecting it and clicking the Delete button.
-
Page 179: Performance Validation
Performance Validation . 175 Perform ance Validation The last form in the Method section of the navigation pane is Performance Validation which is used to calibrate the instrument for optimal performance. NOTE: Use Caution when changing these operational parameters as making inappropriate adjustments will result in poor instrument performance and could cause damage to the instrument. - Page 180 This is useful for converting methods that were created with the previous Chromion version 1. Those methods are missing information used to run the Performance Validation on the Torion T-9 GC-MS and must be updated before being loaded onto the instrument.
-
Page 181: Performance Validation And Calibration Tab
Performance Validation . 177 P erform ance Validation and Calibration Tab The Performance Validation and Calibration tab is used to setup the information used for calibration of both retention time and mass. The following image shows the performance validation screen. Following is a description of each of the columns in the top portion of the form. - Page 182 178 . Torion T-9 User’s Guide The Torion T-9 instrument has approximately 4000 bins for mass data. Each mass has a width of about 8 bins. To convert the index numbers to actual mass values it is necessary to assign a specified mass to a specific index number.
-
Page 183: Tests Section
This section sets up the Tests that are performed to verify that the instrument is working correctly. These are advanced functions and should only be modified by those trained to know how they work. If there are questions about how to use the Tests section contact a PerkinElmer Service Representative for help. -
Page 184: Deconvolution Parameters Tab (Performance Validation)
M ass R ange Tab The Torion T-9 has the ability to set a mass range. Ion trap mass spectrometers use algorithms to control the ionization time and to determine response. These algorithms have improved performance when there are more data points to work with. -
Page 185: Tools
Data R eview Data Review available in the Tools section of the navigation pane is used to view data files which have been created by the Torion T-9 instrument. Data Review M ini Toolbar Upon opening Data Review a mini toolbar displays to the right of the method mini toolbar which contains icons for specific functionality for use in Data Review. - Page 186 A report file in the form of a text file is included. The report has the same information as the report on the Torion T-9 instrument. In addition, the results file also contains the setting.xml file that contains the mass spectrometer and GC parameters.
- Page 187 Tools . 183 Save Data File - This icon is used to save the data from a specific deconvolution run if • processing multiple times. Comments can be entered where detailed information about the run can be entered. Also the Username of the person responsible for the data can be entered. Click OK to save the data.
- Page 188 184 . Torion T-9 User’s Guide Show/Hide Mass Spec Graph (Mass Spectrometer) - The second graph that will automatically display is the MS chart. This is the spectra for a single scan in the TIC. The spectra displayed are selected by the placement of the cursor on a peak in the TIC chart.
- Page 189 Tools . 185 with a given mass or group of masses. The following image shows a RIC graph with a TIC and MS graph open at the same time. Show/Hide Summed Graph - The icon to the right of the RIC icon will display the ...
- Page 190 186 . Torion T-9 User’s Guide Show/Hide Background Graph - To the right of the summed graph icon is the background (Bkgd) icon. By clicking on the icon the background chart will display below the summed graph. Using the cursor move the focus to the icon to the right of Set Mode to Summed Select.
- Page 191 Tools . 187 Hide the MS graph by clicking on the icon. The MS graph will no longer show. Show/Hide Difference Graph - When activated it will show the difference (Diff) between the summed and background spectra. This is the spectral data showing the difference between the background spectra and the summed spectra.
- Page 192 188 . Torion T-9 User’s Guide Right click in the white background area of the TIC graph. A popup menu will display. Select Clear Region and then select All. The two highlighted sections in the TIC are no longer visible.
-
Page 193: Setting The Cursor Mode
Tools . 189 Show/Hide Manual Integration Graph - The graph below shows a manually charted area for a specific compound that usually exceeds a deconvolution response area. Setting the Cursor M ode The next 3 icons in Data Review are used to set the cursor mode. The following describes the different cursor modes. - Page 194 190 . Torion T-9 User’s Guide To unzoom an area right-click inside the graph and a popup menu will display. Select the Unzoom All option to return the graph to the normal unzoomed view. Set Mode to Summed Select - When the cursor is set to this mode it is only ...
-
Page 195: Additional Functionality Icons
Tools . 191 The image above shows the right mouse click dialog box with the Clear Region menu expanded. Additional Functionality Icons The following image displays the remaining icons available in the mini toolbar for Data Review. These icons provide additional functionality that can be performed on various charts which can be helpful when needing detail on the data. - Page 196 192 . Torion T-9 User’s Guide In this window the masses appearing in the RIC chart can be entered by typing the mass into the blank field. Masses can be entered in three ways: a) Individual mass. The mass 105 would display a single trace of the intensity of mass 105 in the RIC graph.
- Page 197 Tools . 193 The Y Offset field allows for the files intensity to be moved to adjust the alignment with other TICs that are being overlaid. Line Color can be selected for the different RES files so the graphs are easier to view in the overlay window.
- Page 198 194 . Torion T-9 User’s Guide Deconvolution uses the settings from the Target Library Editor Setup and Deconvolution Parameters tabs to extract the spectra for a specific peak. Show/Hide Deconvolution Window - Six additional icons will become available after clicking the Show/Hide Deconvolution Window icon.
- Page 199 Tools . 195 4) Show/Hide Compounds Not Found - This icon is used when compounds expected to be on the Target List Compounds after a deconvolution run are not listed. Clicking on the icon will enable the functionality with a blue box appearing around the icon.
- Page 200 196 . Torion T-9 User’s Guide Refer to the Data Review tab in Preferences… for details on settings for Compound Peak Labeling in the Edit Option on the Menu Bar in this chapter. After applying the preference settings for Compound Peak Labeling return to the Data Review window and click the icon Show/Hide Compound Peak Labeling to enable the feature.
-
Page 201: Data Review Menu Items
Tools . 197 Show/Hide TIC Line - The last icon in the mini toolbar is the Show/Hide TIC Line which when pressed will hide the TIC line in the TIC graph. Data Review M enu Item s There are five main menu items in which specific Data Review functionality becomes available when Data Review is opened, a .RES file has been loaded, and the focus is on the Data Review window. - Page 202 198 . Torion T-9 User’s Guide b) Save Data File - Clicking on this icon the Save Data File dialog will open in which to enter a Comment and a Username before saving the .RES file. Edit - Three icons become available to the to Data Review in the Edit main menu item.
- Page 203 Tools . 199 Summed Graph Background Graph Differences Graph Decon Spectra Graph Library Search Spectra Graph Manual Integration Graph Toggle - There is only one specific function for Data Review on this main menu item. ...
- Page 204 200 . Torion T-9 User’s Guide RIC Graph - This is the chromatographic trace for selected masses and can be used to look for a specific peak with a given mass. Summed Graph - This is the spectra of a group of chromatographic scans ...
-
Page 205: Deconvolution Window
Tools . 201 This report is only found in the .CDF file contained in a .RES file. However, if a .CDF is opened directly from an extracted .RES file it will not contain a report. If the .RAW file is opened either from a .RES file or directly from an extracted .RES file it will not contain a report. - Page 206 202 . Torion T-9 User’s Guide The image shows the cursor positioned on bromoform. The peak outline is highlighted in red and the colored spectra are visible in the same color in the deconvolution (Decon) graph. The colors of the peaks will change with each .RES file.
- Page 207 Tools . 203 Below is a description of the column titles on the deconvolution window. Pk# - This is the peak number of the compounds listed by the lowest retention time first. Target List Compounds - This column contains the compound names that appear in ...
- Page 208 204 . Torion T-9 User’s Guide deconvolution run where the software has identified an unknown peak by finding it in an unknown library. The unknown peaks are compared to the unknown library which is specified in the Deconvolution Parameters in the Target Library Editor. The possible matches are sorted on the Match Factor.
-
Page 209: Spectra Graphs/Charts
Tools . 205 The following image shows a TIC with 6 peaks. Three of the peaks co-elute at 34-36 seconds. The other two peaks co-elute at 38-40 seconds. Both co-eluting groups contain one unknown compound. Co-elution occurs when two or more compounds do not chromatographically separate due to the fact that both have retention times that differ by less than the resolution of the method. -
Page 210: Peak Details
206 . Torion T-9 User’s Guide To add a peak to the target library or a library in the Library Editor position the cursor on a peak in the TIC so the spectrum is visible in the mass spectrometer graph or any of the spectra charts listed above to get a spectra that has the desired masses to be added. - Page 211 Tools . 207 Use retention INDEX from data file - This option uses the retention index values that • were stored in the data file spectra. This calibration is from the retention calibration settings in Gas Chromatograph. Use retention INDEX from manual calibration data - This option uses the retention •...
-
Page 212: Library Search
208 . Torion T-9 User’s Guide Library Search The Library Search option is only available by right clicking on a spectra chart. The Library Search Spectra Graph shows the results of a library search and therefore is not used to initiate a library search. -
Page 213: Nist
Tools . 209 the window would be set to RI- of 400 and RI+ of 550. The Window value can be changed in this dialog without changing the default setting in the method. Max Hits This setting by default is set to 5. The search results will show up to a •... - Page 214 210 . Torion T-9 User’s Guide The following image shows the dialog box that opens when the option Write Spectra to NIST File… is selected. Preferences This section of the Export Peak to NIST dialog includes the following. Filename - This is the default filename that is set in the NIST MS Search database in •...
- Page 215 Tools . 211 Clicking the Launch NIST Search icon in the Data Review mini toolbar will open the NIST MS Search software and display the comparison of the saved spectra to the NIST database.
-
Page 216: Mass Spectrometer
212 . Torion T-9 User’s Guide M ass Spectrom eter The Mass Spectrometer window is where the parameters that control the instrument are configured and sent to the instrument. It is also where the data for mass calibration are stored. - Page 217 Mass Spectrometer . 213 Unlock Mass Spec Parameters - This functionality allows access to all of the mass spectrometer settings. The password is “torion123” but caution must be observed as any changes to the instrument without understanding the effect could damage the instrument. Changing settings on the M ass Spectrom eter w ithout proper training m ay cause dam age to the instrum ent and m ay result in costly repairs.
-
Page 218: Ms Parameters Tab
Calibration Data grid. The information in the Auto table is not actively updated. Using the update button will force the software to retrieve the most current data from the Torion T-9. If Auto is checked then the auto calibration data will be used when calculating calibration data. - Page 219 The only settings that normally need to be adjusted are available at the top of the MS Parameters tab in the white background without needing to unlock all the parameters. Detector - The detector in the Torion T-9 instrument is an electron multiplier. The detector •...
-
Page 220: Ms Calibrations Tab
216 . Torion T-9 User’s Guide understanding of what each specific setting is used for and what it does. Contact a PerkinElmer service representative for assistance when making changes to the Mass Spectrometer. M S Calibrations Tab The MS Calibrations tab contains calibration data that are created in the Performance Validation. -
Page 221: File Manager
File Manager . 217 File M anager Chromion File Manager is similar to Windows file management. It is intended as a safe way to transfer files to and from the instrument SD card. Using File Manager directories/folders can be created on the connected computer and data files can be moved from the SD card into those folders on the computer. -
Page 222: Computer Section - Right Click Functionality
218 . Torion T-9 User’s Guide Select a folder and click OK. The folder will now appear in the upper left frame of the window. Notice when selecting the folder the contents of that folder will display in the lower left frame of the window. - Page 223 File Manager . 219 Delete Folder - Select a folder; right click and choose Delete Folder. A confirmation popup • will require a response of Yes or No. Create Folder - Select a folder in which to add a folder. Right click and choose Create •...
-
Page 224: Sd Card Section - Right Click Functionality
220 . Torion T-9 User’s Guide Upload File - This action will copy the selected file from the computer to the folder that is • highlighted on the instrument. Delete File - Clicking this icon will display a confirmation popup that requires a response of •... - Page 225 File Manager . 221 Delete Folder - This option is only available in the Data folder where the daily run files are • written. Selecting a folder and then choosing this option from the right click will delete the folder and its contents. When this option is selected a popup will display requiring confirmation response of Yes or No.
-
Page 226: Supported File Types
222 . Torion T-9 User’s Guide Delete Files - This option will delete a selected file or files from the instrument. Caution • should be taken when deleting files from the SD card unless a copy has been downloaded. Refresh Files - This option will refresh files in a folder. -
Page 227: Library Editor
. I t is im portant to note that som e library data w ere generated on instrum ents that m ay give slightly different spectra than the Torion T-9 instrum ent. This is because different types of m ass spectrom eters w ork in different w ays. -
Page 228: Library Editor Mini Toolbar
224 . Torion T-9 User’s Guide Library Editor M ini Toolbar The Library Editor has a mini toolbar with icons that activate according to required functionality of various features. Select Library - This opens a drop-down list of all of the libraries in the data base. - Page 229 Library Editor . 225 Save Library As - This option will create a copy of the currently open library. This functionality allows for the default library to be copied for editing purposes. When clicking this icon a Save Library As dialog will open allowing for entry of a Library name. Edit Library Name - This option allows for renaming of the currently open library.
- Page 230 226 . Torion T-9 User’s Guide Delete Compound - When clicking this icon whichever compound is selected in the compound list will be deleted after responding to a confirmation dialog. Upon clicking Yes the compound will be deleted. Append to Library - This option allows the contents of a previously exported library to be appended to the currently open library.
- Page 231 Library Editor . 227 Search Library for a Compound - When this icon is selected the Library Editor Search dialog will open with several search conditions which can be used to locate a compound. Enter the search criteria and press the search icon. Click OK to close the dialog. The Library Editor window includes two main sections.
- Page 232 228 . Torion T-9 User’s Guide Spectrum This is a graphical view of the information that is contained in the ion mass list. It cannot be edited and is only available for viewing. Compound Table This section contains the following information for each compound.
- Page 233 Library Editor . 229 Delete Compound - This option is used to delete a compound from the library by clicking on it and selecting the option Delete Compound. This functionality is also available on the mini toolbar. A confirmation dialog will require a Yes or No response. Delete All Compounds - This option allows for the deletion of all the compounds in the ...
- Page 234 230 . Torion T-9 User’s Guide They way around this is to go to the Target List and using the icon Convert Method to Retention Index change the retention mode on all the compounds to retention index then the compound in Library Editor can be added to the Target List.
-
Page 235: Real Time Plots
Real Time Plots . 231 R eal Tim e Plots Real Time Plots windows are used to display a current run on the instrument to a connected computer. To display a plot the Chromion software must be connected to an instrument. Information from only one instrument at a time can be displayed. -
Page 236: Tic Graph Tab
232 . Torion T-9 User’s Guide Write Data from Logger to File - When the Data Logger feature is enabled and • various parameters selected which are plotted to the window the data file can be saved for later review. To save the file the Data Logger must be disabled. Clicking on the icon Write Data from Logger to File will open a browser window with which to use for selecting the location in which to save the file. -
Page 237: Spectra Graph Tab
Real Time Plots . 233 Spectra Graph Tab The Spectra Graph displays a spectrum of a single scan from the instrument. Like the TIC graph zooming functionality is enabled but there is no control over starting, stopping, or other aspects of collecting data from within Chromion. -
Page 238: Logging
234 . Torion T-9 User’s Guide There are several ways to enable or disable the Data Logger. Logging Enable/Disable Data Logging The first icon in the mini toolbar is used for enabling or disabling data logging. When enabled there will be a blue box around the icon. When disabled there will not be a blue box around the icon. - Page 239 Real Time Plots . 235 NOTE: Selecting items to plot that have large differences in value will result in scaling that makes the readings useless. The following list shows the available values and gives a brief description of what they control.
-
Page 240: Clear Chart
236 . Torion T-9 User’s Guide PowerSystem.BatteryVoltageB Battery cell B voltage PowerSystem.CaseTemperature Internal instrument temperature PowerSystem.Cpu33Voltage CPU power 3.3 V PowerSystem.CurrentOutMonitor Power board total current out PowerSystem.MainVoltage Main system voltage PowerSystem.Negative15Voltage Power board - 15 V PowerSystem.Negative5Voltage Power board -5 V PowerSystem.Positive10Voltage... -
Page 241: Desorption
The SPS-3 (Sample Prep Station) is a device used to move samples from a conventional trap to a Custodion Needle Trap that can then be used on a Torion T-9 instrument for analysis. Desorption in Chromion is designed to make it easier to create and maintain a variety of methods for the device which is accessible through an Ethernet connection. -
Page 242: Desorption Mini Toolbar
238 . Torion T-9 User’s Guide The SPS-3 device has a sticker by the Internal Standard port on the device. It contains three numbers which can be used in various capacities. The MAC address is used by the Chromion software to identify the devices on the network. When clicking the Search button in the Desorption window the MAC address of the device will appear with the associated IP address. - Page 243 Desorption . 239 After entering a name for the device the name will appear in parentheses after the MAC and IP addresses as shown below. On the SPS-3 device the name will display on the splash screen as shown below. As shown in a previous image Desorption includes two tabs, the first is Parameters where settings or parameters for each specific method are displayed.
-
Page 244: Log Data Tab
240 . Torion T-9 User’s Guide After entering the new method name and then clicking OK the name will be saved and sent to the SPS-3 device. Log Data Tab The second tab of the Desorption window is the Log Data tab. Using the icon in the mini toolbar the log files created from desorption runs on the device can be retrieved and saved to a computer. - Page 245 Desorption . 241 window will open with which to locate a folder in which to save the log data. The log files are saved in a CSV format. The files can be deleted from the SPS-3 device by clicking the icon Delete Log Files from Device. A confirmation dialog will display requesting a response by the user to continue with the deletion of the files from the device.
-
Page 246: Batch Processing
242 . Torion T-9 User’s Guide Batch Processing The Batch Processing screen allows for a group of files to be processed without having to open each one in Data Review. This is useful when data that was collected using the same method conditions was inspected using Data Review and found to have a problem. - Page 247 Batch Processing . 243 processing of part of a batch of files without having to create a new batch file. The files can then be viewed using Data Review. Cancel Processing - This option is only available during processing of files and allows ...
-
Page 248: Reports
244 . Torion T-9 User’s Guide R eports The Reports window is used to create reports containing different data from .RES files. The report data is formatted and can be used in numerous ways. R eports M ini Toolbar There are three icons in the mini toolbar for Reports that can be used when setting up the type of information on which to be reported. - Page 249 Reports . 245 A Target List of all compounds from the method will be displayed with columns indicating whether or not the compound was found in the sample indicated by a calibration curve or peak. Using the icons in the mini toolbar or the right click option mark the compounds which are to be included in the report.
-
Page 250: Header Information
246 . Torion T-9 User’s Guide Header Inform ation Company Logo - If desired a company logo can be selected for use at the beginning of the report. First, place a checkmark in the box indicating a logo should be used in the report. - Page 251 Reports . 247 Report Table - This report shows a list of all the known and unknown compounds found in the deconvolution run. Method Details - Table This report displays in a table format the settings in Gas Chromatograph.
- Page 252 248 . Torion T-9 User’s Guide Found Target Compounds - This report displays the details of the known compounds found in the deconvolution run as well as the spectrum for each compound. Found Unknown Compounds - This report displays the details of the unknown ...
- Page 253 Reports . 249 Deconvolution Settings - This report shows the settings for Deconvolution Parameters in the Target Library Editor of the method. Compound Quant Review - This report shows the Quant Concentrations settings in the Target Library Editor.
- Page 254 250 . Torion T-9 User’s Guide Quantitative Calibration Table - This report shows in table format the quantitative calibration results for the compounds with calibration curves and peaks.
-
Page 255: Tightvnc Viewer
This software is provided on the same USB drive that contains the Chromion software. There are newer versions of this software available. However, the newer versions of TightVNC have features that are not compatible with the Torion T-9. Use only the version that is provided with the Chromion software. -
Page 256: Nist
252 . Torion T-9 User’s Guide NI ST The NIST Standard Reference Database 2014 software includes the NIST/EPA/NHI MASS SPECTRAL LIBRARY and NIST MASS SPECTRAL SEARCH PROGRAM. optional This is an software package that can be purchased at any time. Any features in the Chromion software that use the NIST database require that the NIST software be installed. -
Page 257: Advanced Operations
Advanced Operations... -
Page 258: Loading Operational Settings When Running An Analysis
R eset and R estart Buttons on the I nstrum ent There is a reset button and an emergency shutdown button on the Torion T-9. The reset button is used to restart the instrument’s CPU without turning off the system power. This is used in cases where the instrument has stopped operating and you want to restart the computer without losing vacuum or temperature. -
Page 259: Deleting Sample Data From The Sd Card
Loading Operational Settings when Running an Analysis . 255 Deleting Sam ple Data from the SD Card Use File Manager in the Chromion software to delete and move files from the SD card. Refer to the File Manager section of the Software chapter of this manual for detailed instructions on deleting and moving files from the SD card . - Page 260 256 . Torion T-9 User’s Guide...
-
Page 261: Maintenance
M aintenance... -
Page 262: Gc Injection Port Maintenance
Unscrew the plastic cover from the Universal Interface. Using the Ring Removal tool remove the stainless steel Interfacing Mounting Ring Nut. Pull the Universal Interface out of the top of the Torion T-9 GC/MS. After removal of the Universal Interface the GC injection port is accessible. -
Page 263: Injection Liner And Seal Cleaning Or Replacement
Remove the Septum from the old Liner and insert it into the new Liner. There are two separate Liners that can be used in the Torion T-9. There is a liner for SPME type injections and a larger volume liner for small liquid injections. -
Page 264: How To "Bake Out" The Gc Injection Port And Column
GC properly. Verify that the param eters have been restored on the Torion T-9 GC/ M S by view ing the tem perature settings under Advanced >... -
Page 265: Changing The Battery
Changing the Battery . 261 Changing the Battery Turn off the Torion T-9 GC/MS. Lift the battery straight out of the battery compartment. After removing the battery, insert the new battery into the battery compartment so the connector in the compartment aligns with the hole in the battery. -
Page 266: Changing The Carrier Gas Cartridge
262 . Torion T-9 User’s Guide Changing the Carrier Gas Cartridge The standard helium carrier gas cartridge for the Torion T-9 GC/MS will provide carrier gas for as many as 300 runs at 25 psi (175 kPa) operating pressure. Turn the Torion T-9 GC/MS instrument off. -
Page 267: Removing/Replacing The Sd Card
Removing/Replacing the SD Card . 263 R em oving/ R eplacing the SD Card When removing the SD card from the Torion T-9 GC/MS, it is best to remove the card when there is little likelyhood of data being written to the card. - Page 268 264 . Torion T-9 User’s Guide...
-
Page 269: Troubleshooting
Troubleshooting... -
Page 270: Troubleshooting Guide
(see About the Power Supply and Battery in Chapter 3 System Overview). Remove the power source connector from the Torion T-9 GC/MS and re-insert it snuggly. Torion T-9 GC/ M S w ill not turn off Press the power button firmly for ten seconds (see Startup in Chapter 5 Basic Operation). -
Page 271: Gc Peaks Are Asymmetric
To replace any of these components contact your PerkinElmer Service Representative for help.. Bake out the vacuum chamber. Contact your PerkinElmer Service Representative for help. GC peaks are asym m etric P lease N ote: Chromatographic peaks during a PERFORMANCE VALIDATION run will look asymmetric and will most likely have peak tailing. -
Page 272: Gc Peaks Are Eluting Late
Replace the injection port liner with a newly deactivated one (see GC injection Port Maintenance in Chapter 8 “Maintenance”). d. Replace the column. Contact your PerkinElmer Service Representative for help. e. Increase the split flow rate (See Sample Concentration in Chapter 5 “Basic Operation”). -
Page 273: Acquired Mass Spectra Are Noisy
The electron gun current may also be too high, producing too many ions for the trap use the system Performance Validation to correct the tune settings on the instrument. Noisy spectra can result from an old or faulty detector. Contact your PerkinElmer Service Representative for help. -
Page 274: Results Are Not Reproducible
If the masses (although incorrect) are staying the same (± 1 amu) from run to run continue to perform the steps below until the problem is corrected. When the acquired mass spectra are not correct the Torion T-9 GC/MS should be recalibrated (see Performance Validation in Chapter 5 “Basic Operation”). -
Page 275: Spme Fiber Came Off Inside The Gc Inlet
Torion T-9 GC/ M S fails to identify a com pound It is possible that the Torion T-9 GC/MS can fail to identify a compound that is actually present (a false negative identification). There are several reasons why the Torion T-9 GC/MS would fail to identify the compound. -
Page 276: Torion T-9 Gc/Ms Is Unable To Run On Battery Power
Torion T-9 GC/MS. Also ensure that the batteries being used still have enough power left to run the Torion T-9 GC/MS. If these remedies fail to resolve the problem contact your PerkinElmer Service Representative for help.
Need help?
Do you have a question about the TORION T-9 and is the answer not in the manual?
Questions and answers