
Related Manuals for Rosemount 951C


Summary of Contents for Rosemount 951C
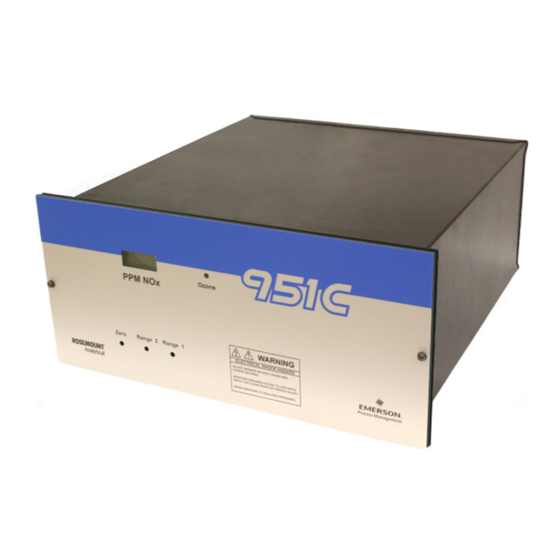
- Page 1 Instruction Manual 748214-X December 2013 Model 951C NO Analyzer Applies to analyzers with SN# F-09000034 or higher.
-
Page 3: Table Of Contents
TA B L E O F C O N T E N T S Section 1: Description and specifications Typical applications ............. . 1-2 Specifications . - Page 4 Section 4: Theory Nitric oxide concentration is determination by chemiluminescence method ....4-1 Analyzer flow system ............4-1 Flow of sample, standard gas or zero gas to reaction chamber .
- Page 5 ESSENTIAL INSTRUCTIONS READ THIS PAGE BEFORE PROCEEDING! Rosemount Analytical designs, manufactures, and tests its products to meet many national and international standards. Because these instruments are sophisticated technical products, you MUST properly install, use, and maintain them to ensure they continue to operate within their normal specifications.
- Page 6 This page is intentionally left blank.
- Page 7 PREFACE The purpose of this manual is to provide information concerning the components, functions, installation and maintenance of the 951C NO analyzer. Some sections may describe equipment not used in your configuration. The user should become thoroughly familiar with the operation of this module before operating it.
- Page 8 SAFETY SUMMARY If this equipment is used in a manner not specified in these instructions, protective systems may be impaired. AUTHORIZED PERSONNEL To avoid explosion, loss of life, personal injury and damage to this equipment and on site property, all personnel authorized to install, operate and service the this equipment should be thoroughly familiar with and strictly follow the instructions in this manual.
- Page 9 WARNING TOXIC CHEMICAL HAZARD This instrument generates ozone which is toxic by inhalation and is a strong irritant to throat and lungs. Ozone is also a strong oxidizing agent. Its presence is detected by a characteristic pungent odor. The instrument exhaust contains both ozone and nitrogen dioxide, both toxic by inhalation, and may contain other constituents of the sample gas which may be toxic.
- Page 10 WARNING TOXIC AND OXIDIZING GAS HAZARD The ozone generator lamp contains mercury. Lamp breakage could result in mercury exposure. Mercury is highly toxic if absorbed through skin or ingested, or if vapors are inhaled. HANDLE LAMP ASSEMBLY WITH EXTREME CARE If lamp is broken, avoid skin contact and inhalation in the area of the lamp or the mercury spill.
- Page 11 GENERAL PRECAUTIONS FOR HANDLING AND STORING HIGH PRESSURE GAS CYLINDERS • Never drop cylinders or permit them to strike each other violently. • Cylinders may be stored in the open, but in such cases, should be protected against extremes of weather and, to prevent rusting, from the dampness of the ground.
- Page 12 CONDENSED STARTUP AND CALIBRATION PROCEDURE The following summarized instructions on startup and calibration are intended for operators already familiar with the analyzer. For initial startup, refer to detailed instructions provided in “Operation” on page 3-1. Review the Purchase Order and make a note of the range that was purchased— Low Range, Mid Range, or High Range.
- Page 13 Establish the correct upscale standard gas pressure: Supply upscale standard gas to the rear panel sample inlet. Note the reading on the sample pressure gauge. It should be the same as in Step 7b. If not, adjust the output regulator as required. NOTE Supply pressure for sample, upscale standard gas and zero air must be the same.
- Page 14 This page is intentionally left blank.
-
Page 15: Section 1: Description And Specifications
To minimize system response time, an internal sample bypass feature provides high velocity sample flow through the analyzer. The case heater assembly of the Model 951C maintains the internal temperature at approximately 50° C (122° F). 1 - 1... -
Page 16: Typical Applications
Instruction Manual Model 951C 748214-X DECEMBER 2013 Typical applications The Model 951C analyzer has the following specific applications: • Oxides of nitrogen (NO ) emissions from the combustion of fossil fuels in: • Vehicle engine exhaust • Incinerators • Boilers •... -
Page 17: Specifications
Model 951C Instruction Manual DECEMBER 2013 748214-X Specifications Repeatability Within 0.1 ppm or ±1% of fullscale, whichever is greater Zero/Span Drift Less than ±0.1 ppm or ±1% of fullscale, whichever is greater, in 24 hours at constant temperature Less than ±0.2 ppm or ±2% of fullscale, whichever is greater, over any... - Page 18 Instruction Manual Model 951C 748214-X DECEMBER 2013 This page is intentionally left blank. 1 - 4...
-
Page 19: Section 2: Installation
Section 2: Installation Unpacking Carefully examine the shipping carton and contents for signs of damage. Immediately notify the shipping carrier if the carton or its contents are damaged. Retain the carton and packing material until the instrument is operational. Location Install analyzer in a clean area, free from moisture and excessive vibration, at a stable temperature within 4 to 40°... -
Page 20: Voltage Requirements
Instruction Manual Model 951C 748214-X DECEMBER 2013 A temperature control system maintains the internal analyzer temperature at 50° C (122° F) to ensure proper operation over an ambient temperature range of 4 to 40° C (40 to 104° F). Temperatures outside these limits necessitate the use of special temperature controlling equipment or environmental protection. - Page 21 Model 951C Instruction Manual DECEMBER 2013 748214-X Figure 2-2. Power Supply Board voltage select switches Figure 2-3. Temperature Control board voltage select switch On the rear of the analyzer, replace the 6.25 A fuse with the 3.15 A fuse (P/N 898587) that is provided in the shipping kit.
-
Page 22: Connecting Cables
Instruction Manual Model 951C 748214-X DECEMBER 2013 Figure 2-4. Rear view of Model 951C (cover removed) Connecting cables The power (PN# 899330) and recorder (PN# 899329) cable glands are supplied in the shipping kit. To connect the appropriate cable to its connector or terminal strip on the analyzer, do the following: Remove the analyzer’s rear cover to access the terminals. -
Page 23: Connecting The Power Cord
The power cord must be at least 18 AWG with a maximum outside diameter (OD) of 48 inches. To connect the power cord to the Model 951C, do the following: Using the cable gland (PN# 899330) that is provided in the installation kit, insert the power cord through the hole on the Model 951C that is labeled POWER. -
Page 24: Connecting The Potentiometric Recorder Cables
Connecting the potentiometric recorder cables Potentiometric recorder cables connect to the rear panel. Route the cable through the cable gland in the hole on the Model 951C that is labeled RECORDER OUTPUT and connect the cable’s leads to the VOLT OUTPUT terminals. -
Page 25: Gas Requirements
WARNING HIGH PRESSURE GAS CYLINDERS The Model 951C requires periodic calibration with a span gas. “Calibrating the analyzer” on page 3-10. See also General Precautions for Handling and Storing High Pressure Gas Cylinders, page P-5. -
Page 26: Sample Requirements
Also, the span gas should be supplied to the Model 951C’s rear panel sample inlet at the same pressure as the sample gas. To ensure constant pressure, use a pressure regulator immediately upstream from the sample inlet. -
Page 27: Connecting Gas
Connect rear exhaust outlet to outside vent by a 1/4 inch (6.3 mm) or larger stainless steel or Teflon line. Check vent line and connections for leakage. To connect a gas to the Model 951C, do the following: Remove plugs and caps from all inlet and outlet fittings. -
Page 28: Leak Testing
Instruction Manual Model 951C 748214-X DECEMBER 2013 2.5.5 Leak testing The following test is designed for sample pressure up to 10 psig (35 kPa). Supply air or an inert gas such as nitrogen to the analyzer’s sample and air input fittings at 10 psig (35 kPa). -
Page 29: Section 3: Operation
Hi, Mid, or Lo. NOTICE The Model 951C’s range is not user-selectable—it is configured at the factory based on the purchase order. Any desired changes to the analyzer’s range must be handled at the factory. -
Page 30: Blinking Backlight
Instruction Manual Model 951C 748214-X DECEMBER 2013 The Hi range set consists of spans with the following ranges: • 0-100 ppm NO • 0-250 ppm NO • 0-1000 ppm NO • 0-2500 ppm NO The Mid range set consists of spans with the following ranges: •... -
Page 31: Sample Pressure Gauge
Model 951C Instruction Manual DECEMBER 2013 748214-X 3.1.4 Sample pressure gauge The internal sample pressure (nominally 4 psig or 28 kPa) is adjusted by rotation of the sample pressure regulator. NOTICE Using the MID ranges (20, 50, 200, and 500 ppm NO ), set the sample pressure regulator to 4.0 psig (28 kPa). -
Page 32: Zero And Span Potentiometers
Instruction Manual Model 951C 748214-X DECEMBER 2013 Figure 3-1. Model 951C Controls, Indicators and Adjustments 3.1.6 Zero and span potentiometers You can adjust the Zero, Range1 and Range2 potentiometers on the signal board by way of screwdriver access holes on the front panel . - Page 33 Model 951C Instruction Manual DECEMBER 2013 748214-X Figure 3-2. Signal board Figure 3-3. Signal board test points 3 - 5...
-
Page 34: Starting The Analyzer
748214-X DECEMBER 2013 Starting the analyzer To start up the Model 951C, do the following: Supply electrical power to the analyzer. The will take the analyzer approximately two hours to reach temperature equilibrium, which is necessary to calibrate the analyzer. - Page 35 Model 951C Instruction Manual DECEMBER 2013 748214-X Figure 3-5. Configuration Jumper Settings (c.) Set the Range2 selection jumpers to Range 4, 2500ppm as shown in Figure 3-6. Figure 3-6. Range 2 Selection Jumpers PPM Range Range Position 1000 2500 Adjust the ozone pressure regulator so that the ozone pressure gauge rests at 20 to 25 psig (138 to 172 kPa).
- Page 36 Instruction Manual Model 951C 748214-X DECEMBER 2013 Do the following to establish the correct zero gas pressure: (a.) Supply zero gas to rear panel sample inlet. (b.) Note the reading on internal sample pressure gauge. It should be the same as the nominal 4 psig (28 kPa) sample pressure indicated on the internal sample pressure gauge.
-
Page 37: Setting Up Remote Range Switching
The analyzer is now ready for calibration. Figure 3-7. Power Supply Board Setting up remote range switching The Model 951C can be configured to switch ranges, via a control system such as a PLC or DCS, when a pre-defined NO measurement setpoint is reached. - Page 38 • A single pole double throw (SPDT) switch that is controlled by the control system. To configure the Model 951C for remote range switching, do the following: Review the following table, which lists the range spans for each type of Model 951C analyzer, to find the setpoint range that should trigger the remote range switching feature.
- Page 39 Range2 Selection. Figure 3-9. Range2 Selection jumpers Set up your control system so that the SPDT switches when the Model 951C’s analog output reaches or exceeds the desired switch point that you selected in Step 1. 3 - 11...
-
Page 40: Calibrating The Analyzer
Instruction Manual Model 951C 748214-X DECEMBER 2013 Calibrating the analyzer There are two kinds of calibration: zero calibration and upscale calibration. 3.4.1 Zero calibrating An effective zero calibration requires that the analyzer be exposed to clean air. To perform a zero calibration, do the following: On the signal board, set PPM RANGE Switch to the same range that will be used during the sample analysis. -
Page 41: Optimizing The Converter Temperature
The converter temperature can be adjusted once the appropriate high voltage and electronic gain have been selected and the value displayed by the Model 951C matches the calibration gas value. The vitreous carbon converter used in this analyzer has a low surface area that gradually increases during high temperature operation of the converter material. - Page 42 Instruction Manual Model 951C 748214-X DECEMBER 2013 In extreme cases, where converter re-profiling has not been conducted, the converter is so active that it not only reduces nitrogen dioxide to nitric oxide, but it also reduces the nitric oxide to nitrogen, which is not detected by the chemiluminescence reaction.
- Page 43 Model 951C Instruction Manual DECEMBER 2013 748214-X Measure the operating temperature of the converter by accessing the power supply board and momentarily pressing the CONV TEMP CHECK (S4) switch while monitoring the resistance across the TP1 and TP2 terminals. Note the value for future reference.
-
Page 44: Measuring Converter Efficiency
Instruction Manual Model 951C 748214-X DECEMBER 2013 Measuring converter efficiency It is the responsibility of the user to measure efficiency of the NO NO converter during initial startup, and thereafter at intervals appropriate to the application--normally once a month. Optimizing the operating temperature of the converter also serves as... -
Page 45: Recommended Calibration Frequency
Model 951C Instruction Manual DECEMBER 2013 748214-X Operate the analyzer and continue to sample the diluted nitric oxide sample for a period of at least thirty minutes. If the nitrogen dioxide-to-nitric oxide conversion is at the 100% level, the instrument response will be stable at the highest value noted. - Page 46 Instruction Manual Model 951C 748214-X DECEMBER 2013 This page is intentionally left blank. 3 - 18...
-
Page 47: Section 4: Theory
Section 4: Theory Nitric oxide concentration is determination by chemiluminescence method The chemiluminescence method for detection of nitric oxide (NO) is based on its reaction with ozone (O ) to produce nitrogen dioxide ) and oxygen (O ). Some of the NO molecules thus produced are initially in an electronically excited state (NO *). - Page 48 Instruction Manual Model 951C 748214-X DECEMBER 2013 Figure 4-1. Flow diagram, Lo and Mid range 4 - 2...
- Page 49 Model 951C Instruction Manual DECEMBER 2013 748214-X Figure 4-2. Flow diagram, Hi range 4 - 3...
-
Page 50: Flow Of Sample, Standard Gas Or Zero Gas To Reaction Chamber
Instruction Manual Model 951C 748214-X DECEMBER 2013 4.2.1 Flow of sample, standard gas or zero gas to reaction chamber Suitably pressurized sample, standard gas or zero gas is supplied to the analyzer through the rear panel sample inlet. A back pressure regulator inside the analyzer controls the flow rate of the selected gas into the reaction chamber. -
Page 51: Signal Conditioning And Display
Model 951C Instruction Manual DECEMBER 2013 748214-X Signal conditioning and display The signal conditioning and display board provides the following functions: • Signal conditioning circuit • An analog to digital converter • Display device • Range control circuits • Post signal amplifier and output amplifier circuit •... -
Page 52: Circuit Functions
The precision amplifier allows for two selectable gains, one for 10, 100, and 1000 spans, and the other for 25, 250, and 2500 spans. Intermediate gain ranges as required by the Model 951C Lo range, Mid range or Hi range can be obtained by interpolating between the requisite ranges using boolean logic and analog switches. - Page 53 The Model 951C has a fully isolated remote control interface. Optical isolators and a remote 24V power supply ensure that no direct return path exists between the user’s system and the 951C when in remote control mode. 4 - 7...
-
Page 54: Analyzer Thermal System
K1 and creates a fully isolated system. Optical isolators connect via a ribbon cable to the remote connector panel at the rear of the Model 951C. A ten terminal barrier strip provides connection for remote range selection. To select one of the four ranges, connect any input terminal (1 through 4) to RTN terminals 5 or 6. - Page 55 Model 951C Instruction Manual DECEMBER 2013 748214-X Figure 4-4. The analyzer thermal system The temperature of the PMT must be held within a half degree band at approximately 18° C if it is to produce a useful signal for low concentrations of NO .
- Page 56 Instruction Manual Model 951C 748214-X DECEMBER 2013 This page is intentionally left blank. 4 - 10...
-
Page 57: Section 5: Routine Servicing
Section 5: Routine servicing WARNING ELECTRICAL SHOCK HAZARD Servicing requires access to live parts which can cause death or serious injury. Refer servicing to qualified personnel. WARNING INTERNAL ULTRAVIOLET LIGHT HAZARD Ultraviolet light from the ozone generator can cause permanent eye damage. Do not look directly at the ozone generator’s ultraviolet source. -
Page 58: Factors Affecting The Overall Sensitivity Of The Analyzer
Instruction Manual Model 951C 748214-X DECEMBER 2013 Adjust the R25 potentiometer on the signal board. If agreement between the display and the recorder cannot be reached, check the recorder. If the recorder is functioning properly, replace the signal board. 5.1.2... -
Page 59: Monitoring Ozone Output
Model 951C Instruction Manual DECEMBER 2013 748214-X 5.1.3 Monitoring ozone output WARNING TOXIC GAS HAZARD Use extreme caution in troubleshooting the ozone generator. Ozone is toxic. To check for adequate output from the ozone lamp, do the following: Calibrate the analyzer on a high-level nitrogen oxide standard such as 250 ppm nitrogen oxide at the nominal 4.0 psi internal... -
Page 60: Finding The Cause Of Excessive Background Current
Instruction Manual Model 951C 748214-X DECEMBER 2013 5.1.4 Finding the cause of excessive background current Excessive background current prevents the proper functioning of the zero control. The source of excessive background current can be found in either the electronic circuitry or the sample flow system. -
Page 61: Servicing The Flow System
Model 951C Instruction Manual DECEMBER 2013 748214-X Servicing the flow system To facilitate servicing and testing, the Model 951C has front drawer access. 5.2.1 Cleaning the sample capillary If you suspect that the sample capillary is clogged, do the following to measure the flow rate: Turn the analyzer off and shut off all gases. - Page 62 Instruction Manual Model 951C 748214-X DECEMBER 2013 Figure 5-1. Photomultiplier housing assembly Remove the sample capillary fitting and make sure the chamber is covered by the cloth to prevent the entry of stray light through the hole left by the removal of the capillary fitting.
-
Page 63: Confirming A Faulty Ozone Restrictor Fitting
Model 951C Instruction Manual DECEMBER 2013 748214-X Supply dry nitrogen or air to the sample inlet on the rear panel. Connect a flowmeter to the open end of the sample capillary. Set the internal sample pressure regulator to 4 psig (28 kPa). - Page 64 Instruction Manual Model 951C 748214-X DECEMBER 2013 Figure 5-2. Major assemblies of the Model 951C Connect a flow meter to the open end of the ozone generator tube. Adjust the ozone pressure regulator so that the ozone pressure gauge indicates a normal operating pressure of 20 to 25 psig (138 to 172 kPa).
-
Page 65: Servicing The Photomultiplier Tube And The Reaction Chamber
Model 951C Instruction Manual DECEMBER 2013 748214-X If the flow is less than 500 cc/mm, that indicates clogging in the flow path that supplies air to the ozone generator. This path contains an air restrictor assembly (PN# 655519) that consists of a metal fitting with an internal restrictor to reduce pressure. - Page 66 Instruction Manual Model 951C 748214-X DECEMBER 2013 Figure 5-3. Photomultiplier housing assembly The assembly must be removed from the analyzer in order to clean the reaction chamber or to replace the photomultiplier tube. 5 - 10...
-
Page 67: Removing Or Replacing The Photomultiplier Assembly
Model 951C Instruction Manual DECEMBER 2013 748214-X 5.3.1 Removing or replacing the photomultiplier assembly To remove the photomultiplier assembly, do the following: Turn the analyzer off and shut off all gases. Unplug the electrical cable from the power supply PC board. - Page 68 Instruction Manual Model 951C 748214-X DECEMBER 2013 Cover and shade the reaction chamber and photomultiplier assembly with a dark cloth or other light-shielding material. CAUTION Always wear surgical rubber gloves when handling the reaction chamber to prevent contamination from handling.
- Page 69 Model 951C Instruction Manual DECEMBER 2013 748214-X Figure 5-4. Photomultiplier housing assembly Unscrew the plastic end cap to free the quartz window and the red plastic optical filter. Note the sequence in which these are assembled. 5 - 13...
- Page 70 Instruction Manual Model 951C 748214-X DECEMBER 2013 Use one of the following methods to clean the reaction chamber, as appropriate: • The standard method is applicable in most cases. • The alternate method is applicable when the instrument has shown high residual fluorescence, which is indicated by...
-
Page 71: Reconstructing The Photomultiplier Assembly
Model 951C Instruction Manual DECEMBER 2013 748214-X Dry the reaction chamber and the quartz window in an oven set to 125° F (52° C) for 30 to 45 minutes or blow dry the parts with cylinder air or nitrogen to eliminate all moisture. -
Page 72: Photomultiplier Tube And Housing
Instruction Manual Model 951C 748214-X DECEMBER 2013 5.3.4 Photomultiplier tube and housing The photomultiplier tube operates at high DC voltages (nominal setting is 1100 volts) and generates small currents that are highly amplified by the signal conditioning circuitry. It is therefore important that ambient humidity and condensed water vapor be kept from the interior of the photomultiplier housing. -
Page 73: Ozone Generator Assembly
Model 951C Instruction Manual DECEMBER 2013 748214-X Carefully rotate and insert the tube, shield and cover into the housing. Orient as noted in Step Ozone generator assembly The ozone generation assembly consists of the ultraviolet lamp, lamp housing, and power supply. -
Page 74: Replacing The Ultraviolet Lamp
Instruction Manual Model 951C 748214-X DECEMBER 2013 Uncouple the two velcro straps that secure the housing to the power supply. Lift the housing from the analyzer. 5.4.2 Replacing the ultraviolet lamp To replace the lamp, do the following: Unscrew and remove the end cap. -
Page 75: Converter Assembly
Model 951C Instruction Manual DECEMBER 2013 748214-X Remove the two screws that secure the power supply to the bottom plate of the analyzer. Lift the power supply from the analyzer. Replace the power supply by reversing the order of the steps in this section. -
Page 76: Removing The Glass Converter Tube
Instruction Manual Model 951C 748214-X DECEMBER 2013 5.5.1 Removing the glass converter tube To remove the glass converter tube, do the following: Turn off the analyzer. Carefully disconnect the blue silicon connectors from the ends of the inlet and outlet tubes. The inlet tube is partially filled with glass wool and has a larger inside diameter than the outlet tube. -
Page 77: Section 6: Replacement Parts
Matrix Each analyzer is configured per the customer sales order. Below is the 951C sales matrix which lists the various configurations avail-able. To identify the configuration of an analyzer, locate the analyzer name- rating plate. The sales matrix identifier number appears on the analyzer name-rating plate. -
Page 78: Circuit Board Replacement Policy
Replacement parts The following parts are recommended for routine maintenance and troubleshooting of the Model 951C. If the trouble-shooting procedures do not resolve the problem, contact your local Rosemount Analytical service office. A list of Rosemount Analytical Service Centers is located in Section 7. -
Page 79: Common Parts
Model 951C Instruction Manual DECEMBER 2013 748214-X 6.3.1 Common parts Figure 6-1. Major Assemblies of the Model 951C 655519 Air Restrictor Fitting 657091 Capacitor Assembly 655166 Capillary, Bypass 6 - 3... - Page 80 Instruction Manual Model 951C 748214-X DECEMBER 2013 655589 Capillary, Sample Hi 623719 Capillary, Sample Lo 654068 Temperature Control Assembly 654070 Converter Assembly 655303 Exhaust Fan 654052 Fan Assembly 898587 Fuse 3.15 A 902413 Fuse 6.25 A 662168 I/O Assembly 652173...
-
Page 81: Photomultiplier Assembly
Model 951C Instruction Manual DECEMBER 2013 748214-X 6.3.2 Photomultiplier assembly Figure 6-2. Photomultiplier Housing Assembly 6 - 5... - Page 82 Instruction Manual Model 951C 748214-X DECEMBER 2013 654943 Housing 649541 Insulating Washer 636318 Magnetic Shield 630916 Magnetic Shield 001522 O Ring 008423 O Ring, Photomultiplier 655168 Photomultiplier Tube 654381 Reaction Chamber 654086 Socket Assembly 639722 Thermal Shield 6 - 6...
-
Page 83: Converter Assembly 654070
Model 951C Instruction Manual DECEMBER 2013 748214-X 6.3.3 Converter assembly 654070 Figure 6-3. Converter Assembly 632784 Connector, Blue Silicone 657127 Heater 632782 Temperature Sensor 632795 Tube 6 - 7... -
Page 84: Temperature Control Assembly 654068
Instruction Manual Model 951C 748214-X DECEMBER 2013 6.3.4 Temperature control assembly 654068 Figure 6-4. Case Heater Temperature Control Assembly 6 - 8... - Page 85 Model 951C Instruction Manual DECEMBER 2013 748214-X 622733 622732 Heater 655335 Temperature Control Board 900492 Thermal Fuse 6 - 9...
- Page 86 Instruction Manual Model 951C 748214-X DECEMBER 2013 This page is intentionally left blank. 6 - 10...
- Page 87 Return of material If factory repair of defective equipment is required, proceed as follows: Secure a return authorization from a Rosemount Analytical Inc. Sales Office or Representative before returning the equipment. Equipment must be returned with complete identification in accordance with Rosemount instructions or it will not be accepted.
- Page 88 If the failure was due to the conditions listed in the standard Rosemount warranty, the defective unit will be repaired or replaced at Rosemount's option, and an operating unit will be returned to the customer in accordance with the shipping instructions furnished in the cover letter.
- Page 89 This page is intentionally left blank.
- Page 90 We reserve the right to modify or improve the designs or specifications of our products at any time without notice. Rosemount Analytical Inc., a division of Emerson Process Management, reserves the right to make changes to any of its products or services at any time without prior notification in order to improve that product or service and to supply the best product or service possible.
Need help?
Do you have a question about the 951C and is the answer not in the manual?
Questions and answers