
Related Manuals for McQuay AGZXXXBS Series


Summary of Contents for McQuay AGZXXXBS Series
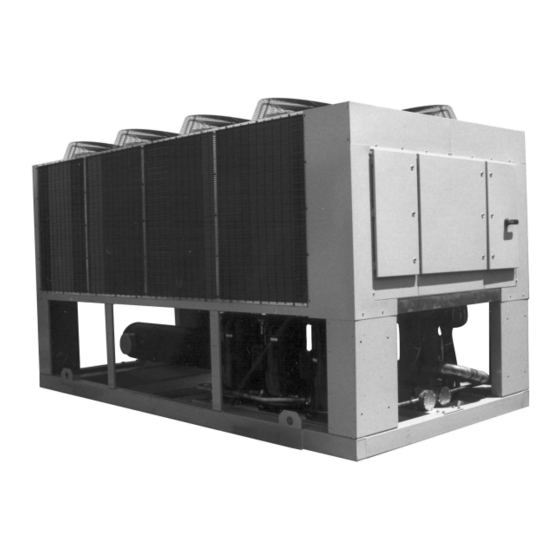
- Page 1 Installation, Operation and Maintenance Manual IOMM AGZ-5 Group: Chiller Part Number: 330411801 Effective: October 2004 Supercedes: IOMM AGZ-4 Air-Cooled Scroll Compressor Chiller AGZ 026B through 130B 60 Hertz, R-22...
-
Page 2: Table Of Contents
"McQuay" is a registered trademark of McQuay International 2002 McQuay International Illustrations and data cover McQuay International products at the time of publication and we reserve the right to make changes in design and construction at anytime without notice. AGZ 026B through 130B... -
Page 3: Introduction
Report shipping damage and file a claim with the carrier. Check the unit nameplate before unloading, making certain it agrees with the power supply available. McQuay is not responsible for physical damage after the unit leaves the factory. Note: Unit shipping and operating weights are available in the Physical Data tables beginning on page 28. -
Page 4: Installation
Installation e: Installation is to be performed by qualified personnel who are familiar with local codes and regulations. WARNING Sharp edges on unit and coil surfaces are a potential hazard to personal safety. Avoid contact with them. Handling Be careful to avoid rough handling of the unit. Do not push or pull the unit from anything other than the base. -
Page 5: Location
Location Figure 3, Clearances Unit Placement AGZ units are for outdoor applications and SEE ATTACHED TABLE DIMENSION “A” can be mounted either on a roof or at ground level. For roof mounted applications, install the unit on a steel channel or I-beam frame to 4 FT. -
Page 6: Agz 026B Through 130B
Occasionally, these clearances cannot be maintained due to site restrictions such as units being too close together or a fence or wall restricting airflow, or both. Fortunately, the McQuay AGZ chillers have several features that can mitigate the problems attributable to restricted airflow. •... -
Page 7: Agz 026B Through 130B
Case 1, Building or Wall on One Side of One Unit The existence of a screening wall or the wall of a building in close proximity to an air-cooled chiller is common in both rooftop and ground level applications. Hot air recirculation on the coils adjoining the wall will increase compressor discharge pressure, decreasing capacity and increasing power consumption. -
Page 8: Agz 026B Through 130B
Case 2, Two Units Side By Side Two or more units sited side by side are common. If spaced closer than 12 feet (3.7 meters) or 8 feet (2.5meters) depending on size, it is necessary to adjust the performance of each unit; circuits adjoining each other are affected. -
Page 9: Agz 026B Through 130B
Case 3, Three or More Units Side By Side When three or more units are side by side, the outside chillers (1 and 3 in this case) are influenced by the middle unit only on their inside circuits. Their adjustment factors will be the same as Case 2. -
Page 10: Agz 026B Through 130B
Case 4, Open Screening Walls Decorative screening walls are often used to help conceal a unit either on grade or on a rooftop. These walls should be designed such that the combination of their open area and distance from the unit do not require performance adjustment. It is assumed that the wall height is equal to or less than the unit height when mounted on its base support. -
Page 11: Agz 026B Through 130B
The grating material and installation design must be strong enough to prevent such accidents, yet provide abundant open area or serious recirculation problems will occur. Have any pit installation reviewed by McQuay application engineers prior to installation to make sure it has sufficient air-flow characteristics. The installation design engineer must approve the work to avoid the risk of accident. -
Page 12: Vibration Isolators
Sound Isolation The low sound level of the AGZ chiller is suitable for most applications. When additional sound reduction is necessary, locate the unit away from sound sensitive areas. Avoid locations beneath windows or between structures where normal operating sounds may be objectionable. -
Page 13: Agz 026B Through 130B
Table 2, AGZ-BS, Isolator Loads At Each Mounting Location (With Aluminum Fins) (1) Copper Total Unit Unit Fin Add Size Fans 026B 1281 1020 3990 1807 030B 1297 1032 4040 1830 035B 1283 1069 4080 1848 040B 1360 1082 4130 1871 045B 1377... -
Page 14: Ambient And Water Flow Limitations
Ambient and Water Flow Limitations AGZ units are designed to operate in temperatures as show in the following table. Table 5, Unit Maximum Operating Ambient Temperature Standard w/ Low Ambient w/ or w/o Low Ambient VFD Control AGZ Unit Model Controls VFD Control Option Plus High Ambient Panel Option... -
Page 15: Agz 026B Through 130B
CAUTION If separate disconnect is used for the 115V supply to the evaporator heating cable, mark the disconnect clearly to ensure the disconnect is not accidentally shut off during cold seasons causing a possible damaging evaporator freeze-up. 9. If the unit is used as a replacement chiller, flush the system thoroughly before unit installation. -
Page 16: Flow Switch
A flow switch is an equipment protection control and should never be used to cycle a unit. A “paddle” type flow switch is available from McQuay (part number 017503300). Certain minimum flow rates are required to close the switch and are listed in Table 6. -
Page 17: Water Connections
Variable water flow involves reducing the water flow through the evaporator as the load decreases. McQuay chillers are designed for this duty provided that the rate of change in water flow is not greater than 10 percent of the change per minute. -
Page 18: Agz 026B Through 130B
Test coolant with a clean, accurate glycol solution hydrometer (similar to that found in service stations) to determine the freezing point. Obtain percent glycol from the freezing point table below. It is recommended that a minimum of 25% solution by weight be used for protection against corrosion or that additional compatible inhibitors be added. -
Page 19: Agz 026B Through 130B
Altitude Correction Factors Performance tables are based at sea level. Elevations other than sea level affect the performance of the unit. The decreased air density will reduce condenser capacity consequently reducing the unit's performance. For performance at elevations other than sea level, refer to Table 11 or Table 12. Evaporator Temperature Drop Factors Performance tables are based on a 10°F (5°C) temperature drop through the evaporator. -
Page 20: Agz 026B Through 130B
Table 12, Capacity and Power Derates, Models AGZ 075 to 130 Fouling Factor Chilled Water Delta T Altitude 0.0001 (0.0176) 0.00025 (0.044) 0.00075 (0.132) 0.00175 (0.308) °F °C Cap. Power Cap. Power Cap. Power Cap. Power 0.990 0.997 0.976 0.994 0.937 0.983 0.868... -
Page 21: Evaporator Flow And Pressure Drop
The evaporator heater cable is factory wired to the 115-volt circuit in the control box. This power should be supplied from a separate source, but it can be supplied from the control circuit. Operation of the heater cable is automatic through the ambient sensing thermostat that energizes the evaporator heater cable for protection against freeze-up. -
Page 22: Agz 026B Through 130B
Figure 19, AGZ 026B – 130B, Evaporator Pressure Drop 075-085-090 120-130 026-030 100-110 065-070 Minimum Nominal Maximum AGZ Unit Inch-Pound S.I. Inch-Pound S.I. Inch-Pound S.I. Model DP ft. DP kpa DP ft. DP kpa DP ft. DP kpa 026B 11.6 10.4 30.9 030B... -
Page 23: Wind Baffles And Hail Guards
Wind Baffles and Hail Guards Wind Baffles/Hail Guards are a field installed option that are used to stabilize unit operation in high wind areas and to assist in operation at low ambient temperatures. Figure 20 is a sketch of a typical panel assembly on an AGZ unit. The actual number of panels and parts will vary by model size. -
Page 24: Agz 026B Through 130B
Table 13, Packing List Description Part Number Bubble Number Vertical Support Rib 074758501 Top Cover 330409401 Front Panel 330409501 ¼ - 20 x ½” Screw (Place in Poly Bag) 046093807 Figure 21, Components REAR (AGAINST UNIT) VERTICAL SUPPORT RIB TOP COVER FRONT PANEL Top Panel, Install Last Overlap the Front panel... -
Page 25: Optional Features
Optional Features Controls Hot Gas Bypass Hot gas bypass permits unit operation down to 10% of full load capacity. This option includes a factory-mounted hot gas bypass valve, solenoid valve, and manual shutoff valve for each circuit. See page 93 for further information. Head Pressure Control Optional fan VFD control allows unit operation down to 0°F (-18°C). -
Page 26: Agz 026B Through 130B
Reference documents ED 15062 and ED 15063 may be obtained from the local McQuay sales office, from the local McQuayService office, or from the McQuay Technical Response Center, located in Staunton, Virginia (540-248-0711). These documents can also be found on www.mcquay.com under Product Information >... -
Page 27: Agz 026B Through 130B
Phase Loss/Voltage Protection Phase loss with under/over voltage protection and multiple LED indication of fault type is available as a factory-installed option to guard against compressor motor burnout. Convenience Outlet 10.0 amp, 115-volt outlet located in control panel to provide power for servicing unit. Ground Fault Protection Protects equipment from damage from line-to-ground fault currents less than those required for conductor protection. -
Page 28: Physical Data
Physical Data AGZ-BS Table 15, AGZ 026BS through 035BS AGZ MODEL NUMBER PHYSICAL DATA 026B 030B 035B BASIC DATA Ckt.1 Ckt.2 Ckt.1 Ckt.2 Ckt.1 Ckt.2 Unit Capacity @ ARI (1), Tons (kW) 27.2 (95.4) 30.2 (106.3) 33.2 (117.2) Number Of Refrigerant Circuits Unit Operating Charge, R-22, Lbs. -
Page 29: Agz 026B Through 130B
Table 16, AGZ 040BS through 055BS AGZ MODEL NUMBER PHYSICAL DATA 040B 045B 050B 055B BASIC DATA Ckt.1 Ckt.1 Ckt.2 Ckt.1 Ckt.2 Ckt.1 Ckt.2 Ckt.2 Unit Capacity @ ARI Conditions (1), Tons (kW) 38.5 (135.5) 42.5 (149.6) 47.0 (165.4) 52.2 (183.7) Number Of Refrigerant Circuits Unit Operating Charge, R-22, lbs. -
Page 30: Agz 026B Through 130B
Table 17, AGZ 060BS through 070BS AGZ MODEL NUMBER PHYSICAL DATA 060B 065B 070B BASIC DATA Ckt.1 Ckt.2 Ckt.1 Ckt.2 Ckt.1 Ckt.2 Unit Capacity @ ARI Conditions (1), Tons (kW) 57.1 (201.0) 61.4 (215.5) 65.5 (230.0) Number Of Refrigerant Circuits Unit Operating Charge, R-22, lbs. -
Page 31: Agz 026B Through 130B
Table 18, AGZ 075BS through 090BS AGZ MODEL NUMBER PHYSICAL DATA 075B 085B 090B BASIC DATA Ckt.1 Ckt.2 Ckt.1 Ckt.2 Ckt.1 Ckt.2 Unit Capacity @ ARI Conditions (1), Tons (kW) 73.7 (259.4) 79.6 (280.2) 85.5 (301.0) Number Of Refrigerant Circuits Unit Operating Charge, R-22, lbs. -
Page 32: Agz 026B Through 130B
Table 5, AGZ 100BS through 130BS AGZ MODEL NUMBER PHYSICAL DATA 100B 110B 120B 130B BASIC DATA Ckt.1 Ckt.2 Ckt.1 Ckt.2 Ckt.1 Ckt.2 Ckt.1 Ckt.2 Unit Capacity @ ARI Conditions (1), Tons (kW) 97.6 (342.6) 107.5 (378.4) 119.8 (421.7) 129.4 (455.5) Number Of Refrigerant Circuits Unit Operating Charge, R-22, lbs. -
Page 33: Electrical Data - Standard Ambient33
Electrical Data - Standard Ambient Table 19, AGZ 026BM/BS – 070BM/BS, Electrical Data, Single Point (105°F & below) Power Supply Recomm’d. Minimum Max. Fuse Field Wire Fuse AGZ Unit Circuit Or HACR Volts Or HACR Wire Size Ampacity Breaker Breaker Quantity Gauge (MCA) -
Page 34: Agz 026B Through 130B
Table 20, AGZ 026BM/BS – 070BM/BS, Compressor and Fan Motor Amps, Single and Multi-Point (Up to 105°F) Rated Load Amps Locked Rotor Amps No. Of F.L.Amps Compressors Compressors Unit Volts Across-The-Line Motors Size Motors Motors No. 1 No. 3 No. 5 No. 2 No. 4 No. 6 (Each) No.1 No. -
Page 35: Agz 026B Through 130B
Table 21, AGZ 026 BM/BS – 070BM/BS, Field Wiring, Single Point Wiring to Standard Wiring to Optional Power Block Non-Fused Disconnect Switch Volts Unit Connector Wire Connector Wire Terminal Disconnect Size Range Range Amps Size (Copper Wire Only) (Copper Wire Only) 14 GA –... -
Page 36: Agz 026B Through 130B
Table 22, AGZ 075BM/BS – 130BM/BS, Electrical Wiring, Single Point (Up to 105°F) Power Supply Recomm’d. Max. Fuse Minimum Fuse Field Wire AGZ Unit Circuit Or HACR Volts Or HACR Wire Size Ampacity Breaker Breaker Quantity Gauge (MCA) Size Size 075B 085B 090B... -
Page 37: Agz 026B Through 130B
Table 23, AGZ 075BM/BS – 130BM/BS, Compressor and Fan Motor Amps, Single and Multi-Point (Up to 105°F) Rated Load Amps Locked Rotor Amps Compressors F.L. Compressors No. Of Amps Across-The-Line Unit Volts Motors Size Motors No. 1 No. 3 No. 5 No. 2 No. -
Page 38: Agz 026B Through 130B
Table 24, AGZ 075BM/BS - 130BM/BS, Field Wiring, Single Point Wiring to Standard Wiring to Optional Power Block Non-Fused Disconnect Switch Volts Unit Connector Wire Terminal Disconnect Connector Wire Range Size Range Amps Size (Copper Wire Only) (Copper Wire Only) 2 GA –... -
Page 39: Agz 026B Through 130B
Table 25, AGZ 026BM/BS – 070BM/BS, Electrical Data, Multi-Point (Up to 105°F) Electrical Circuit #1 Electrical Circuit #2 Power Supply Recomm’d Power Supply Recomm’d Max. Minimum Max. Fuse Minimum Fuse Fuse Fuse Field Wire Field Wire Unit Volts Circuit or HACR Circuit or HACR or HACR... -
Page 40: Agz 026B Through 130B
Table 26, AGZ 026BM/BS - 070BM/BS, Field Wiring, Multi-Point Wiring to Standard Wiring to Optional Power Block Non-Fused Disconnect Switch Volts Terminal Connector Wire Range Connector Wire Range Unit Disconnect Size Size Amps (Copper Wire Only) (Copper Wire Only) Cir #1 Cir #2 Cir #1 Cir #2... -
Page 41: Agz 026B Through 130B
Table 27, AGZ 075BM/BS - 130BM/BS, Field Wiring Data Wiring to Standard Wiring to Optional Power Block Non-Fused Disconnect Switch Volts Unit Terminal Connector Wire Range Connector Wire Range Disconnect Size Amps (Copper Wire Only) (Copper Wire Only) Size Cir #1 Cir #2 Cir #1 Cir #2... -
Page 42: Agz 026B Through 130B
Table 28, AGZ 065BM/BS - 130BM/BS, Electrical Data, Multi-Point (Up to 105°F) Electrical Circuit #1 Electrical Circuit #2 Power Power Recomm’d Recomm’d Max. Supply Supply Minimum Max. Fuse Minimum Fuse Fuse Fuse Volts Circuit or HACR Circuit Field Wire Field Wire Unit or HACR or HACR... -
Page 43: Electrical Data - High Ambient
Electrical Data - High Ambient Table 29, AGZ 026BB/BH – 070BB/BH, Electrical Data, Single Point Power Supply Recomm’d. Minimum Max. Fuse Fuse Field Wire AGZ Unit Circuit Or HACR Volts Or HACR Wire Size Ampacity Breaker Breaker Quantity Gauge (MCA) Size Size 026B... -
Page 44: Agz 026B Through 130B
Table 30, AGZ 026BB/BH – 070BB/BH, Compressor and Fan Motor Amps, Single and Multi-Point (106°F to 125°F) Rated Load Amps Locked Rotor Amps Compressors Compressors F.L.Amps R.L.Amps Unit Volts Across-The-Line Size Motors Motors No. 1 No. 3 No. 5 No. 2 No. -
Page 45: Agz 026B Through 130B
Table 31, AGZ 026BB/BH - 070BB/BH, Electrical Data, Multi-Point (106°F to 125°F) Electrical Circuit #1 Electrical Circuit #2 Power Supply Power Supply Recomm’d Max. Recomm’d Minimum Max. Fuse Minimum Fuse Fuse Fuse Field Wire Field Wire Unit Volts Circuit or HACR Circuit or HACR or HACR... -
Page 46: Agz 026B Through 130B
Table 32, AGZ 075BB/BH – 130BB/BH, Electrical Data, Single Point (Above 105°F) Power Supply Recomm’d. Max. Fuse Minimum Fuse Field Wire AGZ Unit Circuit Or HACR Volts Or HACR Wire Size Ampacity Breaker Breaker Quantity Gauge (MCA) Size Size 075B 085B 090B 100B... -
Page 47: Agz 026B Through 130B
Table 33, AGZ 075BB/BH – 130BB/BH, Compressor and Fan Motor Amps, Single and Multi-Point (106°F to 125°F) Rated Load Amps Locked Rotor Amps Compressors Compressors F.L.Amps R.L.Amps Unit Volts Across-The-Line Size Motors Motors No. 1 No. 3 No. 5 No. 2 No. -
Page 48: Agz 026B Through 130B
Table 34, AGZ 075BB/BH – 130BB/BH, Electrical Data, Multi-Point (106°F) Electrical Circuit #1 Electrical Circuit #2 Power Power Recomm’d Recomm’d Max. Supply Supply Minimum Max. Fuse Minimum Fuse Fuse Fuse Volts Circuit or HACR Circuit Field Wire Field Wire Unit or HACR or HACR or HACR... -
Page 49: Agz 026B Through 130B
Notes for “Electrical Data Single- and Multi-Point” Power: 1. Unit wire size ampacity (MCA) is equal to 125% of the largest compressor- motor RLA plus 100% of RLA of all other loads in the circuit including the control transformer. 2. The control transformer is furnished and no separate 115V power is required. - Page 50 Figure 22, AGZ 026B – AGZ 130B, Typical Field Wiring DISCONNECT UNIT MAIN GND LUG (BY OTHERS) TERMINAL BLOCK 3 PHASE TO COMPRESSOR(S) POWER AND FAN MOTORS NOTE: ALL FIELD WIRING TO BE FUSED CONTROL INSTALLED AS NEC CLASS 1 CIRCUIT TRANSFORMER WIRING SYSTEM WITH CONDUCTOR RATED 600 VOLTS...
-
Page 51: Dimensional Data
Dimensional Data Figure 23, Dimensions, AGZ 026BS – 070BS Packaged Chiller ISOLATOR LOCATIONS ON BOTTOM OF RAIL 13.31 13.31 67.76 (1721.10) (338.07) (338.07) COMPRESSOR COMPRESSOR CIRCUIT #2 CIRCUIT #1 2.00 (50.8) EVAPORATOR 2.00 (50.8) 55.65 (1413.51) CONTROL PANEL CONTROL PANEL POWER ENTRY POINT FIELD CONTROL... -
Page 52: Agz 026B Through 130B
Figure 24, AGZ 075BS - 090BS Packaged Chiller ISOLATOR LOCATIONS ON BOTTOM OF RAIL 12.4 110.1 (2797) (315) (315) COMPRESSORS CIRC. #2 (51) EVAPORATOR INLET OUTLET (51) 14.3 (364) COMPRESSORS CIRC. #1 60.0 (1525) CONTROL PANEL CONTROL POWER ENTRY POINT PANEL 0.875 KNOCK OUT FIELD CONTROL... -
Page 53: Agz 026B Through 130B
Figure 25, AGZ 100BS - 130BS Packaged Chiller ISOLATOR LOCATIONS ON BOTTOM OF RAIL 25.2 67.8 (1721) 67.8 (1721) 12.4 (315) (641) COMPRESSORS CIRC. #2 (51) EVAPORATOR OUTLET INLET "A" "A" 33.7 (855) (51) "B" COMPRESSORS CIRC. #1 "C" CONTROL POWER ENTRY POINT PANEL CONTROL... -
Page 54: Microtech Ii Controller
MicroTech II Controller Software Version AGZD20101A Controller Section Table of Contents Overview ................55 Inputs/Outputs ..............55 Setpoints ................57 Shutdown Alarms ............58 Limit Alarms ..............59 Control Logic..............60 Compressor Control ............61 Condenser Fan Control ...........65 Using the Controller ............68 Getting Started..............77 Menu Screens ..............77 Menu Matrix ..............80 View Screens Defined.............81 Alarm Screens Defined ...........84... -
Page 55: Overview
Overview MicroTech II controller’s state-of-the-art design not only permits the chiller to run more efficiently, but also can simplify troubleshooting if a system failure occurs. Every MicroTech II controller is programmed and tested prior to shipment to facilitate start-up. Operator-friendly The MicroTech II controller menu structure is separated into three distinct categories that provide the operator or service technician with a full description of 1) current unit status, 2) control parameters, and 3) alarms. -
Page 56: Agz 026B Through 130B
Table 37, Digital Inputs Description Type Signal Signal Unit OFF Switch 0 VAC (Disable) 24 VAC (Enable) Pump Down Switch #1 0 VAC (Disable) 24 VAC (Enable) Evaporator Water Flow Switch 0 VAC (No Flow) 24 VAC (Flow) Open Open Pump Down Switch #2 0 VAC (Disable) 24 VAC (Enable) -
Page 57: Setpoints
Setpoints The setpoints shown in Table 39 are retained by battery-back-up and remembered during power off, are factory set to the Default value, and can be adjusted within the values shown in Range. The PW (password) column indicates the password. Passwords are as follows: O = Operator =0100 M = Manager=2001 Table 39, Setpoints... -
Page 58: Shutdown Alarms
Automatic Adjusted Ranges The following are setpoints that will be limited based on the option selected. Evaporator Leaving Water Temperature Mode Range 40 to 60 ° F Unit Mode = Cool 20 to 60 ° F Unit Mode = Cool w/Glycol Evaporator Freeze Temperature Mode Range... -
Page 59: Logging
Table 40, Shutdown Alarms Action Description Occurs When: Reset Taken Evap Pump State = RUN AND Evap Flow Digital Rapid Stop Evap flow switch No Evaporator Water Flow Input = No Flow for time > Evap Flow Proof SP Unit closes Evaporator Press <... -
Page 60: Control Logic
Control Logic Unit Enable Enabling and disabling the chiller is controlled by the Unit Enable Setpoint, with options of OFF and ON. This setpoint can be altered by the Unit Off Input, Digital Input, keypad entry, or BAS request. The Control Source setpoint determines which source can change the Unit Enable setpoint with options of DIGITAL INPUT, KEYPAD, or BAS. -
Page 61: Chilled Water Pump Control
Unit Test Mode The unit test mode allows manual testing of controller outputs. Entering this mode requires the following conditions. Unit OFF input = OFF (i.e., entire chiller is shut down). Manager password active. Available Unit Mode setpoint = TEST A test menu can then be selected to allow activation of the outputs. - Page 62 Required Parameters • Number of starts for all compressors • Number of run-hours for all compressors • Status of all compressors (Available/Unavailable) • Compressor number Compressor Start/Stop Timing-Cool Mode This section defines when a compressor is to start, or stop, and the scenario for doing Required Parameters 1.
- Page 63 Stage Up For 2 compressors/circuit: Control band = Evap Delta T x .3 For 3 compressors/circuit: Control band = Evap Delta T x .2 [LWT Error > Startup_Delta_T_SP + 0.5(Control band) AND Number Comps Running = 0 AND Ice Timer Expired] THEN Stage_Up_Now = YES ELSE IF [LWT Error >...
- Page 64 High Condenser Pressure If the discharge pressure rises above the High Condenser Pressure Unload setpoint, and more than one compressor on the circuit is running, the circuit will stage down. One compressor will shutdown as soon as the pressure rises above the unload setpoint, and if two remain running, then one more will shut down 10 seconds later, if the pressure is still above the unload setpoint.
-
Page 65: Condenser Fan Control
BAS Limit The maximum unit capacity can be limited by a BAS signal. This function is only enabled if the unit control source is set to network. The maximum unit capacity stage is based on the BAS limit value received from the BAS, and is determined as shown in the graphs in the previous section. - Page 66 Fan Stages There are 2, 3, or 4 fans available per circuit. On 8 fan units, fans 5/7 and 6/8 are controlled by one contactor for each pair, using virtual stages to allow a difference of only one fan between stages. See the tables below: 4 and 6 Fan Units Stage (3-Fan) Fans On Cir.
-
Page 67: Optional Low Ambient Vfd
Forced Fan Stage At Start Fans may be started simultaneously with the compressor based on outdoor ambient temperature. When the compressor starts, a Fantrol stage is forced based on the following table. Table 44, Forced Fan Staging Fantrol Stage At Start >... -
Page 68: Using The Controller
Inverter Output to the Motor The AC motor must be connected only to the inverter’s output terminals. The output terminals are uniquely labeled (to differentiate them from the input terminals) with the designations U/T1, V/T2, and W/T3. This corresponds to typical motor lead connection designations T1, T2, and T3. - Page 69 Stop/Reset Key - Press this key to stop the motor when it is running (uses the programmed deceleration rate). This key will also reset an alarm that has tripped. Potentiometer -Allows an operator to directly set the motor speed when the potentiometer is enabled for output frequency control.
- Page 70 NOTE: The inverter 7-segment display shows lower case “b” and “d,” meaning the same as the upper case letters “B” and “D” used in this manual (for uniformity “A to F”). NOTE: The Store Key saves the edited parameter (shown in the display) to the EEPROM in the inverter, regardless of the programming device.
- Page 71 Symptom Condition Probable Cause Solution • • Is the maximum frequency setting A_04 Verify the V/f settings match motor The RPM of the motor does correct? specification. not match the inverter output • • Does the monitor function D_01 display Make sure all scaling (such as A_11 to frequency setting.
- Page 72 Error Codes An error code will appear on the display automatically when a fault causes the inverter to trip The following table lists the cause associated with the error. Error Name Cause(s) Code Over current event while at constant speed The inverter output was short-circuited, or the motor shaft is locked or has a heavy load.
- Page 73 VFD Monthly and Yearly Inspection Chart Frequency Item Inspected Check for ... Inspection Method Criteria Month Year Ambient temperature Ambient Extreme Temperatures & Thermometer, hygrometer between – 10 to 40°C, non- environment humidity condensing Abnormal noise & Stable environment for Major devices Visual &...
- Page 74 This end of this section lists the parameters for the CR100 series inverters and the values as programmed in the factory. Unit identification Parameter Settings for Keypad Entry Main Profile Parameters “F” Group Parameters McQuay Function Setting Name Code F_01...
- Page 75 Standard Functions “A” Group Parameters “A” Group Parameters McQuay McQuay Function Function Setting Setting Name Name Code Code A_01 Frequency source setting A_53 DC braking wait time A_02 Run command source setting A_54 DC braking force during deceleration A_03 Base frequency setting 60.0...
- Page 76 Fine Tuning Functions Intelligent Terminal Functions “B” Group Parameters “C” Group Parameters McQuay McQuay Function Function Setting Setting Name Name Code Code C_01 Terminal [1] function B_01 Selection of automatic restart C_02 Terminal [2] function Allowable under-voltage power failure B_02...
-
Page 77: Using The Controller
Using the Controller 4x20 Display & Keypad Layout The 4-line by 20-character/line liquid crystal display and 6-key keypad are shown below. Figure 26, Display (in MENU mode) and Keypad Layout Key to Screen Pathway MENU Key Air Conditioning < ALARM <... -
Page 78: Menu Screens
screens can then be selected by pressing the key connected to it via the pathway shown in Figure 26. For example, selecting ALARM will go the next row of menus under ALARM (ALARM LOG or ACTIVE ALARM). Selecting VIEW will go the next level of screens under VIEW (VIEW UNIT STATUS or VIEW UNIT TEMP). - Page 79 Most menus containing setpoint values have several different setpoints shown on one menu. When in a setpoint menu, the ENTER key is used to proceed from the top line to the second line and on downward. The cursor will blink at the entry point for making a change.
-
Page 80: Menu Matrix
Figure 28, Menu Matrix "MENU" "VIEW" MENUS VIEW UNIT VIEW UNIT VIEW CIR #1 VIEW CIR #2 VIEW REFRIG CIR VIEW REFRIG CIR VIEW FAN S STATUS (1) TEMP (1) STATUS (1) STATUS (1) #1 STATUS (1) #2 STATUS (1) ... -
Page 81: View Screens Defined
After pressing the “VIEW” menu key, a menu screen will show: VIEW < UNIT < COMPRESSOR < REFRIGRANT < FANS Selection of any of these will advance to the appropriate data menu. For example, after pressing the “ REFRIGERANT ” menu button, the selected data screen will show: VIEW REFRIG °... - Page 82 VIEW UNIT STATUS (5) D.I. 111111111 123456789012345678 111111111111111111 This menu gives the status of digital inputs (D.I.). 1=ON, 0=OFF. Numbers are 1 through 18. See Table 37, Digital Inputs, on page 56 for number reference. VIEW UNIT STATUS (6) Analog Outputs (volts X 100) 1=XXX.X 2=XXX.X...
- Page 83 VIEW CIR1 STATUS (4) Comp5=Off Hours= XXXXX Starts= XXXXX SCREEN DEFINITION: VIEW REFRIGERANT The following three screens are duplicated for circuit #2. VIEW REFRG CIR 1 (1) Evap Press= XXX.Xpsi Cond Press= XXX.Xpsi VIEW REFRG CIR 1 (2) Sat Evap= XXX.X Sat Cond= XXX.X VFD Target= XXX.X VIEW REFRG CIR 1 (3)
-
Page 84: Alarm Screens Defined
Screen Definitions – ALARM Alarm Log Alarm Description Time/Date Data:Edit and scroll The last 25 alarms, either shutdown or limit, are shown in this menu with earlier alarm menus stored under it. ARROW DOWN from this menu will go to the next-to-last alarm, ARROW DOWN again will go to the second from last, and so on through the last 25 occurrences. - Page 85 If a word-type setpoint (for example, YES or NO) is to be selected, the choices are loaded into the menu and selected by scrolling through the available setpoint options using the UP ARROW key. 4. Enter the desired value or word into the controller by pressing the ENTER key. Stated another way, once the desired set screen is reached, editing is accomplished by pressing the ENTER key until the desired field is selected within the set screen.
- Page 86 Unit Mode settings can be: 1. COOL, normal setting used with chilled water air-condition applications. 2. COOL w/GLYCOL, used with low temperature glycol applications. It allows a lower LWT setpoint to be used. 3. ICE w/GLYCOL, used with ice storage systems, allows changing from chilled glycol operation to lower temperature ICE operation.
- Page 87 SET UNIT SPs (8) Units = ° ° ° ° F/psi Lang = ENGLISH Units settings are only °F/psi at the present time. °C/kPa will be available later. Lang (Language) settings can be only ENGLISH at present. SET UNIT SPs (9) Protocol = MODBUS Ident Number=001 Baud Rate=9600...
- Page 88 SET UNIT SPs (15) ENTER PASSWORD XXXX Active Password Level:None SET COMP SETPOINTS SET COMP SPs (1) # of Compressors =X Stop-Start =XXmin Start-Start =XXmin This menu sets the anti-recycle timers. Stop-Start is the time required before starting a compressor after it has stopped. Start-Start is the time required before starting a compressor after the last time it has started.
- Page 89 SET ALARM LMTS (3) HighCondPr = XXXpsi HiCondStgDn = XXXpsi HighCondPr (the unit high-discharge-pressure shutdown) is a stop alarm that shuts off the unit when the discharge pressure reaches the setting. The default setting is 385 psi. The HiCondStDn is a limit alarm that unloads the unit in an attempt to prevent total shutdown from the HighCondPr.
- Page 90 SET FANS SPs # Fans On At Startup >75° ° ° ° F >90° ° ° ° F >105° ° ° ° F Screen Definitions – TEST The field test screens are only available when the unit is in TEST mode. Using these screens, any digital output can be controlled manually.
-
Page 91: Startup
Equipment Warranty Form”. Return this information within 10 working days to McQuay International as instructed on the form to obtain full warranty benefits. 1. Verify chilled water flow. 2. Verify remote start / stop or time clock has requested the chiller to start. -
Page 92: Shutdown
Shutdown Temporary 1. Put both circuit switches to the OFF position (Pumpdown and Stop). 2. After compressors have stopped, put System Switch (S1) to OFF (emergency stop). 3. Turn off chilled water pump. Chilled water pump to operate while compressors are pumping down. -
Page 93: Electrical Check Out
7. Leak detector is applied externally to refrigerant joints at the factory. Do not confuse this residue with an oil leak. 8. Connect refrigerant service gauges to each refrigerant circuit before starting unit. Electrical Check Out CAUTION Electrical power must be applied to the compressor crankcase heaters 24 hours before starting unit to drive off refrigerant from the oil. -
Page 94: Vfd Low Ambient Control (Optional)
A solenoid valve in the hot gas bypass lines is wired in parallel with both circuit’s liquid line solenoid valves SV1 and SV2. The hot gas bypass is available whenever a refrigerant circuit is operating and regulates the evaporator pressure. The pressure regulating valve is factory set to begin opening at 58 psig (32°F for R-22). -
Page 95: Refrigerant Charging
Refrigerant Charging Liquid line subcooling at the liquid shut-off valve should be between 15 and 20 degrees F at full load. If the unit is at steady full load operation and bubbles are visible in the sight glass, then check liquid subcooling. Thermostatic Expansion Valve The expansion valve performs one specific function. -
Page 96: Unit Maintenance
McQuay recommends the use of foaming coil cleaners available at most air conditioning supply outlets. Use caution when applying such cleaners as they can contain potentially harmful chemicals. -
Page 97: Preventive Maintenance Schedule
Liquid Line Sight Glass The refrigerant sight glasses should be observed periodically. (A weekly observation should be adequate.) A clear glass of liquid indicates that there is subcooled refrigerant charge in the system. Bubbling refrigerant in the sight glass, during stable run conditions, indicates that the system can be short of refrigerant charge. -
Page 98: Service
Service WARNING Service on this equipment is to be performed by qualified refrigeration personnel familiar with equipment operation, maintenance, correct servicing procedures, and the safety hazards inherent in this work. Causes for repeated tripping of equipment protection controls must be investigated and corrected. Disconnect all power before doing any service inside the unit. -
Page 99: Evaporator
Evaporator The evaporators are the direct expansion, shell-and-tube type with refrigerant flowing through the tubes and water flowing through the shell over the tubes or stainless steel brazed-plate type. The tubes are internally finned to provide extended surface as well as turbulent flow of refrigeration through the tubes. -
Page 100: Warranty Statement
Warranty Statement Limited Warranty Consult your local McQuay Representative for warranty details. Refer to Form 933- 43285Y. To find your local McQuay Representative, go to www.mcquay.com. AGZ 026B through 130B IOMM AGZ-5... -
Page 101: Agz Troubleshooting Chart
AGZ Troubleshooting Chart PROBLEM POSSIBLE CAUSES POSSIBLE CORRECTIVE STEPS Main switch. Close switch. Check electrical circuits and motor windings for shorts or grounds. Investigate for possible overloading. Replace Fuse blown. circuit breakers open fuse or reset breakers after fault is corrected. Check for loose or corroded connections. - Page 102 PROBLEM POSSIBLE CAUSES POSSIBLE CORRECTIVE STEPS Oil hang-up in piping Review refrigerant piping and correct. Low oil level Check and add oil. Loose fitting on oil line Check and tighten system. Compressor Oil Level too high Adjust thermal expansion valve. Level Too High Or Insufficient water flow - Level too high Adjust flow.
- Page 103 IOMM AGZ-5 AGZ 026B through 130B...
- Page 104 AGZ 026B through 130B IOMM AGZ-5...
- Page 106 This document contains the most current product information as of this printing. For the most up-to- date product information, please go to www.mcquay.com. Post Office 2510, Staunton, Virginia 24402 USA • (800) 432-1342 • www.mcquay.com IOMM AGZ-5 (10/04)
Need help?
Do you have a question about the AGZXXXBS Series and is the answer not in the manual?
Questions and answers