Table of Contents
Advertisement
Advertisement
Table of Contents
Troubleshooting

Subscribe to Our Youtube Channel
Related Manuals for McQuay AGR 055AS


Summary of Contents for McQuay AGR 055AS
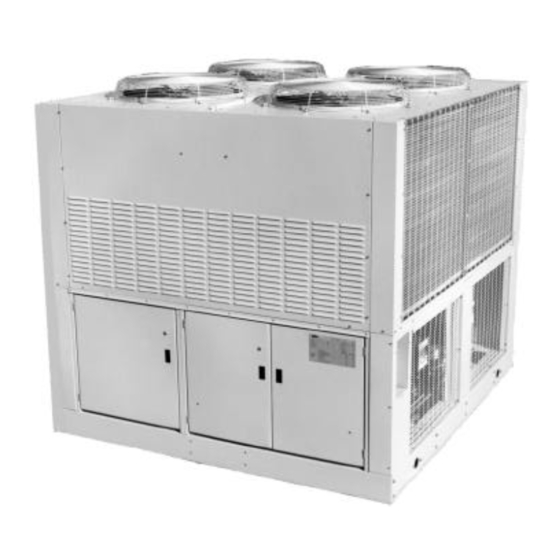
- Page 1 Installation, Operation and Maintenance Manual IOMM AGR Group: Chiller Part Number: 074641101 Effective: June 1998 Supersedes: IOM 690 690None Air-Cooled Reciprocating Chiller AGR 055AS through 100AS 60 Hertz, English and Metric Global Chiller Line © 1997 McQuay International...
-
Page 2: Table Of Contents
"McQuay" is a registered trademark of McQuay International © 1997 McQuay International "Illustrations cover the general appearance of McQuay International products at the time of publication and we reserve the right to make changes in design and construction at anytime without notice" AGR 055A through 100A... -
Page 3: Introduction
Check all items carefully against the bill of lading. Inspect all units for damage upon arrival. Report shipping damage and file a claim with the carrier. Check the unit name plate before unloading, making certain it agrees with the power supply available. McQuay is not responsible for physical damage after unit leaves the factory. -
Page 4: Installation
Installation Note: Installation is to be performed by qualified personnel who are familiar with local codes and regulations. WARNING Sharp edges and coil surfaces are a potential hazard. Avoid contact with them. Handling Be careful to avoid rough handling of the unit. Do not push or pull the unit from anything other than the base. -
Page 5: Location
Location Unit Placement AGR units are for outdoor applications and can be mounted on a roof or ground level. Set units on a solid and level foundation. For roof mounted applications, install the unit on a steel channel or I- beam frame to support the unit above the roof. - Page 6 Figure 3, Clearance Requirements Do not block the flow of air to and from the condenser coil. Restricting airflow or allowing air recirculation will result in a decrease in unit performance and efficiency because discharge pressures are increased. There must be no obstruction above the unit that would deflect discharge air downward where it could be...
-
Page 7: Vibration Isolators
See Dimensional Data for dimensions required to secure each isolator to the mounting surface. The spring flex isolators are white type CP2-32, McQuay part number 047792932. A total of four per unit is required. Figure 4, Isolator Locations (4 and 6 fan units) -
Page 8: Water Piping
Water Piping Local authorities can supply the installer with the proper building and safety codes required for safe and proper installation. Install piping with minimum bends and changes in elevation to minimize pressure drop. Consider the following when installing water piping: 1. -
Page 9: Flow Switch
Mount a water flow switch in either the entering or leaving (recommended) water line to shut down the unit when water flow is interrupted. A flow switch is available from McQuay (part number 0017503300). It is a “paddle” type switch and adaptable to any pipe size from 3” (76mm) to 8” (203mm) nominal. Certain minimum flow rates are required to close the switch and are listed in Table 3. -
Page 10: Glycol Solutions
Figure 7, Refrigerant Piping (Some Components Are Optional) Glycol Solutions The system glycol capacity, glycol solution flow rate in GPM, and pressure drop through the cooler may be calculated using the following formulas and table. Note: The procedure 1. Capacity -- Find the reduced capacity by multiplying the chiller’s capacity with water by the does not specify the capacity correction factor C. - Page 11 CAUTION Do not use an automotive grade antifreeze. Industrial grade glycols must be used. Automotive antifreeze contains inhibitors which will cause plating on the copper tubes within the chiller evaporator. The type and handling of glycol used must be consistent with local codes.
-
Page 12: Evaporator Water Flow And Pressure Drop12
Evaporator Water Flow and Pressure Drop Evaporator flow rate must fall between the minimum and maximum values shown in the evaporator pressure drop table on page 12. Varying chilled water flow through the evaporator while the compressor(s) are operating is not recommended. Figure 8, Pressure Drop Curve 055-060 090-100... -
Page 13: Physical Data
Physical Data Table 7, AGR 0550AS - 070AS PHYSICAL DATA AGR MODEL NUMBER STANDARD EFFICIENCY 055AS 060AS 065AS 070AS BASIC DATA Ckt.1 Ckt.2 Ckt.1 Ckt.2 Ckt.1 Ckt.2 Ckt.1 Ckt.2 Unit Capacity @ ARI Conditions (1), Tons (kW) 54.3 (190.9) 59.3 (208.5) 63.5 (223.3) 67.3 (236.6) Number Of Refrigerant Circuits... - Page 14 Table 8, AGR 075A - 085A PHYSICAL DATA AGR MODEL NUMBER STANDARD EFFICIENCY 075AS 080AS 085AS BASIC DATA Ckt.1 Ckt.2 Ckt.1 Ckt.2 Ckt.1 Ckt.2 Unit Capacity @ ARI Conditions (1), Tons (kW) 71.7 (252.1) 77.9 (273.9) 84.1 (295.7) Number Of Refrigerant Circuits Unit Operating Charge, R-22, Lbs.
- Page 15 Table 9, AGR 090A - 100A PHYSICAL DATA AGR MODEL NUMBER STANDARD EFFICIENCY 090AS 095AS 100AS BASIC DATA Ckt.1 Ckt.2 Ckt.1 Ckt.2 Ckt.1 Ckt.2 Unit Capacity @ ARI Conditions (1), Tons (kW) 86.5 (304.1) 93.4 (328.4) 99.3 (349.1) Number Of Refrigerant Circuits Unit Operating Charge, R-22, lb.
-
Page 16: Electrical Data
Electrical Data Field Wiring CAUTION Internal power wiring to the compressors for single and multiple point option are different. Field wiring must be installed according to unit wiring diagram. Wiring must comply with all applicable codes and ordinances. Warranty is void if wiring is not in accordance with specifications. - Page 17 Table 10, 60 Hz, Single Point Power Electrical Data Minimum POWER SUPPLY Max. Fuse Circuit Field Wire Conduit Hub Unit Volts Ampacity Wire Nominal HACR Breaker Size (MCA) Quantity Gauge Quantity Size Size 2.00 2.00 055A 1.50 1.00 1.00 2.50 2.50 060A 1.50...
- Page 18 Table 11, 60 Hz, Compressor And Condenser Fan Motor Amp Draw Rated Load Amps Locked Rotor Amps Compressors No. Of Compressors Unit Volts Motors Motors Across-The-Line Reduced Inrush Size (Each) Motors (Each) No. 1 No. 2 No. 1 No. 2 23.7 21.4 055A...
- Page 19 Table 12, 60 Hz Single Point Power, Field Wiring Data Wiring to Standard Wiring to Optional Power Block Non-Fused Disconnect Switch Unit Volts Terminal Connector Wire Range Terminal Connector Wire Range Size Amps (Copper Wire Only) Amps (Copper Wire Only) # 4 - 400 MCM 250-500 MCM # 4 - 400 MCM...
- Page 20 Notes for “Electrical Data Single Point” Power: 1. Unit wire size ampacity (MCA) is equal to 125% of the largest compressor-motor RLA plus 100% of RLA of all other loads in the circuit including the control transformer. 2. If the control transformer option is furnished, a separate 115v power is not required. 3.
- Page 21 Figure 9, Typical Field Wiring with Global UNT Controller IOMM AGR AGR 055A through 100A...
- Page 22 Figure 10, Typical Field Wiring Diagram with MicroTech Controller AGR 055A through 100A IOMM AGR...
- Page 23 Figure 11, Standard Single-Point Connection with FanTrol IOMM AGR AGR 055A through 100A...
- Page 24 Figure 12, Standard Single-Point Connection with Optional SpeedTrol AGR 055A through 100A IOMM AGR...
- Page 25 Figure 13, Unit Control Schematic (2 compressor UNT) IOMM AGR AGR 055A through 100A...
- Page 26 Figure 14, Staging Schematic (2 compressor 4-stage UNT) AGR 055A through 100A IOMM AGR...
- Page 27 Figure 15, Staging Schematic (2 compressor 6-stage UNT) IOMM AGR AGR 055A through 100A...
- Page 28 Figure 16, MicroTech Controller Schematic AGR 055A through 100A IOMM AGR...
- Page 29 Figure 17, Unit Control Schematic (MicroTech) IOMM AGR AGR 055A through 100A...
- Page 30 Figure 18, Staging Schematic (4-stage MicroTech) AGR 055A through 100A IOMM AGR...
- Page 31 Figure 19, Staging Schematic (6-stage MicroTech) IOMM AGR AGR 055A through 100A...
- Page 32 Figure 20, Unit Control Schematic (2 compressor MicroTech) AGR 055A through 100A IOMM AGR...
- Page 33 Figure 21, UNT Instrument Layout See legend on page 35. IOMM AGR AGR 055A through 100A...
- Page 34 Figure 22, MicroTech Instrument Layout See legend on page 35. AGR 055A through 100A IOMM AGR...
- Page 35 Figure 23, AGR Power Side Component Layout See legend on page 35. Figure 24, Component Layout Legend IOMM AGR AGR 055A through 100A...
- Page 36 Figure 25, MicroTech Sensor Layout AGR 055A through 100A IOMM AGR...
-
Page 37: Dimensional Data
Dimensional Data Figure 26, Dimensions AGR 055AS through 070AS 4” (107mm) (AGR055-060) 5” (127mm) (AGR065-070) VICTAULIC CONNECTIONS OUTLET FURNISHED WITH GROOVES INLET FOR VICTAULIC COUPLINGS BY OTHERS NOTE: 1. ALL DIMENSIONS IN INCHES (mm) 2. ALL UNITS HAVE (2) INDEPENDENT... - Page 38 Figure 27, Dimensions AGR 075AS through 100AS 5” (127mm) (AGR075-100) VICTAULIC CONNECTIONS NOTE: FURNISHED WITH GROOVES 1. ALL DIMENSIONS IN INCUES (mm) FOR VICTAULIC COUPLINGS 2. ALL UNITS HAVE (2) INDEPENDENT INLET OUTLET BY OTHERS REFRIGERANT CIRCUITS EVAPORATOR 2 REFRIGERANT CIRCUITS CONTROL BOX COIL HEADERS AT THIS END...
-
Page 39: Agr Unit Start-Up
AGR Unit Start-Up Pre start-up The chiller must be inspected to ensure no components became loose or damaged during shipping or installation or during extended shut down periods. Water piping checkout 1. Check the pump operation and vent all air from the system. 2. -
Page 40: Start-Up
Be prepared to record all operating parameters required by the “Compressorized Equipment Warranty Form”. Return this information within 10 working days to McQuay International as instructed on the form to obtain full warranty benefits. - Page 41 before the refrigerant valves are in the correct operating position. When starting the unit, electrical power must be on for 24 hours before starting the chiller. To start the chiller after an extended shutdown, follow the pre startup and startup instructions. IOMM AGR AGR 055A through 100A...
-
Page 42: Agr Unit Operation
AGR Unit Operation Sequence of Operation Starting With control power on, 115Vac power is applied through F1 to the compressor crankcase heaters and control transformer T2. T2 supplies 24Vac to the Global UNT controller. The green light on the Global UNT controller will begin to flash. The panel Alarm Light will illuminate. Put the System Switch S1 into the AUTO position. -
Page 43: Hot Gas Bypass (Optional)
Software Description (Global UNT Interface Kit required to read or change variables) Variable Description Default Value Range Name LPSS Low Pressure Starting Setpoint 10 psi 5 to 15 psi SLPT Starting Low Pressure Time 260 sec 90 to 300 seconds MLPS Minimum Low Pressure Setpoint 5 psi... -
Page 44: System Adjustment
System Adjustment To maintain peak performance at full load operation, the system superheat and liquid subcooling may require adjustment. Read the following subsections closely to determine if adjustment is required. Liquid Sightglass and Moisture Indicator The moisture indicator color is an indication of the dryness of the system and is extremely important when the system has been serviced. -
Page 45: Water Cooler
Water Cooler The water cooler is of the direct expansion type with removable internally finned tubes. The copper tubes are individually rolled into heavy duty steel tube sheets and sealed by a steel refrigerant head. The water connection nozzles which enter and leave the shell are on the same side of the unit. No special attention is required for the cooler except that clean, filtered water should be supplied. -
Page 46: Unt Controller Operation
UNT Controller Operation This section provides setup and troubleshooting information for the Global UNT controller. All operational descriptions are based on the Global UNT software SURE4-2A. Operational characteristics may vary with other versions of software. General Description The Global UNT is a microprocessor based leaving water controller designed for multiple stage operation. - Page 47 Unit Set Points and Calibration The control software is installed and tested by the factory before shipping. No periodic calibration of the controller is necessary. All control and safety set points must be checked by the installing contractor and adjusted as necessary before starting the unit. The “setpoint”...
-
Page 48: Controller Inputs /Outputs
The Global UNT controller can be connected to an IBM or IBM compatible computer for setpoint changes and downloading of different software’s. A Global UNT Interface Kit is available from your local McQuay Sales Representative. Software Identification Control software is factory installed and tested in each panel prior to shipment. The software is identified by a program code which is printed on the a small label attached to the controller. - Page 49 Digital Inputs Note: All Digital Inputs are 24 VAC supplied by transformer T2 in the control panel. Do not use inputs from another power supply external to the unit. This can cause failure of the Global UNT controller. Table 14, Digital Inputs Input Description Location...
- Page 50 Figure 28, Outside Air Reset LWRB LWSP OALL OAHL OARB (OALL=OAHL - OARB) As the OAT increases above the Outdoor Air Low Limit (OALL), the Actual Leaving Water Setpoint is decreased from its Leaving High Limit (Leaving Water Setpoint plus Leaving Reset Band) to the Leaving Water Setpoint.
- Page 51 When Return Water Reset is chosen, a Fail Smart Logic option is also available. This option works as follows. If the Leaving Water Sensor (AI-1) becomes unreliable, the controller switches from Leaving Water control to Return Water control. Actual Return Water Setpoint equals Leaving Water Setpoint (AI-4) plus an adjustable Leaving Water Setpoint Offset.
-
Page 52: Additional Global Unt Controller Features52
Additional Global UNT Controller Features Remote Stop/Start When the remote stop/start switch is open, the controller will be in the unoccupied mode. The unit will be enabled when the remote start / stop switch is closed and will control at the leaving water temperature setpoint. - Page 53 Table 16, System Staging and Unit Capacity Pumpdown Control The AGR units have a limited recycling pump down. The pump down is activated when a circuit’s liquid line solenoid valve is de-energized. After the circuit’s liquid line solenoid valve is de- energized, the operating compressor on that refrigerant circuit will operate until the low pressure switch opens and stops that compressor.
-
Page 54: Alarms
Freezestat Control On startup the Global UNT controller will check the evaporator pressure after the SLPT(starting low pressure time) timer times out. If the evaporator pressure is greater than the LPHL (low pressure high limit) value, the Global UNT controller will continue to stage up as additional cooling is required. -
Page 55: Zone Terminal (Optional)
ZONE TERMINAL (optional) The Zone Terminal (ZT) is a hand-held or unit mounted device that monitors and adjusts your McQuay Global Reciprocating Chiller information. A standard telephone-style jack directly connects the ZT to the McQuay Global UNT controller. Features •... - Page 56 Monitor Mode lets you view up to three of chiller settings/sensed values at a time. To allow you to monitor your system, a clear plastic Insert (factory made and installed) relates the ZT’s output to your McQuay Global UNT controller. You can simultaneously monitor the chiller in three ways: •...
- Page 57 DISPLAYS, SYMBOLS, KEYS, AND BUTTONS The Zone Terminal simultaneously displays three set points or sensed values. In addition, flashing symbols indicate when items are in a state of alarm. The keys, buttons, displays, and symbols are explained below. Table 17, Displays, Symbols, Keys, Buttons DISPLAYS, SYMBOLS, KEYS, BUTTONS DESCRIPTION...
- Page 58 You can unit mount the ZT, or use it as a portable tool for convenient access to any chiller information. McQuay Global Reciprocating Controller Connection A standard telephone-style jack connects the ZT to a McQuay Chiller Controller directly. Figure 33, Connecting ZT to a Global UNT Controller Using 6 to 8 Pin Cable 1 2 3...
-
Page 59: Zone Terminal Glossary
Adjustable Points The following McQuay Global Reciprocating Chiller points are adjustable by the Zone Terminal. Table 18, Adjustable Points TEMPLATE VALUES NAME FACTORY SETPOINT RANGE OA/AI3 HiLim SP 80°F 0 to 100°F OA/AI3 Reset SP -40°F -100 to 100°F LvgWtr Rband SP 0°F... - Page 60 Cir #2 Starts - Counts the number of starts for circuit #2. Note: If power is lost to the controller, this data is lost and will start counting over. When power is applied and kept on, the controller will allow 10 starts for circuit #1 as the lead circuit, then will switch to circuit #2 for the next 10 starts, etc (Automatic Lead/Lag).
-
Page 61: Global Unt Controller Troubleshooting Chart
Global UNT Controller Troubleshooting Chart PROBLEM POSSIBLE CAUSES CORRECTIVE ACTIONS Compressor will not Main switch, circuit breakers open. Close switch. Fuse blown. Check electrical circuits and motor winding for shorts or grounds. Possible overloading. Replace fuse or reset breakers after fault is corrected. Overloads are auto reset. - Page 62 Replace AGR 055A through 100A IOMM AGR...
-
Page 63: Microtech Controller Installation And Operation
Important operating conditions at the time of the alarm are retained in the controller’s memory to aid in troubleshooting and unit diagnostics. McQuay MicroTech Monitor software is available for remote adjustment and monitoring of the chiller. - Page 64 All control and safety set points must be checked by the installing contractor and adjusted as necessary before starting the unit. Controllers for McQuay chillers have default set points. Refer to the menu items listed below.
- Page 65 Field Wiring Interconnecting wiring for the control panel may consist of the following: • 115 VAC power wiring • Chilled water pump relay • Analog input signals • Digital input signals • Digital output signals • Network communications • Communications to a personal computer •...
- Page 66 Digital Outputs The digital output board has normally open solid-state relays with an on-board replaceable 5 amp fuse. The status of all outputs are shown by the individual output red LEDs. Chilled Water Pump Relay The optional chilled water pump relay is connected to terminal #10 and #9 on TB-2. When the unit is enabled, the chilled water pump relay is energized.
- Page 67 Controller Inputs /Outputs Analog Inputs Analog inputs are used to read the various temperatures and pressures on the chiller as well as any customer supplied 4-20mA reset signals. The controller’s internal regulated 5 Vdc and 12 Vdc supplies provide correct operating voltage for the sensors. See Table 19 for details. Table 19, Analog Inputs Input Description...
- Page 68 When in “Ice” reset mode, and adequate amount of glycol must be added to the system to protect the evaporator from freezing. McQuay recommends a minimum of 30% solution of ethylene glycol to protect to 7°F with the minimum leaving water temperature at unit shut down of 21°F. At 21°F shut down, the saturated refrigerant temperature can approach 10°F.
- Page 69 (21°F + 2°F = 23°F; 23°F = 46psig) Network A network refers to a McQuay MicroTech control panel (CSC or RMS) that can provide controlling functions to several McQuay chillers. One function is to control the chiller leaving water temperature according to some control logic in the network control panel.
- Page 70 Manual Operation Manual operating modes are available to simplify setup and troubleshooting of the unit. Any of the following manual modes may be selected from the Control Mode Menu. Note: These manual settings are intended to aid in troubleshooting and should not be considered to be normal operating modes.
- Page 71 MicroTech display, causing lockout of compressors. Thus, the alarm must be manually cleared. When a McQuay Chiller with a MicroTech controller is used with the McQuay RMS (Remote Monitoring and Sequencing) Panel, the user must note that alarm nomenclature varies. The RMS has three possible categories of alarms: faults, problems, and warnings.
-
Page 72: Sequence Of Operation
Circuit Alarm Conditions The “Circuit Alarm Conditions” are those alarms which only affect one circuit and can stop the compressors of that circuit. These alarms are: • Compressor Motor Protection • High Condenser Pressure • Mechanical High Pressure Switch • Low Evaporator Pressure •... - Page 73 If an alarm condition exists which prevents normal operation of both refrigerant circuits, the chiller will be disabled and the display will indicate OFF:Alarm. Assuming none of the above “OFF” conditions are true, the controller will examine the internal time clock schedule to determine if the chiller should start.
-
Page 74: Start-Up And Shutdown
Start-Up and Shutdown Pre-Start Checkout Configuration default set points are entered at the factory and all values must be checked and reset for each installation. Make sure the field wiring for all flow switches, interlocks or jumpers matches the connections detailed on the field wiring drawing. Setting of the HEX Address Switches The controller HEX address switches for each unit determine its logical address in a MicroTech network or in an Open Protocol network. -
Page 75: Keypad / Display
rises above the LPCutIn value, a compressor on the lead circuit will start. Refer to the unit staging schematic to determine which LED is associate to a compressor. The controller will stage up and down to maintain the desired leaving water temperature. Temporary Shutdown Close both pumpdown switches. - Page 76 Menu Structure (general description) The information stored in the MicroTech controller can be accessed through the keypad using a tree- like structure. This tree structure is divided into Categories, Menus and Menu Items. There are three Categories which make up the tree structure: STATUS, CONTROL, and ALARM. Each category is divided into Menus and each Menu into Menu Items.
- Page 77 Keypad Key Functions The MicroTech keypad consists of twelve pressure sensitive membrane switches (Figure 34). These keys are used to step through, access, and manipulate the information in the MicroTech controller tree structure. The keypad keys are divided into four groups with two or four keys in each. These groups of keys and their functions are described below.
-
Page 78: Menu Descriptions
Decr. - When changing the value of a menu item entry, pressing “DECR. -” shifts the menu item display line to the next lower value or previous available selection. Enter - Once a change has been made to a desired value, pressing “ENTER” locks in the new value. Clear - Pressing “ALARMS”... - Page 79 Menu #6: Circuit 62 Pressures—The circuit #2 evaporator and condenser refrigerant pressure readings are displayed under this menu. The calculated minimum and maximum condenser pressure values are also shown. Menu #7: Circuit #l Temperatures—The circuit #I refrigerant temperatures are calculated from their corresponding pressure sensors and displayed here.
- Page 80 ("MaxChWRst"). At 4mA or less, no reset will occur. At 20mA, the chilled water set point will be reset to a value equaling the Leaving Evaporator Water Set Point ("Lvg Evap") plus the value stored in the "MaxChWRst". Any milliamp value between 4 and 20mA will cause a proportional value of the Maximum Chilled Water Reset to be added to the Leaving Chilled Water Set Point.
- Page 81 Figure 35, Delta-T Setpoints for Chillers Menu #15: Softload Set Points—The controller can limit the number of available stages when the unit is initially started to prevent excessive power consumption and help control overshoot of the water temperature set point. The maximum number of stages will equal the Soft Load Maximum Stages for the time period defined in the softload timer set point.
- Page 82 cursor will advance to the Year position on the display. Use the Incr, Decr, and Enter keys to set the correct Year. Press the Next Item key. The display will show the current Day, Hour, Minute and Second. If this information needs to be changed, follow the same procedure used to set the Date in the previous section.
- Page 83 Menus for the AGR MicroTech Controller Table 23, MENU 1 Chiller Status Table 26, MENU 4 Water Temp's Screen Display Screen Display Lvg Evap= xxx.x °F (°C) OFF: Manual Mode Short °F (°C) OFF: System Sw Open °F (°C) OFF: Remote Comm OFF: Remote Sw Ent Evap= xxx.x °F (°C) OFF: Time Clock...
- Page 84 Table 29, MENU 7 Circ #1 Temp's Table 31, MENU 9 Chiller Amps Screen Display Screen Display Satur Evap=xxx°F (°C) PercentRLA=xxx% N/A **°F (°C) SuctLine = xxx.x°F (°C) Open °F (°C) Table 32, MENU 10 Comp RunHours Short °F (°C) Screen Display Super Ht =xxx.x°F (°C)
- Page 85 Table 35, MENU 13 Control Mode Screen Display Factory Setpoint Range Manual Unit Off Manual Unit Off Automatic Manual Staging Manual Stage=xx 1 - 8 Table 36, MENU 14 Lvg Evap Spts Values for R-22 refrigerant, ( ) indicates Centigrade values Screen Display Factory Setpoint...
- Page 86 Table 38, MENU 15 SoftLoad Spts Screen Display Factory Setpoint Range Time Left= xxmin SoftLoad= xx min 0 - 254 SoftLdMaxStg= x 1 - 4 LoadDelay= xxsec 0 - 254 Table 39, MENU 16 CompressorSpt Screen Display Factory Setpoint Range Sequence=Auto Auto 1234...
- Page 87 Table 44, MENU 20 Schedule Screen Display Factory Setpoint Range Override= xx.xx hr 0.00 Hr 00:00 - 63.50 NMPSchedule= N/A Sun 00:00-23:59 00:00 - 23:59 00:00 - 23:59 Mon 00:00-23:59 00:00 - 23:59 00:00 - 23:59 Tue 00:00-23:59 00:00 - 23:59 00:00 - 23:59 Wed 00:00-23:59 00:00 - 23:59...
- Page 88 Table 48, MENU 23 Misc Setup Screen Display Factory Setpoint Range Unit Type= Air Cooled Units = English English English - Metric SpeedTrol = No No - Yes Power = 60 hz 60 - 50 Port A Baud=xxxx 9600 9600 - 2400 - 1200 Pre-Alarm=Blink Blink Blink - Open - Closed...
-
Page 89: Trouble Analysis For The Agr Microtech Controller
Trouble Analysis for the AGR MicroTech Controller Microprocessor Control Board The Microprocessor Control Board (MCB) is shown in Figure 36. It contains a microprocessor that is preprogrammed with the software required to monitor and control the chiller. The various MCB connections and components are described below. - Page 90 Following is the normal start-up sequence that the three status LED’s should follow when power is applied to the MCB: 1. The red (“Reset”) LED turns on and remains on for approximately 5 seconds. During this period the MCB performs a self-test. 2.
- Page 91 Figure 37, Hex Switches HI (left) hex switch LO (right) hex switch * Hex switch setting 01 shown Communication Ports The MCB has two communication ports: port A and port B. Each port has six terminals and is set up for both the RS-232C and RS-485 data transmission interface standards. The male and female connectors for these ports are manufactured by AMP.
-
Page 92: Test Procedures
Test Procedures Status LED Diagnostics The MCB status LED indications can aid in controller diagnostics. If the status LEDs do not operate normally there is a problem with the MCB. Following are troubleshooting procedures for the various symptoms. Red LED Remains On If the red LED remains on after the 5-second self-test period, it is likely that the MCB is defective. - Page 93 6. Reconnect the analog input ribbon cable. Cycle power to the controller and check the power fuses. If both fuses are intact, go to step 7. If either fuse blows, check the ADI board, the connecting ribbon cable, and the field wiring for shorts.
- Page 94 Figure 38, MCB Power Supply Terminals POWER FUSES [BUSSMAN GDC-T2A] Fuse F1 Fuse F2 9 8 7 6 5 4 3 2 1 AUX/OUT Troubleshooting the Keypad/Display Interface The Keypad/Display Interface is connected to the MCB via a ribbon cable and discrete wiring for the back light.
- Page 95 Troubleshooting Analog Inputs An analog input, such as a temperature sensor, is connected to the ADI board. The analog input is then conditioned by the ADI board. The conditioned input is transferred to the MCB via a ribbon cable. Analog Input not Read by the MCB If the MCB appears to be functioning properly and the analog input is not being read by the MCB, perform the following procedure: 1.
- Page 96 Figure 39, Output Board Relay Socket Fuse *250V ~ 50/60 Hz *120V ~ 50/60 Hz Test Resistor 330-680 Ohm WARNING Electric shock hazard. Can cause severe injury or death. Even when power to the panel is off, solid-state relay socket terminals 1 and 2 on the output board could be connected to high voltage.
- Page 97 2. Remove power from the controller by placing CB1 to the OFF position. Disconnect at least one wire from the power input terminals of the Output Board. The resistance should not be less than 3000 ohms. If the resistance is greater than the acceptable value, go to step 3. If the resistance is less than the acceptable value, the Output Board is defective.
- Page 98 3. Remove power from the controller by opening CB1. Try to improve the connections in the Aux/Out plug insulation displacement terminals by pressing down on the wires with a small screwdriver. 4. Check all other wiring and connectors for bent pins or mis-wires. If the chatter does not stop, the electromechanical relay or contactor is probably defective.
-
Page 99: Unit Maintenance
No maintenance is ordinarily required except the routine removal of dirt and debris from the outside surface of the fins. McQuay recommends the use of foaming coil cleaners available at most air conditioning supply outlets. Use caution when applying such cleaners as they may contain potentially harmful chemicals. -
Page 100: Preventative Maintenance Schedule
due to a clogged filter-drier or a restriction elsewhere in the liquid line See Table 55 for maximum allowable pressure drops. If subcooling is low add charge to clear the sightglass. If subcooling is normal (10°-15°F) and flashing is visible in the sightglass check the pressure drop across the filter- drier. -
Page 101: Unit Service
Unit Service CAUTION 1. Service on this equipment is to be performed by qualified refrigeration personnel familiar with equipment operation, maintenance, correct servicing procedures, and the safety hazards inherent in this work. Causes for repeated tripping of safety controls must be investigated and corrected. -
Page 102: Evaporator
Evaporator The evaporator is the direct expansion, shell-and-tube type with refrigerant flowing through the tubes and water flowing through the shell over the tubes. The tubes are internally finned to provide extended surface as well as turbulent flow of refrigeration through the tubes. Normally no service work is required on the evaporator. - Page 103 3. The charge can be added at any load condition between 25-100% load per circuit but at least two fans should be operating per refrigerant circuit if possible. The suction superheat should be in the 6°F-12°F (3.3°C-6.6°C) range. 4. Add sufficient charge to clear the liquid line sightglass and until all flashing stops in the sightglass.
-
Page 104: Agr Troubleshooting Chart
AGR Troubleshooting Chart PROBLEM POSSIBLE CAUSES POSSIBLE CORRECTIVE STEPS Compressor will not Main Switch. Close Switch. Fuse Blown. Circuit breakers open Check electrical circuits and motor windings for shorts or grounds. Investigate for possible overloading. Replace fuse or reset breakers after fault is corrected. Check for loose or corroded connections. -
Page 105: Notes
Notes IOMM AGR AGR 055A through 100A... - Page 106 Post Office Box 2510 Staunton, Virginia, USA 540.248.0711...
Need help?
Do you have a question about the AGR 055AS and is the answer not in the manual?
Questions and answers