Table of Contents
Advertisement
Quick Links
Advertisement
Table of Contents

Related Manuals for McQuay AC 40A


Summary of Contents for McQuay AC 40A
- Page 1 AM - MAC...
-
Page 2: Table Of Contents
Copyright©2003 by McQuay International. All rights reserved. This publication is strictly confidential and is meant for DISTRIBUTORS of McQuay International only. No part of this publication may be reproduced or distributed in any form or by any means, or stored in a data base or retrieval system, without the prior... -
Page 3: Introduction
Introduction The air-cooled mini chillers form part of a complete integrated water hydronic system with the chiller water fan coil units. The range of capacity from 30,000 Btu/hr to 150,000 Btu/hr (8.79 – 43.96 KW) makes them suitable for various applications: Office Rooms Private Houses Business Rooms... - Page 4 Schematic diagram of the basic close hydronic system: Expansion tank Heat Pump Heat SOURCE LOAD Distribution system In the mini chiller, the source will comprise of the refrigeration circuit, i.e. compressor, expansion device, condenser and evaporator. A brazed plate heat exchanger (BPHE) is used as the evaporator to produce the chilled water.
-
Page 5: Introduction
If both chilled water and hot water are required in the system, a mini chiller with a reverse cycle operation will be used. The unit will have an additional 4-way valve and accumulator for this purpose. It is by such integration of components of the hydronic system that the mini chiller becomes compact. -
Page 6: Chiller Mounting
Section 1: Chiller Mounting Care must be taken to locate the air-cooled chiller at the proper place. Ensure sufficient clearance around the unit to allow proper air flow and to facilitate access for maintenance. Location of the units must also prevent short-circuiting of the discharge air. Do not block any air passage in and out of the units. - Page 7 Such brackets must have sufficient strength to carry the weight of the chiller unit. It is recommended that angle bars (e.g. 38mm*38mm*3mm ) or hollow section bars (e.g. 25mm* 50m*2mm ) to be used for fabricating these brackets. These brackets must also allow clearance for removal of service panels for maintenance purposes.
- Page 8 Special installation: The A and B series mini chiller units have been designed with the refrigerant circuit located in the top compartment and the hydraulic kit in the bottom compartment: Piping connection Water Refrigerant Hydraulic kit A-series B-series A-series B-series In some special installations whereby the available space (especially the height) is not sufficient to install the chiller, it is possible to to detach these two compartments and install them side by side.
- Page 9 For the A-series type of mini chiller, the inter-connecting pipes between the two compartments are the refrigerant pipes. For the B-series type, there is a water pipe in between the two compartments. Therefore, the detached installation of the A-series mini chillers is very similar to the installation of a split type air-conditioning unit.
- Page 10 d) Use as few bends as possible in the pipe run. Each bend will cause extra pressure drop and reduces the capacity of the system. Do not use more than 10 bends. For both A and B- series chillers, locating the hydraulic kit at a far distance will also mean having a longer water pipe length.
-
Page 11: Water Pipe Circuit
Section 2: Water Pipe Circuit We have seen that the mini chiller has an integrated buffer storage tank, expansion tank and water pump together as one unit. Henceforth, we will represent the unit as such: Note: For C-series, the buffer tank is not applicable but the fundamentals of water piping circuitry is still the same Water out... - Page 12 Advantages: Lower piping cost High water temperature drops Disadvantages: Each fan coil loading cannot be controlled separately Diverting Circuit: LOAD LOAD FCU 1 FCU 2 LOAD LOAD FCU 4 FCU 3 Advantages: Allows individual control to each fan coil unit Disadvantages: Only fan coil units with low pressure drops can be used Due to low water velocity in each fan coil, an air vent is required for...
- Page 13 Parallel Direct Return Horizontal installation Fan coil unit Vertical installation The basis for the design is "First In - First Out". In this system, the length of supply and return piping for each fan coil is unequal. This will affect the water flow rate through each individual load. Proper balancing is required to provide adequate water flow rate for each fan coil.
- Page 14 Parallel Reverse Return Horizontal Installation Fan coil unit Vertical Installation The basis for the design is "First In - Last Out". In this installation, the supply and return water pipes or of nearly equal lengths. Thus, it seldom requires balancing of water flow rate for individual fan coil unit. If required, this balancing will be easier.
- Page 15 Parallel Reverse Return Header, Direct Supply Rise This is a variation of both the direct and reverse return systems, whereby it is not feasible to have a full reverse return piping. Instead, only the return header is in reverse, whereas the supply to the individual fan coils are in direct configuration.
- Page 16 Close System vs. Open System The mini chiller has been designed with an application for a close water piping system. However, it is still possible to use the unit with an open system by means of an additional buffer tank. Return from load Supply to load Tank...
- Page 17 Primary - Secondary Pump System There may be instances when the integrated pump in the mini chiller is not able to deliver the required head pressure to the load in a close piping system. To overcome this problem: Change the water pump with a higher head pressure capability. Please consult with the factory as to the requirements.
- Page 18 The temperature of water entering the load will depend very much on the sizing of the secondary pump. 1. If the capacity of primary pump = secondary pump, there will be no flow in the bypass loop. Hence, the water temperature entering the load will be equal to the water temperature leaving the chiller.
- Page 19 Multiple Chiller Installation In most cases, one single chiller will not be sufficient to provide the cooling load of a system. Several chillers must be combined together to give the required loading. Generally, these chillers will be installed together in parallel. There are several ways to do this: 1) Common Supply and Return Headers Check valve...
- Page 20 c) Since all the water is pumped into one supply line, there is less flexibility in zoning the water distribution. The pump head may not be sufficient to deliver water to zones of high pressure losses, e.g. at the furthest end of the pipe system. Because of the importance of water flow balancing among all the parallel chillers, the design of the header is very important.
- Page 21 In this method, the load side of the system is isolated from the chiller side. Chillers of different capacities can be installed together without much balancing problems and effect on the supply flow rate to the loading. It just requires individual balancing of the flow rate through each chiller by using the balancing valves.
- Page 22 For both method [A] and [B], the return water temperature for the multiple chillers will not be the same due to mixing. This will cause inefficiencies and energy wastages to the chiller operation. 3) Common Tank System This method is for an open system. return from load CHILLERS Tank...
- Page 23 4) In some instances, variation to method (1) have been used whereby common headers are NOT installed to the multiple chillers. Instead, the chillers are connected together with one supply and return pipe only. To load This is not a common header pipe Return from load This method is still possible but there will be higher pressure drops along the common...
- Page 24 Multiple Chiller, Single Fan Coil Load With Multiple Circuits There are instances where several chillers are used to supply the chilled water to a large single fan coil unit. Each chiller will serve one of the multiple circuits of the heat exchanger coil in the fan coil unit.
- Page 25 The first method has more extensive pipe works. But the water side flow control is easier and there is less pressure drop. Globe valves may be needed to ensure sufficient flow rate. Check valves are not required. Due to the header pipes in the second method, check valves are needed for each chiller.
- Page 26 Make Up Water Supply The make up water supply is used to refill water back into the hydronic system in the event of: a) Leakage in the system b) Maintenance service The supply is usually from the main domestic pipe and it is usually connected to the water return pipe of the pump;...
- Page 27 Loop Piping Installation One of the main advantages of using mini chillers is the ability to have long water piping installations. However, it is important to check that the water pump head pressure capability is adequate to pump the water through the pipe network. The longer the pipe length is, the higher is the pressure drop.
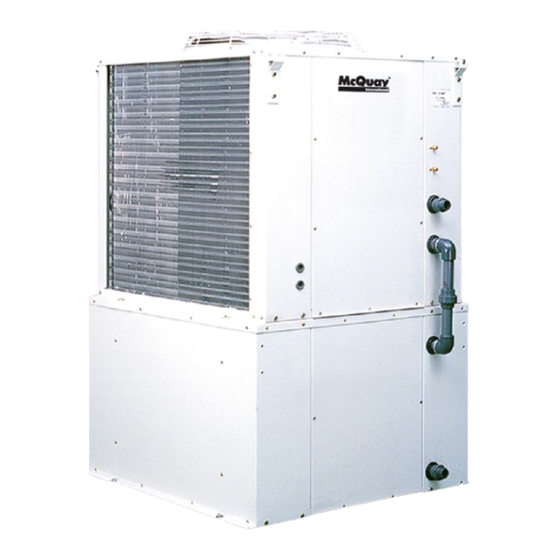
- Page 28 Water Pipe Connections All mini chiller units comes with ∅1-1/4” pipe connections. 1] A-Series The pipe connections are on the right-hand side of the unit (when facing the fan blade). Water inlet Water outlet 2] B-Series The pipe connections are on the same side as the control box compartment Water outlet Water inlet Section 2...
- Page 29 3] C-Series The pipes can be connected either from the left or right side of the unit (with respect to the compartment doors). Water outlet Water inlet Section 2 Page 27...
-
Page 30: Water Pipe And Fittings
Section 3: Water Pipe and Fittings There are several types of pipe we can use for the water piping: Black carbon steel pipe Copper pipe PVC pipe Do not use galvanised iron (GI) steel pipe! This is because the zinc coating on the GI pipe will have an electrolytic reaction with the copper components of the system, e.g. - Page 31 Therefore, pipes may have the same nominal diameters (outside diameters) but with different inside diameters because of the different schedule numbers. The usual schedule numbers are 10, 20, 30, 40, 60, 80, 100, 120, 140 and 160 with the thickness increasing with the numbers.
- Page 32 3. PVC Pipes The plastic PVC (polyvinyl chloride) pipes are light, generally inexpensive and corrosion resistant. The pipes also have a very low friction factor (i.e. with smooth surface) which results in lower pumping power and smaller pipe sizes. However, these pipes are not suitable for high temperature applications as they losses strength rapidly at temperatures above ambient.
- Page 33 Typical Pipe Fittings The following are typical pipe fittings used for installing the mini chillers. Note that the pipe fitting size of the chiller itself is 1-1/4". a) Steel Pipe Because of the pipe fitting size, it is recommended that the connecting pipes and fittings to be joined with thread.
- Page 34 with reducing ends nipple Nipples are usually used for joining different types of fittings, e.g. an elbow with a reducer. External thread connector Used for joining two lengths of pipes together Internal thread Union/ coupling Used for joining two lengths of pipes together Made up of two halves, each screwed into a...
- Page 35 flange connector flange holes for bolt and nipple gasket to be placed on the mating surfaces of both flanges This method is not recommended for the small pipe size used for the mini chiller. ** The fittings for weld joining are very similar to those mentioned above, i.e. they do not come with the thread portion.
- Page 36 b) Copper Pipe The most commonly used method of joining copper pipes is brazing with an oxy-acetylene flame and copper filler rods. For this purpose, one end of the pipe is expanded by using an expander tooling, and the end of the other pipe is inserted into the expanded end. The joint is then brazed together.
- Page 37 connectors expanded end Sometimes, copper connectors are used instead of expanding the copper ends. This is especially with larger pipes where expanding becomes more difficult because of the thicker wall thickness. Also, an alternative to using elbows is to just bend the pipes with a pipe bender to suit the installation requirement.
- Page 38 Copper Pipe: Compression Fittings For some installations, the piping are connected using compression fittings. These fittings enable easy installation and dismantling. However, the cost for these fittings are higher. They are also not as strong as brazing joints. Chances of leakage are higher. Generally, the fittings have mounting rings which are slipped onto the copper pipes.
- Page 39 connector female thread Used for connecting two pipes together. Some have threaded ends for connection with other fittings. union locking nut The two halves opened up threaded end Similar to the steel type. Used for connecting two pipe together with flexibility of easy connection and dismantling.
- Page 40 c) PVC Pipe It is recommended that the PVC pipe fittings used to be in accordance to the DIN 8062 standards. These fittings have thicker walls and able to withstand higher pressures and temperatures. Generally, these fittings are the cheapest and easiest to install. 90°...
- Page 41 adaptor/sockets The sockets may have male or female threaded ends. Such sockets are useful to adapt connection with a steel pipe or tank. union locking nut the two halves of the union Similar to the steel and copper versions, these unions enable easy connection and dismantling of two PVC pipe ends.
- Page 42 Tee Joint Installation Care must be taken during installation of tee joints. Two cases are mentioned here to demonstrate the importance of understanding the design of the water flow system. a. Avoid "bullheading" Do not connect piping to the tee connection with opposing flow directions. turbulence occurs here and causes high friction losses .
- Page 43 Valves In Section 2, we have look at several piping network configurations. The diagrams shown in that section have been simplified. In actual situation, the piping will have most of the pipe fittings described earlier in this Section 3. In addition, valves are also installed along the piping lines. Valves are used for the following purposes: a.
- Page 44 Generally, valves can be categorised as manual or automatic valves. Manual Valves The following are the types of manual valves commonly used in hydronic systems: 1. Globe Valve Flow is controlled by a circular disc forced against or withdrawn from an annular ring, or seat, that surrounds an opening through which flow occurs.
- Page 45 3. Ball Valve This valve has a precision ball seated between two circular seals or seats. A 90° turn of the handle will change the operation from fully open to fully closed. - may be used for throttling duty - generally used with smaller pipe diameters (up to 75mm) 4.
- Page 46 5. Balancing Valve This type of valve provide throttling duty to regulate water flow rate for balancing purposes. Two ports are provided in the inlet and outlet ports of the valve to permit measurement of pressure drop across the valve. By using performance charts provided, the value of flow rate through the valve can be determined.
- Page 47 Automatic Valves This type of valves operate in conjunction with an automatic controller or device to control the fluid flow. These controllers are also called as actuators. There are several types of actuators commonly used: a. Solenoid b. Electric motor c.
- Page 48 motor drive position indicator valve (encased in insulation) c. Pneumatic Valve This type of valve has a flexible diaphragm clamped between an upper and lower housing. The valve stem is attached to the diaphragm. By injecting air pressure into the upper housing, the diaphragm will push the valve stem. An opposing spring force on the valve stem will also resist this movement.
- Page 49 Two Way and Three Way Valves Automatic control valves used in hydronic systems may be classified as either two-way or three-way. All three types of actuators mentioned above may be used for these two types of valves. In the two-way valve, water flows into the inlet port and exits from the outlet port. By means of the actuator, the flow rate may vary from full flow to zero.
- Page 50 Capacity Control With 2-Way and 3-Way Valves supply return supply ret urn LOAD LOAD 2 way diverting mixing LOAD The load of the fan coil unit can be calculated from the equation: Q = 4180 * (water flow rate, L/s) * (water temperature differential.°C) Watt Therefore, the load is propotional to the water flow rate and ∆t.
- Page 51 Application: Both the two-way and three-way valves are suitable for shut-off and flow regulation purposes. The cost of the two-way valves are cheaper compared with the three-way valves. Thus, there is a tendency to use the two-way valves during installations. A typical two-way valve installation: FAN COIL UNIT 1 2-way solenoid...
- Page 52 b. Use a Variable Speed Drive for the Secondary Water Pump. ∆ P primary loop When the differential pressure becomes higher, the inverter will slows down the water pump to maintain the head pressure. If no demand, the water pump will stop running. c.
- Page 53 However, this system has one main disadvantage. Since the supply water is by-passed around the load coil, energy is wasted. This will cause the chiller to cycle on-off more frequent as the return water temperature becomes lower. Therefore, in terms of energy efficiency, applications with 2-way valves are better. Section 3 Page 51...
- Page 54 Other Type of Valves and Fittings a. Check Valve This valve will only allow flow in one direction, i.e. to prevent back flow of water. We have seen an example of usage in Section 2 with multiple chillers installation. There are two basic design of these check valves: 1.
- Page 55 c. Pressure Gauge Cock Generally, this valve is a ball valve. It is used to isolate pressure gauges installed along the water pipe lines. Pressure gauge Impulse tubing loop Gauge cock (Ball valve) Main pipe line The gauge cock is only opened during pressure measurement. When not in use, the valve is closed to prevent prolonged pressurising to the gauge, therefore preventing damage to the gauge itself.
- Page 56 e. Air Vent Valve The mini chiller unit has an automatic air vent located on top of the buffer tank. This is to release any trapped air inside the tank which may cause problem to the pumping operation. This is especially so during heating operation where oxygen and hydrogen gases are formed from the water and gets accumulated inside the tank.
- Page 57 f. Strainer The strainer is an important element in the piping system to remove particles (e.g. sand) and dirt from the water. If not, these impurities will damage the pumping mechanism and clogged-up valves and fittings. IMPORTANT!!! The mini chiller unit do not have a strainer built-in. Always install a strainer on the water inlet pipe into the chiller to protect the internal water pump.
- Page 58 water inlet filter mesh 16 – 20 recommended There is also a practice to install a strainer on the inlet pipe to a fan coil unit. This is done to protect the control valve, located at the outlet pipe, from clogging. strainer FAN COIL UNIT 2-way valve...
- Page 59 During installation, it is important to ensure that the sensing bulb is in touch with the flowing stream of water. If the thermometer is installed too "high" up the connecting socket, the bulb will measure the temperature of stagnant water in the socket. thermometer too high up Thermometer bulb...
- Page 60 Valve Sizing In selecting the suitable valve to use for an application, the following items must be considered: 1. What is the fluid medium of usage. In chillers, the fluid is water. There are valves specially designed other fluids e.g. steam and air, which are not suitable for water.
- Page 61 For a given flow rate, we can select a valve with suitable C to give an appropriate pressure drop. These data are available in graphs provided by the manufacturer. See Appendix 5. Selection of the valve must be done so as not to have too high a pressure drop, else the water pump head will be insufficient for the system.
- Page 62 Head Pressure pump curve increased pressure pressure pressure drop drop of drop with of control valve valve with reduced at full opening zero flow flow system curve w/o control valve Flow rate Reduced flow Design flow Another consideration in selecting the suitable valve is to determine the flow characteristic through the valve.
- Page 63 Selection of valve with equal percentage flow characteristics will give the best performance as this will give a linear heat transfer rate with flow rate: Heat transfer rate, % Valve opening Flow rate, % For automatic on-off valves (e.g. solenoid 2-way, 3-way), the selection is easier. Generally, use the same size as the pipe size, with a low pressure drop (e.g;...
- Page 64 Guidelines for Valve and Fitting Installation: a. Gate valves (shut-off) are installed in the entering and leaving piping to the chiller and fan coil unit. This is to permit servicing and replacement of the equipment without draining the system. A globe valve may be used to serve as one of the shut-off valve and in addition to balance the flow rate.
- Page 65 The following diagrams illustrate examples of piping layout: Typical Mini Chiller Piping Installation: Water supply Water return CHILLER 1-1/4” connector Make-up water (from main supply or water tank) Typical Fan Coil Unit Installation: a. Horizontal installation RETURN SUPPLY FAN COIL UNIT gauge cock Section 3 Page 63...
- Page 66 b. Vertical Installation Supply riser Return riser FAN COIL UNIT 3-way mixing valve tee joint o Multiple Fan Coil Unit Installation air vent globe valve FAN COIL 1 FAN COIL 2 FAN COIL 3 All three fan coil units to serve one area with a 3-way common thermostat.
- Page 67 Multiple Chiller Installation check valve glove valve CHILLER 1 Supply CHILLER 2 Return CHILLER 3 Make-up water Common Header Globe valve will be used to balance the flow rate through each chiller unit. Additional gate valves may be installed along the main supply and return lines to isolate the entire chiller assembly.
- Page 68 Primary-Secondary System glove valve secondary pump RETURN CHILLER tee joint (Remember ! Do not encourage bullheading here) Water Tank Installation (Open System) RETURN RETURN TANK adaptor(c/w nubber gasket) To external pump CHILLER SUPPLY Section 3 Page 66...
-
Page 69: Pipe And Fitting Size
Section 4: Pipe and Fitting Sizing In the previous section, we have looked at the different types of pipes which can be used in a hydronic system. We have also looked at the various types of fittings used in conjunction with the piping. - Page 70 Water Flow Limitations The factors which determine the water velocity limits are noise, erosion and installation cost. If the piping is too small, noise and erosion levels will become unfavourable even though the cost is more economical. Conversely, choosing a larger pipe will incur higher costs. It is recommended that the following guidelines to be used for the mini chiller units: 1.
- Page 71 The following data are extracted from the mini chiller technical manual: Water flowrate Velocity, fps Model USGPM /min 1-1/4" 1" AC 40A 0.89 1.43 2.47 AC 50A 1.19 1.91 3.30 AC 58A 11.1 1.48 2.38 4.12 AC 75B 17.8 2.37 3.80...
- Page 72 Equivalent Pipe Length The concept of equivalent pipe length is very useful in calculating friction losses along the hydronic pipe system. Defination: The equivalent pipe length of a component in the pipe system is the length of a straight pipe which will give the same friction losses as the component itself. For example, we have a 1"...
- Page 73 Other than that, there are also losses in the chiller unit itself, i.e. through the brazed plate heat exchanger (BPHE), internal pipework, pump fittings, flow switch, etc. All these internal losses are as tabulated below: Model Friction loss, Nominal water flow rate, GPM AC 40A/AR AC 50A/AR AC 58A/AR 11.1 AC 75B/BR 17.8 AC 100B/BR 22.2...
- Page 74 Friction Loss Calculation It is of utmost importance that a calculation to be made to determine the total friction loss along the piping network. This is to ensure that the water pump is able to deliver the required flow rate through the system.
-
Page 75: Water Pump
Section 5: Water Pump We have seen in Introduction that the pump is one of the fundamental component in a hydronic system. It circulates the water through all the other components in the system. We have also seen that in the mini-chiller unit, this pump is incorporated together with the other components as one package. - Page 76 Refer to the corresponding pump specifications and catalogs for detailed information of the pumps. The multistage end-suction pump used in the mini-chillers are from GRUNDFOS. The models involved are: Mini-Chiller Model AC 40A/AR CH2-30 AC 50A/AR CH2-30 AC 58A/AR CH2-30...
-
Page 77: Pump Performance
Pump Performance One of the most useful performance chart of a pump is the P-Q curve, which describes the relationship between the head pressure (P) vs. the volumetric flowrate (Q). The shape of the curve is as follows: With increasing impeller diameter This curve shows that when the head pressure increases, the flow rate reduces (and vice- versa). - Page 78 Let us now examine the sample calculation of the friction loss shown in Application Example No. 1 (Section 4). The flowrate in that example is 11 USGPM = 2.497 m /hr at a total friction loss of 14.67m. For the mini chiller model AC 58A, the pump used is CH2-30. 2.497 m The performance curve of the pump shows that at the design flowrate, the...
- Page 79 System Curve The system curve of a hydronic system is a plot of the pressure loss vs. the flowrate of the piping system itself. This curve describes the performance of the piping network itself. By plotting this curve onto the pump P-Q curve, we have the following: system curve operating point pump curve...
- Page 80 In the second example, we find that the water pump is insufficient to cater for the system curve. system curve 1 calculated operating point which lies above the pump curve pump curve system curve 2 In order to use the mini chiller, it is necessary for the piping network to have a characteristic of System Curve 2.
- Page 81 Parallel and Series Pump Operation We have seen examples of the mini-chillers operating in parallel, e.g. where they are connected together via a common supply and return header pipe. Such installations are common when the single chiller do not have sufficient cooling capacity. In the parallel operation, the water pumps will work together to deliver a higher water flowrate (which is equivalent to the summation of each individual pump flowrate) at the operating head pressure.
- Page 82 Now, if the friction loss in each branch is different, this will cause the flowrate in each branch to be different also, say ϖ1 and ϖ2. Therefore, the total flow to the load will become ϖ1 + ϖ2. Thus, the pump curves will become: Head pressure single pump curve...
- Page 83 One caution point we need to take care with parallel pumping of different pump capacities is to ensure the operating head pressure does not cause the pump of lower capacity to operate at shut-off conditions and cause over-heating, i.e. at point X.
- Page 84 Cavitation The phenomenon of cavitation occurs when the absolute pressure at the pump suction approaches the vapour pressure of water at the operating temperature. If the suction pressure becomes lower than the vapour pressure, vapour pockets (in the form of bubbles) will form along the pump impeller blade passages.
- Page 85 2. For close systems, use the following equation: NPSHA = P + (v /2g) - P where P is the atmospheric pressure is the pressure at the pump inlet is the velocity of water at the pump inlet is the accelaration due to graviti (32.17 ft/sec or 9.81 m/sec is the vapour pressure of water at the operating temperature [Note: The term v...
- Page 86 From the performance curve of CH2-30, at a flowrate of 1.82 m /hr, we have a NPSHR = 1 m = 3.28 ft Since NPSHA > NPSHR, there will be no cavitation problems. We can see that the elevated tank will not give any cavitation problem as the water column height will be sufficient to keep the inlet pressure higher than the vapour pressure.
- Page 87 Example 2: A mini chiller installed in a close piping system has the following operating parameters: 20 USGPM = 2.674ft /min = 4.54m Pipe size is 1-1/4" SCH 40 steel pipe The pressure measurement at the inlet pipe is 1 psig (= 2.3 ft wg.) The chiller has a pump, model CH4-40.
- Page 88 Diagram of an imploding bubble which causes cavitation on the pump impeller: Air Lock Air lock is the phenomenon when air gets sucked into the pumping chamber and prevents water from discharging out of the pump volute. This normally occurs during refilling of water into the chiller unit during maintenance service.
-
Page 89: Water Storage Tank And Expansion Tank
It has been mentioned in the Introduction that there is a water buffer storage tank inside the mini chiller unit [for series A and series B versions]. The capacity of the tank is: Model Capacity/litres AC 40A AC 50A AC 58A AC 75B... - Page 90 The series A chillers only have 1 compressor. Therefore, the minimum volume required for a temperature differential of 5 deg. C is: 860 * 11.72 * 4 = 134 litres 5 * 60 * 1 With an internal buffer tank of 32 litres, the remaining volume of (134 - 32) = 102 litre must be from the external piping and fan coil units.
- Page 91 How to calculate the water volume in the piping system? We need to determine the volume in the piping system which contributes to the total volume required by the system. The following volumes per unit length can be used for this calculation. These figures are taken from the pipe data tabulated in Appendix 1, 2 and 3: Pipe Size Water volumn, litres/m...
- Page 92 In the mini-chiller unit, the expansion tank is located on the storage tank. However, this tank is only available in the larger units, i.e. AC 75B, AC 100B, AC 125B. For the smaller units, i.e. AC 40A, AC 50A and AC 58A, the expansion tank must be located externally.
- Page 93 The expansion tank in the larger mini-chiller unit is connected to the top of the water storage tank and it has a capacity of 8 litres, with a charged pressure of 1.5 bar. To calculate the size of a diaphragm expansion tank, use the following formula: ) - 1] - 3 α∆...
- Page 94 Reworking the example by using the lower temperature as 0°C and the higher temperature as 80°C, we will get: (0.001028/0.001) - 1] - (3*11.7*10 )(80-0) 1 - (80/300) = 4.29 litres (5.1 litres with 20% safety factor) Thus, a 6 litres tank is needed. Therefore, the higher the water temperature, the larger the volume of the tank that is required.
- Page 95 Installation of External Expansion Tank To install the expansion tank to the water pipe, make a tee-joint at the point of installation. Most tanks have threaded ends for connection purposes. Tank There is an option to also install a ball threaded end (e.g.
-
Page 96: Insulation Material
Section 7: Insulation Material In this section, we will look at the insulation material needed to be used for the chilled water piping installed with the mini chiller unit. The purpose of using the insulation material around the pipe is: a) To prevent heat gain to or heat loss from the water in the pipes. - Page 97 b. Through a Hollow Cylinder With Internal Radius, r1 and External Radius, r2 Q = 2πkL (T1 - T2) where L is the length of the cylinder ln (r2/r1) T1 is the internal surface temperature T2 is the external surface temperature with T1 >...
- Page 98 k-values of Insulation Material The following values can be used for the common insulation materials used: k-value (W/m.K) Closed cell elastomeric insulation 0.034 - 0.0374 Polyurethane 0.021 - 0.026 Fibre glass 0.03 - 0.033 Polystyrene 0.028 - 0.03 For other types of insulation material, refer to the manufacturer's catalogs and specifications for the k-values.
- Page 99 Pre-Insulated Pipes These are black steel pipes which have been injected with polyurethane foam together with an external spirally wound metal cladding (aluminium or galvanised iron). Because these pipes have been pre-fabricated, they are widely used in the installation of chillers. The insulation forms a rigid and strong bond with the pipe surface.
- Page 100 Sectional Polyurethane As an alternative to the pre-insulated pipes, pre-fabricated sectional polyurethane can be attached onto the bare black steel pipes with an external metal cladding rivetted around the pipe. Various shapes and sizes are available to fit the piping network. It is important that a layer of grease to be applied on the internal surface of the polyurethane sections before placing it around the pipe.
- Page 101 Example of Selection: The mini chiller has a piping network of diameter 1-1/4". The pipes are to be insulated with Armaflex. The pipes run through a ceiling space with a temperature of 38°C and 85% RH. Determine the minimum insulation thickness required to prevent condensation if the chilled water temperature is at: a.
- Page 102 Piping Insulation Thickness Calculation: To Prevent Condensation Air Condition: DB/ ºC Dew Point RH/ % DP/ ºC 35.07 Pipe specification: Pipe dia. 1.25 Radius, r1 15.879 mm Pipe surface temperature / ºC Insulation material: Material: Pre-insulated polyurethane pipe Thermal conductivity, k 0.025W/mK Surface convective heat transfer 9 W/m...
- Page 103 Piping Insulation Thickness Calculation: To Prevent Condensation Air Condition: DB/ ºC Dew Point RH/ % DP/ ºC 35.07 Pipe specification: Pipe dia. 1.25 Radius, r1 15.879 mm Pipe surface temperature / ºC Insulation material: Material: Pre-insulated polyurethane pipe Thermal conductivity, k 0.025W/mK Surface convective heat transfer 9 W/m...
- Page 104 Piping Insulation Thickness Calculation: To Prevent Condensation Air Condition: DB/ ºC Dew Point RH/ % DP/ ºC 35.07 Pipe specification: Pipe dia. 1.25 Radius, r1 15.879 mm Pipe surface temperature / ºC Insulation material: Material: ARMAFLEX Thermal conductivity, k 0.0374W/mK Surface convective heat transfer 9 W/m Coefficient, h...
- Page 105 Piping Insulation Thickness Calculation: To Prevent Condensation Air Condition: DB/ ºC Dew Point RH/ % DP/ ºC 35.07 Pipe specification: Pipe dia. 1.25 Radius, r1 15.879 mm Pipe surface temperature / ºC Insulation material: Material: ARMAFLEX Thermal conductivity, k 0.0374W/mK Surface convective heat transfer 9 W/m Coefficient, h...
- Page 106 Example no. 2 For heating applications, it is desired to check the insulation thickness required to ensure an external insulation temperature of not more than 37°C. The hot water temperature was found operating at a maximum temperature of 50°C. The pipe size is 1" and the insulation material used is fibreglass encased in a metal cladding.
- Page 107 Piping Insulation Thickness Calculation: Hot Pipe Insulation Thickness Air Condition: DB/ ºC RH/ % Pipe specification: Pipe dia. Radius, r1 12.703 mm Pipe surface temperature / ºC Insulation surface temp. / ºC Insulation material: Material: Fiberglass Thermal conductivity, k 0.0374W/mK Surface convective heat transfer 9 W/m Coefficient, h...
- Page 108 Insulation thickness selection can also be made with the manufacturer's recommendations. Please refer to the relevant catalogs or technical manuals. Usually, manufacturers will publish selection tables to suit various temperature applications. Some also have graphical methods for this purpose. Computer selection programmes are also available. See Appendix 14 for an example of a nomograph used by Armaflex.
-
Page 109: Pipe Support
Section 8: Pipe Support Depending on the complexity of the piping network, various pipe supports are needed to hold and support the piping along its route. Such supports will include hangers, saddles, trays, brackets, anchors, etc. These supports must be strong enough to withstand all static and dynamic load conditions, which include: a. -
Page 110: Water Side Treatment
Section 9: Water Side Treatment The brazed plate heat exchanger (BPHE) which is used in the mini chiller unit consists of several stainless steel plates brazed together to form two distinct flow channels in between each successive plates. Water flows in one channel and refrigerant in the other, usually in a counter flow direction. - Page 111 The organic fouling includes microbiological growth or slime on the surfaces of the heat exchanger plates and pipes. Algae may also formed on these surfaces. This type of fouling is more significant in open systems whereby oxygen dissolved in the water through the open storage tank will encourage the microbiological growth.
- Page 112 b. Inorganic fouling The most commonly used cleaning agent for scaling problems is acid. Mineral acids have a strong ability to dissolve the scales. But these can also corrode the steel and copper material in the system. Such acids include sulfuric acid, hydrochloric acid and nitric acid.
- Page 113 Recommendations for Cleaning It is recommended that the cleaning chemical to be pumped directly into the BPHE, which will also recirculate into the piping network. Flush out all water from the piping system. Remove the entering water sensor and anti-freeze sensor from the BPHE. Connect the supply and discharge tubing/hose from the cleaning chemical pump to the BPHE (via 1/2"...
-
Page 114: Periodic Maintenance
Periodic maintenance It is a good practice to have a periodic maintenance for the mini chiller, especially on the water side. Check the water quality regularly. Drain out some water from the buffer tank and observe for excessive impurities and rust. For open systems, this can be done from the reservoir tank. -
Page 115: Glycol Solutions
Glycol Solutions As mentioned earlier, the mini chiller has two water sensors at the BPHE: a) Water Entering Temperature Sensor This has an adjustable range of 10 to 15°C. Adjustment is by turning a varistor on the electronic controller board. Refer to the Technical Manual for more details on this adjustment. However, if required, this can further be adjusted down to 3°C, i.e. - Page 116 Aqueous solutions of glycol are corrossive to metals and therefore it must be used with an inhibitor. This corrossion inhibitor forms a surface barrier that protects the metal from attack. The inhibited glycol solution are generally stable and relatively non-corrossive to most standard materials.
-
Page 117: Heating Operation
Section 10: Heating Operation In most of our discussion in the previous sections, emphasis has been given to the cooling operation whereby the mini chiller produces chilled water. The heat pump version of the mini chiller (designated with "R" at the end of the model name, e.g. AC 50AR, AC 125BR, AC 80CR can operate both under the cooling mode and heating mode, i.e. - Page 118 6. As a result of the reverse cycle, the finned tube heat exchanger coil will now act as an evaporator in the heating cycle. Therefore, moisture removal will occur at this coil and the water will flow down to the ground. Care must be taken for proper drainage of this water. Do not allow this condensate water to drip onto live wire parts.
- Page 119 10. Perhaps the most important function that occurs during the heating cycle is the defrost function. Operation of heating cycle under sub-zero ambient temperatures will cause the evaportor condensate to ice-up on the fin surfaces. The ice/frost will retard heat transfer and reduces the chiller performance.
- Page 120 12. Before purging or releasing hot water from the chiller unit, allow sufficient time for the water to cool down first. Water temperature of 40 to 50°C can cause injury to the body. Remember also that the hot water will be under a higher pressure and sudden opening of drain valves may cause spitting out of hot water.
- Page 121 3-way positioning valve Additional pump Expansion tank Load 1 Load 2 Mini Boiler chiller When the 3-way positioning valve is at A-AB, chilled water will flow into the loads. When the 3-way positioning valve is at B-AB, hot water will flow into the loads. Since the pump is in the mini chiller unit, an additional pump is required to circulate the hot water from the boiler.
- Page 122 Pump Expansion tank Boiler Mini chiller A water pump and expansion tank is also required for the hot water system. By is configuration, we can have the cooling coil in the fan coil unit for humidity ontrol of the air and the heating coil to reheat the air. Nevertheless, this method more expansive as the pipe network is more extensive.
-
Page 123: Electrical Wiring Control
Section 11: Electrical Wiring Control The mini chiller unit has a PCB (printed circuit board) electronic controller to operate the unit. The function of the controller is: a) to sequentially ON/OFF the compressor, fan motor and pump according to the water temperature settings and operation mode settings. - Page 124 2. All external wires must be placed inside a trunking or conduit pipe for protection purposes. Ensure sufficient support for the trunking or conduit so that there is no sagging. It is recommended to use galvanised steel trunking and conduit pipe for external use. Do not use PVC wire conduits because these will become brittle after long exposure to sunlight.
- Page 125 Wiring configuration [for series A and series B mini chillers] For the AC 40/50/58- A/AR series, the PCB is located in the bottom compartment of the chiller unit. There is an interconnecting power cable between this bottom compartment and the upper condensing unit (factory provided).
- Page 126 AC 040A/050A/058A Method 1 OPTION: Signal from FCU AC/DC supply Power 12VDC or 240VAC COMP cord Alarm OPTION: UPPER Remote CONDENSING ON/OFF UNIT switch BOTTOM COMP COMPARTMENT The mini chiller is switched ON or OFF by the command of the fan coil unit. The signal COMP from the fan coil unit will supply the power to the PCB in the chiller.
- Page 127 AC 040A/050A/058A: Together with Fan Coil Unit COMP 3-way valve Power cord (1-phase) Power cord Alternative connecting (3-phase) Method 1 UPPER Remote CONDENSING ON/OFF UNIT switch BOTTOM COMP COMPARTMENT If the fan coil unit do not a controller board in it (e.g. CC-BW,SB-BW models), then the wiring termination will be as follows: Power cord Thermostat RTH...
- Page 128 AC 040AR/050AR/058AR Method 1 OPTION: Signal from FCU AC/DC supply Power 12VDC or 240VAC COMP cord Alarm OPTION: Changeover UPPER Remote switch CONDENSING ON/OFF UNIT switch BOTTOM COMP AL2 COOL HEAT 12V COMPARTMENT This method is similar to the cooling only models whereby the FCU thermostat will determine the switching ON or OFF of the mini chiller unit.
- Page 129 AC 040AR/050AR/058AR: together with Fan Coil Unit COMP 3-way valve Power cord (1-phase) Power cord (3-phase) UPPER Remote CONDENSING ON/OFF UNIT switch BOTTOM COMP AL2 COOL HEAT 12V COMPARTMENT C1 is the auxillary relay for cooling mode. C2 is the aux illary relay for heating mode.
- Page 130 AC 075B/100B/125B Alternative: Method 1 Manual OPTION: switch AC/DC supply Signal from FCU 12VDC or 240VAC COMP Alarm OPTION: Auxillary Power Remote contact cord ON/OFF switch C.OL P.OL HEAT COOL 12V Screw terminal For this range of product, the cooling mode is initiated when the COOL and 12V terminals are connected together.
- Page 131 Section 11 Page 129...
- Page 132 Section 11 Page 130...
- Page 133 AC 075BR/100BR/125BR Method 1 OPTION: AC/DC supply Signal from FCU 12VDC or 240VAC COMP Changeover switch Alarm OPTION: Power Remote cord ON/OFF switch C.OL P.OL HEAT COOL 12V Screw terminal The wiring configuration for this heat pump version is very similar to the cooling only model. The only difference is the manual mode changeover switch between the COOL and HEAT terminals.
- Page 134 Section 11 Page132...
- Page 135 Section 11 Page 133...
- Page 136 Wiring configuration [for series C mini chillers] For the AC 80/100/120/150- C/CR series, the control box is located just on top of the compartment doors. The controller PCB is mounted inside and all the necessary wiring terminations are made available via terminal blocks for field connection. There are 3 terminal blocks in the unit: 4WV1 4WV2 HTR ALL IN ALL OUT ENSAVE HP1 LP1 FL HP2 LP2 CP1A CP2A CP1B CP2B L L L...
- Page 137 AC 80/100/120/150C/CR Method 1 Optional: Alarm output Live Remote ON/OFF switch 4WV1 4WV2 ALL IN ALL OUT ENSAVE CP1A CP2A CP1B CP2B Power supply Method 2 Optional: Signal from FCU Alarm output 'VALVE' relay 4WV1 4WV2 ALL IN ALL OUT ENSAVE CP1A CP2A CP1B CP2B Power supply...
- Page 138 Wiring configuration [for series A(E) and B(E) mini chillers] The 'E' specifications for the series A and B mini chillers have been specially developed for the European market. This range of chillers use CAREL controllers to operate. Carel is a popular controller brand name in Italy, and it has been widely used in air-cooled chillers in the European market.
- Page 139 Carel Controller Field Wiring NEUTRAL Alarm REMOTE ON/OFF output Power device supply C1/2 C1/2 C3/4 GND GND C3/4 Section 11 Page 137...
- Page 140 External Starter Board In some instances, external starter boards are required to fulfill local wiring regulations. For example, using auto-transformer to start the compressor. Some countries may ask for special starters for the compressor. Some modification to the control box will be required to accomodate such installations. Basically, an additional switch board is used to house the starters.
- Page 141 Method 2: External of chiller EXTERNAL SWITCHBOARD C/W STARTERS contactor COMP PUMP This method is the same as the previous one, with the exception that the staters will supply the power directly to the compressor, fan motor and pump. The contactors in the chiller unit only act to provide an auxillary signal to activate the starters in the external board.
- Page 142 Among these 3 methods, Method 1 is the preferred way to install the external starter switchboard. This is because the protection system of the chiller is relatively "untouched" by the addition of the external board. In any way, such modifications must only be done by qualified personnel. All components in the external board must be properly sized.
-
Page 143: Flow Switch
Section 12: Flow Switch The function of the flow switch is to switch off the chiller unit when a low water flow rate condition is detected in the piping. Such occurances may happen due to: 1. pump failure 2. blocked BPHE 3. - Page 144 The length of the paddles is very important: a. If the length is too short, the switch may not contact or if the flow rate is very strong, the paddle may deform. b. If the length is too long, the paddle may touch the internal surface of the pipe and becomes stuck inside.
- Page 145 The switch in the flow switch is a SPDT (Single Pole, Double Throw) type. It has a common terminal and two contacts. One contact will activate when there is an increase in flow, whereas the other will activate when there is a decrease in flow. Each flow switch will have it's own 'activation' flowrate setting.
- Page 146 Adjustments The flow switch comes with a factory pre-set setting. Due to the different applications at site, it may be necessary to perform some adjustments to the flow switch to allow it to function properly. Such adjustments are done to cater for the flow rate requirements. To do this, turn the adjustment screw clockwise or anticlockwise with a screwdriver.
- Page 147 Another type of flow switch used in the mini chiller units is the differential pressure flow switch. This flow switch works by measuring the difference in pressure between the inlet and outlet to detect the flow. The schematic diagram is as follows: Water out BPHE Flow switch...
-
Page 148: System Balancing
Section 13: System Balancing In the previous sections, we have mentioned the importance of ensuring proper balancing of water in the chillers and fan coil units. The act of balancing is to distribute the correct amount of water flowing through the chillers and fan coil units, in accordance to the design specifications. Incorrect balancing can cause unbalance loading of the chillers and different performance characteristics of the fan coil units. - Page 149 Adjustments of the throttling valves (e.g. globe valves, balancing valves) are then made to ensure sufficient flow rate through each chiller. We can also measure the water temperature difference between the supply and return side of each chiller to check if the balancing is sufficient or not. The correct result should be about 4 - 5 °C.
- Page 150 3. Multiple Fan Coil Units: Indirect Flowrate Measurement FCU 1 Pressure gauges Supply Return FCU 2 FCU 3 The objective is the still the same, i.e. to measure the flow rate through each fan coil unit. However, in this example, the pressure drop across each fan coil unit is measured and the flow rate is then obtained indirectly from the fan coil water pressure drop performance charts.
-
Page 151: Chiller Shut Down
Section 14: Chiller Shut Down The following procedures must considered when the mini chiller is shut down for long periods of time: 1. Do not totally disconnect the power supply to the chiller unit. This will allow the compressor crankcase heater to energise and prevent refrigerant migration during the shut down period. 2. - Page 152 When restarting the compressor, check for any abnormal sound from the compressor, e.g. knocking sound. This is an indication of liquid compression which will damage the compressor. If such sounds are heard, switch off the compressor immediately. Allow the crankcase heater to continue warming up the compressor. Repeat the restart again.
-
Page 153: Appendix (Appendix 1-19)
Appendix 1... - Page 154 Appendix 2 Appendix 2...
- Page 155 PVC-U Pipes Material: PVC-U, Polyvinyl Chloride DIN 8061 Color: RAL 7011-dark-grey Dimension: DIN 8062 Pipe length: 5m, with plain ends Pipe serie – S 4, nominal pressure PN 10 Code Kg/m 161 017 082 0.174 161 017 083 0.264 161 017 084 0.350 161 017 085 0.552...
- Page 156 COPPER TUBE EXPANDING SPECIFICATION CU PIPE Ф DIMENSION A (mm) (MM) (INCH) MACHINE MANUAL 6.35 1 /4 7.63 5/16 9.52 12.70 1 /2 15.87 19.05 ¾ 22.23 25.40 28.60 1 1/8 Appendix 4...
- Page 157 Appendix 5-1...
- Page 159 Water Capacity Graph: Appendix 5-2...
- Page 160 CHART 3 – FRICTION LOSS FOR CLOSED PIPING SYSTEMS Appendix 6-1...
- Page 161 CHART 4 – FRICTION LOSS FOR OPEN PIPING SYSTEMS Appendix 6-2...
- Page 162 CHART 5 – FRICTION LOSS FOR CLOSED AND OPEN PIPING SYSTEMS Appendix 6-3...
- Page 163 Hazen & Wiilioms Flow Diagram for SSS PIPE up #0 300 mm Diameter. [U-PVC] TECHNICAL INFORMATION (F54) Head Loss in meters/1000 meters of pipe line Appendix 6-4...
- Page 164 Losses are for all valves in fully open position and strainers clean. These losses do not apply to valves with needle point type seats. ## Losses also apply to the in-line, ball type check valve. *** For “Y” pattern globe lift check valve with seat approximately equal to the nominal pipe diameter, use values of 60º...
- Page 165 TABLE 11-FITTING LOSSES IN EQUIVALENT FEET OF PIPE Screwed, Welded, Flanged, and Flared Connections SMOOTH BEND ELBOWS SMOOTH BEND TEES 90º Long 90º Std* 90º Street* 45º Std* 45º Street* 180º Std* Straight-Thru Flow Rad. ** Flow-Thru Reduced Reduced NOMINAL Branch Reduction PIPE OR...
- Page 166 TABLE 12 -SPECIAL FITTING LOSSES IN EQUIVALENT FEET OF PIPE SUDDEN ENLARGEMENT* d/D SUDDEN CONTRACTION* d/D SHARP EDGE* PIPE PROJECTION* NOM- Entrance Exit Entrance Exit PIPE OR TUBE SIZE(in.) ½ ¾ ¼ 1 ½ ½ ½ * Enter table for losses at smallest diameter “d”. Appendix 7-3...
- Page 167 Table 6 Equivalent Lengths in Metres of Pipe for 90º Elbows Pipe Size, mm Velocity, 0.33 0.67 1.00 1.33 1.67 2.00 2.35 2.67 3.00 3.33 Table 7 Iron and Copper Elbow Equivalents Copper Tubing Fitting Iron Pipe Elbow, 90º Elbow. 45º Elbow, 90°...
- Page 168 Appendix 8 Appendix 8...
- Page 169 Appendix 8-1...
- Page 170 Appendix 8-2...
- Page 171 Appendix 8-3...
- Page 172 Appendix 8-4...
- Page 173 Appendix 8-5 Appendix 8-5...
- Page 174 Appendix 8-6 Appendix 8-6...
- Page 175 Appendix 8-7 Appendix 8-7...
- Page 176 Appendix 9...
- Page 177 Centrifugal pumps and entrained-air problems. a. Vortexing in an open tank. b. Baffle for bottom connection in an open tank. c. Vortex plate for side exit from tank. d. Slotted pipe in vortex breaker. Suction elbow in open tank. Figure 6.8. Vortexing in HVAC pumps. (From James H.Ingram, Suction side problems: Gas entrainment, Pump and System Magazine, September 1994, p.34.) Appendix 10...
- Page 178 Appendix 11-1 Appendix 11-1...
- Page 179 Appendix 11-2 Appendix 11-2...
- Page 180 Appendix 13...
- Page 181 Appendix 13-1...
- Page 182 Appendix 14 Appendix 14...
- Page 183 Appendix 15-1 Appendix 15-1...
- Page 184 Fig. 9 Density of Aqueous Solutions of Industrially Fig. 12 Viscosity of Aqueous Solutions of Inhibited Ethylene Glycol (vol. %) Industrially Inhibited Ethylene Glycol(vol. %) Fig. 10 Specific Heat of Aqueous Solutions of Fig. 13 Density of Aqueous Solutions of Industrially Industrially Inhibited Ethylene Glycol (vol.
- Page 185 Fig. 29 Example of Effect of Aqueous Ethylene Glycol Solutions on Heat Exchanger Output Fig. 31 Pressure Drop Correction for Glycol Solutions Fig. 30 Effect of Viscosity on Pump Characteristics Appendix 16...
- Page 186 Appendix 17 Appendix 17...
- Page 187 Appendix 18...
- Page 188 CE20DW CE25DW Note : PRESSURE DROP CORRECTION FACTOR = 1.2947 – 0.0021 * (EWTºF) Appendix 19...
- Page 189 REGISTERED ISO 9002 ©2003 McQuay International +603 55194922 www.mcquayup.com...
Need help?
Do you have a question about the AC 40A and is the answer not in the manual?
Questions and answers