Polycom EagleEye Director II Administrator's Manual
Hide thumbs
Also See for EagleEye Director II:
- Setup sheet (12 pages) ,
- Quick tips (2 pages) ,
- Setup sheet (12 pages)

Subscribe to Our Youtube Channel
Related Manuals for Polycom EagleEye Director II


Summary of Contents for Polycom EagleEye Director II
- Page 1 2.0 | April 2018 | 3725-69439-001A ADMINISTRATOR GUIDE ® ™ Polycom EagleEye Director II...
- Page 2 Open Source Software Used in this Product This product may contain open source software. You may receive the open source software from Polycom up to three (3) years after the distribution date of the applicable product or software at a charge not greater than the cost to Polycom of shipping or distributing the software to you.
-
Page 3: Table Of Contents
Replace the EagleEye IV Camera................9 Skype for Business......................9 Enable the Camera in Skype for Business Client.............9 Installing the App..................... 11 Install the EagleEye Director II App.................. 11 Using the App....................12 View Device Status......................12 Connect to a Device......................12 Add Another Device...................... - Page 4 Update Camera Software Using Windows................26 Update Software Using a USB Storage Device..............27 Troubleshooting....................28 Diagnostics........................28 Test the Microphones.....................28 Download Log Files....................28 Call Detail Report (CDR)..................29 Restart Your Camera......................29 Reset Your Camera......................29 Perform a Factory Restore....................29 Polycom, Inc.
-
Page 5: Before You Begin
EagleEye Director II interoperability with other Polycom endpoints and devices. The Polycom EagleEye Director II Setup Sheet describes how to set up the EagleEye Director II camera to connect with following Polycom endpoints and devices: ▪... -
Page 6: Getting Started
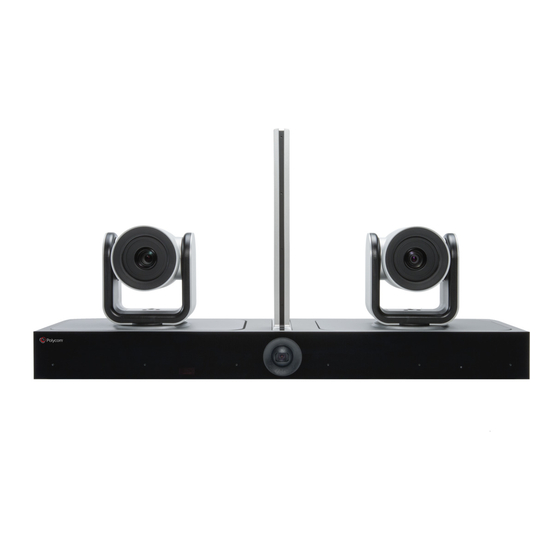
It automatically pans, tilts, and zooms the camera, frames the speaker, and sends a framed image to the connected system or device. The EagleEye Director II camera acts as a director of a video production, and uses sophisticated Polycom-developed technology. The camera is a dual-camera solution that uses EagleEye IV 12x cameras with 1080p resolution. -
Page 7: Setting Up Your Camera
Skype for Business Position the Camera To position the EagleEye Director II camera, follow these guidelines for the ultimate experience. Procedure 1. Mount the camera in a level position on a wall. Place it between 5.5 and 7 feet (1.7 to 2.1 m) from the floor, and at least 12 inches (0.3m) from the ceiling and walls, measuring from the side of the... -
Page 8: Cable Connections
21 Cable Connections Depending upon your environment and how you want to use the EagleEye Director II camera, cable connections can vary. Refer to the figure and table for information on cables, connection to the respective ports, and the related scenarios where you can use them. - Page 9 Setting Up Your Camera Cable Connections, Ports, and Usage Scenarios Reference Port Cable Connection Usage Scenarios Number Details HDCI line-out HDCI Polycom Connect the Scenario 1: Use a EagleEye IV Digital mini-HDCI single camera with camera cable cable from a RealPresence the camera...
-
Page 10: Indicator Lights
Related Links Cascading Two Cameras on page 21 Indicator Lights Indicator lights display when the EagleEye Director II camera is powered on. LED Indicator Light Status LED Light Color Description Blue Power on, and camera is in active state... -
Page 11: Using A Polycom Eagleeye Iv Camera
To use the EagleEye Director II camera as a USB camera for Skype for Business calls, the client computer requires some configuration. Enable the Camera in Skype for Business Client Before you can use the EagleEye Director II camera with Skype for Business, you must select it as a video device in the client computer. Polycom, Inc. - Page 12 Setting Up Your Camera Procedure 1. In the Skype for Business client, select Options > Tools > Video Device Settings. 2. Select EagleEye Director II camera from the list. 3. Select OK. Polycom, Inc.
-
Page 13: Installing The App
You can install the EagleEye Director II App using a setup wizard. Install the EagleEye Director II App The EagleEye Director II App allows administrators to view connected, available, and recently connected devices. Ensure that you do the following before installation: Prerequisites ▪... -
Page 14: Using The App
The camera is directly connected to the computer with the app. Note: Windows 10 is highly recommended for the EagleEye Director II App. Windows 7 and Windows 8 don’t support the Bluetooth iBeacon used to discover the EagleEye Director II camera. -
Page 15: Add Another Device
After successfully connecting, the status information displays, and you can configure settings for the camera. Add Another Device In the EagleEye Director II App, you can add another EagleEye Director II camera to the available devices list, then select that camera to connect to it. Procedure 1. -
Page 16: Setting Up Connections
Connect to the Camera Web Interface To connect to the web interface for the EagleEye Director II camera for the first time, you must complete a few configuration steps. Prerequisites ▪... -
Page 17: Name Your Device
Note: This button is located at the top right of all screens, and on the Welcome screen when you first log in. Name Your Device Name your EagleEye Director II camera to distinguish the device from other cameras or other devices in a connection list. Procedure 1. -
Page 18: Configure A Connection Mode
12 Configure a Connection Mode By selecting a mode in the web interface, you can set up an EagleEye Director II camera to work with a RealPresence Group Series system, or to work with a local computer. Procedure 1. -
Page 19: Configuring Settings
Configure Camera Tracking ▪ Configuring the PIP Layout You can configure settings in the EagleEye Director II camera’s web interface for your environment. Configure Camera Tracking Tracking settings allow the camera to frame the speaker or the meeting participants, adjust the tracking speed, and change the subject frame size. -
Page 20: Improve Video Quality
Note: The following settings are also available in the RealPresence Group Series web interface. The last changes to these settings are applied for the camera, whether you change the settings in the RealPresence Group Series system settings, or in the EagleEye Director II settings. Procedure 1. -
Page 21: Configuring The Pip Layout
You can change the PIP window position that displays in a video conference call. Procedure 1. In the camera web interface, select Camera Settings > Tracking. 2. At PIP Layout, select one of the window positions available. Related Links Configure Cascading on page 23 Polycom, Inc. -
Page 22: Using The Camera
The analytics camera provides participant count details and PIP video for the EagleEye Director II camera. The analytics camera captures group view video only when the EagleEye Director II camera is in tracking mode, or when the analytics camera is in a tilt position. At the same time, the two EagleEye IV cameras in an active state display an LED light. -
Page 23: Cascading Two Cameras
Note: Since the EagleEye Director II camera uses audio to detect the speaker, if the room is noisy, the camera won’t work properly. The EagleEye Director II camera doesn’t support a local sound reinforcement system. - Page 24 Scenario 3: One camera is positioned on the left front of the room and the other is positioned on the right front of the room. This configuration works well in classrooms or large seminars. Related Links Position the Camera on page 5 Change Your Password on page 25 Polycom, Inc.
-
Page 25: Configure Cascading
Cascading involves using two EagleEye Director II cameras in the same room. In this documentation, the original camera is called primary, while the additional camera is called secondary. To connect the primary EagleEye Director II camera to a RealPresence Group Series system or to a computer, you must select a mode in the web interface. -
Page 26: Securing The Camera
Polycom recommends that you have a strong understanding of certificate management and how it applies to your EagleEye Director II camera before you integrate it with the PKI. Cameras can generate requests for certificates (CSRs) that can be sent to a certificate authority (CA) for official issuance. -
Page 27: Change Your Password
4. Select Restart System. Change Your Password Polycom recommends that you change your password from the default for security reasons. Your corporate security department might set standards for passwords. As a best practice, communicate passwords to the appropriate people in your organization. -
Page 28: System Maintenance
Note: If you are using cascading, the primary camera is updated and then automatically sends the software update to the secondary camera. Procedure 1. Use Windows Update to manually update the camera software. If an update does not launch, the server might be busy. Perform the following step. Polycom, Inc. -
Page 29: Update Software Using A Usb Storage Device
USB cable, then try the Windows Update again. Update Software Using a USB Storage Device To update the EagleEye Director II camera software version, you can use a USB storage device. Ensure that the device is in FAT32 format and has at least 200MB of available space. -
Page 30: Troubleshooting
Download log files to assist in troubleshooting. Procedure 1. In the web interface, select Diagnostics > Logs. 2. Select Download Logs. 3. Download the system log .tar file and specify a location on your computer to save the file. Polycom, Inc. -
Page 31: Call Detail Report (Cdr)
Troubleshooting Call Detail Report (CDR) The Call Detail Report (CDR) provides a history of the EagleEye Director II camera and a RealPresence Group Series system during calls. You can enable the CDR in the RealPresence Group Series system web interface. - Page 32 The camera enters factory restore mode. The factory restore takes approximately eight minutes to complete. The camera automatically powers off and back on when the process is complete. Related Links Indicator Lights on page 8 Polycom, Inc.
Need help?
Do you have a question about the EagleEye Director II and is the answer not in the manual?
Questions and answers