Table of Contents
Advertisement
Quick Links
Advertisement
Table of Contents

Related Manuals for Dietz SANGO ADVANCED Series


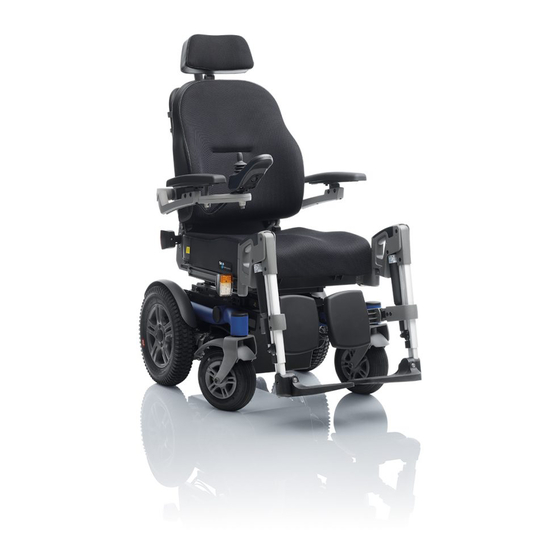
![Wheelchair Dietz AS[01] Manual](https://static-data2.manualslib.com/product-images/a82/1599654/60x60/dietz-as-01-wheelchair.jpg)


![Wheelchair Dietz AS[01] Operating Instructions Manual](https://static-data2.manualslib.com/product-images/a82/1308262/60x60/dietz-as-01-wheelchair.jpg)
Summary of Contents for Dietz SANGO ADVANCED Series
- Page 1 USER MANUAL Sango Advanced R Sango Advanced F Sango Advanced M Sango Slimline M...
- Page 2 DIETZ-Power BV. The information provided is based on general data pertaining to constructions known at the time of issue. DIETZ-Power BV pursues a policy of continuous product development and therefore reserves the right to make changes. The information provided applies to the standard version of the product.
-
Page 3: Table Of Contents
Table of contents Table of contents 1 Preface ......................5 1.1. About this manual 1.2. Symbols used in this manual 2 Safety ....................... 6 2.1. Temperature 2.2. Moving parts 2.3. Electromagnetic radiation 2.4. Markings on the wheelchair 3 General description ..................9 3.1. - Page 4 Table of contents 7.4. Driving on slopes or ramps 7.5. Obstacles 7.6. Pushing the wheelchair 7.7. Storage of the wheelchair after use 8 Transport ...................... 28 8.1. Transporting the wheelchair in motor vehicles 8.2. The wheelchair as a driver’s seat in a car with Dahl docking system (option) 8.3.
-
Page 5: Preface
If you have a visual impairment, you can find a PDF version of this user manual at www.DIETZ-Power.com. You can also request a large-print paper version by contacting DIETZ-Power. Contact information can be found on the back cover of this user manual. SANGO ADVANCED / SLIMLINE - 5... -
Page 6: Safety
2 Safety 2 Safety All of the very latest information relating to product safety and any product recalls can be found on our website at www.DIETZ-Power.com. Warning Follow the instructions given under warnings! Failure to exercise due care in following these instructions may result in physical injury, damage to the wheelchair or damage to the environment. -
Page 7: Electromagnetic Radiation
2 Safety 2.3. Electromagnetic radiation The standard version of your powered wheelchair has been tested for compliance with the applicable requirements relating to electromagnetic radiation (EMC requirements). Warning Despite testing, the following cannot be ruled out: • electromagnetic radiation interfering with the wheelchair. For example mobile telephones, large medical devices or other sources of electromagnetic radiation •... -
Page 8: Markings On The Wheelchair
2 Safety 2.4. Markings on the wheelchair Warning • The markings, symbols and instructions on the wheelchair are part of the safety features. They must not be covered up or removed. They must remain on the wheelchair and be clearly legible for the whole lifespan of the wheelchair. •... -
Page 9: General Description
3 General description 3 General description Front-, mid- and rear-wheel drive wheelchairs and their major components (figures 2, 3 and 4) A. Drive wheels B. Castor wheels C. Freewheel switch D. Controller E. Battery F. Seat cushion G. Backrest H. Armrest I. -
Page 10: The User
3 General description 3.2. The user Driving a powered wheelchair requires the user to have cognitive, physical and visual abilities. The user must be capable of estimating the consequences of any action taken while driving the wheelchair and of correcting action where required. The wheelchair must not carry more than one person. -
Page 11: Operating Environment
3 General description 3.3. Operating environment This wheelchair has been developed for both indoor and outdoor use (EN 12184 (2014) class B). When outdoors, drive only on paved roads, pavements, footpaths and cycle paths. Always adjust your speed to your surroundings. Warning •... -
Page 12: General Procedures
4 General procedures 4 General procedures Some parts can be removed without the use of tools. The wheelchair can easily be reduced in size. For example to transport the wheelchair (see 8). Warning! The removal of parts might have adverse or beneficial effects on the wheelchair. -
Page 13: Leg Rests
4 General procedures 4.3. Leg rests (figure 7) To remove 1. Press the handle (A) upwards to release the leg rest. 2. Remove the leg rest (B) by lifting it out of the bracket. To replace Place the leg rest in the bracket. Warning •... -
Page 14: Wheelchair Settings (Qualified Specialists Only)
5 Wheelchair settings (qualified specialists only) There is no such thing as an average wheelchair user. This is why DIETZ-Power wheelchairs can be adjusted to a specific user's individual situation. We make a distinction between user adjustments and permanent settings. -
Page 15: Seat Height And Seat Angle Setting
5 Wheelchair settings (qualified specialists only) 5.3. Seat height and seat angle setting The seat height can be permanently adjusted according to the user's specific situation. All of the optional seat heights fall within the maximum safe slope of 6˚ (10.5%), as set out in EN 12184 (2014) class B. -
Page 16: Leg Rest Settings
5 Wheelchair settings (qualified specialists only) 5.7. Leg rest settings Leg rest width (also affects seat width) 1. Remove the seat cushion (A figure 13). 2. Loosen the allen screws (B) by one turn. 3. Slide the leg rest bracket (C) into the desired position. - Page 17 5 Wheelchair settings (qualified specialists only) Height of the calf support 1. Loosen the two allen screws (A) by a few turns (figure 16). 2. Slide the calf support (B) into the desired position. 3. Tighten the allen screws. Calf support depth (option) 1.
-
Page 18: Armrest Settings
5 Wheelchair settings (qualified specialists only) 5.8. Armrest settings Armrest width (also affects seat width) 1. Loosen the allen screw (A) by two turns (figure 19). 2. Slide the armrest (B) to the side. 3. If required, remove or position the spacer ring (C). -
Page 19: Controller Settings
5 Wheelchair settings (qualified specialists only) Armrest pad angle 1. Loosen the allen screws (A figure 22). 2. Slide the armrest pad (B) into the desired position. 3. Tighten the allen screw. 5.9. Controller settings Control system programme Warning Making incorrect adjustments to the control system parameters can lead to extremely dangerous situations. -
Page 20: Headrest Settings
5 Wheelchair settings (qualified specialists only) 5.10. Headrest settings Headrest height and position 1. Loosen the 4 allen screws (A figure 25). 2. Adjust the segments (B) to the right position. 3. Tighten the allen screws. 5.11. The positioning belt (option) The wheelchair can be fitted with a positioning belt. -
Page 21: Wheelchair Adjustments
6 Wheelchair adjustments 6 Wheelchair adjustments Wheelchair adjustments are those components that the user can adjust without the use of tools. The wheelchair may be fitted with powered and/or mechanical adjustment options. Warning • The centre of gravity is affected when adjustments are made. Adjustments should therefore only be made when the wheelchair is on a flat surface. -
Page 22: Mechanical Adjustments
6 Wheelchair adjustments 6.2. Mechanical adjustments The following mechanical adjustments are possible: Comfort leg rest knee angle The angles of the comfort leg rests can be adjusted independently of each other. 1. Push the lever (A) forwards (figure 27). 2. Raise your leg up or push your leg down. -
Page 23: Using The Wheelchair
7 Using the wheelchair 7 Using the wheelchair 7.1. Checking the wheelchair Warning Carry out the following checks before using the wheelchair: • CONTROLLER check whether the batteries are sufficiently charged: if they are, the green lights on the battery indicator will be on. •... -
Page 24: Driving The Wheelchair
7 Using the wheelchair Side transfer 1. Flip up / remove the armrest (A figure 32). 2. If possible, swing-away the leg rest (B) or remove it from the bracket. 3. Sit down in the wheelchair 7.3. Driving the wheelchair CONTROLLER A controller is used for driving a powered wheelchair. -
Page 25: Driving On Slopes Or Ramps
7 Using the wheelchair 7.4. Driving on slopes or ramps With all settings in the neutral position (see 6.1), slopes/ramps of ≤6˚ (10.5%) are deemed to be part of the standard user ≤6˚ environment for the FWD without stability being affected (figure 33). For the RWD and MWD the applicable gradient is ≤10˚... -
Page 26: Obstacles
7 Using the wheelchair 7.5. Obstacles Warning 90° • Never descend steps/a flight of stairs in a wheelchair. • Do not drive off of obstacles higher than 50 mm. • Always drive onto or off an obstacle in forward direction. •... -
Page 27: Storage Of The Wheelchair After Use
7 Using the wheelchair • The automatic parking brake works only in the 'Drive' position. • The freewheel lever must be set to the 'Push' position only if the wheelchair is to be actually pushed. Set the freewheel switch to the 'Drive' position immediately after pushing is finished. -
Page 28: Transport
(figure 36) and tightened securely in accordance with the instructions of the manufacturer of the tiedown system. • The wheelchair should be inspected by a DIETZ-Power authorised dealer before re-use following involvement in any type of vehicle impact. 28 - SANGO ADVANCED / SLIMLINE... - Page 29 • Ensure that the controller is turned off. • DIETZ-Power recommends fitting and using the headrest during transportation. • Any belt attached to the wheelchair will be purely for positioning purposes and should not be used or relied on for occupant restraint in a moving vehicle.
-
Page 30: The Wheelchair As A Driver's Seat In A Car With Dahl Docking System (Option)
8.2. The wheelchair as a driver’s seat in a car with Dahl docking system (option) Securing the wheelchair (figure 39) 1. Drive the wheelchair into the car docking station (A). When the wheelchair is correctly positioned, the locking plate that is mounted under the wheelchair automatically clicks into the docking station. -
Page 31: Special Transport
8.3. Special transport In addition to being transported by road, the wheelchair can also be transported by rail, sea or air. Its batteries may be transported in accordance with IATA regulations. Warning • Before travelling, contact the organisation providing transport. Your tour operator will be able to provide you with information about any special requirements/instructions. -
Page 32: Wheelchair Maintenance
Have your wheelchair checked by your dealer once a year or, if under intensive use, once every six months. Take this manual with you and have the dealer fill in details on the schedule below. Use only original DIETZ-Power parts for maintenance and repairs. Model Serial number... -
Page 33: Wheelchair Maintenance
9 Wheelchair maintenance 9.1. Cleaning the wheelchair and its upholstery Warning • When cleaning the wheelchair, ensure that the controller is turned off. If the joystick is accidently touched, this may cause the wheelchair to start moving or the powered options to be operated. •... -
Page 34: Tyres
9 Wheelchair maintenance 9.3. Tyres In order to ensure optimum performance of your wheelchair, it is very important to keep its tyres at the right pressure. The correct pressure can also be found on the side of the tyres. Maximum tyre Wheel pressure 8”... -
Page 35: Disposing Of The Wheelchair
9 Wheelchair maintenance 9.4. Disposing of the wheelchair The technical lifetime of the wheelchair is influenced by the extent to which it is used. Under normal use and with the prescribed maintenance, the expected technical lifetime of the wheelchair is approximately seven years. In order to derive maximum benefit from the lifetime of the wheelchair, ensure that it undergoes regular maintenance (see 9). -
Page 36: Technical Specifications
10 Technical specifications 10 Technical specifications 10.1. Standards and requirements This product complies with the provisions of the Medical Devices Directive and therefore carries the CE mark. The wheelchair conforms to the following standards and requirements. This has been verified by independent test institutes. Standard Description Weight... -
Page 37: Specifications Sango Advanced Sego Comfort
10 Technical specifications 10.3. Specifications Sango Advanced Sego Comfort Manufacturer DIETZ-Power B.V. - Vlamovenweg 12 - 5708 JV Helmond User weight max. 160 kg Class B SANGO ADVANCED Type Specifications min. max. min. max. min. max. Unit Overall length incl. leg rest... -
Page 38: Specifications Sango Slimline Sego Comfort
10 Technical specifications 10.4. Specifications Sango Slimline Sego Comfort Manufacturer DIETZ-Power B.V. - Vlamovenweg 12 - 5708 JV Helmond User weight max. 136 kg Class B SANGO SLIMLINE Type Specifications min. max. Unit Overall length incl. leg rest 1070 1265 mm... -
Page 39: Specifications Batteries
10 Technical specifications Specifications were measured with 9» and 14» wheels, powered legrests and in most extreme positions (for min. most stripped version and max. most extended version) Measured with powered legrest, lift/tilt module and powered backrest. Measured with the powered adjustments in the neutral position. With the powered adjustments in the most extreme positions the specifications will be 9°... -
Page 40: Warranty Conditions
Dealers and/or users have statutory (legal) rights in relation to the purchase of consumer products. The warranty conditions applying to products/parts sold by DIETZ-Power B.V. are set out below. The warranty applies to any product/part that becomes defective or needs to be repaired or replaced as the result of a manufacturing fault or material defect within the stated warranty period. -
Page 41: Warranty Provisions
11 Warranty conditions 11.2. Warranty provisions The manufacturer shall not provide any warranty if: • the product has been passed on to a different owner. The warranty applies only to the first owner to whom the manufacturer supplied the product/parts. The warranty is not transferable and applies only to those models bought from the manufacturer;... - Page 42 11 Warranty conditions • whether the dealer should order a new product/part from the manufacturer. The dealer then receives an invoice detailing the shipping costs involved. The dealer arranges and pays for the defective product/ part to be sent to the manufacturer. Once the manufacturer has received the defective product/part, it is assessed.
- Page 43 SANGO ADVANCED / SLIMLINE - 43...
- Page 44 If you have any questions, please contact your local dealer: Sango is a product manufactured by: DIETZ-Power B.V. Vlamovenweg 12 5708 JV Helmond The Netherlands +31 492 792 196 info@DIETZ-Power.com www.DIETZ-Power.com If there is no authorised dealer near you, please contact DIETZ-Power.
Need help?
Do you have a question about the SANGO ADVANCED Series and is the answer not in the manual?
Questions and answers