Table of Contents
Advertisement
Quick Links
Advertisement
Table of Contents

Subscribe to Our Youtube Channel
Related Manuals for Advan AMM215WTTP


Summary of Contents for Advan AMM215WTTP
- Page 1 USER’s GUIDE AMM215WTTP LCD Color Display Rev.B Rev.A...
-
Page 2: Table Of Contents
Symbol Definitions ....................... 4 Usage Notice 9 Precautions ......................... 9 Introduction 10 About AMM215WTTP Series ..................10 Touch Screen for AMM215WTTP ................10 Package Overview .....................11 Installation 13 Product Overview .......................13 Front View ......................13 Bottom View (Without Stand) .................13 VESA Mount for Your Monitor ..................14... - Page 3 The information contained in this document is subject to change without notice. This document contains proprietary information that is protected by copyright. All rights are reserved. No part of this document may be reproduced,translated to another language or stored in a retrieval system, or transmitted by any means, electronic, mechanical, photocopying, recording, or otherwise, without prior written permission.
-
Page 4: Warnings And Cautions
Product(s), therefore, may not agree in detail to the published design or specifications. All specifications are subject to change without notice. Please use rear cover page with ADVAN contact points or phone your local ADVAN Int’l Corp sales representative or agent for information on changes and new products. -
Page 5: Warnings
Warnings Warning TO AVOID POTENTIAL SERIOUS INJURY TO THE USER AND THE PATIENT AND/OR DAMAGE TO THIS DEVICE, THE USER MUST : 1. Read the operating manual thoroughly and be familiar with its contents prior to using this equipment. 2. Carefully unpack the unit and check if any damage occurred during shipment. 3. -
Page 6: Cautions
1. The AC Adapter must be plugged into a grounded power outlet. 2. Use only the proprietary AMM215WTTP power supply for the AMM215WTTP monitor. 3. Turn power off when unit is not in use. Disconnect the power plug from AC outlet if the product is not going to be used for an extended period of time. -
Page 7: Symbol Definitions
Symbol Definitions For indoor use only. General warning sign of risk of danger Tested to comply with FCC Class B standards. Dangerous: High Voltage DC power control switch Direct Current Serial Number Medical Equipment With respect to electric shock, fire and mechanical hazards This way up only in accordance with ANSI/ AAMI ES60601-1(2005/(R)2012... -
Page 8: Eu Declaration Of Conformity For Medical Applications
A Declaration of Conformity has been filed for this product. A sample of this document may be found in the addendum which accompanied this manual. For a copy of the Declaration of Conformity document, please contact ADVAN Int’l Corp. and request for AMM215WTTP DOC. - Page 9 This monitor is intended for use in Health Care Facilities Model AMM215WTTP Equipment is not suitable for use in the presence of flammable anesthetic mixture with air or with oxygen or nitrous oxide. No user serviceable parts inside, ask qualified personnel when accessing inside.
-
Page 10: Electromagnetic Compatibility
Consult the tables below for guidance in placing the AMM215WTTP. Manufacturer's Declaration - Electromagnetic Emission The Model AMM215WTTP is intended for use in the electromagnetic environment specified below. The user of AMM215WTTP should assure that it is used in such an environment. Emission test Compliance... - Page 11 To assess the electromagnetic environment due to fixed RF transmitters, an electromagnetic site survey should be considered. If the measured field strength in the location in which the AMM215WTTP is used exceeds the applicable RF compliance level above, the AMM215WTTP should be observed to verify normal operation.
-
Page 12: Usage Notice
Recommended Separation Distances Between Portable and Mobile RF Communications Equipement and the AMM215WTTP System The AMM215WTTP system is intended for use in an electromagnetic environment in which radiated RF disturbances are controlled. The user of the AMM215WTTP system can help prevent electromagnetic... -
Page 13: Introduction
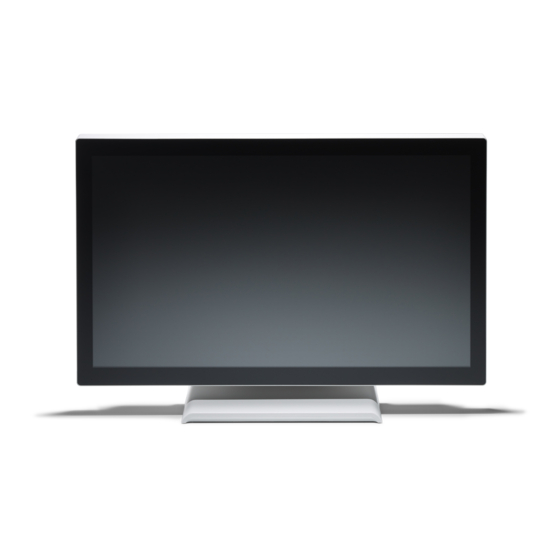
Introduction About AMM215WTTP Series The AMM215WTTP Touch screen LCD Monitor displays information from imaging systems and devices. Features include: • Direct Analog signal input • Direct Digital signal input • Active matrix TFT LCD technology • 1920 x 1080 resolution •... -
Page 14: Package Overview
Package Overview VGA Signal Cable LCD Display Power Cord USB Cable ( A to B) DVI-D Cable DC Power Supply Touch Driver CD Audio Cable Quick Start Guide (optional) *Accessories might change depending on region. -
Page 15: Unpacking The Monitor
Unpacking the Monitor Before you unpack your monitor, prepare a suitable workspace. You need a stable and level surface near a grounded wall outlet in an area which is relatively free of glare from sunlight or other sources of bright light. The monitor is cooled by natural convection (it has no fan). For optimum performance, do not block the cooling vents. -
Page 16: Installation
Installation Product Overview • Front View • Bottom View (Without Stand) AUDIO USB B Type USB A Type DC IN RJ11... -
Page 17: Vesa Mount For Your Monitor
Flat Panel Mounting Physical Mounting Interface by VESA This monitor conforms to the VESA Flat Panel Mounting Physical Mounting Interface standard which defines a physical mounting interface for flat panel monitors, and corresponding with the standards of flat panel monitor mounting devices, such as wall and table arms. -
Page 18: Start Your Installation
Start Your Installation Please follow these instructions so that you can hook up the cables to associated connectors. 1. Lay the LCD flat on an even surface. Step 2 2. Move the stand into position as seen in the step 1 diagram. 3. -
Page 19: Connecting The Display
Connecting the Display To setup this display, please refer to the following figure and procedures. 1. Be sure all equipment is turned off. 2. Connect the DC plug to the power connector on the monitor and the other end into an electrical outlet (8.1). -
Page 20: Figure
Figure ... -
Page 21: User Controls
User Controls Back Panel Controls Icon Key Name Menu Down Select Power Menu off status Menu on status Menu appear Menu disappear / return to main item Brightness Main item select up / Adjust up Mute Main item select down / Adjust down Select sub-item function Power On / Off... -
Page 22: How To Use The Osd Menus
How to Use the OSD Menus Icon Key Name Menu Down Select Power 1. Press the “Menu” button to pop up the “on-screen menu” and press “Up” or “Down” button to select among the five functions in the main menu. 2. -
Page 23: On-Screen Display Menus
On-Screen Display Menus Main OSD Menu: ITEM CONTENT Contrast The monitor luminance level control. Brightness The monitor backlight level control. Auto Adjust Fine-tune the image to full screen automatically. Left/Right Moving screen image horizontal position to left or right. Up/Down Moving screen image vertical position to up or down. -
Page 24: Appendix
Appendix Troubleshooting If you are experiencing trouble with the LCD display, refer to the following. If the problem persists, please contact your local dealer or our service center. Problem: No image appears on screen. ► Check that all the I/O and power connectors are correctly and well connected as described in the “Installation”... -
Page 25: Warning Signal
Warning Signal If you see warning messages on your LCD screen, this means that the LCD display cannot receive a clean signal from the computer graphics card. Below are the three kinds of Warning Signal. Please check the cable connections or contact your local dealer or our service center for more information. -
Page 26: Product Dimensions
Product Dimensions 517.4mm ► Front View ► Side View 46.0mm ► Top View 249.6mm... -
Page 27: Compatibility Modes
Compatibility Modes Mode Resolution H-Frequency(khz) V-Frequency(hz) IBM VGA 720X400 31.47 IBM VGA 640X480 31.47 Apple MacII 640X480 35.00 VESA VGA 640X480 37.86 VESA VGA 640X480 37.50 VESA SVGA 800X600 35.16 VESA SVGA 800X600 37.88 VESA SVGA 800X600 48.08 VESA SVGA 800X600 46.88 Apple Mac... -
Page 28: Touch Screen Driver Installation
Touch Screen Driver Installation The AMM215WTTP is available with USB connections. The touch driver is located on the enclosed CD-ROM for these operating systems: VISTA, XP, 2000, CE, XP Embedded, Linux, Apple® Mac OS. Please Note: 1. The AMM215WTTP is Microsoft® Windows® HID (Human Interface Device) compatible if you use the USB touch screen interface. - Page 29 ® If you are using a PC running Windows CE, follow the instructions below: 1. Power on the computer. 2. Make sure that the USB cable is connected to the computer. 3. Using Platform Builder, build an image file by following the step-by-step instructions found in the folder file on the CD-ROM.
-
Page 30: Description Of Warranty
ADVAN specifications, and to any ADVAN approved specifications furnished to ADVAN by the Buyer, and will be free of defects in materials and workmanship. ADVAN warrants that the product purchased is manufactured from new com- ponents which meet ADVAN’s standards, quality and specifications. - Page 31 ADVAN or its ASC. No goods are to be returned to ADVAN or its ASC without prior authorization. Buyer will be responsible for packaging (preferably original container) and shipping the defective goods to ADVAN or its ASC, shipping charges prepaid.
- Page 32 Product End of Life (EOL) In the event of a RMA of an EOL product(s), ADVAN will hold or store major components of its products for a period of five (5) years, after the EOL of its products. ADVAN shall continue to perform the service of its products as long as ADVAN holds or stores said components of the products, with reasonable charge.
- Page 33 Korea Tel : +82 2 783 5197 Fax : +82 2 868 0880 Web Page : http://www.advancorp.com ADVAN INT’L CORP 47817 Fremont Blvd. Fremont, CA 94538, USA Tel : 1 510 490 1005 Fax : 1 510 490 1151 Web Page : http://www.advancorp.com...
Need help?
Do you have a question about the AMM215WTTP and is the answer not in the manual?
Questions and answers