
Related Manuals for Seeley Climate Wizard CW-H10


Summary of Contents for Seeley Climate Wizard CW-H10
- Page 1 INSTALLATION & OPERATION MANUAL INDIRECT EVAPORATIVE COOLER CW-H10, CW-H15, CW-H15S, CW-H15S Plus (English) (CW-H15) ILL2468-A Original English Instructions...
-
Page 2: Table Of Contents
TABLE OF CONTENTS MAINTENANCE NOTE CONTROL SCHEMES Option 1 - Local Zone Control with Wall Control SAFETY Option 2 - Building Management System (BMS) Interface 20 Risk Assessment Remote On-Off (Input) Installer and Maintenance Contractors Cool/Vent (Input) Some Points to Consider Fan Speed (Input) Other Important Requirements Error Signal (Output) -
Page 3: Maintenance Note
Any failure to carry out the required maintenance and servicing, and any failure to fill out the maintenance schedule, will void your warranty. SEELEY INTERNATIONAL - INSTALLATION MANUAL |... -
Page 4: Safety
• If a worker is alone, who knows they are there and if they get into difficulty, how can they summon help? (Call someone on Seeley International provides the following information as a the ground? Mobile phone? etc.) guide to contractors and employees to assist in minimizing risk whilst working at height. -
Page 5: Cooler Views
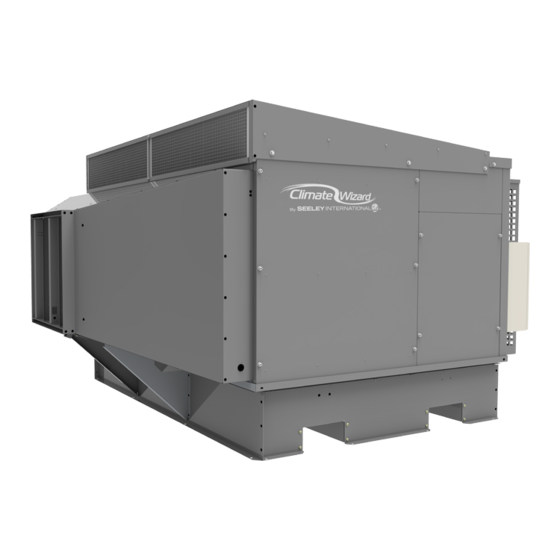
COOLER VIEWS ISOMETRIC CW-H15 views shown ILL1916-A ILL1918-A REAR SIDE ILL1917-A ILL1919-A FRONT BOTTOM ILL2422-A ILL1920-A Dimensions are in mm (inches in brackets). SEELEY INTERNATIONAL - INSTALLATION MANUAL |... -
Page 6: Cooler Exploded View
COOLER EXPLODED VIEW CW-H10, H15, H15S, H15S Plus... -
Page 7: Cooler Specifications
Stand alone cooling capacity may be lower, depending on application. Frequency Radiated Sound Power Level (dB(A) re 1pw) Octave Band Centre Frequency Total Sound Power (Hz) dB(A) re 1pw CW-H10 CW-H15 CW-H15S CW-H15S Plus SEELEY INTERNATIONAL - INSTALLATION MANUAL |... -
Page 8: Technical Specifications - Imperial Models
COOLER SPECIFICATIONS TECHNICAL SPECIFICATIONS - IMPERIAL CW-H MODELS Specification CW-H15 CW-H15S CW-H15S Plus Airflow 2330 CFM @ 0.60 in WG 2330 CFM @ 0.52 in WG 3390 CFM @ 0.32 in WG Maximum External Static 0.86 in WG 0.78 in WG 0.62 in WG Pressure Capacity... -
Page 9: Cooler Contents
High Altitude Smartcard 380-480V/3~ (CW-H15) High Altitude Smartcard 200-240V/3~ (CW-H15) High Altitude Smartcard 200-240V/1~ (CW-H15) ITEM 1 ITEMS 2A & 2B ITEM3 ITEM 4 ILL2425 ILL2425-A ITEM 5 ITEM 6 ITEM 7 Not Shown ITEM 16 ILL2425-A SEELEY INTERNATIONAL - INSTALLATION MANUAL |... -
Page 10: Installation
50 x 50 x 3mm (2” x 2” x 1/8”) RHS Galvanized or Painted DRIP-TRAY Specific CW-H Roofstands are available for order via Seeley When Climate Wizard coolers are installed indoors, or International to suit cooler size and accommodating 5 or 10 anywhere that water leakage could cause damage, install degree roof pitches. -
Page 11: Exhaust Transition Assembly
Ensure any additional ducting is readily removable and/or lightweight. • Where an installation requires extended exhaust ducts, the increase in static load should not exceed 20 Pa (0.08 in wg). ILL2428-A SEELEY INTERNATIONAL - INSTALLATION MANUAL |... -
Page 12: Inlet Air Filter Assembly Or Safety Grille
INSTALLATION cont. INLET AIR FILTER ASSEMBLY OR SAFETY GRILLE OPTION 2 - INLET AIR FILTER ASSEMBLY Climate Wizard coolers SHOULD NEVER BE INSTALLED CW-H10: = P/N 120409 WITHOUT DUST FILTERS. CW-H15, H15S, H15S Plus: = P/N 120379 Use either the Inlet Air Filter Assembly supplied from the factory 1. -
Page 13: Inlet Air Filter Cowling Assembly
3. Remove the pre-fitted centre and right hand screws from the cooler lid back panel. Slip the long large upstand of the Cowling Top Panel under the lip of the cooler lid back panel and re-fit the screws. ILL2439-A ILL2439-A SEELEY INTERNATIONAL - INSTALLATION MANUAL |... -
Page 14: Water Supply Installation
An access panel can be removed for rear discharge options. ILL2 WATER SUPPLY FILTRATION Seeley International requires an inlet filter to be installed on the water supply line, external to the Climate Wizard cooler to prevent any debris from entering and damaging cooler components. -
Page 15: Electrical Supply Installation (Australia, Europe - 3Ph 380-415V)
TO LOCAL ELECTRICAL RULES, REGULATIONS AND PUMP JUNCTION BOX STANDARDS. It is a requirement of Seeley International that all coolers be wired with a dedicated circuit and circuit breaker to the distribution board, incorporating an isolation switch in the fixed... -
Page 16: Electrical Supply Installation
PUMP JUNCTION BOX TO LOCAL ELECTRICAL RULES, REGULATIONS AND STANDARDS. SET FOR 480V It is a requirement of Seeley International that all Coolers be wired with a dedicated circuit and circuit breaker to the 37 36 35 34 33 32 31... -
Page 17: Electrical Supply Installation
PUMP JUNCTION BOX TO LOCAL ELECTRICAL CODES, REGULATIONS AND STANDARDS. It is a requirement of Seeley International that all Coolers be wired with a dedicated circuit and circuit breaker to the distribution board, incorporating an isolation switch in the fixed... -
Page 18: Electrical Supply Installation
PUMP JUNCTION BOX TO LOCAL ELECTRICAL CODES, REGULATIONS AND STANDARDS. It is a requirement of Seeley International that all Coolers be wired with a dedicated circuit and circuit breaker to the distribution board, incorporating an isolation switch in the fixed... -
Page 19: Climate Wizard Supercool Installation
Place a relay switch in series with one of the conductors to the 24VDC Relay. Link the relay switch to the BMS. ILL2445-A MOTOR RELAY 24VDC SUPERCOOL PUMP RELAY SWITCH 24VDC POWER SUPPLY ILL2446-A SEELEY INTERNATIONAL - INSTALLATION MANUAL |... -
Page 20: Control Schemes
INSTALLATION cont. CONTROL SCHEMES • REMOTE ON-OFF (INPUT) When a voltage (4-32VDC or 10-32AC) is applied to the OPTION 1 - LOCAL ZONE CONTROL WITH WALL REMOTE ON-OFF receptacle, the Wall Control is ignored and CONTROL cooler control is handed over to the BMS. If fitted, the Wall Climate Wizard coolers are supplied from the factory with one Control display will flash “Preparing to Start”. -
Page 21: Wall Control Installation
Connect the cable to the wall control and mount the wall control onto its bracket. Important! Take care not to damage the cable or plug during this process. Always seal the cable entry hole. FIG. 3 ILL1210-D ILL1066-D SEELEY INTERNATIONAL - INSTALLATION MANUAL |... -
Page 22: Commissioning
COMMISSIONING WATER MANAGEMENT SYSTEM Water Usage sensing: • Number of times that reservoir is filled from bottom probe Tank (reservoir) drain valve control to top probe is counted. When this count reaches 8, a drain cycle is initiated. • When power switched on to the cooler, the Drain Valve opens to check operation of the Valve. -
Page 23: Testing The Cooler
- Drain 3 days after COOL off Auto re-start after Power failure: - Requires manual re-start when power OFF - Auto restart Temperature units: - Display °C - Display °F * = Default Value SEELEY INTERNATIONAL - INSTALLATION MANUAL |... -
Page 24: Setting The Air Discharge Damper
COMMISSIONING cont. SETTING THE AIR DISCHARGE DAMPER AIR FLOW BALANCING In order for the Climate Wizard to produce cool air it is mandatory that some of the inlet air is forced to return through the heat exchanger cores and be exhausted to atmosphere. Therefore only a proportion of the total inlet air is delivered into the cooled zone. -
Page 25: Installation Checklist
□ Air flow balancing set discharge damper (Refer "COMMISSIONING" Page 24). Value = _______________kPa □ Cooler function test with wall control function check OK. □ BMS control test (where applicable) OK. Commissioning Engineer: ......Signed by Installer: ......... Date: ..............Dated: ............... SEELEY INTERNATIONAL - INSTALLATION MANUAL |... -
Page 26: Operating Instructions
OPERATING INSTRUCTIONS WALL CONTROL DELAYED START AND STOP TURNING THE COOLER ON The cooler can be programmed to start at a specific time or stop at a specific time. The wall control can be switched on and off by pressing the button. -
Page 27: If '02' Or '03' Is Displayed
You will have to re-start it at the wall control. If parameter 01 is set, the cooler will re-start again when power is restored. SEELEY INTERNATIONAL - INSTALLATION MANUAL |... -
Page 28: Maintenance Instructions
MAINTENANCE INSTRUCTIONS QUARTERLY INSPECTION PROCEDURES PUMP MAINTENANCE & REPLACEMENT NOTE! All maintenance must be done by a trained, Quantities and locations of pumps for each model. licensed technician, in accordance with National and Local Regulations (eg AS/NZS 3666.2 etc). Some activities may require 2 persons to comply with local Health and Safety regulations. -
Page 29: Chlorinator Maintenance & Replacement
Refit the assembly. Use a new cable tie to tidy and secure all the cables again and re-assemble. SEELEY INTERNATIONAL - INSTALLATION MANUAL |... -
Page 30: Drain Valve Maintenance & Replacement
MAINTENANCE INSTRUCTIONS cont. DRAIN VALVE MAINTENANCE AND REPLACEMENT CLEANING THE WATER RESERVOIR (TANK) Flushing of the Water Reservoir is best achieved with the SIDE VIEW - RHS pumps/chlorinator and water management probe removed. Cores In instances of large amounts of solid debris, it is also Water Distribution Spreaders Reservoir access recommended to remove the drain valve. -
Page 31: Cleaning Or Replacing Inlet Air Filters
They can be placed aside onto the lid of the cooler cabinet OF THE CORES BACK ABOVE THE while still remaining connected to the plumbing system. ILL2462-A FAN HOUSING. ILL2455-A ILL2455-A ILL2456-A SEELEY INTERNATIONAL - INSTALLATION MANUAL |... -
Page 32: Cooler Cores - Orientation
MAINTENANCE INSTRUCTIONS cont. CHANGING COOLER CORES Locate the water spreader assembly front flange into the extrusion at top front of the cores. The cores can now be slid out from either side of the cooler through the access panel openings. Take care to ensure the cores are not damaged during removal. -
Page 33: Changing Cooler Chillcel Pads
Reposition the extruded T-section at the rear of the pad, wedging it between the spreader rail and the drip tray. Refit the centre and far left pad. Refit the chillcel retention rail. Re-assemble the cooler cores. SEELEY INTERNATIONAL - INSTALLATION MANUAL |... -
Page 34: Operating And Fault Code Diagnosis
MAINTENANCE INSTRUCTIONS cont. OPERATING AND FAULT CODE DIAGNOSIS The fault code history log may be entered at any time after the cooler power has been turned ON. The fault code history log is There are 2 methods for confirming the cooler operation and entered via the wall control using the following method: diagnosing faults on the cooler. - Page 35 Damper" on page 24. Check spreader assemblies securely clamped to top of cores and gaps between in exhaust moved during transport. cores covered up. Check core doors correctly sealing against sides of cores. airstream SEELEY INTERNATIONAL - INSTALLATION MANUAL |...
-
Page 36: Maintenance Schedule
MAINTENANCE SCHEDULE Installation 29 /1980 Installer: Date: It is a condition of your warranty cover that the items in the schedule below are checked (and action taken as required) once every 3 months from the date of installation by a qualified, licensed technician, and that the schedule is properly filled out (i.e. name, signature, date, action taken). - Page 37 Service Company No.1 ......................No.2 ......................No.3 ....................... No.4 ....................... No.5 ....................... No.6 ....................... No.7 ....................... No.8 ....................... SEELEY INTERNATIONAL - INSTALLATION MANUAL |...
- Page 38 MAINTENANCE SCHEDULE cont. Service Item Check/Adjust Clean Replace Electrical Connections and Component Operation Electrical wiring Fan motor PCBs & Control box Drain valve Water inlet solenoid Water probes Chlorinator Water pump Water Distribution System Water distribution system - hoses and spreaders Water level Cabinet and Accessories Cabinet integrity / leaks...
-
Page 39: Spare Parts
Panel Door Nutsert Kit 115993 Panel Door Kit - Core ILL2467-B 116082 Panel Door Kit - Pump 117669 Screw Retrofit Kit - Pump and Probe 117270 24VDC Relay CW-H15S 117294 Chillcel 3off 637x545x150 CW-H15S SEELEY INTERNATIONAL - INSTALLATION MANUAL |... -
Page 40: How To Register Your Product Warranty (Australia Only)
HOW TO REGISTER YOUR PRODUCT WARRANTY (AUSTRALIA ONLY) WARRANTY INFORMATION SECTION HOW TO REGISTER YOUR PRODUCT WARRANTY (Australia only) Please register your warranty online by visiting www.seeleyinternational.com and following these steps: Step 1 Select “GET SUPPORT” and “REGISTER A WARRANTY” Step 2 Select the brand of the product you purchased Step 3... -
Page 41: Warranty Terms And Information (Australia Only)
WARRANTY DETAILS (AUSTRALIA ONLY) In this warranty: We or us means Seeley International Pty Ltd (Seeley) ABN 23 054 687 035, and our contact details are set out at the end of this warranty; You means you, the original end-user purchaser of the Goods;... - Page 42 8. The warranty granted in clause 1 covers the costs of parts and labour but you will be responsible for: the cost of travel incurred for a Seeley International service agent to get to and from the location of the Goods if the location of the Goods is either: (i) outside the metropolitan areas of the capital cities;...
- Page 43 PRIVACY NOTICE Seeley International Pty Ltd ABN 23 054 687 035 will use the personal information you provide us with to provide warranty support for the product you have purchased and to inform you about other products and services. If you choose not to supply us with the information requested, we may be unable to provide you with warranty support.
- Page 44 Seeley International Pty Ltd, 112 O’Sullivan Beach Road, Lonsdale, SA 5160, Australia MANUFACTURED BY: Seeley International Pty Ltd, 77 North Street, Albury, New South Wales 2640, Australia (for Australia, Europe and South Africa) Seeley Acquisition Co., Ltd. doing business as Coolerado, 4430 Glencoe Street,...
Need help?
Do you have a question about the Climate Wizard CW-H10 and is the answer not in the manual?
Questions and answers