Table of Contents
Advertisement
Advertisement
Table of Contents

Related Manuals for Daikin Altherma 3 ECH2O


Summary of Contents for Daikin Altherma 3 ECH2O
-
Page 1: Installation And Maintenance
Installation and maintenance instructions Daikin Altherma 3 ECH EHSX(B)04P30D EHSX(B)08P30D EHSX(B)04P50D EHSX(B)08P50D EHSH(B)04P30D EHSH(B)08P30D EHSH(B)08P50D Installation and maintenance instructions English Heat pump (indoor unit) with integrated heat accumulator 11/2018... -
Page 3: Table Of Contents
Connecting switching contacts (AUX outputs) .... 27 4.7.14 Off-peak mains connection (HT/NT) ......27 4.7.15 Connecting an intelligent controller (Smart Grid - SG) 28 Daikin Altherma EHS(X/H)(B)-D Installation and maintenance instructions Heat pump (indoor unit) with integrated heat accumulator 008.1444099_01 – 11/2018 – EN... -
Page 4: General Safety Precautions
▪ The installation of the system, and all activities described in this children without supervision. manual and the applicable documents for the installer must be carried out by an approved installer. Installation and maintenance instructions Daikin Altherma EHS(X/H)(B)-D Heat pump (indoor unit) with integrated heat accumulator 008.1444099_01 – 11/2018 – EN... -
Page 5: Meaning Of Warnings And Symbols
Daikin Altherma EHS(X/H)(B)-D Installation and maintenance instructions Heat pump (indoor unit) with integrated heat accumulator 008.1444099_01 – 11/2018 – EN... -
Page 6: Intended Use
(>3 mmol/l - total of the calcium and magnesium concentrations, cal- culated as calcium carbonate). We recommend the use of Fernox Installation and maintenance instructions Daikin Altherma EHS(X/H)(B)-D Heat pump (indoor unit) with integrated heat accumulator 008.1444099_01 – 11/2018 – EN... -
Page 7: Heating System And Sanitary Connection
▪ only operate if the protective cover is installed. The specified servicing intervals should be adhered to and inspec- tion work must be carried out. Daikin Altherma EHS(X/H)(B)-D Installation and maintenance instructions Heat pump (indoor unit) with integrated heat accumulator... -
Page 8: Handover To Operator And Warranty
There is only an entitlement to warranty services when it can be cer- tified that the annual maintenance work according to Chap. 7 been regularly completed. Installation and maintenance instructions Daikin Altherma EHS(X/H)(B)-D Heat pump (indoor unit) with integrated heat accumulator 008.1444099_01 – 11/2018 – EN... -
Page 9: Product Description
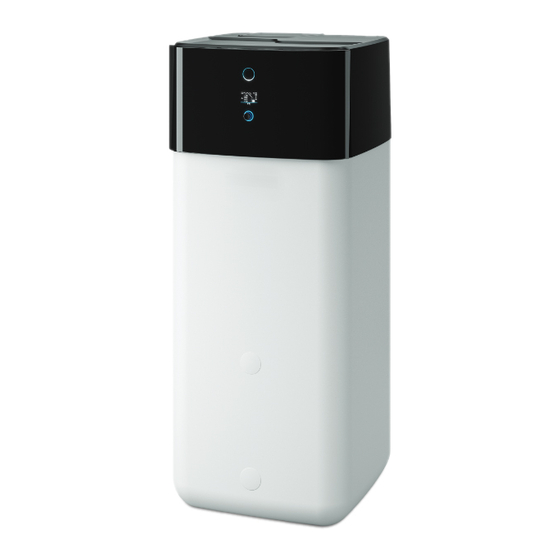
Design and components - Top of the device Fig. 3-1 Design and components - Outside of the device For legend, see Tab. 3-1 Daikin Altherma EHS(X/H)(B)-D Installation and maintenance instructions Heat pump (indoor unit) with integrated heat accumulator 008.1444099_01 – 11/2018 – EN... - Page 10 Fig. 3-4 Design and components – Internal struc- ture ...04P30D/...08P30D (Biv) ture ...04P50D / ...08P50D (Biv) For legend, see Tab. 3-1 Installation and maintenance instructions Daikin Altherma EHS(X/H)(B)-D Heat pump (indoor unit) with integrated heat accumulator 008.1444099_01 – 11/2018 – EN...
-
Page 11: Function Of The 3-Way Switch Valves
Safety overflow connec- Diaphragm expansion tion vessel Mount for handle Tab. 3-1 Legend for Fig. 3-1 Fig. 3-4 Daikin Altherma EHS(X/H)(B)-D Installation and maintenance instructions Heat pump (indoor unit) with integrated heat accumulator 008.1444099_01 – 11/2018 – EN... -
Page 12: Set-Up And Installation
Dimensions and connection Dimensions …04P50D/…08P50D dimensions Dimensions …04P30D/…08P30D Fig. 4-3 Dimensions, side view - Type …04P50D/…08P50D Fig. 4-1 Dimensions, side view - …04P30D/…08P30D Installation and maintenance instructions Daikin Altherma EHS(X/H)(B)-D Heat pump (indoor unit) with integrated heat accumulator 008.1444099_01 – 11/2018 – EN... -
Page 13: Transport And Delivery
Please follow the installa- tion instructions. The installation site of the indoor unit must meet the minimum re- quirements below (see also Chap. 1.2.3). Daikin Altherma EHS(X/H)(B)-D Installation and maintenance instructions Heat pump (indoor unit) with integrated heat accumulator 008.1444099_01 – 11/2018 – EN... -
Page 14: Installing The Device
4-6, item A) into the now uncovered threaded holes. Carefully transport the indoor unit to the installation site, use the handles. Installation and maintenance instructions Daikin Altherma EHS(X/H)(B)-D Heat pump (indoor unit) with integrated heat accumulator 008.1444099_01 – 11/2018 – EN... -
Page 15: Preparing The Device For Installation
Undo the screws (1.). Unhook the protective cover from the rearward facing holding burls (2.), lift at the back (3.) and remove to the front (4.). Daikin Altherma EHS(X/H)(B)-D Installation and maintenance instructions Heat pump (indoor unit) with integrated heat accumulator... -
Page 16: Open The Controller Housing
▪ Pull the side insulating element off vertically (item A). ▪ Pull the rear insulating element off vertically (item B). Fig. 4-12 Open the controller housing Installation and maintenance instructions Daikin Altherma EHS(X/H)(B)-D Heat pump (indoor unit) with integrated heat accumulator 008.1444099_01 – 11/2018 – EN... -
Page 17: Opening The Vent Valve
Turn the elbow (Fig. 4-17, item H) 90° to the rear. Pull the plug bracket off the manifold (Fig. 4-17, item G). Daikin Altherma EHS(X/H)(B)-D Installation and maintenance instructions Heat pump (indoor unit) with integrated heat accumulator 008.1444099_01 – 11/2018 – EN... -
Page 18: Making The Hood Opening
Remove additional components from the housing (strain relief clip, cable tie, grommet). Installation and maintenance instructions Daikin Altherma EHS(X/H)(B)-D Heat pump (indoor unit) with integrated heat accumulator 008.1444099_01 – 11/2018 – EN... -
Page 19: Installation Of The Db Connection Kit
▪ Install a dirt filter or sludge separator in the heating re- turn flow (see chap. ). Fig. 4-25 DB connection kit Daikin Altherma EHS(X/H)(B)-D Installation and maintenance instructions Heat pump (indoor unit) with integrated heat accumulator 008.1444099_01 – 11/2018 – EN... -
Page 20: Connecting Hydraulic Lines
Fix the hydraulic block in place with a screwdriver. ▪ Position the diaphragm expansion vessel in an easily access- ible place (maintenance, parts replacement). Installation and maintenance instructions Daikin Altherma EHS(X/H)(B)-D Heat pump (indoor unit) with integrated heat accumulator 008.1444099_01 – 11/2018 – EN... -
Page 21: Connecting The Drain
The operator alone shall bear responsibility for any resulting damage. Fig. 4-30 Connection of the overflow hose Daikin Altherma EHS(X/H)(B)-D Installation and maintenance instructions Heat pump (indoor unit) with integrated heat accumulator 008.1444099_01 – 11/2018 – EN... -
Page 22: Overall Connection Diagram
Overall connection diagram - for the electrical connection during the device installation (for the legend and pin assignment of the printed circuit board, see Chap. 10.6) Installation and maintenance instructions Daikin Altherma EHS(X/H)(B)-D Heat pump (indoor unit) with integrated heat accumulator 008.1444099_01 – 11/2018 – EN... -
Page 23: Position Of The Printed Circuit Boards And Terminal Strips
Follow the installation steps in Chap. 4.7.4. Connect the heat pump outdoor unit to terminal strip XAG1 (see Fig. 4-35). Daikin Altherma EHS(X/H)(B)-D Installation and maintenance instructions Heat pump (indoor unit) with integrated heat accumulator 008.1444099_01 – 11/2018 – EN... -
Page 24: Connecting The Outside Temperature Sensor (Optional)
To connect an external heat generator, the connection set ated, the input is not evaluated. for external heat generators must be installed. (see Chap. 4.5). Installation and maintenance instructions Daikin Altherma EHS(X/H)(B)-D Heat pump (indoor unit) with integrated heat accumulator 008.1444099_01 – 11/2018 – EN... -
Page 25: Connecting The Room Thermostat
Connecting the room thermostat INFORMATION A separate manual containing instructions about installa- tion and operation is included with this component. Daikin Altherma EHS(X/H)(B)-D Installation and maintenance instructions Heat pump (indoor unit) with integrated heat accumulator 008.1444099_01 – 11/2018 – EN... -
Page 26: Connection Of Optional Rocon System Components
See the enclosed control system manual for instructions on setting and operation. Internet gateway EHS157056 Fig. 4-39 Connection with wired room thermostat (RT = Daikin The controller can be connected to the internet with the optional EKRTW) EHS157056 gateway. This enables remote control of the indoor unit by mobile phones (by app). -
Page 27: Connecting Switching Contacts (Aux Outputs)
See Controller operating instructions → chapter Parameter settings. Precise information on the electrical connection and the re- quired parameter settings for such bivalent heating sys- tems are available on the Internet (www.daikin.com) or from your service partner. 4.7.14 Off-peak mains connection (HT/NT) -
Page 28: Connecting An Intelligent Controller (Smart Grid - Sg)
Installation and maintenance instructions Daikin Altherma EHS(X/H)(B)-D Heat pump (indoor unit) with integrated heat accumulator 008.1444099_01 – 11/2018 – EN... -
Page 29: Pressure Test And Filling The Refrigerant Circuit
Perform pressure test with nitrogen. ▪ Use nitrogen 4.0 or higher. ▪ Maximum 40 bar. Daikin Altherma EHS(X/H)(B)-D Installation and maintenance instructions Heat pump (indoor unit) with integrated heat accumulator 008.1444099_01 – 11/2018 – EN... -
Page 30: Start-Up
During the ventilation function, any air present can escape via the automatic vent valve and the hydraulic circuit connected to the in- door unit is evacuated. Installation and maintenance instructions Daikin Altherma EHS(X/H)(B)-D Heat pump (indoor unit) with integrated heat accumulator 008.1444099_01 – 11/2018 – EN... -
Page 31: Checking The Minimum Flow
▪ Read the [Current volume flow] information parameter [→ Main menu → Information → Values]. ▪ The flow rate must be at least 480 l/h (see Controller operating instructions). Daikin Altherma EHS(X/H)(B)-D Installation and maintenance instructions Heat pump (indoor unit) with integrated heat accumulator 008.1444099_01 – 11/2018 – EN... -
Page 32: Commissioning Checklist
Check the cold water connection and, where necessary, fill the potable water heat exchanger. Switch on the power supply to the indoor unit. Installation and maintenance instructions Daikin Altherma EHS(X/H)(B)-D Heat pump (indoor unit) with integrated heat accumulator 008.1444099_01 – 11/2018 – EN... - Page 33 If a solar system is connected, commission it according to the enclosed instructions. After shutting off the solar system, again check the fill level in the buffer storage tank. Daikin Altherma EHS(X/H)(B)-D Installation and maintenance instructions Heat pump (indoor unit) with integrated heat accumulator...
-
Page 34: Hydraulic Connection
Sludge and magnetic separator Solar panel field Safety overpressure valve Outside temperature sensor Storage tank temperature sensor Inflow temperature sensor, mixer circuit Installation and maintenance instructions Daikin Altherma EHS(X/H)(B)-D Heat pump (indoor unit) with integrated heat accumulator 008.1444099_01 – 11/2018 – EN... - Page 35 Solaris storage cylinder temp. sensor Fan (vaporiser) Scalding protection VTA32 Tab. 6-1 Fig. 6-1 Hydraulic diagram (Biv types) with pressurised solar system Daikin Altherma EHS(X/H)(B)-D Installation and maintenance instructions Heat pump (indoor unit) with integrated heat accumulator 008.1444099_01 – 11/2018 – EN...
-
Page 36: Inspection And Maintenance
▪ When removing the service pipes from the filling connec- tions, never hold the connections in the direction of your body. Residual refrigerant could escape. Installation and maintenance instructions Daikin Altherma EHS(X/H)(B)-D Heat pump (indoor unit) with integrated heat accumulator 008.1444099_01 – 11/2018 – EN... -
Page 37: Inspection And Maintenance Tasks
▪ If necessary, clean the safety overflow and drain hose and relay it; replace damaged parts. Check all electrical components, connections and cables. ▪ Repair damaged parts or replace them. Daikin Altherma EHS(X/H)(B)-D Installation and maintenance instructions Heat pump (indoor unit) with integrated heat accumulator 008.1444099_01 – 11/2018 – EN... -
Page 38: Filling, Topping Up The Heating System
▪ After the first filling and before switching on the indoor unit at the mains switch, check that all electric parts and connection points are dry. Installation and maintenance instructions Daikin Altherma EHS(X/H)(B)-D Heat pump (indoor unit) with integrated heat accumulator 008.1444099_01 – 11/2018 – EN... - Page 39 (Fig. 7-2, Diaphragm expansion vessel item 2). Tab. 7-2 Legend for Fig. 7-2 if not already installed in the heating system Daikin Altherma EHS(X/H)(B)-D Installation and maintenance instructions Heat pump (indoor unit) with integrated heat accumulator 008.1444099_01 – 11/2018 – EN...
-
Page 40: Faults And Malfunctions
The electricity company has sent the peak rate sig- ▪ Wait for the repeat off-peak rate signal which reactivates the power supply. nal. Installation and maintenance instructions Daikin Altherma EHS(X/H)(B)-D Heat pump (indoor unit) with integrated heat accumulator 008.1444099_01 – 11/2018 – EN... - Page 41 ▪ Check the [Config. of external heat source] and [Ext. power level 1] and [Ext. power level 2] parameters [→ Main menu → Settings → Ext. source]. Daikin Altherma EHS(X/H)(B)-D Installation and maintenance instructions Heat pump (indoor unit) with integrated heat accumulator 008.1444099_01 – 11/2018 – EN...
- Page 42 ▪ If the refrigerant quantity is too high, recycle the refrigerant and refill the system with the correct quantity. Installation and maintenance instructions Daikin Altherma EHS(X/H)(B)-D Heat pump (indoor unit) with integrated heat accumulator 008.1444099_01 – 11/2018 – EN...
-
Page 43: Fault Codes
▪ Check, replace. E129 Pressure sensor DS Pressure sensor error Pressure sensor DS defective. ▪ Check, replace. Daikin Altherma EHS(X/H)(B)-D Installation and maintenance instructions Heat pump (indoor unit) with integrated heat accumulator 008.1444099_01 – 11/2018 – EN... - Page 44 ▪ Failure of the frost protection function for the plate heat exchanger because there is a lack of refri- gerant in the system. See fault code E9015 / E4. Installation and maintenance instructions Daikin Altherma EHS(X/H)(B)-D Heat pump (indoor unit) with integrated heat accumulator 008.1444099_01 – 11/2018 – EN...
- Page 45 E9013 Heat pump outdoor unit AG circuit board defective defective. main circuit board ▪ Fan motor defective. ▪ Check, replace. Daikin Altherma EHS(X/H)(B)-D Installation and maintenance instructions Heat pump (indoor unit) with integrated heat accumulator 008.1444099_01 – 11/2018 – EN...
- Page 46 (hot gas sensor) R2T on the heat pump outdoor unit ▪ Refrigerant compressor defective. refrigerant compressor too ▪ Check, replace. high Installation and maintenance instructions Daikin Altherma EHS(X/H)(B)-D Heat pump (indoor unit) with integrated heat accumulator 008.1444099_01 – 11/2018 – EN...
- Page 47 (only in 11 -16 kW system) E9029 Fluid side temperature AG cold sensor error sensor R6T in the heat pump outdoor unit Daikin Altherma EHS(X/H)(B)-D Installation and maintenance instructions Heat pump (indoor unit) with integrated heat accumulator 008.1444099_01 – 11/2018 – EN...
- Page 48 ▪ Inverter circuit board in the heat pump outdoor unit defective. ▪ Check, eliminate cause, replace. ▪ If necessary, contact a service technician. Installation and maintenance instructions Daikin Altherma EHS(X/H)(B)-D Heat pump (indoor unit) with integrated heat accumulator 008.1444099_01 – 11/2018 – EN...
- Page 49 ▪ Check the building's DHW tap. ▪ Confirm that the software and EEPROM on the hydro printed circuit board match. Daikin Altherma EHS(X/H)(B)-D Installation and maintenance instructions Heat pump (indoor unit) with integrated heat accumulator 008.1444099_01 – 11/2018 – EN...
- Page 50 ▪ Check the quality of the refrigerant. ▪ Check the shut-off valves. ▪ Check that the hydro printed circuit board is being supplied with voltage. Installation and maintenance instructions Daikin Altherma EHS(X/H)(B)-D Heat pump (indoor unit) with integrated heat accumulator 008.1444099_01 – 11/2018 – EN...
- Page 51 ▪ Check that the correct replacement part has been installed. ▪ Check that the outer main conductor plate is re- ceiving a power supply. Daikin Altherma EHS(X/H)(B)-D Installation and maintenance instructions Heat pump (indoor unit) with integrated heat accumulator 008.1444099_01 – 11/2018 – EN...
- Page 52 Inverter circuit board Fin heat ex- Outside temper- changer (evap- ature sensor orator) Only for 11-16 kW heat pump outdoor units. Installation and maintenance instructions Daikin Altherma EHS(X/H)(B)-D Heat pump (indoor unit) with integrated heat accumulator 008.1444099_01 – 11/2018 – EN...
-
Page 53: Emergency Operation
Otherwise, emergency operation can only be started in the event of an error via the error screen (see enclosed controller operating instructions). Daikin Altherma EHS(X/H)(B)-D Installation and maintenance instructions Heat pump (indoor unit) with integrated heat accumulator... -
Page 54: Taking Out Of Operation
After removing the sealing plug, storage tank water surges out. There is no valve or check valve on the filling and draining connection. Installation and maintenance instructions Daikin Altherma EHS(X/H)(B)-D Heat pump (indoor unit) with integrated heat accumulator 008.1444099_01 – 11/2018 – EN... -
Page 55: Draining The Heating Circuit And Hot Water Circuit
Shut off the valve insert, remove the blind plug from the connection bracket disconnected from all electrical, oil and water connections, Daikin Altherma EHS(X/H)(B)-D Installation and maintenance instructions Heat pump (indoor unit) with integrated heat accumulator 008.1444099_01 – 11/2018 – EN... - Page 56 ▪ Disposal may only be carried out by an organization that special- ises in reuse, recycling and recovery. Further information is available from the installation company or the responsible local authorities. Installation and maintenance instructions Daikin Altherma EHS(X/H)(B)-D Heat pump (indoor unit) with integrated heat accumulator 008.1444099_01 – 11/2018 – EN...
-
Page 57: Technical Data
— 3/4" IG + 1" AG — 3/4" IG + 1" AG Solar connection Refrigerant circuit Number of circuits — Daikin Altherma EHS(X/H)(B)-D Installation and maintenance instructions Heat pump (indoor unit) with integrated heat accumulator 008.1444099_01 – 11/2018 – EN... -
Page 58: Information On The Type Plate
Number of individual lines in the connection cable including protective earth conductor. The cross-section of the individual lines is dependent on the current load, the length of the connection cable and the respective legal provisions. Installation and maintenance instructions Daikin Altherma EHS(X/H)(B)-D Heat pump (indoor unit) with integrated heat accumulator 008.1444099_01 – 11/2018 – EN... -
Page 59: Characteristic Lines
Temperature Flow rate of heating system Return flow temperature sensor Tab. 10-21 Legend for Fig. 10-5 Tab. 10-19 Legend for Fig. 10-3 Daikin Altherma EHS(X/H)(B)-D Installation and maintenance instructions Heat pump (indoor unit) with integrated heat accumulator 008.1444099_01 – 11/2018 – EN... -
Page 60: Tightening Torque
20 mm. The bottom of the opening must be ≤ 100 mm above ) (cm the floor. At least 50 % of the required minimum area of the 1.76 1.63 1.49 1.35 1.21 Installation and maintenance instructions Daikin Altherma EHS(X/H)(B)-D Heat pump (indoor unit) with integrated heat accumulator 008.1444099_01 – 11/2018 – EN... - Page 61 0.30 dm = 1.9 kg - 1.32 kg = 0.58 kg 0.26 from Tab. 10-25: dm = 0.58 kg -> VA = 294 cm² Daikin Altherma EHS(X/H)(B)-D Installation and maintenance instructions Heat pump (indoor unit) with integrated heat accumulator 008.1444099_01 – 11/2018 – EN...
-
Page 62: Electrical Connection Diagram
Technical data 10.6 Electrical connection diagram Fig. 10-6 Electrical connection diagram Installation and maintenance instructions Daikin Altherma EHS(X/H)(B)-D Heat pump (indoor unit) with integrated heat accumulator 008.1444099_01 – 11/2018 – EN... - Page 63 RTX-EHS Printed circuit board (backup heater) X11M Terminal strip in the HP convector Tab. 10-26 Key names for connection and wiring diagrams Daikin Altherma EHS(X/H)(B)-D Installation and maintenance instructions Heat pump (indoor unit) with integrated heat accumulator 008.1444099_01 – 11/2018 – EN...
-
Page 64: Notes
Notes Notes Installation and maintenance instructions Daikin Altherma EHS(X/H)(B)-D Heat pump (indoor unit) with integrated heat accumulator 008.1444099_01 – 11/2018 – EN... - Page 65 Notes Daikin Altherma EHS(X/H)(B)-D Installation and maintenance instructions Heat pump (indoor unit) with integrated heat accumulator 008.1444099_01 – 11/2018 – EN...
- Page 66 Notes Installation and maintenance instructions Daikin Altherma EHS(X/H)(B)-D Heat pump (indoor unit) with integrated heat accumulator 008.1444099_01 – 11/2018 – EN...
-
Page 67: List Of Keywords
......................Room station 26 ....................... Scope of delivery 13 ...................... Tightening torques 60 ....................Transport 13 ........................Warranty 8 .......................... Daikin Altherma EHS(X/H)(B)-D Installation and maintenance instructions Heat pump (indoor unit) with integrated heat accumulator 008.1444099_01 – 11/2018 – EN... - Page 68 008.1444099_01 – 11/2018 – EN...
Need help?
Do you have a question about the Altherma 3 ECH2O and is the answer not in the manual?
Questions and answers