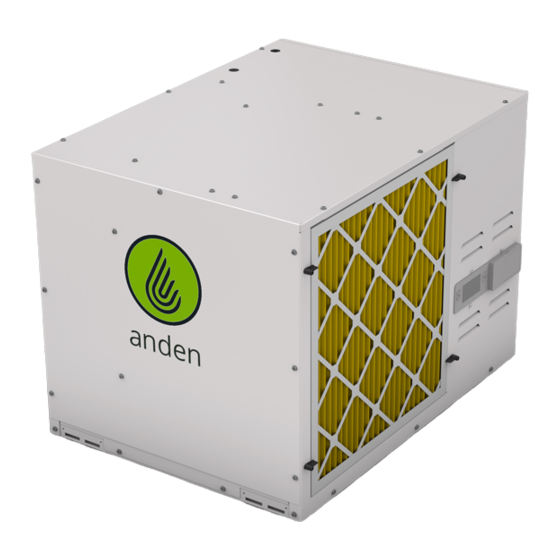
Anden A320V1 Installation And Operating Instructions Manual
Hide thumbs
Also See for A320V1:
- Installation and operating instructions manual (20 pages) ,
- Quick start manual (4 pages) ,
- Specification sheet (2 pages)
Table of Contents
Advertisement
Available languages
Available languages
ON/OFF BUTTON
USED TO TURN
BUTTONS USED TO
DEHUMIDIFIER ON
CHANGE HUMIDITY
AND OFF
MODE BUTTON
USED FOR
OPTIONAL FEATURES
SAFETY INSTRUCTIONS
1. High voltage may cause serious injury from electric shock. Disconnect electrical power before starting installation or servicing. Leave power
disconnected until installation/service is completed.
2. Sharp edges may cause serious injury from cuts. Use care when cutting plenum openings and handling duct work.
3. Dropping may cause personal injury or equipment damage. Handle with care and follow installation instructions.
1. Read all instructions before beginning installation.
2. This appliance is not intended for use by persons (including children) with reduced physical, sensory or mental capabilities, or lack of
experience and knowledge, unless they have been given supervision or instruction concerning use of the appliance by a person responsible
for their safety. Children should be supervised to ensure that they do not play with the appliance.
3. Do not use in pool applications. Pool chemicals can damage the dehumidifier.
4. Do not use solvents or cleaners on or near the circuit board. Chemicals can damage circuit board components.
5. Wait 24 hours before running the unit if it was not shipped or stored in the upright position
6. If the supply cord is damaged, it must be replaced by the manufacturer, its service agent or similarly qualified persons in order to avoid a hazard.
10013678 B2208381A 12.18
Model A320V1 and A320V3 Dehumidifier
Installation and Operating Instructions
UP/DOWN
SETTING
FILTER
DEHUMIDIFER CONTROL
READ AND SAVE THESE INSTRUCTIONS
INLET
WARNING
CAUTION
OUTLET
90-2432
English 1
Advertisement
Chapters
Table of Contents

Related Manuals for Anden A320V1


Summary of Contents for Anden A320V1
- Page 1 Model A320V1 and A320V3 Dehumidifier Installation and Operating Instructions ON/OFF BUTTON UP/DOWN OUTLET USED TO TURN BUTTONS USED TO DEHUMIDIFIER ON CHANGE HUMIDITY AND OFF SETTING MODE BUTTON USED FOR OPTIONAL FEATURES FILTER INLET 90-2432 DEHUMIDIFER CONTROL SAFETY INSTRUCTIONS WARNING 1.
-
Page 2: Table Of Contents
TABLE OF CONTENTS SAFETY INSTRUCTIONS � � � � � � � � � � � � � � � � � � � � � � � � � � � � � � � � � � � � � � � � � � � � � � � � � � � � � � � � � � � � � � � � � � � � � � � � � � � � � � � � � � � � � � � � � � � � � � � � � � � � � � � � � � � � � � � � � � 1 SPECIFICATIONS �... -
Page 3: Specifications
SPECIFICATIONS ENVIRONMENTAL ELECTRICAL A320V1 A320V3 Operating Temperature Range 65°F – 85°F Voltage 208-240 VAC (~), 1ø, 60 HZ 277 VAC (~), 1ø, 60 HZ Operating Dew Point 40°F – 75°F Operating Current 11�1A @ 80°F, 60% RH 9�1A @ 80°F, 60% RH 2�9 L/kW-hr (6�0 pints/kW-hr) 2�6 L/kW-hr (5�5 pints/kW-hr) -
Page 4: Unpacking The Dehumidifier
UNPACKING THE DEHUMIDIFIER Use the cut line on the carton to pulll carton off dehumidfier� INCLUDED IN THE CARTON • Dehumidifier • 3/4" MNPT x 3/4" female pipe • Installation manual • 3/4" FNPT x 3/4" female pipe • Hanging brackets •... -
Page 5: Floor Mounting
FLOOR MOUNTING The 5789 leveling feet kit (not included) is required for floor mounting� The drain hose must continuously slope downward toward the drain� Use solid supports as needed to elevate the unit enough to allow for continuous drain slope� Use the adjustable feet to level the unit right to left and front to back so that unit drains properly�... -
Page 6: Suspending The Dehumidifier
SUSPENDING THE DEHUMIDIFIER INSTALL BRACKETS FOR SUSPENDING UNIT The brackets are designed to accommodate up to 1/2" threaded rod� 1. Insert bracket into slots on the base� See FIGURE 5� 2. Rotate the bracket up toward the dehumidifier and secure the bracket to the side of the dehumidifier using #12 sheet metal screws (provided)� See FIGURE 6�... -
Page 7: Drain Installation
DRAIN INSTALLATION The blower draws air through the dehumidifier, putting the cabinet under FIGURE 8 – DRAIN ASSEMBLY negative pressure� As a result, the included P-trap is required for proper draining� The 3/4" FLEXIBLE TUBE installed drain fitting on the dehumidifier (INCLUDED) is 3/4"... -
Page 8: Hard Wiring - Line Voltage
The A320V1 dehumidifier comes with a power cord that has a NEMA 6-20P plug that can simply be plugged into a corresponding NEMA 6-20R receptacle� The A320V3 dehumidifier comes with a power... -
Page 9: Model A76 - Remote Control And Wiring
MODEL A76 – REMOTE CONTROL AND WIRING NOTE: Use 18-22 AWG wire for control wiring� FIGURE 11 – MODEL A76 REMOTE CONTROL WIRING Humidity can be controlled using the internal dehumidifier control, a Model A76 control or a different external control like a thermostat� Without an external control, the dehumidifier will turn on its blower for three minutes every 15, 30 or 45 minutes depending on how often the unit is set to sample the air�... -
Page 10: System Set Up & Checkout
SYSTEM SET-UP & CHECKOUT Skip set up and proceed to INSTALLER TEST MODE on page 11 unless: REMOTE CONTROL • A Model A76 or other external control is to be installed If not installing a Model A76, leave • changing the air sampling rate DISABLED and press MODE to go 1. -
Page 11: Installer Test Mode
EXTERNAL CONTROL INSTALLER TEST MODE If using the dehumidifier on-board If everything is properly wired, the dehumidifier and all of the control, leave DISABLED and press wired components will turn on and off during Installer Test MODE to go to the next screen� Mode to demonstrate that all are properly operating�... -
Page 12: Start Up And Sequence Of Operation
START UP AND SEQUENCE OF OPERATION USING THE DEHUMIDIFIER CONTROL 1. Press the ON/OFF button to turn the dehumidifier control ON� The display will show the current setting, and the dehumidifier blower will turn on to start sampling the air� The setting will be replaced by the measured humidity and “AIR SAMPLING”... -
Page 13: Troubleshooting
TROUBLESHOOTING Technical Support is available Monday through Friday, DIAGNOSTIC CODES 7:00 a�m� to 5:00 p�m� CST, at (800) 972-3710� Use the guides on the following pages to identify and correct system When an error occurs, the Diagnostic faults� Contact Technical Support before replacing the unit Code along with SERVICE REQUIRED or any components and for additional troubleshooting�... - Page 14 TABLE 2 – TROUBLESHOOTING GUIDE Symptom Possible Reason Troubleshooting Procedure Dehumidifier does not No power to unit� • Check that the dehumidifier is plugged in� turn on/run� • Check that the power switch is turned ON� • Check that the control is turned ON� •...
-
Page 15: Service Parts
SERVICE PARTS 90-2440 Part Description Part No. Part Description Part No. Transformer, 40VA, 240V (V1) 5784 User Interface 5738 Transformer, 40VA, 277V (V3) 5808 Low Temperature Sensor 5814 Fuse, 1A, Slow-Blow 5785 High Temperature Sensor 5815 Internal Power PCB 5444 Not Shown Compressor Contactor 5714... -
Page 16: Limited Warranty
WARRANTY REGISTRATION Visit us online at anden.com to register your Anden product� If you do not have online access, please mail a postcard with your name, address, phone number, email address, product purchased, model number, date of purchase, and dealer name and address to: Research Products Corporation, P�O� Box 1467, Madison, WI 53701�... - Page 17 Déshumidificateur Modèle A320V1 et Modèle A320V3 Directives d’installation et mode d’emploi SORTIE BOUTONS UP/DOWN BOUTON ON/OFF (MARCHE/ (FLÈCHES VERS LE HAUT ARRÊT) POUR METTRE EN ET VERS LE BAS) POUR MARCHE ET ÉTEINDRE LE AJUSTER LE RÉGLAGE DÉSHUMIDIFICATEUR DE L’HUMIDITÉ...
- Page 18 TABLE DES MATIÈRES DIRECTIVES RELATIVES À LA SÉCURITÉ � � � � � � � � � � � � � � � � � � � � � � � � � � � � � � � � � � � � � � � � � � � � � � � � � � � � � � � � � � � � � � � � � � � � � � � � � � � � � � � � � � � � � � � � � � � � � � � � � � � 1 SPÉCIFICATIONS �...
-
Page 19: Spécifications
SPÉCIFICATIONS ENVIRONNEMENT ÉLECTRICITÉ A320V1 A320V3 Plage de températures Tension 208-240 V c�a� (~), 1ø, 60 HZ 277 V c�a� (~), 1ø, 60 HZ 18 à 29 °C (65 à 85 °F) de fonctionnement Courant de 11,1 A @ 27 °C (80 °F), 60 % d’HR 9,1 A @ 27 °C (80 °F), 60 % d’HR... -
Page 20: Retrait De L'emballage Du Déshumidificateur
RETRAIT DE L’EMBALLAGE DU DÉSHUMIDIFICATEUR Suivez la ligne de découpe sur le carton pour dégager le déshumidificateur du carton� CONTENU DU CARTON • Déshumidificateur • Conduite femelle 19 mm (3/4 po) MNPT x 19 mm (3/4 po) • Manuel d’installation • Conduite femelle 19 mm (3/4 po) FNPT x 19 mm (3/4 po) •... -
Page 21: Fixation Sur Le Sol
FIXATION SUR LE SOL La trousse des pieds de mise à niveau 5789 (non inclus) est exigé pour la fixation sur le sol� Le tuyau d’évacuation doit être posé en pente descendante vers la conduite d’évacuation� Utilisez des supports solides pour soulever suffisamment l’appareil afin d’obtenir une pente ininterrompue vers la conduite d’évacuation�... -
Page 22: Suspendre Le Déshumidificateur
SUSPENDRE LE DÉSHUMIDIFICATEUR INSTALLER LES SUPPORTS POUR SUSPENDRE L’APPAREIL Les supports sont conçus pour accueillir une tige filetée de 12,5 mm (0,5 po) au maximum� 1. Insérez le support dans les fentes de la base de l'appareil� Reportez-vous à la FIGURE 5� 2. -
Page 23: Installation De L'évacuation
INSTALLATION DE L’ÉVACUATION Le ventilateur aspire l’air par le déshumidifcateur, ce qui met l’appareil FIGURE 8 – ASSEMBLAGE DE L’ÉVACUATION en pression négative� Par conséquent, le siphon en P fourni est nécessaire pour que le drainage se fasse correctement� TUYAU FLEXIBLE 19 mm 3/4 PO (INCLUS) Le raccord de vidange installé... -
Page 24: Câblage Direct - Tension De La Ligne
également qualifiées pour éviter tout danger. Le déshumidificateur A320V1 est doté d'un cordon électrique avec une fiche NEMA 6-20P qu'il suffit de brancher dans la prise NEMA 6-20R correspondante�... -
Page 25: Modèle A76 - Commande À Distance Et Câblage
MODÈLE A76 – COMMANDE À DISTANCE ET CÂBLAGE REMARQUE : Utilisez un câble 18-22 AWG pour le câble de la commande� L’humidité peut être contrôlée à l’aide d’une commande de FIGURE 11 – CÂBLAGE DE LA COMMANDE À DISTANCE MODÈLE A76 déshumidificateur externe, une commande modèle A76 ou une autre commande externe comme un thermostat�... -
Page 26: Configuration & Vérification Du Système
CONFIGURATION ET VÉRIFICATION DU SYSTÈME Sautez la configuration et passez à la section MODE D’ESSAI DE COMMANDE À DISTANCE L’INSTALLATEUR, page 11, sauf si: Si vous n’installez pas un modèle • Il faut installer une commande externe modèle A76 ou autre A76, laissez DISABLED (désactivé) •... -
Page 27: Mode D'essai De L'installateur
COMMANDE EXTERNE MODE D’ESSAI DE L’INSTALLATEUR Si vous utilisez la commande Si tout a bien été branché, le déshumidificateur et toutes intégrée du déshumidificateur, les composantes câblées vont se mettre en marche et se laissez DISABLED (désactivé) et désactiver en Mode d’essai de l’installation pour prouver que appuyez sur MODE pour passer à... -
Page 28: Démarrage Et Séquence De Fonctionnement
DÉMARRAGE ET SÉQUENCE DE FONCTIONNEMENT À L’AIDE DE LA COMMANDE DU DÉSHUMIDIFICATEUR 1. Appuyez sur le bouton Marche/Arrêt pour mettre en marche la commande du déshumidificateur� L’écran va afficher le réglage actuel et le moteur du déshumidificateur va se mettre en marche pour commencer à vérifier l’air� Le réglage sera remplacé... -
Page 29: Dépannage
DÉPANNAGE Le support technique est disponible du lundi au vendredi de CODES DE DIAGNOSTIC 7 h à 17 h (heure du centre) en composant le (800) 972-3710� Utilisez les guides des pages suivantes pour identifier et En cas d’erreur, le code de diagnostic remédier aux défaillances du système�... -
Page 30: Tableau 2 - Guide De Dépannage
TABLEAU 2 – GUIDE DE DÉPANNAGE Symptôme Raison possible Procédure de dépannage L’humidificateur ne se Il n’y a pas de courant • Vérifiez que la prise du déshumidificateur est branchée� met pas en marche/ vers l’appareil� • Vérifiez que l’interrupteur est activé� ne fonctionne pas�... -
Page 31: Pièces De Rechange
PIÈCES DE RECHANGE 90-2440 Part Description Part No. Part Description Part No. Transformateur, 40 VA, 240 V (V1) 5784 Capteur de basses températures 5814 Transformateur, 40 VA, 277 V (V3) 5808 Capteur de hautes températures 5815 Fusible, 1 A Fusion lente 5785 Not Shown Carte de circuits imprimés interne... -
Page 32: Garantie Limitée
ENREGISTREMENT DE LA GARANTIE Visitez-nous en ligne à anden.com pour enregistrer votre produit Anden� Si vous n’avez pas accès à Internet, veuillez envoyer une carte postale en indiquant votre nom, adresse, numéro de téléphone, adresse électronique, le produit acheté, le numéro de modèle, la date d’achat et le nom du concessionnaire à : Research Products Corporation, P�O� Box 1467, Madison, WI 53701 É�-U�...
Need help?
Do you have a question about the A320V1 and is the answer not in the manual?
Questions and answers
How do I turn on the defrost function of anden Dehumidifier
The defrost function of the Anden A320V1 Dehumidifier is automatic and does not require manual activation. It operates as needed when ice forms on the coils during low-temperature conditions.
This answer is automatically generated