Table of Contents
Advertisement
ON/OFF BUTTON
USED TO TURN
DEHUMIDIFIER ON
AND OFF
MODE BUTTON USED
FOR OPTIONAL
VENTILATION FEATURE
SAFETY INSTRUCTIONS
1. 120 Volts may cause serious injury from electric shock. Disconnect electrical power before starting installation or servicing. Leave power
disconnected until installation/service is completed.
2. Sharp edges may cause serious injury from cuts. Use care when cutting plenum openings and handling duct work.
3. Dropping may cause personal injury or equipment damage. Handle with care and follow installation instructions.
1. Read all instructions before beginning installation.
2. Improper installation may cause property damage or injury. Installation, service, and maintenance must be performed by a qualified service
technician.
3. Do not use in pool applications. Pool chemicals can damage the dehumidifier.
4. Do not use solvents or cleaners on or near the circuit board. Chemicals can damage circuit board components.
5. Wait 24 hours before running the unit if it was not shipped or stored in the upright position
6. Do not use dehumidification to prevent window condensation in the winter. To address window condensation, use ventilation to lower
indoor humidity in the winter.
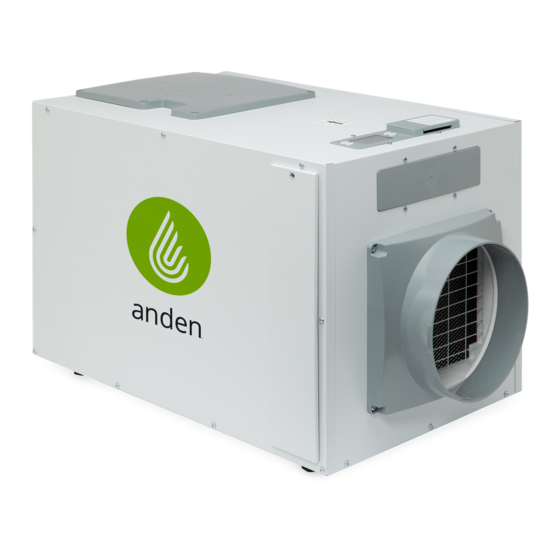
Model A130 Dehumidifier
Installation and Operating Instructions
UP/DOWN
BUTTONS USED TO
CHANGE HUMIDITY
SETTING
INLET
READ AND SAVE THESE INSTRUCTIONS
DEHUMIDIFER CONTROL
FILTER ACCESS DOOR
WARNING
CAUTION
OUTLET
DRAIN
POWER
SWITCH
1
Advertisement
Table of Contents
Troubleshooting

Summary of Contents for Anden A130
-
Page 1: Safety Instructions
Model A130 Dehumidifier Installation and Operating Instructions ON/OFF BUTTON UP/DOWN DEHUMIDIFER CONTROL OUTLET USED TO TURN BUTTONS USED TO DEHUMIDIFIER ON CHANGE HUMIDITY AND OFF SETTING MODE BUTTON USED FOR OPTIONAL VENTILATION FEATURE INLET FILTER ACCESS DOOR DRAIN POWER SWITCH... -
Page 2: Table Of Contents
Air Conditioning is Running ........6 SPECIFICATIONS Model A130 TABLE 1 – SPECIFICATIONS... -
Page 3: Set Up Dehumidifier For Installation
SET UP DEHUMIDIFIER FOR INSTALLATION IMPORTANT: Cut the strap securing the compressor shipping support bracket and remove the strap and shipping bracket. See FIGURE 1. FIGURE 1 – REMOVE SHIPPING BRACKET PACKAGING CONTENT REMOVE SCREWS (2) DISCARD SHIPPING BRACKET REINSTALL SCREWS (2) 1. -
Page 4: Control Location
CONTROL LOCATION For floor mount installation, leave the control mounted to the top of the unit. For suspended FIGURE 5 – CONTROL LOCATION installations, it will be easier to see if the control is relocated to the front of the unit. CONTROL CONTROL PANEL COVER... -
Page 5: Drain Installation
DRAIN INSTALLATION The drain outlet on the dehumidifier can be hard piped using a 3/4" PVC Slip x 3/4" MNPT fitting and 3/4" nominal drain tubing or the provided 3/4" MNPT x 3/4" hose barb fitting and 3/4" clear PVC tubing can be used to drain the dehumidifier. Always maintain a constant downward slope from the dehumidifier to the drain and do not allow soft tubing to curl up which may result in air lock. -
Page 6: Model A77 - Remote Or External Control And Wiring
MODEL A77 – REMOTE OR EXTERNAL CONTROL AND WIRING NOTE: Use 18-22 AWG wire for control wiring. FIGURE 9 – MODEL A77 REMOTE CONTROL WIRING The internal dehumidifier control can be used to control humidity, or a remote Model A77 Control or other external control (see below) can be wired to the dehumidifier. -
Page 7: System Set Up & Checkout
SYSTEM SET-UP & CHECKOUT Skip set up and proceed to INSTALLER TEST MODE on page 8 unless: REMOTE CONTROL • A Model A77 or other external control is to be installed If not installing an A77, leave • changing the air sampling rate DISABLED and press MODE to go 1. -
Page 8: Installer Test Mode
EXTERNAL CONTROL INSTALLER TEST MODE If using the dehumidifier on-board If everything is properly wired, the dehumidifier and all of the control, leave DISABLED and press wired components will turn on and off during Installer Test MODE to go to the next screen. Mode to demonstrate that all are properly operating. -
Page 9: Start Up And Sequence Of Operation
START UP AND SEQUENCE OF OPERATION USING THE DEHUMIDIFIER CONTROL 1. Press the ON/OFF button to turn the dehumidifier control ON. The display will show the current setting, and the dehumidifier blower will turn on to start sampling the air. The setting will be replaced by the measured humidity and “AIR SAMPLING”... -
Page 10: Troubleshooting
TROUBLESHOOTING Technical Support is available Monday through Friday, DIAGNOSTIC CODES 7:00 a.m. to 5:00 p.m. CST, at (800) 972-3710. Use the guides on the following pages to identify and correct system When an error occurs, the Diagnostic faults. Contact Technical Support before replacing the unit Code along with SERVICE REQUIRED or any components and for additional troubleshooting. -
Page 11: Limited Warranty
WARRANTY REGISTRATION Visit us online at anden.com to register your Anden product. If you do not have online access, please mail a postcard with your name, address, phone number, email address, product purchased, model number, date of purchase, and dealer name and address to: Research Products Corporation, P.O. Box 1467, Madison, WI 53701. -
Page 12: Service Parts
5665 Cover, Outlet, Deh 5452 Compressor Overload Switch 5574 Fan, 130pt Deh, with 10MFD Capacitor 5572 anden.com P.O. Box 1467 Madison, WI 53701-1467 800.972.3710 F: 608.257.4357 Printed in USA ©2019 Anden – A Quality brand from Research Products Corporation 10013580 B2208340B 2.19...


Need help?
Do you have a question about the A130 and is the answer not in the manual?
Questions and answers