Aiphone IX-MV7-HW Operation Manual
Master station.
software version 1.00 or later
Hide thumbs
Also See for IX-MV7-HW:
- Operation manual (234 pages) ,
- Quick start programming manual (24 pages) ,
- User & installation manual (3 pages)
Table of Contents
Advertisement
IX System
Master Station
IX-MV7-HW
IX-MV7-HB
IX-MV7-W
IX-MV7-B
Operation Manual
Software version 1.00 or later
IX-MV7-HW
IX-MV7-HB
Important
• Be sure to read this document (Operation Manual) prior to usage to ensure correct
operation, After reading this document, store it in a safe location so that it can be
referred to at any time.
• The illustrations and images in this manual may vary from the actual ones.
IX-MV7-W
IX-MV7-B
Advertisement
Table of Contents

Related Manuals for Aiphone IX-MV7-HW


Summary of Contents for Aiphone IX-MV7-HW
- Page 1 IX System Master Station IX-MV7-HW IX-MV7-HB IX-MV7-W IX-MV7-B Operation Manual Software version 1.00 or later IX-MV7-HW IX-MV7-W IX-MV7-HB IX-MV7-B Important • Be sure to read this document (Operation Manual) prior to usage to ensure correct operation, After reading this document, store it in a safe location so that it can be referred to at any time.
-
Page 2: Precautions
Precautions Literature information Literature information The important information concerning correct operation and what you should observe is marked with the following symbols. This symbol means that operating the device incorrectly ignoring these precautions may cause Warning severe injury or death. This symbol means that operating the device incorrectly ignoring these precautions may cause Caution severe injury or property damage. -
Page 3: Precautions
Precautions Precautions Precautions This symbol means that operating the device incorrectly ignoring these Warning precautions may cause severe injury or death. Do not disassemble or modify the device. If the device is emitting smoke, an abnormal May cause fire or electrical shock. odor, or an abnormal sound, or if the device is dropped or damaged, immediately unplug the Keep the unit away from water or any other... -
Page 4: Precautions On Operation
Refer to the relevant page of this document for information on how to clear information. • When using sensors or other devices from a non-AIPHONE brand with this system, do so according to the specifications and guarantees provided by the manufacturer and seller. - Page 5 • This unit is designed for indoor use only. Do not install at outdoor location. • This device is not meant to protect lives or property. AIPHONE is not to be held responsible for any and all resulting serious accidents, disaster accidents, or physical damage.
-
Page 6: Table Of Contents
Table of contents Table of contents Precautions Literature information ......................2 Literature information ......................2 Precautions ..........................3 Precautions .......................... 3 Precautions on operation ..................... 4 Before you start using the device Part Names ..........................9 Part Names .......................... 9 About indicators ........................ - Page 7 Table of contents Page all stations ......................... 44 Page a group with a message .................... 46 Paging all stations with a message ..................49 Page from an external device .................... 52 To receive a paging call ..................... 53 Monitoring ..........................55 Monitor a door station ......................
- Page 8 Table of contents Communication ........................ 111 Transfer ..........................112 Page ..........................123 Monitor ..........................124 Record ..........................126 Chime ..........................128 Relay Output (administrator privileges only) ..............134 Volume ..........................143 Speed Dial ........................145 Supervision (administrator privileges only) ..............156 Factory Reset ........................
-
Page 9: Before You Start Using The Device Part Names
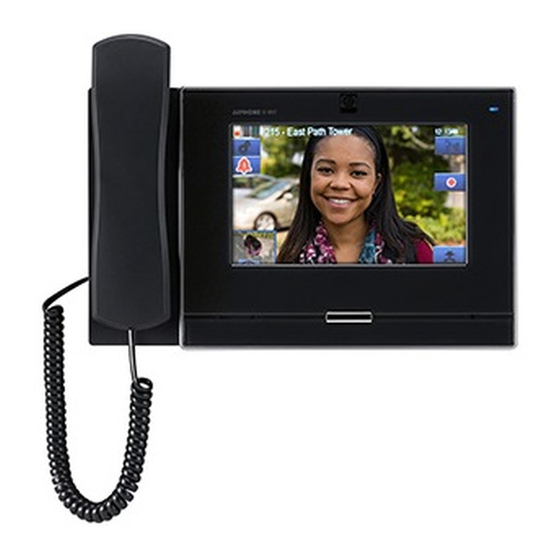
Before you start using the device Part Names Part Names Master Station IX-MV7-HW, IX-MV7-HB, IX-MV7-W, and IX-MV7-B The illustrations use IX-MV7-HW as an example. Right side surface... - Page 10 Before you start using the device Part Names Number Name & description Handset (IX-MV7-HW and IX-MV7-HB only) LCD display (touch panel) Camera This shows a video of the other person during calls. Status indicator (orange/blue) This shows the status of this station.
-
Page 11: About Indicators
Before you start using the device About indicators About indicators The illustrations use IX-MV7-HW and IX-MV7-W as examples. IX-MV7-HW IX-MV7-W (IX-MV7-HB is the same) (IX-MV7-B is the same) Status indicator Status indicator : On, : Off Name Status (pattern) Description... - Page 12 Before you start using the device About indicators Name Status (pattern) Description Status Blue light Operating properly indicator (this indicator does not light depending on the setting during standby) Blue Slow flashing (during normal operation) Calling destination flashing busy 1sec 1sec Repeat 3 times, then turn on Slow flashing...
-
Page 13: Camera Capture Area And Adjustment
Before you start using the device Camera Capture Area and Adjustment Camera Capture Area and Adjustment Capture position setting The camera angle can be adjusted downward (0 to 20 degrees) using the camera angle adjustment lever. Set the angle to an angle that is easy to see. Rear Camera angle adjustment lever -20°... -
Page 14: How To View The Screen
Before you start using the device How to View the Screen How to View the Screen When the LCD display is OFF, the device is in standby mode. If the screen is not used for a certain period of time (of if the [HOME] button is pressed), the device enters standby mode. - Page 15 Before you start using the device How to View the Screen Numbe Name Description Privacy ON/Privacy OFF Press this to turn the privacy function ON/OFF. (The privacy function turns the microphone and image from this station off when a call is answered with Auto Answer, so that audio and video are not sent to the other person.) Call...
- Page 16 Before you start using the device How to View the Screen Incoming call screen Calling station is a station with camera Calling station is a station without camera Numbe Name Description Priority Indicates the priority level of the incoming call and paging. : Urgent, : Priority, : Normal...
- Page 17 Before you start using the device How to View the Screen Numbe Name Description Screen control icon Press these to change the visible display area of the screen. This cannot be done if the icon is not displayed. (→page 75) : Move the screen up.
- Page 18 Before you start using the device How to View the Screen Communication screen Calling station is a station with camera Calling station is a station without camera Numbe Name Description Priority This shows the priority of the current call. : Urgent, : Priority, : Normal Function...
- Page 19 Before you start using the device How to View the Screen Numbe Name Description Screen control icon Press these to change the visible display area of the screen. This cannot be done if the icon is not displayed. (→page 75) : Move the screen up.
-
Page 20: How To Enter Text
Before you start using the device How to enter text How to enter text Use this to search or configure stations in the Address Book. Sample: Address book search screen Alphabet input mode Numbe Name Description Text field Entered text is displayed. Switch input mode The input mode changes from "Alphabet"... -
Page 21: How To Receive A Call
Before you start using the device How to receive a call How to receive a call To receive a call with the handset To receive a call hands-free Pick up the handset when you When you receive a call, tap receive a call Talk with the other party Speak with the other party... - Page 22 Before you start using the device How to receive a call Note • Picking up the handset during a hands-free call will switch the call to the handset. • You may find it difficult to listen or talk hands-free when there is a lot of ambient noise.
- Page 23 Before you start using the device How to receive a call Talking using touch-to-talk This station prioritizes whichever is louder and automatically switches so that quieter sounds can be heard. Touch-to-talk calls are convenient as they manually switch between transmitting and receiving audio in noisy areas.
- Page 24 Before you start using the device How to receive a call Use a headset A separately sold headset can be connected to the 3.5 mm 4-pole stereo mini jack on this station. You cannot use the microphone and speaker on the main unit when using a headset.
-
Page 25: Setting The Date And Time
Before you start using the device Setting the date and time Setting the date and time The date and time are used for video/audio recording and the incoming/outgoing call history. Be sure to set them correctly. When the station is synchronized with an NTP server for date and time, you do not have to set them up. Initial value: January 1, 2018 09:00 Tap [Settings] on the Home screen. -
Page 26: About Microsd Card
• A maximum of 999 video/audio files can be saved. However, this may vary depending on the size of the video/audio files and the capacity of the microSD card. • Line monitoring and malfunction monitoring results are also saved to the microSD card. • Please note that Aiphone is not to be held responsible in any way for microSD cards. -
Page 27: Inserting/Removing Microsd Cards
Before you start using the device About microSD card Inserting/Removing microSD Cards Inserting the microSD card Removing the microSD card Press the Home button or tap the standby screen to display the Home screen. Open the microSD card slot cover. Tap [Yes]. - Page 28 Before you start using the device About microSD card Important • Only insert or remove the microSD card when this station is not being called. Calls and other similar operations cannot be performed while the microSD card is mounted. • Removing the microSD card before disappears could cause data corruption.
-
Page 29: How To Use The Device Specifying Stations (Voip Phones) And Groups
How to use the device Specifying Stations (VoIP Phones) and Groups Specifying by Number When making a call, specify a station or group by the station number (extension number or external number) or group number. Tap [DIAL] on Home screen 1. Enter the station number or group number using the keypad (1) The entered number is displayed. -
Page 30: Choose A Number From The Address Book
How to use the device Specifying Stations (VoIP Phones) and Groups Choose a number from the address book. When calling, specify a station or group registered in the Address Book from the list. Tap [ADDRESS BOOK] on Home screen 1 or [CALL] on Home screen 2. -
Page 31: Searching And Specifying
How to use the device Specifying Stations (VoIP Phones) and Groups Searching and Specifying Enter characters to search and specify stations, groups, or messages. <Example: Making an outgoing call> Tap the station or group to call. Enter the name or number of the Note station or group to search. -
Page 32: View The History
How to use the device View the history View the history You can review the incoming/outgoing/missed call history, as well as the history of recorded video/audio. Monitoring is not logged in the history. Up to 500 incoming/outgoing call records are saved. New records will be saved over the oldest records if the number of records exceeds 500. -
Page 33: How To View The History Screen
How to use the device View the history How to View the History Screen Outgoing history screen Recorded video/audio history Numbe Name Description Missed : This is displayed for unanswered calls in the history. It is not displayed if the other station answered. Priority/Type : This is displayed for calls in the history. -
Page 34: To Make A Call / To Respond To An Incoming Call
How to use the device To make a call / To respond to an incoming call Making a call to a station Pick up the handset. • If there is no handset, proceed to the next step. • If the handset is lifted after specifying a station, the call will be placed under [Normal] priority. - Page 35 How to use the device To make a call / To respond to an incoming call Note • When calling a VoIP Phone, this will be the shorter time of the time set for "Call Timeout" and the call duration configured on the IP-PBX.
-
Page 36: Call A Group
How to use the device To make a call / To respond to an incoming call Call a group Make an outgoing call to all stations that belong to the selected group, and communicate with the first station to answer. Pick up the handset. - Page 37 How to use the device To make a call / To respond to an incoming call Note • When calling a VoIP Phone, this will be the shorter time of the time set for "Call Timeout" and the call duration configured on the IP-PBX.
-
Page 38: To Use An External Device To Make A Call
How to use the device To make a call / To respond to an incoming call To use an external device to make a call Use an external device (sensor, call button, etc.) to place a call to a pre-determined location. Input Outgoing Call button, etc. - Page 39 How to use the device To make a call / To respond to an incoming call Note • When calling a VoIP Phone, this will be the shorter time of the time set for "Call Timeout" and the call duration set on the IP-PBX.
-
Page 40: To Respond To An Incoming Call
How to use the device To make a call / To respond to an incoming call To respond to an incoming call When the device receives an incoming call, the ringtone sounds and the video image shows up on the screen. <Example: If the incoming call is from a Video Door Station>... - Page 41 How to use the device To make a call / To respond to an incoming call Note • Depending on the configuration, the ringtone may be heard from a separately installed speaker or other device. • If the call duration that was previously configured on the other station (for calls with a VoIP phone, the call duration configured on the VoIP phone) elapses, the call will automatically end.
-
Page 42: Page / Receive Paging
How to use the device Page / Receive paging Page a group Page all stations other than VoIP phones that belong to a selected group. [PAGE] may not be displayed on the Home screen, depending on the configuration. If this is the case, this function cannot be used. - Page 43 How to use the device Page / Receive paging To stop paging, put the handset Note back or tap • When the station being paged answers, paging will be interrupted and the station will switch to a call with the station that answered.
-
Page 44: Page All Stations
How to use the device Page / Receive paging Page all stations Page all stations other than VoIP phones registered in the Address Book of this station. [PAGE] may not be displayed on the Home screen, depending on the configuration. If this is the case, this function cannot be used. - Page 45 How to use the device Page / Receive paging Note • When the station being paged answers, paging will be interrupted and the station will switch to a call with the station that answered. • The calling tone will sound until paging begins. •...
-
Page 46: Page A Group With A Message
How to use the device Page / Receive paging Page a group with a message Page all stations other than VoIP phones that belong to a selected group with a pre-recorded message (audio data). [PAGE] may not be displayed on the Home screen, depending on the configuration. If this is the case, this function cannot be used. - Page 47 How to use the device Page / Receive paging Stopping sent messages that are Once the message is sent, the playing on stations screen returns to the Home screen. Tap [History] on the Home screen. No. of stations to which message was No.
- Page 48 How to use the device Page / Receive paging Tap [PAGE CANCEL]. • The sent message playing on stations stops. Note • The calling tone plays until paging begins. • Depending on the configuration, the paging pretone may be heard from a separately installed speaker or other device.
-
Page 49: Paging All Stations With A Message
How to use the device Page / Receive paging Paging all stations with a message Page all stations other than VoIP phones registered in the Address Book of this station, using a prerecorded message (audio data). [PAGE] may not be displayed on the Home screen, depending on the configuration. If this is the case, this function cannot be used. - Page 50 How to use the device Page / Receive paging Stopping sent messages that are Tap [PAGE] or [URGENT PAGE]. playing on stations Tap [History] on the Home screen. • The page will be sent with the selected priority. Once the message is sent, the screen returns to the Home screen.
- Page 51 How to use the device Page / Receive paging Tap [PAGE CANCEL]. • The sent message playing on stations stops. Note • The calling tone plays until paging begins. • Depending on the configuration, the paging pretone may be heard from a separately installed speaker or other device.
-
Page 52: Page From An External Device
How to use the device Page / Receive paging Page from an external device You can also page by detecting external device input (such as a button or sensor) to send a page or message page to a destination other than a VoIP phone registered to this station, or page using an external audio source. Input Paging Button, etc. -
Page 53: To Receive A Paging Call
How to use the device Page / Receive paging To receive a paging call When a page is received, the announcement tone will play and paging begins. Depending on the configuration, may be displayed when a page is received. Answering the page in this case will begin the call. - Page 54 How to use the device Page / Receive paging To terminate a call, put the handset back or tap Alternately, Note • The announcement tone may not sound, depending on the configuration. • Depending on the configuration, the paging pretone and incoming page tone may be heard from a separately installed speaker or other device.
-
Page 55: Monitoring
How to use the device Monitoring Monitor a door station You can monitor video and audio from a station or from a network camera. For stations without cameras, only audio monitoring will be performed. Master Stations, VoIP phones, and groups cannot be monitored. - Page 56 How to use the device Monitoring Note • You can tap or pick up the handset during monitoring to initiate a call. • If the configured monitoring duration elapses, monitoring will automatically end. A notification tone will play approximately 10 seconds prior to monitoring ending. The notification tone may not play, depending on the configuration.
-
Page 57: Scan Monitoring
How to use the device Monitoring Scan monitoring You can monitor video and audio from multiple pre-configured stations or network cameras, automatically and in order. This function can be configured in “Monitor (→page 124)”. For stations without cameras, only audio monitoring will be performed. Master Stations and VoIP phones cannot be monitored. - Page 58 How to use the device Monitoring To stop scan monitoring , tap Note • During scan monitoring, if this station begins playing a chime or receives a page or call from another station, scan monitoring will be paused. When the page, call, or conversation ends, scan monitoring will resume from the first station.
-
Page 59: Using Speed Dial Buttons
How to use the device Using Speed Dial Buttons Using Speed Dial Buttons The Speed Dial buttons can be used to quickly perform functions that have been pre-assigned. This function can be configured in “Speed Dial (→page 145)”. Home screen 1 Home screen 2 Tap [Favorites] on the Home screen to display the Speed Dial The Speed Dial buttons are displayed on the Home screen. -
Page 60: Check The Recorded Video And Audio
How to use the device Check the recorded video and audio Play back the recording Video/audio recordings can be selected from the history for playback. Depending on the configuration, a single video/audio recording may be split into multiple files. Tap [History] on the Home Tap [Play]. - Page 61 How to use the device Check the recorded video and audio Note • Depending on the communication status when recording video/audio, the video/audio recording may not be saved properly and may not be able to be played back normally. • The network camera may not be able to record video, depending on the size of the image.
-
Page 62: How To View The Playback Screen
How to use the device Check the recorded video and audio How to View the Playback Screen 12 13 Numbe Name Description Station information This shows the station number, station name (terminal name), and location of the station that recorded the video/audio. Date and time This shows the date and time the video/audio was recorded. -
Page 63: Playing Recorded Video/Audio On A Pc
How to use the device Check the recorded video and audio Playing Recorded Video/Audio on a PC Insert the microSD card into the microSD card slot on the PC or into a microSD card reader connected to the PC to play video/audio recordings recorded to the microSD card on the PC. -
Page 64: Transfer
How to use the device Transfer Transfer a calls (while on the line) A call can be transferred to another station when it is on hold. Transfer a call Once the transfer destination answers, inform the person that during a call to put the the transfer will be made. - Page 65 How to use the device Transfer Receive a transferred call Note When you receive an incoming call • You may not be able to transfer calls, depending on the from the transfer source, lift the configuration of the transfer destination station. •...
- Page 66 How to use the device Transfer • For how to view the screen during a call, refer (→page 18). • Refer to (page 70 through page 79) for information on possible operations during a call. Note • Transferring a call from a station with a camera will transfer the video as well.
-
Page 67: Transferring Incoming Calls When Away
How to use the device Transfer Transferring Incoming Calls when Away You can set absent transfer ahead of time to transfer incoming calls to another station when you are away. This cannot be used via administrator setting. Calls from VoIP phones will arrive on this station without being transferred. Absent transfer When a call is received when you are away, the call is automatically transferred to another station. - Page 68 How to use the device Transfer ■ Canceling absent transfer Tap [TRANSFER/ON] on the Home screen. It switches to [TRANSFER/OFF] and lights OFF. Note • Absent transfer can also be set via PC configuration (“Absent Transfer (→page 113)”). • If transfer destinations include a VoIP Phone configured to automatically answer the call, that VoIP Phone will answer.
-
Page 69: Other Transfer Functions
How to use the device Transfer Other Transfer Functions Incoming calls can be automatically transferred to another station when you are away. Calls from VoIP phones will arrive on this station without being transferred. Call transfer must be configured ahead of time. Calls may be transferred to multiple stations. -
Page 70: Possible Operations When Making Calls, During Calls, During Pages, And During Monitoring
Possible operations when making calls, during calls, How to use the device during pages, and during monitoring To unlock the electric lock The electrical lock can be released during calls or monitoring. Releasing with the door release button Releasing with the ten-key pad Depending on the configuration, the button may during a call or during... - Page 71 Possible operations when making calls, during calls, How to use the device during pages, and during monitoring Tap [ENTER]. • The door unlocks. • When the door is released, switches to for 3 seconds. • When an electrical lock connected to this station is released, the status indicator flashes blue.
-
Page 72: Put A Call On Hold
Possible operations when making calls, during calls, How to use the device during pages, and during monitoring Put a call on hold When on a call, the call can be put on hold temporarily. The on-hold tone will play on the other station while it is on hold. during a call. -
Page 73: Select A Station To Respond
Possible operations when making calls, during calls, How to use the device during pages, and during monitoring Select a station to respond When receiving multiple incoming calls or receiving an incoming call from another station when placing an outgoing call, sending a page, or on a call, you can select which station to answer. on the screen. -
Page 74: Video/Audio Recording
Possible operations when making calls, during calls, How to use the device during pages, and during monitoring Video/Audio Recording Video/audio can be recorded from the camera when receiving an incoming call, during a call, and during monitoring. If there is no image from the camera, only audio will be recorded. Depending on the configuration, may not be displayed on the screen. -
Page 75: Locking The Capture Area
Possible operations when making calls, during calls, How to use the device during pages, and during monitoring Locking the Capture Area The image capture area of the network camera can be modified. The capture area may not be able to be adjusted/locked, depending on the network camera configuration. When a network camera image is Tap [CAMERA PRESET] to lock the capture area. -
Page 76: Adjust Video To Enhance Visibility
Possible operations when making calls, during calls, How to use the device during pages, and during monitoring Adjust video to enhance visibility Adjust the video displayed by a Video Door Station to enhance visibility. <Video playing on Video Door Station> •... -
Page 77: Adjusting Screen Brightness
Possible operations when making calls, during calls, How to use the device during pages, and during monitoring Adjusting Screen Brightness The brightness of the screen can be adjusted when making an outgoing call, receiving an incoming page, during a call, or during (scan) monitoring. to adjust the screen brightness. -
Page 78: Adjust Speaker Volume
Possible operations when making calls, during calls, How to use the device during pages, and during monitoring Adjust speaker volume The receive volume can be adjusted during a call or during (scan) monitoring. Note • Adjusting the receive volume will also change the calling tone volume. -
Page 79: Adjust Microphone Volume
Possible operations when making calls, during calls, How to use the device during pages, and during monitoring Adjust microphone volume The microphone volume can be adjusted during a call or when sending a page. to adjust the microphone volume. • Press this to decrease one step. -
Page 80: Adjusting Ringtone Volume
Possible operations when making calls, during calls, How to use the device during pages, and during monitoring Adjusting Ringtone Volume The ringtone volume can be adjusted during an incoming call or when receiving a page. to adjust the ringtone volume. •... -
Page 81: Checking The System
How to use the device Checking the System Line Monitoring You can check network communication between this station and stations other than VoIP phones registered in this station's Address Book. Network communication can also be automatically checked on a periodic basis (“Supervision (administrator privileges only) (→page 156)”). - Page 82 How to use the device Checking the System Error detected Restore the error and perform line monitoring again. Tap [Status] on the Home screen. • If the error has been restored to normal, [Status] on the Home screen will change back from red to green.
-
Page 83: Monitoring Malfunctions
How to use the device Checking the System Monitoring Malfunctions Stations registered to this station's Address Book (other than VoIP phones) can be checked for speaker/microphone, program, Call button, and contact input malfunctions. IX-MV, IX-DA, and IX-BA can be checked only for program malfunctions. It is not possible to check for network camera malfunctions. - Page 84 How to use the device Checking the System Error detected Tap the station to check details on the malfunction. Tap [Status] on the Home screen. Tap [DETAIL]. Tap [Device Check Results]. Check the station with an error. Malfunction monitoring start time : Normal.
-
Page 85: Confirming Station Information
How to use the device Checking the System Confirming Station Information The firmware version and network configuration information can be checked for this station. • CONTACT INFORMATION: This shows Tap [Status] on the Home screen. information on the installer configured in the IX Support Tool configuration tool. - Page 86 How to use the device Checking the System Check the network configuration information for this station. • Tap [BACK] to return to the [Station Information] screen.
-
Page 87: Other Functions
How to use the device Other functions To make the device sound a tone on a schedule You can set up the device so that a registered chime sounds on a schedule you create. Refer to “Chime (→page 128)” for information on configuring chimes. <Example schedule>... -
Page 88: Automatically Play Back The Communication Audio Messages
How to use the device Other functions Automatically play back the Communication Audio Messages A message to help identify the location of the other station can be automatically played when a call starts or via ten- key pad input. The Communication Audio Messages can be used if it is registered to the other station. Receive a call Call begins Message sent when call begins... -
Page 89: To Make The Device Send An Email Message
How to use the device Other functions To make the device send an email message The device can be configured to send an email message to a registered address when making an urgent outgoing call or when a specific event occurs such as an outgoing call failure. For how to configure email settings, refer to “Email (→page 184)”. -
Page 90: About The Settings
Settings and Adjustments About the settings About the settings You can configure the settings in either of the following methods. • Configure on the device. Some settings can be configured using the buttons on this station. • Configure using a PC You can access the device from a PC to configure most of the setting items. - Page 91 Settings and Adjustments About the settings Settings when using the computer Entry Reference page Entry Reference page Communication COMMUNICATION TIMER page 111 Talk Timeout [sec] page 221 FORCE TOUCH-TO-TALK page 111 Force Touch-to-Talk page 221 Transfer page 112 page 202 Absent Transfer Absent Transfer page 114...
- Page 92 Settings and Adjustments About the settings Settings when using the computer Entry Reference page Entry Reference page Relay Output 1 Schedule Daily Schedule page 139 Daily Schedule WEEKLY SETTINGS page 141 Weekly Schedule Relay Output 2 Schedule page 139 Daily Schedule Daily Schedule page 141 WEEKLY SETTINGS...
- Page 93 Settings and Adjustments About the settings If configured on this station Entry Reference page Entry Reference page Time Zone Select time zone page 166 Time Zone page 101 Daylight Savings Time Enable automatic daylight savings time page 166 DAYLIGHT SAVINGS TIME page 101 Date and Time page 166...
- Page 94 Settings and Adjustments About the settings If configured on this station Entry Reference page Entry Reference page Option Input Ringtone Count [time(s)] page 175 OPTION INPUT page 105 VoIP Phone page 176 Option Input / Relay Output Settings Relay Output Output terminal advanced settings Authentication Key page 177...
- Page 95 Settings and Adjustments About the settings If configured on this station Entry Reference page Entry Reference page SD Card Error page 186 Recording Memory Full page 186 Line Supervision (Passed) page 186 Line Supervision (Failed) page 186 Device Check (Passed) page 186 Device Check (Failed) page 186...
- Page 96 Settings and Adjustments About the settings If configured on this station Entry Reference page Entry Reference page Images page 199 Company Image page 199 Greeting Image page 199 Receptionist Image page 199 Button Function page 200 Button 1- 4 page 200 Button Name for Group Call page 201 Button Name for Select By Name...
- Page 97 Settings and Adjustments About the settings If configured on this station Entry Reference page Entry Reference page Headset Jack Transmit page 216 HEADSET JACK TRANSMIT page 144 Headset Jack Receive page 216 HEADSET JACK RECEIVE page 144 VoIP Phone Volume Adjustment page 216 Ringtone page 216...
-
Page 98: Configure On The Device
Settings and Adjustments Configure on the device. Before Configuring on the Station Tap [Settings] on the Home screen. • The privileges selection screen is displayed. Select the privileges to configure. • To configure using user privileges, tap [User] and proceed to Step 4. •... - Page 99 Settings and Adjustments Configure on the device. Tap the item to configure (refer to the following page onward for details). • Tap to display the Settings 2 screen. • To stop configuring, use the [HOME] button, etc. to return to the Home screen. •...
-
Page 100: Station
Settings and Adjustments Configure on the device. Station Configure the language, date and time, LED ON during standby, and brightness for this station. You can also disable display tapping to clean the screen. Tap [Station] on the Settings (1/2) screen. •... - Page 101 Settings and Adjustments Configure on the device. How to configure the date and time (1) Tap [Date and Time] on the Settings (1/2) screen. (2) Configure the detailed date and time. – Tapping [BACK] will save the settings. It may take some time to update the settings. Entry Description Settings...
-
Page 102: Call
Settings and Adjustments Configure on the device. Call Configure settings related to outgoing and incoming calls. Tap [Call] on the Settings (1/2) screen. • The Call Settings (1/5) screen is displayed. Change settings related to "Outgoing Call Setting 1 - Call Timer." •... - Page 103 Settings and Adjustments Configure on the device. Once you have changed the setting, tap • The settings are saved. • The Call Settings (2/5) screen is displayed. Change settings related to "Outgoing Call Setting 2 - Ringback Tone." ■ Call Button Configure the contact input via main unit operation (any operation other than contact input).
- Page 104 Settings and Adjustments Configure on the device. ■ Option Input 1 - Option Input 4 Configure the calling tone via contact input 1-4. Entry Description Settings Default values PLAY COUNT This item lets you define the number of rings • 1-20 rings ∞...
- Page 105 Settings and Adjustments Configure on the device. Once you have changed the setting, tap • The Call Settings (3/5) screen is displayed. Change settings related to "Incoming Call Setting 1 - Ringtone Count." • Tapping [Back] will save the settings. Entry Description Settings...
- Page 106 Settings and Adjustments Configure on the device. Once you have changed the setting, tap • The settings are saved. • The Call Settings (4/5) screen is displayed. Change settings related to "Incoming Call Setting 2 - Ringtone."...
- Page 107 Settings and Adjustments Configure on the device. ■ Call Button Configure the ringtone for each priority when a call is received via main unit operation. This can be configured for each caller. Refer to “How to configure incoming tones (→page 110)” for information on how to configure this.
- Page 108 Settings and Adjustments Configure on the device. Once you have changed the setting, tap • The Call Settings (5/5) screen is displayed. Change settings related to "Incoming Call Setting 3." Tap [Back]. • The settings are saved. Entry Description Settings Default values AUTO ANSWER This item lets you define the automatic...
- Page 109 Settings and Adjustments Configure on the device. How to configure calling tones (1) Tap [Call Button] or [Option Input 1] - [Option Input 4]. (2) Configure the calling tone count and tone. – The selected calling tone will continue to play. (3) Tap [SELECT].
- Page 110 Settings and Adjustments Configure on the device. How to configure incoming tones (1) Tap [Call Button] or [Option Input] on the Calling Settings (4/5) screen. – The Ringtone Settings screen is displayed. (2) Tap the calling station for which to change the incoming tone. –...
-
Page 111: Communication
Settings and Adjustments Configure on the device. Communication Configure the call duration and whether to always use touch-to-talk. Tap [Communication] on the Settings (1/2) screen. • The Communication Settings screen is displayed. Change the settings. Tap [Back]. • The settings are saved. Entry Description Settings... -
Page 112: Transfer
Settings and Adjustments Configure on the device. Transfer Configure settings related to absent transfer, delay transfer, and schedule transfer. *This is an administrator privileges setting. If "LOCK TRANSFER SETTINGS" is set to "ON," this cannot be configured under user privileges. •... - Page 113 Settings and Adjustments Configure on the device. Entry Description Settings Default values Absent Transfer Configure whether to use absent transfer. • ON (absent transfer This cannot be set to "ON" if “How to enabled) configure absent transfer (→page 114)” • OFF (absent transfer not configured.
- Page 114 Settings and Adjustments Configure on the device. How to configure absent transfer Important • Do not configure multiple VoIP phones as transfer destinations. If multiple VoIP phones are configured, calls will be transferred to only one VoIP phone. (1) Tap [Absent Transfer] on the Transfer Settings screen. –...
- Page 115 Settings and Adjustments Configure on the device. How to configure delay transfer Important • Do not configure multiple VoIP phones as transfer destinations. If multiple VoIP phones are configured, calls will be transferred to only one VoIP phone. (1) Tap [Delay Transfer] on the Transfer Settings screen. –...
- Page 116 Settings and Adjustments Configure on the device. (5) Configure [DELAY TIMER]. (6) Tap [SELECT]. – The settings are saved. Entry Description Settings Default values DELAY TIMER Configure the time until delay transfer is 1-300 sec (by 1 sec) 30 sec. performed.
- Page 117 Settings and Adjustments Configure on the device. How to configure schedule transfer (daily schedule) Configure the transfer destination and time for schedule transfer, in units of one day. A schedule one year from the set day can be configured. 12 schedules can be set for each day. Important •...
- Page 118 Settings and Adjustments Configure on the device. (4) Tap [NEW] to configure the transfer destination station. To configure a retransfer destination, tap the Re row and then tap [EDIT]. *Up to 10 transfer destinations and a single retransfer (i.e. transfer a transferred call) destination can be configured.
- Page 119 Settings and Adjustments Configure on the device. (8) Tap [SELECT]. – The settings are saved. Entry Description Settings Default values START Configure the time to begin schedule 00:00 - 23:59 transfer. Configure the time at which to stop schedule 00:00 - 23:59 transfer.
- Page 120 Settings and Adjustments Configure on the device. How to configure schedule transfer (weekly schedule) Configure the transfer destination and time for schedule transfer, for each day of the week from Sunday through Saturday. Up to 12 schedules can be set for each day of the week. Important •...
- Page 121 Settings and Adjustments Configure on the device. (5) Tap [NEW] to configure the transfer destination station. To configure a retransfer destination, tap the Re row and then tap [EDIT]. *Up to 10 transfer destinations and a single retransfer (i.e. transfer a transferred call) destination can be configured.
- Page 122 Settings and Adjustments Configure on the device. (9) Tap [SELECT]. – The settings are saved. Entry Description Settings Default values START Configure the time to begin schedule 00:00 - 23:59 transfer. Configure the time at which to stop schedule 00:00 - 23:59 transfer.
- Page 123 Settings and Adjustments Configure on the device. Page Configure settings related to paging. Tap [Page] on the Settings (1/2) screen. • The Paging Settings screen is displayed. Change the settings. Tap [BACK]. • The settings are saved. Entry Description Settings Default values PAGE TIMER Configure the time to continue paging when...
-
Page 124: Monitor
Settings and Adjustments Configure on the device. Monitor Configure settings related to monitoring and scan monitoring. Scan monitoring: This function automatically switches monitoring between multiple stations and network cameras (other than VoIP phones) for a certain interval. Tap [Monitor] on the Settings (1/2) screen. •... - Page 125 Settings and Adjustments Configure on the device. How to configure scan monitoring (1) Tap [Scan Monitor Settings] on the Monitor Settings screen. – The Scan Monitor Settings screen is displayed. (2) Tap [NEW] and then configure the stations and network cameras for which to perform scan monitoring. –...
-
Page 126: Record
Settings and Adjustments Configure on the device. Record Configure settings related to video/audio recording. If there is no image, only audio will be recorded. When recording audio during a call, anything said using this station will also be recorded. Important •... - Page 127 Settings and Adjustments Configure on the device. Tap [Back]. • The settings are saved. Entry Description Settings Default values MANUAL RECORD Configure whether to allow manual video/ • ON audio recording. • OFF TRIGGER EVENT Configure the trigger to use to start Several of the following may Not selected automatically recording video/audio.
-
Page 128: Chime
Settings and Adjustments Configure on the device. Chime Configure settings related to chimes (“To make the device sound a tone on a schedule (→page 87)”). Tap [Chime] on the Settings (1/2) screen. • The Chime Schedule screen is displayed. It may take some time for the screen to be displayed. Configure detailed settings. - Page 129 Settings and Adjustments Configure on the device. How to configure chime settings (daily schedule) Configure the chime tone start time and the chime tone, in units of one day. A schedule one year from the set day can be configured. 50 schedules can be set for each day. (1) On the Chime Schedule screen, tap the day for which to configure a schedule.
- Page 130 Settings and Adjustments Configure on the device. (4) Tap the chime tone to play. – Refer to “Searching and Specifying (→page 31)” to search chime tones. (5) Tap [ENTER]. – The Set Daily Schedule screen is displayed. (6) Configure the start time. (7) Tap [SELECT].
- Page 131 Settings and Adjustments Configure on the device. How to configure chime settings (weekly schedule) Configure the chime tone start time and the chime tone for each day of the week from Sunday through Saturday. 50 schedules can be configured for each day of the week. (1) On the Chime configuration screen, tap [WEEKLY SETTINGS].
- Page 132 Settings and Adjustments Configure on the device. (4) Tap [EDIT]. – The Select Chime screen is displayed. (5) Tap the chime tone to play. *Refer to “Searching and Specifying (→page 31)” to search chime tones. (6) Tap [ENTER]. – The Set Weekly Schedule screen is displayed. (7) Configure the start time.
- Page 133 Settings and Adjustments Configure on the device. (8) Tap [SELECT]. – The settings are saved. Entry Description Settings Default values CHIME Configure the chime tone to play. • None None • Call Pattern 1 • Call Pattern 2 • Call Pattern 3 •...
-
Page 134: Relay Output (Administrator Privileges Only)
Settings and Adjustments Configure on the device. Relay Output (administrator privileges only) Configure settings related to relay output. Important • The four relay output methods are shown below. Redundant configuration is possible for each output terminal. If multiple commands occur during a single relay output, the latest command will take priority. –... - Page 135 Settings and Adjustments Configure on the device. ■ Relay Output 1 - Relay Output 2 On the Relay Output Settings screen, tap [Relay Output 1] or [Relay Output 2]. • The Relay Output Settings (Advanced) screen is displayed. Entry Description Settings Default values FUNCTION...
- Page 136 Settings and Adjustments Configure on the device. ■ Relay Output 1 Schedule integration setting, Relay Output 2 Schedule integration setting Configure the schedule at which to perform relay output for relay output 1 and relay output 2. Refer to “How to configure Relay Output Schedule integration (daily schedule) (→page 139)”...
- Page 137 Settings and Adjustments Configure on the device. How to configure Status Output (1) On the Relay Output Settings (Advanced) screen, tap [Status Output]. – The Status Output screen is displayed. (2) Select the operation for which to perform relay output (multiple selections allowed). (3) Tap [SELECT].
- Page 138 Settings and Adjustments Configure on the device. How to configure Door Release (1) On the Relay Output Settings (Advanced) screen, tap [Door Release]. – The Set Relay Output - Door Release screen is displayed. (2) Configure detailed settings. (3) Tap [SELECT]. –...
- Page 139 Settings and Adjustments Configure on the device. How to configure Relay Output Schedule integration (daily schedule) Configure the time at which relay output will be performed, in units of one day. A schedule one year from the set day can be configured. 12 schedules can be set for each day. (1) On the Relay Output Settings screen, tap [Relay Output 1 Schedule] or [Relay Output 2 Schedule].
- Page 140 Settings and Adjustments Configure on the device. (5) Tap [SELECT]. – The settings are saved. Entry Description Settings Default values Start Configure the time when relay output starts. 00:00 - 23:59 Configure the time to stop relay output. If 00:00 - 23:59 this is set earlier than "Start,"...
- Page 141 Settings and Adjustments Configure on the device. How to configure Relay Output Schedule integration (weekly schedule) Configure the time at which to perform relay output for each day of the week, from Sunday to Saturday. 12 schedules can be set for each day of the week. (1) On the Relay Output Settings screen, tap [Relay Output 1 Schedule] or [Relay Output 2 Schedule].
- Page 142 Settings and Adjustments Configure on the device. (5) Configure [Start] and [End]. Entry Description Settings Default values Start Configure the time when relay output starts. 00:00 - 23:59 Configure the time to stop relay output. If this is 00:00 - 23:59 set earlier than "Start,"...
-
Page 143: Volume
Settings and Adjustments Configure on the device. Volume Configure settings related to volume and operation sounds. Tap [Volume] on the Settings (2/2) screen. • The Volume Settings (1/2) screen is displayed. Change the settings. • Tapping [BACK] will save the settings. Entry Description Settings... - Page 144 Settings and Adjustments Configure on the device. • The settings are saved. • The Volume Settings (2/2) screen is displayed. Change the settings. Tap [Back]. • The settings are saved. Entry Description Settings Default values HEADSET JACK Configure the receive volume for the 1 - 10 RECEIVE speakers connected to the pin jack.
-
Page 145: Speed Dial
Settings and Adjustments Configure on the device. Speed Dial Configure settings related to the Speed Dial buttons. *This is an administrator privileges setting. If configuring the Speed Dial buttons is restricted, this cannot be configured under user privileges. Tap [Speed Dial] on the Settings (2/2) screen. •... - Page 146 Settings and Adjustments Configure on the device. Configure the function to assign. Entry Description Settings Default values Call Assign the calling function to the Speed Dial button. Refer to “How to assign calling functions to Speed Dial buttons (→page 148)” information on how to configure this.
- Page 147 Settings and Adjustments Configure on the device. Enter the Set Speed Dial Name. • Refer to “How to enter text (→page 20)” for information on how to enter characters. Entry Description Settings Default values Edit Name Configure the name of the Speed Dial 1-24 alphanumeric characters button.
- Page 148 Settings and Adjustments Configure on the device. Confirm the details of the configured Speed Dial button, and then tap [SELECT]. • Tap [BACK] to display the Speed Dial Settings screen without saving settings. • The configured name will be displayed on the Favorites button. The entire name may not be displayed, depending on the type of Home screen and number of characters.
- Page 149 Settings and Adjustments Configure on the device. – The Speed Dial Settings (Advanced) screen is displayed. (4) Tap [SELECT]. – The settings are saved.
- Page 150 Settings and Adjustments Configure on the device. How to assign paging functions to Speed Dial buttons (1) On the Speed Dial Settings (Advanced) screen , tap [Page]. (2) Tap the group to page using the Speed Dial button. – Refer to “Searching and Specifying (→page 31)”...
- Page 151 Settings and Adjustments Configure on the device. Entry Description Settings Default values Play Count Configure the number of times to play the 1 - 20 times 1 time message configured in "Name." Name Configure the message for message paging. • Call Pattern 1 •...
- Page 152 Settings and Adjustments Configure on the device. How to assign monitoring functions to Speed Dial buttons (1) On the Speed Dial Settings (Advanced) screen, tap [Monitor]. (2) To assign the monitoring function, tap the station to monitor. – Refer to “Searching and Specifying (→page 31)”...
- Page 153 Settings and Adjustments Configure on the device. How to assign optional relay functions to Speed Dial buttons (1) On the Speed Dial Settings screen, tap [Relay Control]. – The Set Destination Relay screen is displayed. (2) Configure detailed settings. Entry Description Settings Default values...
- Page 154 Settings and Adjustments Configure on the device. – The Set Destination Relay screen is displayed. (4) Tap [NEW] to configure the terminal for which to control the output terminal. *To change an output terminal control station that has already been registered, tap the station to change, and then tap [EDIT].
- Page 155 Settings and Adjustments Configure on the device. (7) Tap [ENTER]. – The Set Destination Relay screen is displayed. (8) Tap [ENTER]. (9) Tap [SELECT]. – The settings are saved.
-
Page 156: Supervision (Administrator Privileges Only)
Settings and Adjustments Configure on the device. Supervision (administrator privileges only) Configure details for automatic line monitoring and malfunction monitoring. Tap [Supervision] on the Settings (2/2) screen. • The Supervision Settings screen is displayed. Change the settings. Tap [BACK]. • The settings are saved. Entry Description Settings... - Page 157 Settings and Adjustments Configure on the device. Entry Description Settings Default values DEVICE CHECK Configure the interval at which to • OFF INTERVAL automatically perform malfunction • 10min monitoring. • 20min • 30min • 60min • 1 day • Weekly: Select the day of the week from the drop- down list.
-
Page 158: Factory Reset
Settings and Adjustments Configure on the device. Factory Reset The settings of the station can be reset to their initial values. Tap [Factory Reset] on the Settings (2/2) screen. • Display the confirmation screen. Follow the procedure from Step 3. •... - Page 159 Settings and Adjustments Configure on the device. Entry Description Default User Settings Settings in “Settings on the device (→page 90)” will be initialized. Settings restricted under administrator privileges will not be initialized. The incoming/outgoing/not answered history will also be cleared. Factory Reset (administrator All settings will be initialized, and the system log and incoming/outgoing/not answered history only)
-
Page 160: Configuring The Device On A Pc
Settings and Adjustments Configuring the device on a PC Configuring the device on a PC Connecting a PC to the same network as the device allows you to configure it on the PC using a Web browser. System requirements The PC must satisfy the following requirements to configure settings. Network Ethernet (10BASE-T, 100BASE-TX) Web browser... - Page 161 Settings and Adjustments Configuring the device on a PC Select the language • The selected language is used to display messages on the PC. • Display the login screen of the selected language. Enter the ID and password, and then click [Login]. •...
- Page 162 Settings and Adjustments Configuring the device on a PC Note • Do not login multiple times using multiple browsers at one time on the same PC. • The initial IP address and Subnet mask values are below. – IP Address: 192.168.1.160 –...
- Page 163 Settings and Adjustments Configuring the device on a PC Setting window When accessing the web server of the station, the following setting window will appear. The station can be configured in this window. • Depending on PC and OS being used, the window may be slightly different. •...
- Page 164 Settings and Adjustments Configuring the device on a PC Note • To stop configuring, do not use [X] to close the window. Instead, click [Log out]. If [Log out] is not used, you will be unable to login for approximately 1 hour. •...
-
Page 165: Station Information
Settings and Adjustments Configuring the device on a PC Station Information ID and Password Entry Description Settings Default values Set the ID for accessing via a Web browser to 1 - 32 alphanumeric user User ID configure a station. characters User Password Set the password for accessing via a Web 1 - 32 alphanumeric... - Page 166 Settings and Adjustments Configuring the device on a PC Time Important • If power is not supplied for 30 minutes or longer due to power outrage, for instance, the date and time settings may return to the default. Configure the date and time settings again if this happens. ■...
-
Page 167: Network Settings
Settings and Adjustments Configuring the device on a PC Network Settings Video Important • When sending video to a VoIP Phone, configure the same video settings as the VoIP Phone. • Video is not sent when making an outgoing call to a VoIP Phone. •... - Page 168 Settings and Adjustments Configuring the device on a PC ■ Enable NTP Entry Description Settings Default values Enable NTP Set whether to obtain the time from an NTP • Yes No Use server. • No Use An NTP server must be configured separately to use an NTP server.
-
Page 169: System Information
• If using this as calling tone, ringtone, or network camera event notification tone, add a period of silence at the end of the audio source. • Sample files of custom tones are provided on our website (https://www.aiphone.net/product/) for download and use as audio sources. - Page 170 Settings and Adjustments Configuring the device on a PC How to delete a custom sound Check the [Delete] box of the audio file to delete. Click [Update].
-
Page 171: Call Settings
Settings and Adjustments Configuring the device on a PC Call Settings Call Stations (for Master) You can call a station registered in "Address Book (administrator setting)." Call Origination ■ Call Origination Settings (Call Button) Entry Description Settings Default values Ringback Tone Configure the calling tone heard from this •... - Page 172 Settings and Adjustments Configuring the device on a PC Entry Description Settings Default values Call Timeout Configure the call timer for calls. • 10 - 600 sec: Select 60sec when setting a value from 10 to 600 sec (by 1 sec).
- Page 173 Settings and Adjustments Configuring the device on a PC Entry Description Settings Default values Ringback Tone Count This item lets you define the number of rings for • 1 - 20 times Infinite [time(s)] the calling tone. • Infinite: The calling tone continues to play for the amount of time set in "Call Timeout."...
- Page 174 Settings and Adjustments Configuring the device on a PC Incoming Call ■ Call Answer Settings Entry Description Settings Default values Auto Answer This item lets you define the automatic • ON: Auto Answer connection when an individual call is received. enabled.
- Page 175 Settings and Adjustments Configuring the device on a PC Entry Description Settings Default values Call Button Configure the ringtone for each priority when a • None Call Pattern 1 call is received via main unit operation. This can • Call Pattern 1 be configured for each caller.
- Page 176 Settings and Adjustments Configuring the device on a PC ■ VoIP Phone Entry Description Settings Default values VoIP Phone Call Priority Configure the incoming priority when a call is • Normal Normal received from a VoIP Phone. • Priority • Urgent...
-
Page 177: Option Input / Relay Output Settings
Settings and Adjustments Configuring the device on a PC Option Input / Relay Output Settings Relay Output ■ Relay output advanced settings How to configure relay output Select the relay output to configure in "Relay Output #." • The settings of the selected relay output are displayed. Configure each item. - Page 178 Settings and Adjustments Configuring the device on a PC Entry Description Settings Default values Sound Settings You can select tones for output terminals. • None Door Release: • Door Release: Configure the tone heard • Call Pattern 1 Operation Sound when relay output is performed to release •...
-
Page 179: Paging Settings
Settings and Adjustments Configuring the device on a PC Paging Settings Important • All pages, group pages, message pages, and external input pages cannot be sent to a VoIP Phone. Paging Origination Entry Description Settings Default values Paging Timeout [sec] Configure the time to continue paging when a 10 - 600 sec (by 1 sec) 30 sec... - Page 180 Settings and Adjustments Configuring the device on a PC How to configure Option Input Page Select the contact input to set for "Option Input #." This cannot be selected if "Paging," "Message Page," or "Message Page" is not set for contact input. •...
-
Page 181: Function Settings
Settings and Adjustments Configuring the device on a PC Function Settings Door Release ■ Door Release Assignment Entry Description Settings Default values Contact Assignment Configure which station's connected electrical • Originating Station: Destination Station lock to release for each station, when a door Release the electrical release operation is performed during a call or lock connected to this... - Page 182 Settings and Adjustments Configuring the device on a PC Network Camera Integration ■ Event Registration Settings configured under administrator privileges are displayed for items other than "Event Tone" and "Play count of Event Tone." Entry Description Settings Default values Event Tone Select the notification tone that is heard when •...
- Page 183 Settings and Adjustments Configuring the device on a PC ■ Play count of Event Tone Entry Description Settings Default values Play count of Event Tone Configure the event ringtone count if the • 1-20 rings operation selection (administrator privileges) is •...
- Page 184 Settings and Adjustments Configuring the device on a PC Email Configure settings related to the email function (the function that sends information on station operation to the set email address). Important • If an SMTP server is not configured, email will not be sent even if email is configured. If email is not sent, contact the system administrator.
- Page 185 Settings and Adjustments Configuring the device on a PC ■ Email Event Trigger Configure the event trigger used to send emails. A event trigger can be configured for each destination. Entry Description Settings Default values Outgoing Normal Call An email message will be sent when an •...
- Page 186 Settings and Adjustments Configuring the device on a PC Entry Description Settings Default values Door Release Activated An email message will be sent when the door • Checked: Send Unchecked: Do not release button or ten-key pad is used to perform •...
- Page 187 Settings and Adjustments Configuring the device on a PC ■ Periodic Log Transmission Entry Description Settings Default values Periodic Log Transmission System log is regularly sent via email. • Enable Disable • Disable Periodic Log Transmit Configure the time to send "Periodic Log From 00:00 to 23:59 00:00 Time...
- Page 188 Settings and Adjustments Configuring the device on a PC ■ Send Test Email Send a test email to the address set in “Email Addresses (→page 184)”. How to send a test email Click [Send]. The following email message will be sent to the address you set up. Example of sending an email message: When sending a test email from this station (Station Number: 001, Station Name: Intercom Station 1, Location: Office).
- Page 189 Settings and Adjustments Configuring the device on a PC Record Configure settings related to video/audio recording. If there is no image, only audio will be recorded. When recording audio during a call, anything said using this station will also be recorded. Important •...
- Page 190 Settings and Adjustments Configuring the device on a PC Entry Description Settings Default values Event Recording Timer Configure the time to stop once video/audio • Disable: Does not stop Disable recording has started, regardless of whether it is until the operating automatic or manual.
- Page 191 Settings and Adjustments Configuring the device on a PC Chime Configure the chime heard from this station integrated with the schedule. Click [Chime]. Or, click "Chime" in the Setting menu to display the Chime screen. ■ Weekly Schedule Configure the chime tone start time and the chime tone for every day from Sunday through Saturday. 50 schedules can be set for each day.
- Page 192 Settings and Adjustments Configuring the device on a PC How to delete the Weekly Schedule Click [Delete] on the row of the schedule to delete. Click [Update]. ■ Daily Schedule For each day, you can define the time to start chiming and the chime tone. A schedule one year from the set day can be configured.
- Page 193 Settings and Adjustments Configuring the device on a PC How to configure Daily Schedule Select the day for which to set a schedule from "Calendar." Configure "Start Time" and "Chime," and then click [Add]. When done, click [Update]. Entry Description Settings Default values Start Time...
- Page 194 Settings and Adjustments Configuring the device on a PC Display Mode Configure details for "Standard Mode" and "Receptionist Mode" configured in Screen Mode Settings (administrator setting). The configured screen mode can be confirmed on the Web configuration screen. ■ Standard Mode Entry Description Settings...
- Page 195 Settings and Adjustments Configuring the device on a PC ■ Receptionist Mode Color Scheme Entry Description Settings Default values Color Scheme Configure the color tone of the screen. • Light Light Confirm screen images in "Color Scheme." • Dark • Color Scheme Example where "Layout 1"...
- Page 196 Settings and Adjustments Configuring the device on a PC • Screen Layout Example where "Light" was set in “Color Scheme (→page 195)” Layout 1 Layout 2 Layout 3...
- Page 197 Settings and Adjustments Configuring the device on a PC Customizing each screen layout Characters, images, and button displays can be customized for each screen layout. The following spaces are customized by configuring “Company Information (→page 198)”, “Greeting Information (→page 198)”, “Images (→page 199)”, and “Button Function (→page...
- Page 198 Settings and Adjustments Configuring the device on a PC Layout 3 “Receptionist Image (→page 199)” Recommended resolution (W×H): 800×120 “Company Image (→page 199)” Recommended resolution (W×H): 400×120 “Greeting Information “Company Information (→page 198)” (→page 198)” “Button 1 (→page 200)” “Button 2 (→page 200)” “Button 3 (→page 200)”...
- Page 199 Settings and Adjustments Configuring the device on a PC Entry Description Settings Default values Text Color Configure the color of the characters displayed Option 1 Option 1 in the greeting space. • "Black" if “Color Scheme (→page 195)” is set to "Light." •...
- Page 200 Settings and Adjustments Configuring the device on a PC Button Function Entry Description Settings Default values Button 1 Configure the function for button 1. • Group Call: Calls the Hide group configured in "Group Call Destination." • Select By Name: Select the call recipient from the station name and group name.
- Page 201 Settings and Adjustments Configuring the device on a PC Entry Description Settings Default values Button 4 Configure the function for button 4. • Group Call: Calls the Hide group configured in "Group Call Destination." • Select By Name: Select the call recipient from the station name and group name.
-
Page 202: Transfer Settings
Settings and Adjustments Configuring the device on a PC Transfer Settings Configure settings related to absent transfer, delay transfer, and schedule transfer. *This is an administrator privileges setting. If "Lock Transfer" is set to "ON," this cannot be configured. Important •... - Page 203 Settings and Adjustments Configuring the device on a PC ■ Transfer Destination List Entry Description Settings Default values Station Number Configure the station number of the transfer 3-32 digits destination station for absent transfer. Up to 10 transfer destination stations can be set. However, if the calling station is IX-MV, IX-DA(- *), or IX-BA, calls will only be transferred to the station set as number 1 in the series.
- Page 204 Settings and Adjustments Configuring the device on a PC ■ Delay Transfer Entry Description Settings Default values Delay Transfer Configure whether to use delay transfer. This • Disable: Delay transfer Disable cannot be set to "Enable" if “Station Number disabled (→page 204)”...
- Page 205 Settings and Adjustments Configuring the device on a PC Schedule Transfer An incoming call can be automatically transferred to the transfer destination, if an incoming call is received during the time configured in the weekly schedule or daily schedule. Important •...
- Page 206 Settings and Adjustments Configuring the device on a PC Entry Description Settings Default values Transfer Destination Configure the station number of the transfer Per station: 3-32 digits destination station. Up to 10 transfer destination To configure multiple stations can be set. However, if the calling stations, enter them station is IX-MV, IX-DA(-*), or IX-BA, calls will separated with a comma...
- Page 207 Settings and Adjustments Configuring the device on a PC ■ Daily Schedule Configure the transfer destination and time for schedule transfer, in units of one day. A schedule one year from the set day can be configured. Up to 12 schedules can be set for each day. Calendar Set schedule list How to configure Daily Schedule...
- Page 208 Settings and Adjustments Configuring the device on a PC Important • Do not configure multiple VoIP phones as transfer destinations. If multiple VoIP phones are configured, calls will be transferred to only one VoIP phone. How to delete Daily Schedule Select the day for which to delete a schedule from "Calendar."...
-
Page 209: Station Settings
Settings and Adjustments Configuring the device on a PC Station Settings Speed Dials / Favorites Configure settings related to the Speed Dial. Configure the function to assign to each Speed Dial button. Up to eight Speed Dial buttons can be configured. *This is an administrator privileges setting. - Page 210 Settings and Adjustments Configuring the device on a PC ■ Speed Dial button advanced settings How to configure speed dials Select the Speed Dial to configure in "Speed Dial #." • The settings of the selected Speed Dial are displayed. Configure each item.
- Page 211 Settings and Adjustments Configuring the device on a PC When done, click [Update]. Entry Description Settings Default values Speed Dial Name Configure the name of the Speed Dial 1 - 24 alphanumeric characters button. The entire name may not be shown on this station's screen, depending on the number of characters.
- Page 212 Settings and Adjustments Configuring the device on a PC How to configure Individual Call Configure this if "Individual Call" is set in “Function (→page 211)”. Entry Description Settings Default values Station Number Configure the call destination station 3-32 digits (station number). This cannot be configured for IXW-MA.
- Page 213 Settings and Adjustments Configuring the device on a PC Entry Description Settings Default values Message Select the message (audio file) to send • None None during message paging. • Call Pattern 1 • Call Pattern 2 • Call Pattern 3 •...
- Page 214 Settings and Adjustments Configuring the device on a PC How to configure Monitor Configure this if "Monitor" is set in “Function (→page 211)”. Entry Description Settings Default values Station Number Configure the station to monitor (station 3-32 digits number). This cannot be configured for IX-MV7-*, IX-MV, IXW-MA, or a VoIP Phone.
- Page 215 Settings and Adjustments Configuring the device on a PC Indicates a required field. The settings should be entered. Retain the default values, unless a change is necessary. Important • If "TLS" is set to "Enable," control may take some time if there are multiple stations to control. Note •...
- Page 216 Settings and Adjustments Configuring the device on a PC Entry Description Settings Default values Hands-free Receive Configure the receive volume from the built-in 1 - 10 speaker during hands-free calls, monitoring, or paging. The calling tone volume will be changed as well.
- Page 217 Settings and Adjustments Configuring the device on a PC Entry Description Settings Default values Communication Timeout Configure the tone heard when an outgoing call • None Error Notification is made but the call times out without the • Call Pattern 1 recipient station answering.
- Page 218 Settings and Adjustments Configuring the device on a PC Entry Description Settings Default values Call Queue Notification Configure the tone heard when there is an • None Call Queue incoming call from another station during • Call Pattern 1 Notification communication.
- Page 219 Settings and Adjustments Configuring the device on a PC Entry Description Settings Default values Auto Answer Tone This item lets you select a tone which sounds • None Pre Tone 1 when the following occurs: • Call Pattern 1 • The incoming tone when an individual call is •...
- Page 220 Settings and Adjustments Configuring the device on a PC Entry Description Settings Default values Key Received Configure the tone to send to the other station • None None when the door release key entered using the • Call Pattern 1 numerical keypad on the other station (station •...
- Page 221 Settings and Adjustments Configuring the device on a PC Communication Entry Description Settings Default values Configure the call duration when making an • Infinite: Do not end until 60sec Talk Timeout [sec] outgoing call from this station or answering a end operation occurs.
- Page 222 Settings and Adjustments Configuring the device on a PC Monitor Important • Monitoring cannot be performed for IX-MV7-*, IX-MV, or VoIP phones.
- Page 223 Settings and Adjustments Configuring the device on a PC ■ Monitor Timeout [sec] Entry Description Settings Default values Configure the time until monitoring • Infinite 60sec Monitor Timeout [sec] automatically stops, when a station or network • 10-600 seconds: camera is monitored individually. Scan Configure between 10 monitoring will not end until an end operation is and 600 sec (by 1 sec).
-
Page 224: Maintenance
Settings and Adjustments Configuring the device on a PC Maintenance Initialization The setting values for everything other than “Settings on the device (→page 90)” “Language (→page 100)” “Settings using a PC (→page 92)” administrator privilege settings will return to their initial values. Settings restricted with administrator privileges will not return to their initial values. -
Page 225: Other
IX-MV7-HB, IX-MV7-B: Black Dimensions IX-MV7-HB and IX-MV7-HW: 280 mm (11") [W] × 204 mm (8-1/16") [H] × 55.5 mm (2-3/16") [D] IX-MV7-B and IX-MV7-W: 220 mm (8-11/16") [W] × 172 mm (6-3/4") [H] × 31.5 mm (1-1/4") [D] (excluding projection) Weight: IX-MV7-HB and IX-MV7-HW: Approx. -
Page 226: Notice Regarding The Software
Other Notice regarding the software Notice regarding the software Use of the software installed on this product has received direct or indirect authorization from third parties. (1) Apache License 2.0 This software includes Google Protocol Buffers. You may obtain a copy of the License at "http://www.apache.org/licenses/LICENSE-2.0". Please be noted that a portion of this software is made by changing or modifying original source files. - Page 227 OF OR IN CONNECTION WITH THE USE OR PERFORMANCE OF THIS SOFTWARE. (6) MIT License Copyright (c) 2018 Aiphone co.,Ltd. Released under the MIT license. Permission is hereby granted, free of charge, to any person obtaining a copy of this software and associated documentation files (the "Software"), to deal in the Software without restriction, including without limitation the...
- Page 228 Other Notice regarding the software (a) Redistributions of source code must retain the above copyright notice, this list of conditions and the following disclaimer. (b) Redistributions in binary form must reproduce the above copyright notice, this list of conditions and the following disclaimer in the documentation and/or other materials provided with the distribution.
- Page 229 (14) This software is based in part on the work of the FreeType team. See the following website for source code including changes for software that has been authorized under the above licenses. http://www.aiphone.co.jp/data/software/source/gpl/download/ix/ * Be sure to read the following before downloading. <<Please confirm>>...
-
Page 230: For Proper Use Of The Station
Other FOR PROPER USE OF THE STATION REGULATIONS This device complies with part 15 of the FCC Rules. Operation is subject to the following two conditions: (1) This device may not cause harmful interference, and (2) this device must accept any interference received, including interference that may cause undesired operation. -
Page 231: Warranty
This warranty shall not apply to any Aiphone product which has been subject to misuse, neglect, accident, power surge, or to use in violation of instructions furnished, nor extended to units which have been repaired or altered outside of the factory. - Page 232 MEMO...
- Page 233 AIPHONE CO., LTD., NAGOYA, JAPAN Ⓐ Issue Date: Nov.2018 P1118 MQ 60241...
Need help?
Do you have a question about the IX-MV7-HW and is the answer not in the manual?
Questions and answers
When someone hits the door button from the parking lot, the call goes to two locations. If one of the locations picks up the phone, the other continues to ring. Is it possible to turn off the other phone#1 when phone #2 picks it up. Our phone continues to ring, even though it has already been picked up from another location. PLEASE HELP!!