Alto-Shaam CT Express CTX4-10E Installation Manual
Combitherm
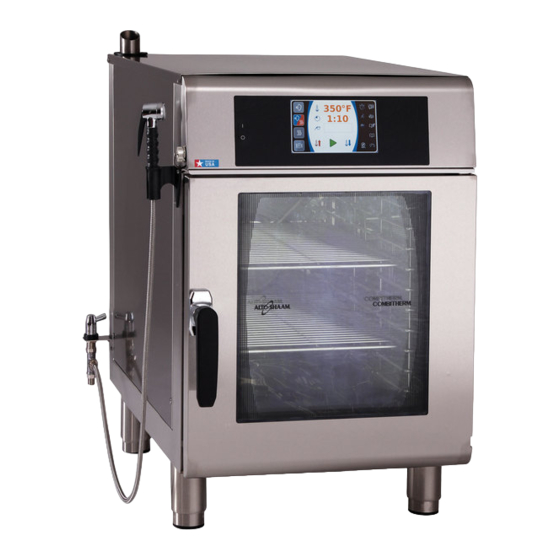
combination oven/steamer
Hide thumbs
Also See for CT Express CTX4-10E:
- Manual (76 pages) ,
- Operation manual (57 pages) ,
- Technical & service manual (149 pages)
Table of Contents
Advertisement
Quick Links
Shown with ExpressTouch Control
WARNING
To prevent personal injury, death or
property damage:
Do not store or use gasoline or other
flammable vapors or liquids in the vicinity
of this or any other appliance.
W164 N9221 Water Street • P.O. Box 450
Menomonee Falls, Wisconsin 53052-0450 U.S.A.
PHONE: 262.251.3800 • 800.558.8744 U.S.A. / CANADA
FAX: 262.251.7067 • 800.329.8744 U.S.A. ONLY
www.alto-shaam.com
Printed in the U.S.A.
Combination Oven/Steamer
Improper installation, alteration, adjustment, service,
cleaning, or maintenance could result in property
damage, severe injury, or death.
Read and understand the installation, operating and
maintenance instructions thoroughly before installing,
servicing, or operating this equipment.
Consult instructions for
Combitherm®
CT Express™
CTX4-10E
CTX4-10EVH
CTX4-10EC
• Installation
WARNING
operation and use.
MN-29805 • Rev 11 • 07/18
Advertisement
Table of Contents

Related Manuals for Alto-Shaam CT Express CTX4-10E


Summary of Contents for Alto-Shaam CT Express CTX4-10E
- Page 1 W164 N9221 Water Street • P.O. Box 450 Menomonee Falls, Wisconsin 53052-0450 U.S.A. PHONE: 262.251.3800 • 800.558.8744 U.S.A. / CANADA FAX: 262.251.7067 • 800.329.8744 U.S.A. ONLY Consult instructions for www.alto-shaam.com operation and use. MN-29805 • Rev 11 • 07/18 Printed in the U.S.A.
-
Page 2: Table Of Contents
Table of Contents Table of Contents Water Connection ..25 Water Quality Requirements ..25 Delivery How to connect the oven to the water supply and install the spray hose . -
Page 3: Delivery
Delivery This Alto-Shaam appliance has been thoroughly tested The serial number is required for all inquiries. and inspected to ensure only the highest quality Always include both model and serial number(s) in any appliance is provided. Upon receipt, check for any correspondence regarding the appliance. -
Page 4: Transportation Damage And Claims
Alto-Shaam will continue our policy of assisting our receiving area. Do not wait until a er the appliance is customers in collecting claims which have been properly moved to a storage area. -
Page 5: Unpacking
Alto-Shaam of all liability. • Remove all protective plastic fi lm, packaging materials, and accessories from the appliance before connecting electrical power. -
Page 6: Safety Procedures
Operating instructions and warnings must WARNING be read and understood by all operators and users. Alto-Shaam recommends regular staff training to avoid Indicates a hazardous situation that, if not avoided, could the risk of accident or damage to the appliance. Operators result in death or serious injury. - Page 7 If your appliance makes an especially loud noise Safety Procedures warranty and relieve Alto-Shaam of all liability. when starting up, shut down the appliance and call a quali ed and trained service technician.
-
Page 8: Installation Codes And Standards
Installation Codes and Standards WARNING Ventilation Requirements Authorities having jurisdiction should be consulted as to the requirements for this equipment with respect to ventilation Improper installation, alteration, adjustment, service, and fire extinguishing systems to ensure conformity with cleaning, or maintenance could result in property any Federal, State, or local installation codes. -
Page 9: Installation Duties And Responsibilities
Perform mechanical startup. Complete post installation check sheet. Pictures of the install’s electrical connections, water, drain, and clearances should be taken and sent to: installation_program@alto-shaam.com RSP/Dealer: A er Install Confirm installation is correct. Provide operational training and demonstration, and contact information for post installation support. - Page 10 Perform mechanical startup. Complete post installation check sheet. Pictures of the install’s electrical connections, water, drain, and clearances should be taken and sent to: installation_program@alto-shaam.com RSP/Dealer: A er Install Confirm installation is correct. Provide operational training and demonstration, and contact information for post installation support.
-
Page 11: Pre-Installation Checklist
Pre-Installation Checklist Pre-Installation Checklist Location Information Location Name: __________________________________________________________ Site Contact Name: ____________________________________________________________ Location Street Address: __________________________________________________________ Site Contact Phone No : ____________________________________________________________ Location City: __________________________________________________________ Site Contact Email: ____________________________________________________________ Location State: _____________________ Zip: ___________________________ Pre-Installation Company Information Company Name: __________________________________________________________ Technician Name: ____________________________________________________________ Mailing Address: __________________________________________________________ Technician Phone No : ____________________________________________________________... - Page 12 Pre-Installation Checklist Pre-Installation Checklist Electrical What is the rated voltage and phase of the appliance(s) to be installed? What is the measured voltage at the site? L1-N L2-N L3-N L1-L2 L2-3 L1-L3 What is the current draw of the appliance(s) to be installed? What is the on-site breaker size supplying power to the appliance(s)? Is there a disconnect or junction box within 3' (914mm) of where the appliance(s) will be installed?
- Page 13 On-site manager should make the necessary contacts to move forward with theses changes as soon as possible. If there are any questions, please contact Alto-Shaam Technical Service Department at 800-558-8744 ext. 6702. Or, review documentation regarding the equipment www.alto-shaam.com/en/resource-library.
- Page 14 This page intentionally left blank...
-
Page 15: Spec Sheets
24-3/8" (619mm) Must meet line pressure and flow rate specifications for both inlets. manufacturer’s warranty. Alto-Shaam recommends using OptiPure [www. ® WATER DRAIN: 1-1/2" NPT (50mm) connection with a vertical vent to extend above the exhaust vent. -
Page 16: Ctx4-10Evh
(527mm) (946mm) Must meet line pressure and flow rate specifications for both inlets. manufacturer’s warranty. Alto-Shaam recommends using OptiPure ® [www. WATER DRAIN: 1-1/2" NPT (50mm) connection with a vertical vent to extend above the exhaust vent. -
Page 17: Ctx4-10Ec
37-1/4" Must meet line pressure and flow rate specifications for both inlets. (527mm) (946mm) manufacturer’s warranty. Alto-Shaam recommends using OptiPure [www. ® WATER DRAIN: 1-1/2" NPT (50mm) connection with a vertical vent to extend above the exhaust vent. optipurewater.com] products to properly treat your water. -
Page 18: Installation
Installation WARNING To prevent serious injury, death, or property damage: • Always keep appliance on top of a pallet when using a fork li or a pallet li truck to move appliance. • Always use a su icient number of trained and experienced workers to place the appliance on floor, stand, or counter. -
Page 19: Lifting Instructions
Installation Lifting Instructions Remove banding before lifting. Lift the appliance never from from either side of the appliance, the front or back Adjust the forks so that they do not damage any of Air intake the components under the appliance. vents are located in front of the legs and must not be damaged The left and right fork should be located between... -
Page 20: Positioning Requirements
Installation Positioning Requirements 4" (102mm) □ In order to ensure proper ventilation, a minimum distance of at least 4" (102mm) must be kept from the sides of the appliance and any adjoining surfaces. NOTE: Additional clearance is needed for service access. EXHAUST VENT 18"... -
Page 21: Electric Requirements
Installation CAUTION WARNING To prevent serious injury, death, or Power source must match voltage identified property damage: on appliance rating tag. The rating tag provides essential technical information All electrical connections must be required for any appliance installation, made by a qualified and trained service maintenance or repairs. -
Page 22: Mobile Equipment Restraint
Installation Mobile Equipment Restraint Any appliance that is not furnished with a power supply cord but includes a set of casters, stand with casters, or a stacked configuration must be installed with a Mounting connector tether. Adequate means must be provided to limit for restraining device the movement of this appliance without depending on or transmitting stress to the electrical conduit. -
Page 23: Electrical Kit Installation - 50 Hz
Installation Electrical Kit Installation - 50 Hz International Cut threads into nut before installing fitting. To do so, apply a light lubricant and thread Applications nut on and off fitting. Appliance side Remove enough cable covering so the wires reach the terminal strip. -
Page 24: Electrical Kit Installation - 60 Hz
Installation Electrical Kit Installation - 60 Hz Applications for the Americas Appliance side 1 PH Chassis Power supply side Remove enough cable covering so the wires reach the terminal strip. Depending on the application, install the straight or elbow fitting to the cable. Cut threads into nut before installing fitting. -
Page 25: Water Connection
(152mm) B: 8-1/4" B = Untreated water inlet (211mm) Alto-Shaam will continue our efforts to provide viable equipment. Since water quality is an important issue, C: 5-3/4" C = Water drain (145mm) -
Page 26: How To Connect The Oven To The Water Supply And Install The Spray Hose
▪ sealing compound is not recommended. What you will need NOTE: all items are included in the Alto-Shaam installation kit, or must be provided by the installer. One (1) 3/4" NPT 90° brass elbow for the treated water inlet ▪... - Page 27 Installation MN-29805 • Rev 11 • 07/18 • Combitherm CT Express Installation Manual...
-
Page 28: How To Install The Water Drain Piping
Food Service Sanitation Manual of the Food & Drug Administration [FDA]. What you will need NOTE: all items are included in the Alto-Shaam installation kit, or must be provided by the installer. Piping included in kit can be cut to create the shaded configuration shown on the next page, with a maximum drain run of 4-1/2' (1372mm). - Page 29 Installation 45° 45° 90° 90° MN-29805 • Rev 11 • 07/18 • Combitherm CT Express Installation Manual...
-
Page 30: How To Install The Water Drain Piping For Stacked Ovens
What you will need What you will need NOTE: all items are included in the Alto-Shaam installation kit, or must be provided by the NOTE: all items are included in the Alto-Shaam installation kit, or must be provided by the installer. - Page 31 Installation 45° 45° 90° 90° 45° 90° 45° MN-29805 • Rev 11 • 07/18 • Combitherm CT Express Installation Manual...
-
Page 32: Ventless Hood Model
Ventless Hood Model The Ventless Hood option is factory installed directly on the top of the Alto-Shaam Combitherm appliance. The hood is designed to vent clean air back into the kitchen, filtering vapors and grease. A high-power fan draws steam and fumes into the hood intake and out the top surface exhaust vent. - Page 33 Installation Ventless Hood Model To p E xhaus t V ent F il te r Tra ck F i lter Switch 1. Charcoal Filter: The charcoal lter should be 2. Grease Filter: Cleaning frequency should be based inspected for contaminant's on a regular basis. on appliance usage with a maximum of two weeks Replacement must be made at a minimum of three between cleaning if the appliance is used for non-...
-
Page 34: Accessories
Installation Accessories □ Combitherm Cleaning Liquid — specially formulated for Combitherm appliances □ Twelve (12) containers/case, 1 quart (c. 1 liter) each CE-24750 □ CombiClean® CombiTabs™ — specially formulated for CTX combitherm appliances □ 90 (0.5 ounce) packets each container CE-28892 CombiHood®... -
Page 35: Post-Installation Checklist
Post-Installation Checklist Post-Installation Checklist Location Information Location Name: __________________________________________________________ Site Contact Name: ____________________________________________________________ Location Street Address: __________________________________________________________ Site Contact Phone No : ____________________________________________________________ Location City: __________________________________________________________ Site Contact Email: ____________________________________________________________ Location State: ______________________ Zip: ___________________________ Post-Installation Company Information Company Name: __________________________________________________________ Technician Name: ____________________________________________________________ Mailing Address: __________________________________________________________ Technician Phone No : ____________________________________________________________... - Page 36 Post-Installation Checklist Post-Installation Checklist Electrical What is the rated voltage and phase of the appliance(s) installed? VOLTAGE PHASE Is the wire size for the main incoming power to the appliance(s) in accordance with the minimum size listed in the specifi cation sheet PASS FAIL for this specifi c appliance?
-
Page 37: Function Test Checklist
Function Test Checklist Function Test Checklist Wire Connections Behind the left side panel, check and tighten all electrical connections, and tighten all electrical screws. Behind the left side panel, check and tighten all electrical screws. Behind the control panel, check and tighten all connections on the control board. Behind the control panel, check and tighten all connections on the options board. - Page 38 Function Test Checklist Function Test Checklist Installation Complete Cleanup job site Wipe down and clean exterior of combi appliance Picture of screen displaying current software versions Picture(s) of complete drain run Picture of water connections at combi appliance Picture of appliance in place with surrounding equipment Size of treated water line: Flow rate of treated water line in gmp (L/min) Size of untreated water line:...
-
Page 39: Ct Express Checklist
200°F (93°C). Signature of store representative: NOTICE: Alto-Shaam has listed Water Quality Requirements in the ________________________________________________ installation manual for this equipment. It is the responsibility of the end user to have the water connected to this appliance tested to ensure these standards are met before putting the appliance into use. -
Page 40: Cleaning And Preventive Maintenance
Cleaning and Preventive Maintenance CT Express™ Checklist - Daily More frequent preventative maintenance inspection/service is required when cooking large quantities of fatty foods. The acids and related compounds found in fat, particularly chicken fat, accumulate over time and can damage appliance components. Failure to regularly inspect and maintain the appliance may result in void of warranty, property damage, or personal injury. -
Page 41: Ct Express™ Checklist - Weekly
Cleaning and Preventive Maintenance CT Express™ Checklist - Weekly More frequent preventative maintenance inspection/service is required when cooking large quantities of fatty foods. The acids and related compounds found in fat, particularly chicken fat, accumulate over time and can damage appliance components. Failure to regularly inspect and maintain the appliance may result in void of warranty, property damage, or personal injury. -
Page 42: Ct Express™ Checklist - Monthly
Cleaning and Preventive Maintenance CT Express™ Checklist - Monthly More frequent preventative maintenance inspection/service is required when cooking large quantities of fatty foods. The acids and related compounds found in fat, particularly chicken fat, accumulate over time and can damage appliance components. Failure to regularly inspect and maintain the appliance may result in void of warranty, property damage, or personal injury. -
Page 43: Ct Express™ Checklist - 12 Month
Cleaning and Preventive Maintenance CT Express™ Checklist - 12 Month More frequent preventative maintenance inspection/service is required when cooking large quantities of fatty foods. The acids and related compounds found in fat, particularly chicken fat, accumulate over time and can damage appliance components. Failure to regularly inspect and maintain the appliance may result in void of warranty, property damage, or personal injury. - Page 44 Cleaning and Preventive Maintenance CT Express™ Checklist - 12 Month Unit Information Business Name: _______________________________________ Serial Number: ______________________________ Model Number: _______________________________________ 12-Month Inspection Start Date: ______________________________ 12-Month Inspection Checklist Inspect - The heat exchanger for any signs of major deformation. If yes, immediately remove from service and take corrective action steps.
- Page 45 Cleaning and Preventive Maintenance CT Express™ Checklist - 12 Month Unit Information Business Name: _______________________________________ Serial Number: ______________________________ Model Number: _______________________________________ 12-Month Inspection Start Date: ______________________________ 12-Month Inspection Checklist Inspect and Tighten - Door hinges and lower hinge pin bolt Inspect and Tighten - Door handle If there is a smoker, inspect the smoke element for visual signs of deformation, cracks or breaks (replace as needed) Review - Error code history...
-
Page 46: Troubleshooting - Error Codes
Troubleshooting – Error Codes Error Codes ALWAYS check the circuit breaker is turned “ON” and your unit is receiving power BEFORE calling your Authorized Alto-Shaam Service Agent NOTICE This section is provided for the assistance of qualified and trained service technicians only and is not intended for use by untrained or unauthorized service personnel. - Page 47 Troubleshooting – Error Codes Error Error Call Out Description of Error Possible Cause(s) Code in Display Boiler Temperature High Steam generator – Immersion element is not submersed in water due to scale temperature too hot build up on the water level probe/inside the tank. –...
- Page 48 Troubleshooting – Error Codes Error Error Call Out Description of Error Possible Cause(s) Code in Display No Water In Boiler Steam generator fill – Water supply is disconnected or shut off. error – Low water pressure. – Boiler drain cap leaking or missing. –...
- Page 49 Troubleshooting – Error Codes Error Error Call Out Description of Error Possible Cause(s) Code in Display E100 DB version is not equal to RB version. Error Software update may – Perform software update. generated have failed. – Ribbon cable defective. by DB. –...
-
Page 50: Touch Control Error Codes
Troubleshooting – Error Codes Touch Control Error Codes When the appliance malfunctions, an error code will appear in the display. Press the Start icon to acknowledge the error. When the appliance error notifi cation has been acknowledged, the appliance will attempt to return to normal operation. Model Mode Error... -
Page 51: Original Equipment Limited Warranty
No person except an offi cer of Alto‑ Shaam, Inc. is authorized to modify this warranty or to incur on behalf of Alto-Shaam any other obligation or liability in connection with Alto- Shaam equipment. - Page 52 CT Express™...
Need help?
Do you have a question about the CT Express CTX4-10E and is the answer not in the manual?
Questions and answers