Advertisement
WPL308 Quick Start Guide
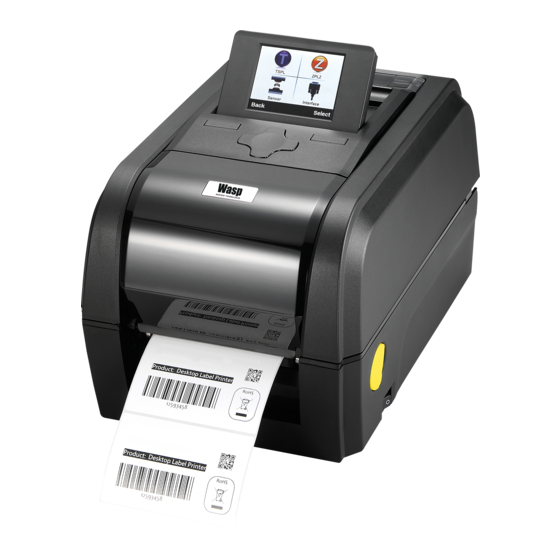
Printer Overview
LED indicator
Feed / Pause
button
Power
Top cover
switch
open lever
Note: The interface picture here is for reference only. Please refer to the product specification for the interfaces
availability.
Ribbon
Ribbon access
rewind hub
cover
Top cover
Media holder
Media holder
locking switch
Black mark
sensor
Power jack
socket
Ethernet
RS-232C
Micro SD
interface
interface
card socket
Ribbon
rewind gear
Ribbon
supply hub
Print head
Gap sensor
Media cover
(receiver)
Gap sensor
(transmitter)
Media guide
adjustment button
Platen roller
Media guides
Loading the Ribbon
Fan-fold paper
entrance chute
USB host
(1) Open the printer's top cover by
pulling the top cover open levers
Centronics
located on each side of the printer
interface
and lifting the top cover to the
USB
maximum open angle.
interface
(4) Install the ribbon right side onto the
supply hub first then align the
notches on the left side and mount
onto the spokes.
Note: The yellow part of spindle is in
left side.
(7) Stick the ribbon onto the ribbon
rewind paper core.
Page 1 of 2
(2) Open the ribbon access cover and
(3) Insert the ribbon spindle into the
the media cover.
ribbon core.
(5) Insert the rewind spindle into the
(6) Install the paper core right side
paper core.
onto the rewind hub first then
align the notches on the left side
and mount onto the spokes.
Note: The yellow part of spindle is
in left side.
* Loading Path for Ribbon
(8) Turn the ribbon rewind gear until
the ribbon plastic leader is
thoroughly wound. Close the ribbon
access cover and the top cover.
Advertisement
Table of Contents

Related Manuals for Wasp WPL308


Summary of Contents for Wasp WPL308
- Page 1 WPL308 Quick Start Guide Loading the Ribbon Printer Overview LED indicator Feed / Pause button Fan-fold paper entrance chute USB host (1) Open the printer’s top cover by (2) Open the ribbon access cover and (3) Insert the ribbon spindle into the pulling the top cover open levers the media cover.
- Page 2 Loading the Media Button Functions (1) Feed labels When the printer is ready, press the button to feed one label to the beginning of next label. (2) Pause the printing job When the printer is printing, press the button to pause a print job. When the printer is paused the power LED will blink green.
Need help?
Do you have a question about the WPL308 and is the answer not in the manual?
Questions and answers