Table of Contents
Advertisement
Quick Links
Advertisement
Table of Contents

Related Manuals for Wasp WPL618 Series


Summary of Contents for Wasp WPL618 Series
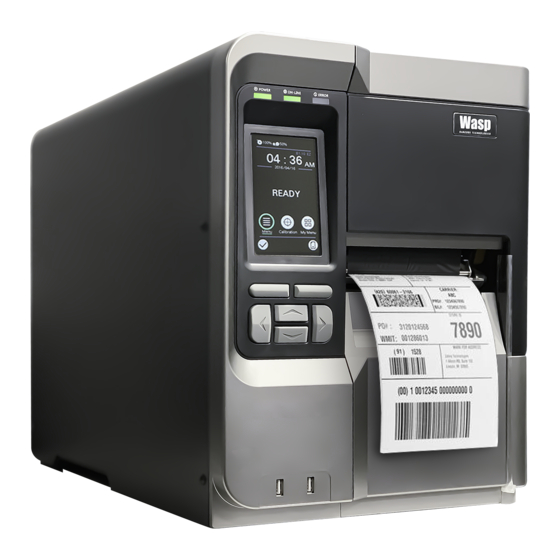
- Page 1 WPL618 Series THERMAL TRANSFER / DIRECT THERMAL BAR CODE PRINTER USER’S MANUAL...
- Page 2 Information in this document is subject to change without notice and does not represent a commitment on the part of Wasp Barcode Technologies No part of this manual may be reproduced or transmitted in any form or by any means, for any purpose other than the purchaser’s personal use, without the expressed...
- Page 3 Agency Compliance and Approvals EN 55022, Class B EN 55024 EN 60950-1 EN 55032 EN 61000-3-2 EN 61000-3-3 FCC part 15B, Class B AS/NZS CISPR 22/ 32, Class B UL 60950-1 EN 60950-1 GB 4943.1 GB 9254 GB 17625.1 TP TC 004 TP TC 020 IS 13252(Part 1)/ IEC 60950-1...
- Page 4 8. Please refer to user manual for maximum operation ambient temperature. WARNING: Hazardous moving parts keep fingers and other body parts away. CAUTION: (For equipment with RTC (CR2032) battery or rechargeable battery pack) Risk of explosion if battery is replaced by an incorrect type. Dispose of used batteries according to the Instructions as below.
- Page 5 CAUTION: Any changes or modifications not expressly approved by the grantee of this device could void the user's authority to operate the equipment. - iv...
- Page 6 Equipment name: Type designation (Type): WPL618 Restricted substances and its chemical symbols Hexavalent Polybrominate Polybrominate Lead Mercury Cadmium Unit chromium d biphenyls d diphenyl ethers (PBDE) (Pb) (Hg) (Cd) (PBB) ○ ○ ○ ○ ○ ○ ○ ○ ○ ○ ○...
- Page 7 1.〝0.1 wt %〞〝0.01 wt %〞 Note 1:“Exceeding 0.1 wt %” and “exceeding 0.01 wt %” indicate that the percentage content of the restricted substance exceeds the reference percentage value of presence condition. 2.〝○〞 Note 2:“○” indicates that the percentage content of the restricted substance does not exceed the percentage of reference value of presence.
-
Page 8: Table Of Contents
Contents 1. Introduction ............................1 1.1 Product Introduction ........................1 1.2 Product Features ........................2 1.2.1 Printer Standard Features ....................2 1.2.2 Printer Optional Features ....................4 1.3 Printer Specifications ......................... 4 1.4 Print Specifications ........................5 1.5 Ribbon Specifications ........................ 5 1.6 Media Specifications ........................ - Page 9 6.2 Printer Function ........................34 6.3 Setting Ethernet by Diagnostic Tool ..................35 6.3.1 Using USB interface to setup Ethernet interface ............35 6.3.2 Using RS-232 interface to setup Ethernet interface ........... 36 6.3.3 Using Ethernet interface to setup Ethernet interface ..........37 7.
-
Page 10: Introduction
This new design results in a more durable printer that is suited for your most heavy-duty demand cycles. There are three models available with the WPL618 Series. The WPL618 prints at 203 dpi at speeds up to an amazing 18 inches per second, WPL618 - 300 offers higher 300 dpi... -
Page 11: Product Features
1.2 Product Features 1.2.1 Printer Standard Features The printer offers the following standard features. Product standard feature Printing Thermal transfer/ or direct thermal method Die-cast based print mechanism and frame / Aluminum cover with large Mechanism clear media view window LCD display/ Multi-language selectable Large Backlit LCD display (LCD: 16 bits Color, Operation... - Page 12 ・ Codepage 1257 (Baltic) ・ Codepage 1258 (Vietnam) ・ ISO-8859-1: Latin-1 (Western European) ・ ISO-8859-2: Latin-2 (Central European) ・ ISO-8859-3: Latin-3 (South European) ・ ISO-8859-4: Latin-4 (North European) ・ ISO-8859-5: Cyrillic ・ ISO-8859-6: Arabic ・ ISO-8859-7: Greek ・ ISO-8859-8: Hebrew ・...
-
Page 13: Printer Optional Features
1.2.2 Printer Optional Features The printer offers the following optional features. User Dealer Factory Product option feature option option option ○ Option Card (GPIO + Parallel) Internal full rewinding kit ( Max. 8“ OD) ○ Peel-off module assembly (Max.4 ips) ○... -
Page 14: Print Specifications
1.4 Print Specifications Print WPL618 WPL618-300 WPL618-600 Specifications Print head resolution 300 dots/inch 600 dots/inch 203 dots/inch (dots per inch/mm) (8 dots/mm) (12 dots/mm) (24 dots/mm) Printing method Thermal transfer/ or direct thermal Dot size 0.125 x 0.125 mm 0.084 x 0.084 mm 0.042 x 0.042 mm (width x length) (1 mm = 8 dots) -
Page 15: Media Specifications
1.6 Media Specifications Media Specifications WPL618 WPL618-300 WPL618-600 Media roll capacity Max. 8” (203.2 mm) OD Media core diameter 3” (76.2 mm) ID core Media type Continuous, die-cut, black mark, external fan-fold, notch Media wound type Outside wound Media width 20 mm ~ 114 mm (0.78“... -
Page 16: Operations Overview
2. Operations Overview 2.1 Unpacking and Inspection This printer has been specially packaged to withstand damage during shipping. Please carefully inspect the packaging and printer upon receiving the bar code printer. Please retain the packaging materials in case you need to reship the printer. Unpacking the printer, the following items are included in the carton. -
Page 17: Printer Overview
2.2 Printer Overview 2.2.1 Front View LED indicators LCD display Paper exit chute Front panel buttons Printer cover USB host x 2 - 8 -... -
Page 18: Interior View
2.2.2 Interior view Ribbon rewind spindle Print head release lever Media sensor position adjustment knob Label guide bar release lever Ribbon supply spindle Ribbon tension adjustment knobs Media capacity sensor Label supply spindle Rear label guide External label entrance chute Print head pressure adjustment knobs Platen roller Print head... -
Page 19: Rear View
2.2.3 Rear View External label entrance chute Power cord socket Power switch Slot-in Wi-Fi module (Option) RS-232C interface GPIO interface (Option) Ethernet interface USB interface * Micro SD card socket Centronics interface Note: The interface picture here is for reference only. Please refer to the product specification for the interfaces availability. - Page 20 * Recommended SD card specification. Type SD card spec SD card capacity Approved SD card manufacturer Transcend V2.0 Class 4 V2.0 Class 4 Transcend V3.0 Class 10 UHS-I 16G Transcend V3.0 Class 10 UHS-I 32G Transcend Micro SD V3.0 Class 10 Kingston V2.0 Class 4 Scandisk...
-
Page 21: Operator Control
2.3 Operator Control LEDs Status Printer firmware version Printer model Time & Date Touch screen IP1: Ethernet IP2: Wi-Fi Icons Keys 2.3.1 LED Indication and Keys Status Indication Printer power off POWER Printer power on Printer is ready ON-LINE Printer is paused Blinking Printer is downloading data - 12 -... -
Page 22: Main
Printer is ready ERROR Carriage open or cutter error Blinking No paper, paper jam or no ribbon Keys Function Soft keys The labels on the footer of the UI will explain the function for left and right soft key. Check the labels on the footer of the UI screen. The meaning of the soft keys will vary. -
Page 23: Touch Screen
2.3.3 Touch Screen Tap an item to open/use it. Be selected (Green) Scroll up Scroll down Return Enter Up page Note: For LCD Menu panel, please refer to section 7 for more details. - 14 -... -
Page 24: Setup
3. Setup 3.1 Setting up the printer 1. Place the printer on a flat, secure surface. 2. Make sure the power switch is off. 3. Connect the printer to the computer with the provided USB cable. 4. Plug the power cord into the AC power cord socket at the rear of the printer, and then plug the power cord into a properly grounded power outlet. -
Page 25: Loading The Ribbon
3.2 Loading the Ribbon Open the printer right side cover. Install the ribbon and paper core onto ribbon supply spindle and ribbon rewind spindle. Push print head release lever to open print head mechanism. - 16 -... - Page 26 Thread ribbon above the ribbon guide bar and through ribbon sensor slot. (Please refer to “Loading path for ribbon” as following fig.) Wind the ribbon rewind spindle counterclockwise roughly 3~5 circles until ribbon is smooth, properly stretched and wrinkle-free. Close the print head mechanism by pushing the print head release lever.
- Page 27 Loading path for ribbon * Ink coated outside wound * Ink coated inside wound - 18 -...
-
Page 28: Loading The Media
3.3 Loading the Media 3.3.1 Loading the Media 1. Open the printer right side cover. 2. Place the roll of media on the label supply spindle. Note: For 1”~2.5” width media, please install label roll guard on the supply spindle to fix media. 3. - Page 29 4. Pull the leading edge of the label forward through the media guide bar pass media sensor, and place the leading edge onto the platen roller. 5. Adjust the rear label guide (green) to fit the label width. 6. Adjust the front label guide (green) to fit the label width.
- Page 30 8. Close print head release lever and label guide bar release lever. 9. Set media sensor type and calibrate the selected sensor. Note: * Please calibrate the gap/black mark sensor when changing media. Loading path for media - 21 -...
-
Page 31: Loading The Fan-Fold/External Media
3.3.2 Loading the Fan-fold/External Media 1. Open the printer right side cover. 2. Insert the fan-fold media through the bottom or rear external label entrance chute. 3. Please refer to section 3.3.1 step 3~9 for loading media. Note: Please calibrate the gap/black mark sensor when changing media. -
Page 32: Loading Media In Peel-Off Mode (Option)
3.3.3 Loading Media in Peel-off Mode (Option) 1. Open the printer right side cover. 2. Please refer to section 3.3.1 step 3~9 for loading media. 3. Using the front display panel to do the calibration first and set the printer mode to peeler mode. - Page 33 7. Feed the leading edge of liner through the peeler sensor and peel-off roller. Peel-off sensor Peel-off roller 8. Wrap the liner onto the paper core and wind the spindle until the liner stretched properly. 9. Press the middle of the peel-off roller to close the peel-off roller release lever.
- Page 34 10. Close print head release lever and label guide bar release lever. 11. Press the FEED button to test. - 25 -...
-
Page 35: Loading Media In Rewind Mode (Option)
3.3.4 Loading Media in Rewind Mode (Option) 1. Open the printer right side cover. 2. Please refer to section 3.3.1 step 3~9 for loading media. 3. Using the front display panel to do the calibration and set the printer mode to rewind mode. - Page 36 7. Wrap the label onto the internal rewind spindle and stick the label onto the paper core. Wind the spindle until the label stretched properly. 8. Adjust the supply holder guide to fit the supply width. Turn the screw to fix the supply holder guide.
-
Page 37: Moveable Print Head Pressure Adjustment Knob
4. Moveable Print Head Pressure Adjustment Knob The moveable print head pressure adjustment knob has 5 levels of adjustment. Because the printer’s paper alignment is to the left side of mechanism, different media widths require different pressure to print correctly. Therefore it may require to adjust the pressure knob to get your best print quality. -
Page 38: Mechanism Fine Adjustment To Avoid Ribbon Wrinkles
4.1 Mechanism Fine Adjustment to Avoid Ribbon Wrinkles This printer has been fully tested before delivery. There should be no ribbon wrinkle presented on the media for general-purpose printing application. Ribbon wrinkle is related to the media thickness, print head pressure balance, ribbon film characteristics, print darkness setting…etc. -
Page 39: Ribbon Tension Adjustment Knob
5. Ribbon Tension Adjustment Knob The ribbon tension adjustment knob has 3 levels of adjustment. Because the printer’s ribbon alignment is to the left side of mechanism, different ribbon widths require different tension to print correctly. Therefore it may require adjusting the ribbon tension knob to get your best print quality. The biggest tension is #1. Adjust the tension by turning the knobs to suitable # (1, 2 or3) on both ribbon supply &... -
Page 40: Suggestion Of Ribbon Tension Adjustment
5.1 Suggestion of Ribbon Tension Adjustment For 4” width ribbon If the ribbon width is 4”, adjust both ribbon tension adjustment knobs to the #1 on ribbon supply & rewind spindles. (Factory default tension is #1) Ribbon Rewind Spindle Ribbon Supply Spindle Tension # 1 Tension # 1 For 3”... - Page 41 For 2” width ribbon If the ribbon width is 2”, adjust both ribbon tension adjustment knobs to the #3 on ribbon supply & rewind spindles. Ribbon Rewind Spindle Ribbon Supply Spindle Tension # 3 Tension # 3 - 32 -...
-
Page 42: Diagnostic Tool
6. Diagnostic Tool Wasp Barcode’s Diagnostic Utility is an integrated tool incorporating features that enable you to explore a printer’s settings/status; change a printer’s settings; download graphics, fonts and firmware; create a printer bitmap font; and send additional commands to a printer. With the aid of this powerful tool, you can review printer status and setting in an instant, which makes it much easier to troubleshoot problems and other issues. -
Page 43: Printer Function
6.2 Printer Function 1. Connect the printer and computer with a cable. 2. Select the PC interface connected with bar code printer. USB cable Other cable The default interface setting is USB interface. If USB interface is connected with printer, no other settings need to be changed in the interface field. -
Page 44: Setting Ethernet By Diagnostic Tool
6.3 Setting Ethernet by Diagnostic Tool The Diagnostic Utility is enclosed in the CD disk \Utilities directory. Users can use Diagnostic Tool to setup the Ethernet by RS-232, USB and Ethernet interfaces. The following contents will instruct users how to configure the Ethernet by these three interfaces. -
Page 45: Using Rs-232 Interface To Setup Ethernet Interface
6.3.2 Using RS-232 interface to setup Ethernet interface 1. Connect the computer and the printer with a RS-232 cable. 2. Turn on the printer power. 3. Start the Diagnostic Utility by double clicks on the icon. 4. Select “COM” as interface then click on the “Setup” button to setup the serial port baud rate, parity check, data bits, stop bit and flow control parameters. -
Page 46: Using Ethernet Interface To Setup Ethernet Interface
6.3.3 Using Ethernet interface to setup Ethernet interface 1. Connect the computer and the printer to the LAN. 2. Turn on the printer power. 3. Start the Diagnostic Utility by double clicks on the icon. 4. Select “Ethernet” as the interface then click on the “Setup” button to setup the IP address, subnet mask and gateway for the on board Ethernet. - Page 47 Users can also change the “Printer Name” by another model name in this fields then click “Set Printer Name” to take effect this change. Note: After clicking the “Set Printer Name” or “Set IP” button, printer will reset to take effect the settings.
-
Page 48: Lcd Menu Function
7. LCD Menu Function 7.1 Enter the Menu * By touch display: Tap the “Menu” icon on LCD main page to enter the menu. * By Keys: Use navigational keys to select the “Menu” icon (be marked in green) and press the left soft key button (means ) to enter the menu. -
Page 49: Menu Overview
7.2 Menu Overview There are 6 categories for the menu. You can easy to set the settings of printer without connecting the computer. Please refer to following sections for more details. This “Setting” category can set up the printer settings for WPL & ZPL2. This "Sensor"... -
Page 50: Setting
7.3 Setting Tap the “Command Set” item on LCD to switch the WPL and ZPL2. Or select the “Command Set” item by navigational key and press right soft key to switch the WPL and ZPL2. 7.3.1 WPL This “WPL” category can set up the printer settings for WPL. Speed None Density... - Page 51 The direction setting value is either 1 or 0. Use this item to setup the printout direction. DIRECTION 0 DIRECTION 1 Direction This item is used to set the print mode. There are 6 modes as below, Printer Mode Description None Next label top of form is aligned to the print head burn line location.
-
Page 52: Zpl2
7.3.2 ZPL2 This “ZPL2” category can set up the printer settings for ZPL2. Darkness Print Speed Tear Off Tear Off Peeler Off Print Mode Cutter Print Width Rewind List Fonts List Images List Formats List Setup Control Prefix Format Prefix Feed Delimiter Char Menu... - Page 53 This item is used to fine tune media stop location. Available Tear Off 0 dot setting value range is from -120~120 dots. This item is used to set the print mode. There are 3 modes as below, Printer Mode Description Print mode Tear Off Next label top of form is aligned to the print...
- Page 54 you would like to scale. Note: If printing from enclosed software/driver, the software/driver will send out the commands, which will overwrite the settings set from the panel. - 45 -...
-
Page 55: Sensor
Sensor This option is used to calibrate the selected sensor. We recommend calibrate the sensor before printing when changing the media. Black Mark Auto Calibration Continuous Preprint Black Mark Manual Setup Continuous Menu Sensor Media Capacity Auto Threshold Detect Fixed Maximum Length Advanced... -
Page 56: Interface
Interface This option is used to set the printer interface settings. Serial Ethernet Menu Interface Wi-Fi Bluetooth 7.5.1 Serial Comm. This option is used to set the printer RS-232 settings. 1200 bps 2400 bps 4800 bps 9600 bps Baud Rate 19200 bps 38400 bps 57600 bps... -
Page 57: Ethernet
7.5.2 Ethernet Use this menu to configure internal Ethernet configuration check the printer’s Ethernet module status, and reset the Ethernet module. Status Menu Interface Ethernet Config Item Description Default Use this menu to check the Ethernet IP address and Status MAC setting status. -
Page 58: Wi-Fi
7.5.3 Wi-Fi This option is used to set the printer Wi-Fi settings. Status Config Menu Interface Wi-Fi SSID Security Password Item Description Default Use this menu to check the Wi-Fi IP address, MAC Status setting status…. DHCP: This item is used to ON or OFF the DHCP (Dynamic Host Configuration Protocol) network protocol. -
Page 59: Advanced
7.6 Advanced Language Printer Information Initialization Display Brightness Date Format Touchscreen Calibration Date Date & Time Time Format Time Menu Advanced Menu Lock Menu Password Security MyMenu Lock Cutter Type MyMenu Password Media Low Warning Ribbon Low Warning Warning Reset Counter Printer Head Care Interval Contact Us... - Page 60 This item is used to check print head status and to set the settings for print head care. Item Description This item is used to enable/disable the print head clean warning. If enable this feature, once print head has been Warning reached the setting mileage then the warning icon will be shown on printer UI...
-
Page 61: File Manager
7.7 File Manager This feature is used to check the printer available memory, show the files list, delete the files or run the files that saved in the printer DRAM/Flash/Card memory. DRAM Menu File Manager FLASH CARD - 52 -... -
Page 62: Diagnostic
7.8 Diagnostic Print Config. Dump Mode Menu Diagnostic Print Head Diag Gap Display Diag Black Mark Sensor Diag Ribbon End Diag Media Item Description This feature is used to print current printer configuration to the label. On the configuration printout, there is a print head test pattern, which is useful for checking if there is any dot damage on the print head heater element. - Page 63 Numbers of download files Total & available memory space Print head check pattern Note: Checking dot damage requires 4” wide paper width. Captures the data from the communications port and prints out the data received by printer. In the dump mode, all characters will be printed in 2 columns.
-
Page 64: Favorites
7.9 Favorites This feature can create customized menu list. You can organize the commonly used setting options in “Favorites”. Get organized “Favorites” list Touch and hold a favorite option item, unit “Join Favorites” setting screen pops up. Tap “Yes” to add this setting option item to “Favorites”... -
Page 65: Troubleshooting
8 Troubleshooting The following guide lists the most common problems that may be encountered when operating this bar code printer. If the printer still does not function after all suggested solutions have been invoked, please contact the Customer Service Department of your purchased reseller or distributor for assistance. - Page 66 * SD card is damaged. * Use the supported capacity SD card. * SD card doesn’t insert * Insert the SD card again. SD card is unable to use correctly. * The supported SD card spec and the * Use the non-approved SD approved SD card manufacturers, card manufacturer.
- Page 67 * Calibrate the sensor sensitivity again. * Set the correct label size and gap size. * Press [MENU] [SELECT] x3[DOWN]x6 [SELECT] to fine tune the parameter of Shift Y. * If using the software BarTender, please set the vertical offset in the driver. * Media sensor sensitivity is not set properly.
-
Page 68: Maintenance
9 Maintenance This session presents the clean tools and methods to maintain your printer. 1. Please use one of following material to clean the printer. Cotton swab Lint-free cloth Vacuum / Blower brush 100% Ethanol or Isopropyl Alcohol 2. -
Page 69: Revise History
Revise History Date Content Editor 2016/06/22 Modify agency compliance section Camille 2016/08/19 Add a note for Energy star (power saver mode) Camille 2016/08/24 Modify button color from black to gray Camille 2016/11/10 Modify LCD feature name from “MyMenu” to “Favorites” Camille 2016/12/20 Modify chapter 1.2.2 (add internal Bluetooth) - Page 71 Corporate Headquarters 1400 10th St Plano, TX 75074 TEL: 214-547-4100 Website: www.waspbarcode.com E-mail: support.waspbarcode.com Wasp Barcode Technologies...
Need help?
Do you have a question about the WPL618 Series and is the answer not in the manual?
Questions and answers