Table of Contents
Advertisement
Quick Links
Advertisement
Table of Contents

Related Manuals for Wasp WWS150i


Summary of Contents for Wasp WWS150i
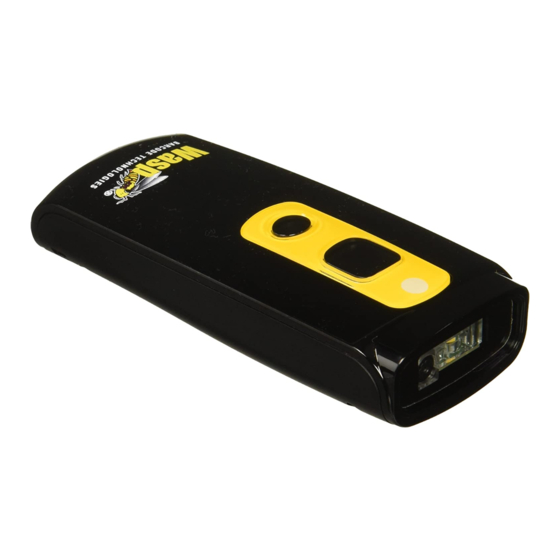
- Page 1 WWS150i...
-
Page 2: Table Of Contents
Introduction Chapter 2 Barcode Symbologies Chapter 3 Quick Start Chapter 4 WWS150i Setup & Configuration 1. Setup & Configuration 2. Factory Default and Autosense Stand Mode 3. Connection and Scan Options 4. Start and Stop Pin 5. Interface Settings 6. Memory Mode 10-12 7. -
Page 3: Chapter 1 Introduction
CCD reader is the easiest to use and most cost effective for the typical business user. The Wasp WWS150i Scanner is an extended distance scanner with a depth of reading of up to one foot depending on the mil size of the barcode. -
Page 4: Barcode Symbologies
(greater than 0.020 in./0.50 mm). Medium and low densities are the most common since these are the easiest to read (scan) with nearly all scanning devices. The Wasp WWS150i scanner can read barcodes with X-dimensions as low as 5 mils (0.005 in/0.13mm). -
Page 5: Quick Start
5 Check the “My device is setup and ready to be found.” and click Next. The scanner will show up in the list of Bluetooth devices found. Select the Wasp Barcode Bluetooth Keyboard and click Next. If Wasp Barcode Bluetooth Keyboard does not show up in the available devices please check the following: 1. - Page 6 (XP Instructions, cont.) The Complete Wizard screen appears. Just click Finish to complete. Once the wizard is complete the scanner will show up as a Wasp Keyboard. Click OK to close the screen. You are now ready to use the WWS150i.
-
Page 7: Chapter 4 Wws150I Setup & Configuration
Use the Factory Default barcode to reset the scanner to the Default settings. Factory Default Autosense Stand Mode Scan this Autosense Stand Mode barcode to enable the hands-free autosense feature of the WWS150i Scanner. If you desire to turn this mode “off,” please scan the default barcode above. Autosense Flash Mode Enable... -
Page 8: Connection And Scan Options
Chapter 4 CONNECTION AND SCAN OPTIONS Check Version Scan the Check Version barcode to verify your current firmware’s version number. Check Version Link Quality On/Off The Link Quality affects the transmission quality. When Link Quality is turned on (default setting), data transfer is more secure, but slower. -
Page 9: Start And Stop Pin
Chapter 4 CONNECTION AND SCAN OPTIONS Start and Stop Pin Use the Start and Stop Pin barcodes when you are prompted for a password during Bluetooth pairing. To use this setting: 1. When prompted for a password, scan the Start Pin barcode 2. -
Page 10: Interface Settings
Chapter 4 INTERFACE SETTINGS Scan any one of the barcodes below to reset the scanner back to the desired interface: *To retrieve stored data, connect the scanner to the host with the cable, access removable storage device “Miniscan” from which you may open or copy the file “Barcode.txt”... - Page 11 GROUP-13 WIRELESS SCANNER SETTINGS Chapter 4 INTERFACE SETTINGS AND MEMORY MODE INTERFACE . E043$ Interface Settings BT HID Scan any one of the barcodes below to reset the scanner back to the desired interface: Emulates a Bluetooth HID keyboard that transmits each barcode data to the host after decode.
-
Page 12: Memory Mode
Chapter 4 MEMORY MODE MEMORY MODE MEMORY MODE MEMORY MODE MEMORY MODE . R006$ Memory Mode *.R006$* . R006$ SET DATE DATA FORMAT *.R006$* SET DATE DATA FORMAT The default Data Format is <Date> Example: To set Date to 2014-08-01 (Year-Month-Day): below are the codes for each item 1. - Page 13 Chapter 4 MEMORY MODE MEMORY MODE MEMORY MODE . R008$ *.R008$* DATE FORMAT TIME FORMAT The default Date Format is DD/MM/YYYY (Code = 09). Below is full list of available formats and their setup codes: The default Date Format is DD/MM/YYYY (Code = 09), below The default Time Format is HH Code Format is full list of available formats and their setup codes:...
-
Page 14: Beep Settings
Chapter 4 BEEP SETTINGS The ‘Beep and Delay’ configuration supports the general control options for the Wasp WWS150i Scanner. These options include the volume, intercharacter delay, and interblock delay. Interblock delay (see page 13) is the minimum time interval between two adjacent scans. If the processing speed of your host device is slower than your scanning speed, a longer interblock delay may ensure the data integrity. -
Page 15: Ios Hotkey
Chapter 4 ENABLE IOS HOTKEY/SECURE SIMPLE PAIRING Enable/Disable iOS Hotkey Use these barcodes to enable or disable the iOS hotkey on your device. Enable iOS Hotkey Disable iOS Hotkey * *Default... -
Page 16: Set Scanner 1D
3. Scan up to 16 characters from the ASCII table on pp 28-31. 4. Set Scanner ID 5. Bluetooth HID Note: Sometimes only 8 characters of a longer name are seen when pairing, e.g. “Wasp Bar” instead of “Wasp Barcode”. Clear Scanner ID procedure: 1. Clear Scanner ID 2. -
Page 17: Beep Delay And Caps Lock
Chapter 4 INTERBLOCK/INTERCHARACTER DELAY AND CAPS LOCK Interblock Delay 0ms * 10ms 50ms 100ms 200ms 500ms Intercharacter Delay 140us * 500us 16ms • Caps Lock Auto (For PC XT/AT only): In Auto mode, the scanner will keep track of the Caps Lock status automatically. For some PCs, the scanning performance may be compromised because of the auto tracing. -
Page 18: Language And Preamble/Postamble
Chapter 4 KEYBOARDLANGUAGE AND PREAMBLE/POSTAMBLE The ‘Keyboard Language’ setting controls the key codes for your keyboard’s language. German U.S. * French Spanish Italian The ‘Preamble/Postamble’ configuration is used to add a prefix or suffix set of characters to the barcode value. Up to 8 characters may be added for each option separately. -
Page 19: Terminator/Code Id
Chapter 4 TERMINATOR/CODE ID Terminator The ‘Terminator’ option is used to specify the end-of-text message and is primarily used to denote the end of the barcode value. CR * None Space CR + LF Code ID The ‘Code ID’ option sends a specific value when a particular barcode symbology is scanned. For example, if ‘Code ID’ is enabled and Code 39 is scanned, an “M”... -
Page 20: Enable/Disable Barcode Symbologies
Chapter 4 ENABLE/DISABLE BARCODE SYMBOLOGIES Enable Disable Enable All Disable All MSI Plessey MSI Plessey * Interleaved 2 of 5 * Interleaved 2 of 5 Code 128 * Code 128 Codabar * Codabar Code 39 * Code 39 UPC A * UPC A UPC E UPC E *... -
Page 21: Code 39 And Interleaved 2 Of 5 Settings
Chapter 4 CODE 39 AND INTERLEAVED 2 OF 5 SETTINGS Code 39 is variable length and is the most frequently used symbology in industrial barcode systems today. It is extensively used within the Department of Defense (DOD). The principal feature is to encode messages using the full alphanumeric character set. Standard Code 39 contains only 43 characters (0-9, A-Z, $, /, %, +, -, ., SPACE) and can be extended to a 128 character symbology (full ASCII) by combining one of the special characters (S, /, %, +) with a letter (A-Z) to form the characters that are not present in the standard Code 39 symbology. -
Page 22: Code 93 And Msi Plessey Settings
Chapter 4 CODE 93 AND MSI PLESSEY SETTINGS Code 93 encodes the full 128 ASCII character set using 9 modules arranged into 3 bars with adjacent spaces. Two of the characters are check characters. Code 93 is similar to Code 39 but encodes more characters per inch. Enable Code 93 Disable Code 93 * Minimum Length (6 *) -
Page 23: Code 128 And Ucc/Ean 128 Settings
Chapter 4 CODE 128 AND UCC/EAN 128 SETTINGS Code 128 is the most flexible of all the common linear symbologies. It supports alpha and numeric characters easily, has the highest number of characters per inch, and is variable length. See page 6 for information on setting the minimum and maximum lengths. Enable Code 128 * Minimum Length (5 *) Disable Code 128... -
Page 24: Codabar And Upc-A Settings
Chapter 4 CODABAR AND UPC-A SETTINGS Codabar is a variable length symbology capable of encoding six special alphanumeric characters, capital letters A through D, T, N, *, E, and all numeric digits. Codabar is one of the oldest barcode symbologies and is still used in some library applications. It should not be considered for new applications except under unusual circumstances. -
Page 25: Upc-A Supplement Settings / Upc-A To Ean-13/Upc-E Settings
Chapter 4 UPC-A SUPPLEMENT SETTINGS / UPC-A TO EAN-13/UPC-E SETTINGS This option enables the two and five digit supplements for the UPC and EAN/JAN barcode symbologies. 5 Digit Supplement 5 Digit Supplement Enable Disable * 2 Digit Supplement 2 Digit Supplement Enable Disable * Transmit if Present... -
Page 26: Upc-E Supplement/Ean-8 Settings
Chapter 4 UPC-E SUPPLEMENT/EAN-8 SETTINGS This option enables the two and five digit supplements for the UPC and EAN/JAN barcode symbologies. 5 Digit Supplement 5 Digit Supplement Enable Disable * 2 Digit Supplement 2 Digit Supplement Enable Disable * Transmit if Present Must Be Present * The EAN/JAN-8 is fixed length and is similar to the UPC-E code, but includes two more digits for the country code. -
Page 27: Ean-8 Supplemental And Ean-13 Settings
Chapter 4 EAN-8 SUPPLEMENTAL AND EAN-13 SETTINGS This option enables the two and five digit supplements for the UPC and EAN/JAN barcode symbologies. 5 Digit Supplement 5 Digit Supplement Enable Disable * 2 Digit Supplement 2 Digit Supplement Enable Disable * Transmit if Present Must Be Present * The EAN/JAN-13 (European Article Number/Japanese Article Number) is fixed length and is similar to the UPC-A symbology, but... -
Page 28: Ean-13 Supplemental Settings
Chapter 4 EAN-13 SUPPLEMENTAL SETTINGS This option enables the two and five digit supplements for the UPC and EAN/JAN barcode symbologies. 5 Digit Supplement 5 Digit Supplement Enable Disable * 2 Digit Supplement 2 Digit Supplement Enable Disable * Transmit if Present Must Be Present * *Default... -
Page 29: Chapter 5 Bluetooth Settings
Connect and Disconnect GROUP-24 Scan the “Set Connection” barcode before pairing the WWS150i Scanner and the internal Bluetooth adaptor. Scanner LED light will turn blue when attempting to connect/reconnect via Bluetooth, LED will then turn green and blink to indicate successful pairing. -
Page 30: Appendix A Barcode Test Symbols
Appendix A BARCODE TEST SYMBOLS Note: Make sure that the appropriate barcode symbology is configured properly and enabled before trying to scan. Use the ‘Barcode Symbologies’ configuration beginning on page 16 to enable specific symbologies. Code 39* UPC-A* UPC-A Code 93 w/5 digit supplement UPC-A Interleaved 2 of 5 *... - Page 31 Appendix A BARCODE TEST SYMBOLS EAN/JAN-13* EAN/JAN-13 w/5 digit supplement EAN/JAN-13 w/2 digit supplement EAN/JAN-8* EAN/JAN-8 w/5 digit supplement EAN/JAN-8 w/2 digit supplement *Default...
-
Page 32: Appendix Bascii Table
Appendix B ASCII TABLE Use this ASCII Table to add preamble and postamble characters to your barcode value. Please refer to the appropriate configuration section for the number of characters that can be configured. - Page 33 Appendix B ASCII TABLE “ & < ‘ >...
- Page 34 Appendix B ASCII TABLE...
- Page 35 Appendix B ASCII TABLE...
-
Page 36: Appendix C Function Codes For Pc
Appendix C FUNCTION CODES FOR PC Cursor Right Cursor Up Cursor Left Cursor Down Back Tab Page Up Page Down Home Enter Back Space... -
Page 37: Appendix D Technical Specifications
Appendix D TECHNICAL SPECIFICATIONS Light Source : 525nm visible green LED, 635nm visible red LED Optic & Scan Rate: 200 scans/sec Performance Resolution: 4mil/0.1mm (3mil readable) Scan Angle: 40° Print Contrast: 30% Memory: 2MB D.O.F. (Environment: 800 lux): 4 Mil Code39: 60 ~ 80mm, 5 Mil Code39: 50 ~ 90mm, 10 Mil Code39: 60 ~ 180mm, 15 Mil Code39: 60 ~ 250mm, 13 Mil UPC/EAN: 60 ~ 180mm Dimension: 1.67in W x 4.02 L x 0.85 H (W42.5xL102xH21.5 mm) Physical... -
Page 38: Appendix E Warranty Information
This warranty is limited to repair or replacement at Wasp Barcode Technologies option, with reasonable promptness after being notified. These provisions do not prolong the original warranty term for any product which has been repaired or replaced by Wasp Barcode Technologies. -
Page 39: Faq
Appendix E Q: How do I change the terminator to a Tab? A: Scan the “Tab” barcode on page 18. Q: How do I remove the terminator? A: Scan the “None” barcode on page 18. Q: How do I enable the Full ASCII character set for the Code 39 barcode symbology? A: Scan the “Enable Code 39 Full ASCII”... -
Page 40: Product Support
Appendix E PRODUCT SUPPORT If you experience any problems with the Wasp WWS150i Scanner that you are unable to resolve, call for technical assistance at (214) 547-4100 ext 2, Monday through Friday, 8:00 AM - 5:00 PM Central Standard Time.
Need help?
Do you have a question about the WWS150i and is the answer not in the manual?
Questions and answers