Table of Contents
Advertisement
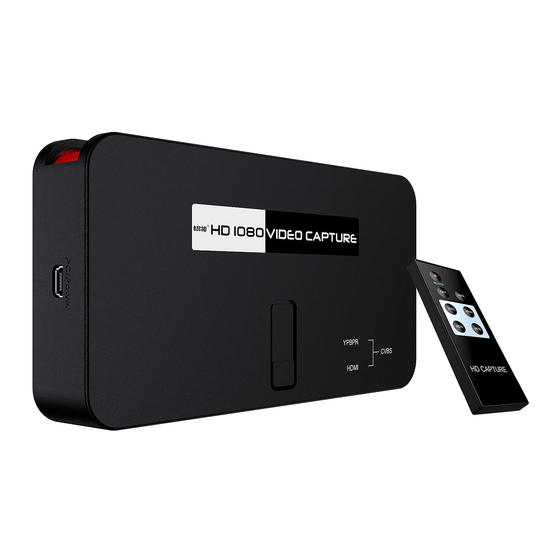
HD Video Capture
Quick Start Guide
Thanks for purchasing ezcap284 HD Video Capture. The following guides you how to set up. Hope
this device will bring you nice digital experience.
With this ezcap284 HD Video Capture, you can capture up to 1080P video from HDMI ,Ypbpr
(component) or composite port, such as blue ray, set-top-box, computer, game box, VHS, etc. With
remote control, can set input signal manually, recording quality, or capture a still image by
SNAPSHOT button.
Features/ports and buttons:
1. PWR—DC 5V power supply.
2. HDMI IN—HDMI input.
3. AV IN —Ypbpr component or composite input through adapter cable
4. MIC—For connect a microphone and record voice comments when play game.
5. LINE OUT—Audio output.
6. HDMI OUT—HDMI output, so can connect to monitor to pass through display the input video.
7. HOST—Plug a USB flash (or USB HDD) to save record video.
8. SD—Plug a SD card to save record video.
9. Record button and LED indicator—Press button to record/stop record, the indicator shows the work
status
Advertisement
Table of Contents

Related Manuals for EzCAP 284


Summary of Contents for EzCAP 284
- Page 1 HD Video Capture Quick Start Guide Thanks for purchasing ezcap284 HD Video Capture. The following guides you how to set up. Hope this device will bring you nice digital experience. With this ezcap284 HD Video Capture, you can capture up to 1080P video from HDMI ,Ypbpr (component) or composite port, such as blue ray, set-top-box, computer, game box, VHS, etc.
- Page 2 Connections: Ezcap284 have 3 input modes: HDMI, component, composite. It will automatically recognize the input video source if only connect one source. You can also use remote controller to choose the input source if you connect 2 or 3 video source same time. Connect with HDMI input source: 1, Connect power with DC adaptor 2, Plug an USB disk or a SD card (Note: ezcap284 will only recognize the first connected one if you...
- Page 3 recording. Some HDMI video sources may have HDCP protection; you cannot get the pass through video and record it. PS3 need to with HDMI Splitter to decode HDCP, if not, will can not working. And for PS4, if not with HDMI Splitter, need to disabled HDCP option (check the steps as below).
- Page 4 1, Connect power with DC adaptor 2, Use the adapter cable in the package to connect component (red, blue, green), just don’t mix the red with the audio cable (the audio cable red and white will be separated with component) 3, With HDMI cable connect to monitor 4, Plug in an USB drive.
- Page 5 Connect with composite video source (such as PS2, VHS, V8, Hi8, Etc): 1, Connect power with DC adaptor 2, Connect the composite (yellow cable and red white audio cable) to your video source with the adapter cable come with the package. 3, With HDMI cable connect to monitor 4, Plug in an USB drive.
- Page 6 Remote controller REC/STOP—Start and stop recording. 720P—Change record quality to 720P, only effect when Input source is more than 720P 1080P—Change record quality to 1080P, only effect when input source is 1080P CVBS/YPbPr/HDMI—Select input source. SNAPSHOT—To capture one still image with one press Won’t work during recording.
- Page 7 There are several reasons for no actions when press record button, you may need check: 1, The input video source disconnected. 2, The USB drive is out of memory. 3, The format for USB drive is not suitable, e.g. exFAT. Ezcap284 support FAT, FAT32, and NTFS. 4, The USB drive is not connected well.
- Page 8 local date and time with following format (for 2014 July 31 11:00:00): /:2014 /:31 /:11 /:00 /:00 Should be exactly same format as it (first line be year, second line be month..etc, end with /:0 , each line with start “/:”), and save it. Then copy the rtc_setup file to a SD card or USB flash, connect to ezcap284 then power on, then the time is set ready.
- Page 9 2, You can cut a video to two or more: 3, Click “Produce” after editing, you can create DVD or upload video to YouTube:...
-
Page 10: Specifications
4, Please click “Create file” to create multiple files for different devices, such as apple, PSP, mobile phone, etc: Specifications: Connections Interface USB 2.0 Host, SD Card Digital: HDMI Video Input Analog: Component Video, Composite Video Digital: HDMI Audio Input Analog: RCA L/R, 3.5mm Micro Phone In... -
Page 11: Package Contents
Note: Microphone without pass through for HDMI input Digital: HDMI (Pass-through from HDMI, component or Video Output composite) Digital: HDMI (Pass-through from HDMI, L/R) Audio Output Analog: 3.5mm Stereo (Pass-through from HDMI or Audio RCA L/R Input) Package Contents Device HD Video Capture AV adapter cable, USB DC adapter, USB Cable for connecting Others... - Page 12 Record Format Video: MP4, Audio: AAC Stereo Record Quality Max: 18Mbps@1080P 30fps Record File Max: 2GB / Per File Record Place Max: 140MB / Minute, 8.4GB / Hour Power Supply DC 5V / 2A with Mini USB port Applications Software Arcsoft Showbiz Timeline / Storyboard edit, Split / Divide Scenes, Multi Trim Video Editing...
- Page 13 Please make sure your USB drive or USB HDD is the right format – it doesn’t support exFAT format. Please format them in your computer, and FAT32 is the best choice. Please use “safety remove” option to remove your USB drive, don’t just plug out directly without “safety remove” option.
- Page 14 Please right click Sound icon, and select Playback device, and set EZCAP28X to be default device. You will get recording video without audio if you don’t set this. 6, Why can’t record audio from PS3 by HDMI port?
-
Page 15: Driver Installation
System requirement: CPU: core i5 or above, RAM: 4GB or above, OS: windows 7, 8, 10. 1, Driver Installation: Use USB cable connect ezcap HD Video Capture device to computer, a new hardware will show up in device manager: Double click “DrvInstall”... - Page 16 Click “Next’ of the pop up window, then click “Finish”. Device then will be installed successful: Notice:...
- Page 17 Caused by Availability of SHA-2 Code signing Support, maybe driver installation has the Windows7/64bit OS Windows6.1-KB3033929-x64.msu . Find “ ” in problem for software CD, and run it to solve the problem according to Microsoft Security Advisory 3033929. If you installed the wrong drivers and can’t re-install the right drivers, please run the “DrvUninstall.exe”...
- Page 18 Click “OK”. Connect the video source to ezcap deivce. Choose “IT9910 Capture Filter (HD)” in Device select box, then click “OK”, you may see the video of your source now (for HDMI input).
- Page 19 You need do following setting if your don’t connect HDMI input source: Click“ConfigureCrossbar”. Choose from the input select box “0: Video ParallelDigital In” is for HDMI input. “1: Video YRYBY In” is for Component Video (YPbPr) input. “3: Video Composite In” is for Composite Video (CVBS) input.
- Page 20 Normally you need to restart OBS Studio after change the input source, then will show up the video. 4, Video Recording: After above setting and show up the video, just simply click”Start Recording” to record video, and click “Stop” to stop recording video. Check the recorded documents:...
- Page 21 You can set the record resolutions: Set the format and save path here (settings—Output---Recording):...
- Page 22 You can record your comment by you microphone of computer with video: Settings – Audio - Mic/Auxiliary audio Device, choose Default, then click “OK”. On some computer, you may found the recording video no sound, do following settings to fix: Set the Audio - Sample Rate to 44.1khz,then “OK”...
-
Page 23: Video Streaming
Set the Volume of Video Capture Device to 80% at Advanced Audio Properties 5, Video Streaming Go Setting - Stream, set the Service by Choose the select box:... - Page 24 You can choose “Custom Stream Server” if your stream service is not in the list above: Type the URL and Stream key of your server:...
- Page 25 Simply click “Start Stream”, now your video is streaming:...
- Page 26 高清视频采集盒 使用说明书 非常感谢您购买我司研发生产的 ezcap284 高清视频采集盒,下述内容详细说明如何使用和设置该产 品,希望这款产品给你带来美好的使用体验! 使用 ezcap284 高清视频采集盒,你可以透过 AV、色差或 HDMI 借口,采集最高达 1080P 解析度的视 频文件,比如蓝光、机顶盒、游戏机、摄像机等。附带遥控器,可以手动选择输入信号源、录制视频质 量,或通过 SNAPSHOT 按键抓图。 外观、接口及按键:...
- Page 27 1. PWR—直流 5 伏 2 安 迷你 USB 电源接口 2. HDMI IN—HDMI 输入端口 3. AV IN —视频多用输入端口: 配合配备的视频多用线材 - 色差(红绿蓝)、AV(黄)、音频(红白) 4. MIC—麦克风输入端口,用于连接麦克风录制语音 5. LINE OUT—音频输出端口,用于连接耳机或音箱等 6. HDMI OUT—HDMI 输出端口,用于连接电视机或显示器来显示视频源影像 7. HOST—U 盘或 USB 移动硬盘端口,用于插入 U 盘或移动硬盘存储 录制文件 8. SD—SD 卡端口,用于插入 SD 卡存储录制文件 9.
- Page 28 1, 设备连接电源适配器 2, 插入 U 盘/移动硬盘或 SD 卡 注意:当你同时插入 U 盘和 SD 卡时,ezcap284 高清视频采集盒仅识别你第一个插入的设备。 3, 使用 HDMI 线材(请自行准备, 包装内不含任何 HDMI 线材)连接视频源 HDMI 输出到采集盒的 HDMI IN 接口。 4, 使用 HDMI 线材连接采集盒的 HDMI OUT 接口到电视机或显示屏的 HDMI 输入接口。 5, “LINE OUT” 音频输出端口用于连接耳机或音箱,如果你不需要则无需连接,因为 HDMI 输出已经包 含音频输出。...
- Page 29 设置:settings---System – 不勾选 “Enable HDCP” 选项 注意:消除 HDCP 选项仅仅支持游戏,而不支持蓝光 DVD 等其它光碟。 连接至色差视频源: 1, 设备连接电源适配器 2, 使用配备的视频多用线材和色差分量线(需自行购买,含红白音频线)连接至视频源之色差输出端口。 3, 使用 HDMI 线材连接高清视频采集盒的 HDMI OUT 接口到电视机或显示屏的 HDMI 输入接口。 4, 插入 U 盘或移动硬盘 5, “LINE OUT” 音频输出端口用于连接耳机或音箱,如果你不需要则无需连接,因为 HDMI 输出已经包 含音频输出。 6, “MIC”麦克风输入端口, 当你打游戏时,你可以连接你的麦克风来同时录制你的语音和游戏视频。...
- Page 30 如果不需要则无需连接。 注意: 色差分量为红绿蓝,左右声道音频为红白,请不要混淆这两根红色线材,多用线材的音频红 白是连在一起的,使用时请留意。 注意:与索尼 PS3 的连接使用,需要做如下设置: settings---Video output settings, 选择 “Component/D-Terminal” 色差端口 Video Output Settings – 确认 1080P 选项没有被勾选,否则一些游戏(比如 GT5)将无法录制。 连接至 AV 视频源:...
- Page 31 1, 设备连接电源适配器 2, 使用配备的视频多用线材和 AV 视频线(需自行购买,AV 线为黄色,含红白音频线)连接至视频源之 AV 输出端口。 3, 使用 HDMI 线材连接高清视频采集盒的 HDMI OUT 接口到电视机或显示屏的 HDMI 输入接口。 4, 插入 U 盘或移动硬盘 5, “LINE OUT” 音频输出端口用于连接耳机或音箱,如果你不需要则无需连接,因为 HDMI 输出已经包 含音频输出。 6, “MIC”麦克风输入端口, 当你打游戏时,你可以连接你的麦克风来同时录制你的语音和游戏视频。 如果不需要则无需连接。 遥控器 REC/STOP—开始录制 / 停止录制 720P / 1080P — 设定录制视频质量,仅针对输入源超过 720P 的有效。 CVBS/YPbPr/HDMI—选择输入视频源...
- Page 32 连接电源,蓝色电源(POWER)指示灯会亮 按下录制按键开始录制,红色录制(RECORD)指示灯会亮 输入或选择 HDMI 视频源,HDMI 绿色指示灯会亮 输入或选择色差分量视频源,YPBPR 绿色指示灯会亮 输入或选择 CVBS 视频源,HDMI 和 YPBPR 指示灯会同时亮 录制: 连接好后,你一定可以在电视或显示器上获得影像和声音,同时蓝色指示灯常亮,现在采集盒已经准备 好录制了。 录制非常简单,只要你轻轻按下录制按键,你看到蓝色指示灯变为粉色,这就代表已经开始录制了。 如果按下录制键,指示灯没有变化的话,或许有如下几种原因,请确认: 1, 输入的视频源没有连接好 2, U 盘、移动硬盘或 SD 卡容量已满 3, U 盘、 移动硬盘或 SD 卡的格式不适合, 比如 exFAT 格式。 采集盒支持 FAT、 FAT32 和 NTFS 格式。 4, U 盘、移动硬盘或...
- Page 33 存储设备格式为 FAT32 格式并再次尝试。 程序升级、文件名清零和文件时间设定: 1, 程序升级:因为一些原因你或许需要升级程序。 请将新的程序拷贝到 U 盘或 SD 卡内,将采集盒电 源拔掉,插上 U 盘或 SD 卡,再接上电源,这时指示灯将会闪烁七八秒, 并最终变成蓝色常亮,这时 表示软件升级成功。 2, 采集盒长时间使用后,你将会看到录制文件名的数值越来越大,比如 Encode_1080P_234。 如果 你觉得不太好管理,而想从 Encode_1080P_0 开始的话,请在采集盒接电前长按录制按键,并接上电 源,大概三秒后, 文件名将会清零。 3, 采集盒有 RTC 实时时钟功能,可以显示录制的实际时间,同时你也可以根据你当地的时间来设定。 你需要新建一个 TXT 文档,并命名为“rtc_setup”。 按照下述格式写下当地的日期和时间。(比如 2014 年 7 月 31 日 11 点 0 分 0 秒) /:2014 /:31 /:11...
- Page 34 1, 你可以将两个录制文件合并成一个文件,仅仅将需要合并的文件拖进软件界面即可。 2, 你可以将一个文件分割为两个或者更多。...
- Page 35 3, 完成编辑后点击 “Produce”制作,你可以存为你想要的任何格式的文件,或者上传到你的 YouTube 账户: 4, 点击 “Create file” 你可以将编辑好的视频文件保存为各种不同设备适合的文件格式, 比如苹果设备、 PSP 及其它。...
- Page 36 产品规格参数: 接口连接 界面 USB 2.0, SD 卡 数字: HDMI 视频输入 模拟: 色差分量,CVBS 视频 数字: HDMI 音频输入 模拟: RCA 左右声道,3.5mm 麦克风输入 注: HDMI 输入情况下,HDMI 输出没有麦克风信号输出 视频输出 数字: HDMI (通过 HDMI、色差分量或 AV 视频输入获得) 数字: HDMI (通过 HDMI 或色差和 AV 视频左右声道输入获得) 音频输出 模拟: 3.5mm 立体声 (通过 HDMI 或色差和 AV 视频左右声道输 入获得) 包装内容...
- Page 37 重量 净重 115 克 规格参数 U 盘、移动硬盘、SD 卡 存储媒介 注: 不支持 exFAT 格式 输入 / 输出: 720 x 480 (60p), 720 x 576 (50p), 1280 x 720p (50p), 1280 x 720p(60p), 1920 x 1080 (50i), 1920 x 1080 (60i), 1920 x 1080 (24p), 1920 x 1080 (25p), 1920 x 1080 (30p), 1920 x 1080 (50p), 1920 x 1080 (60p) 录制:...
- Page 38 内存 4 GB RAM 显卡 VGA card with support for DirectX 10.0c or above 常见问题汇总: 1, 为什么不能通过 HDMI 接口直接录制一些设备的视频,比如 PS3 和一些蓝光 DVD? 因为以上这些设备具有 HDCP 保护功能,你需要购买具有 HDCP 解码的 HDMI 分路器,或者直接 从这些设备的色差分量输出来录制视频。 当然,解码 HDCP 在一些国家和地区是非法的。 2, 为什么 ezcap284 高清录制采集盒无法录制视频? 第一步请确保你的显示器可以正常显示你需要录制的音视频。如果不行,请确认所有的线材连接, 确认 HDMI 信号是否有 HDCP 保护,比如以上第 2 点,如果有保护显示器无法显示视频。 如果是...
- Page 39 请右击电脑的扬声器图标选择属性或播放设备,并将 EZCAP28X 设备设定为默认播放设备。 如果 没有设定这一个,你录制的视频将会没有声音。 6, 为什么从 PS3 的 HDMI 录制视频发现文件没有声音?...
- Page 40 系列高清视频录制盒除了能独立录制高清视频外, 现在配合 OBS 软件, 可以在电脑上录制, 以及实现流媒体广播。 OBS 软件,是一款免费开源的软件,其强大的能力以及较低的资源占用率受到了很多玩家的喜欢, 是目前主流的一款直播软件,支持绝大部分的直播平台,境外的如 Twitch, YouTube, Bitbox, beam, Facebook Live 等等,国内的如斗鱼,战旗,熊猫 TV,虎牙,龙珠,等等。 配合 ezcap 高清采集卡,可以录制高清视频,且可以选择不同的格式,如 flv, ts, mp4,mov, 可以 设置录制不同的比特率,可以设置录制不同的分辨率,而且可以和电脑的麦克风进行混音录制等。 注:建议电脑 CPU i5 或以上,RAM 4G 以上, Windows 7,8,10。 一, 驱动安装: 1,使用 USB 线连接产品到电脑的 USB 口,在设备管理器会出现一个新的硬件:...
- Page 41 2,双击”DrvInstall”: 3,在出现的对话框,点击”Next” 4, 点击 “Finish”: 5, 安装成功了!
- Page 42 注: 如果你的电脑是 Windows7 64 位系统, 那因为微软安全漏洞的原因可能导致安装不成功提示未经 过数字签名。 请安装软件光盘里的“Windows6.1-KB3033929-x64.msu”程序即可解决。 如果你之前安装过错误的驱动而导致现在无法安装正确驱动,请双击 DrvUninstall.exe 以删除之 前已经安装的错误文件,然后就可以重新安装正确驱动了。 二,OBS STUDIO 软件安装: 从 下载 OBS STUDIO 安装文件,并按提示安装即可。 https://obsproject.com/ 三,软件设定: 1, 打开 OBS STUDIO,在来源处点“+”: 2,点选“视频捕获设备”...
- Page 43 3,点击“确定” 4,将视频源接入 ezcap 高清采集盒,设备框里选择“IT9910 Capture Filter (HD)”稍等片刻,即可预览 到输入的视频了(如果是接入的 HDMI 输入的话) : 5,若接入的不是 HDMI 视频,则需点选“配置 Crossbar”...
- Page 44 6, 选择对应接入的视频然后“确定”,通常情况下改选输入源后需要重新启动软件后才能预览视频。 0: Video ParallelDigital In 对应 HDMI 信号输入; 1:YRYBY In 对应色差分量信号输入(红绿蓝三色端子); 3:Video Composite In 对应复合同步视频信号输入(CVBS,AV,黄色端子) 四,视频录制: 1, 如上视频出来后,可以直接点“开始录制”就可以录制视频啦:...
- Page 45 2, 录制后点击“显示录像”就可以查看录制的视频文件了: 3, 录下来的视频都在这里: 4, 录制前你可以选择自己想要的录制文件格式: 5, 在“输出”-“录像”里,我们看到各种设定,包括录像路径(如果默认的 C 盘空间不足可以改到其他的 磁盘) 6, 可以设置各 种录像格式:...
- Page 46 7, 可以设置录制视频的同时与电脑的麦克风输入进行混音,在音频设置里 麦克风选框,点选电脑的 麦克风: 8, 选择正确的话可以在混音器下看到麦克风, 且它的音量进度条会根据周围的音量在变化, 如果没有, 则需要重新设置或检查麦克风接入。 9, 可以设置录制分辨率:...
- Page 47 10, 有些情况下部分电脑会有录下的视频没有声音,做如下设定即可,在设定—音频下设置采样率为 44.1khz, 设置确定后需重启启动软件: 11, 点“混音器”,在“高级音频属性”将“视频捕获设备”的值设为 80%:...
- Page 48 五,视频串流: 经过如上的各种设定,串流-这个最强大的功能反而很简单的操作就可以实现了: 1,在设置—串流的默认设置里如果有自己使用的平台,选择它,然后选择服务器输入流密钥: 2, 在国内没有使用上述平台的,选择自定义流媒体服务器,然后输入 URL 和流密钥: 3, 服 务 器 的 URL 和 流 密 钥 , 在 申 请 直 播 后 自 己 的 后 台 可 以 看 到 , 如 斗 鱼 的 : 4, 然后就可以直播啦!直接点选“开始串流”即可: 5,...
- Page 49 Ver 284_3.2...
Need help?
Do you have a question about the 284 and is the answer not in the manual?
Questions and answers