Table of Contents
Advertisement
Available languages
Available languages
Quick Links
Advertisement
Table of Contents

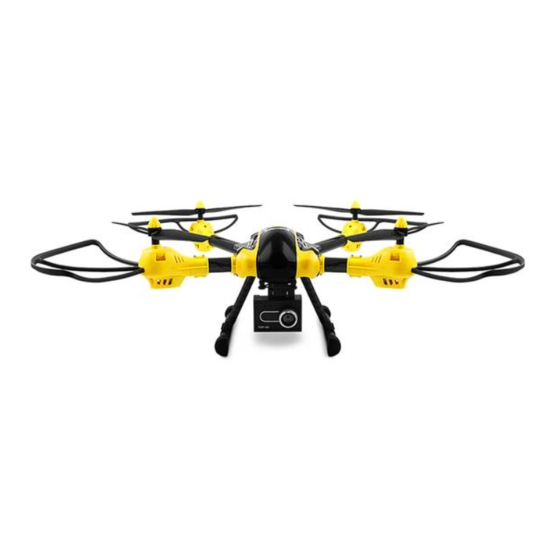
Related Manuals for Overmax X-Bee Drone 7.1


Summary of Contents for Overmax X-Bee Drone 7.1
-
Page 2: Safety Notes
1. SAFETY NOTES ** The product is designed for people aged 14 and up** • The users under 18 years of age can operate the product under adult supervision only. We suggest those, who are just getting started to operate drones, to contact a person with more experience in this field. •... - Page 3 2. CONTROLLER (TRANSMITTER) DIAGRAM Back Home button Speed mode button Start / landing button Photo / video button (press and hold for 3 seconds to stop the engines) Camera navigation button Throttle stick Direction control stick Forward / backward migration Right / left migration key Right / left migration key Lights button...
-
Page 4: Battery Charging
4. BATTERY CHARGING Use the included charger to charge the battery of the drone. ** Use ONLY the supplied charger for charging. Battery charging should always be done under adult supervision. LED indicator Red and green - on Red - on Charging completed Charging... - Page 5 Place battery drone's battery Turn your X-Bee Drone 7.1 on using the switch compartment and connect the battery plug to the located on the upper side of the drone. The drone’s battery slot. Close the cover and tighten LEDs start to blink.
-
Page 6: Flight Control
6. FLIGHT CONTROL Press the start/landing button to start the engines. Press the same button to land. Auto-landing can be used only if the drone is at a height of less than 20 meters from the ground. Using the above at a height of 20 meters, threatening drone fall from a considerable height and its damage. -
Page 7: Headless Mode
360-degree stunts When you press the Flip mode button the controller emits a beep sound indicating that the drone is in 3D flip mode. When in 3D flip mode, move the direction stick forward, backward, left or right to flip the drone in the chosen direction. -
Page 8: Taking Pictures And Shooting Videos
8. BACK HOME MODE Before you start to fly the drone must be calibrated. During the calibration the device saves the starting (home) position. Then, once you press the "Back home" button, the drone starts to fly back towards the starting point regardless of its current position and location. - Page 9 Polski...
- Page 10 1. INFORMACJE ODNOŚNIE BEZPIECZEŃSTWA UŻYTKOWANIA ** Produkt przeznaczony jest dla osób powyżej 14 roku życia** • Obsługa produktu przez użytkowników poniżej 18 roku życia powinna odbywać się wyłącznie pod nadzorem osób dorosłych.Tym, którzy dopiero zaczynają przygodę z pilotowaniem dronów, sugerujemy kontakt z osobą o większym doświadczeniu w tej dziedzinie.
- Page 11 2. SCHEMAT KONTROLERA (NADAJNIKA) Przycisk zmiany prędkości Przycisk Back Home Przycisk startu/lądowania Przycisk zdjęcia/wiedo (przytrzymaj 3 sekundy aby zatrzymać silniki) Przycisk sterowania kamerą Drążek obrotów silnika I Drążek kierunków rotacji Przycisk lotu do przodu/do tyłu Przycisk lotu w lewo / w Przycisk obrotów w lewo / w prawo prawo Przycisk podświetlenia...
-
Page 12: Ładowanie Akumulatorów
4. ŁADOWANIE AKUMULATORÓW Użyj załączonej do zestawu ładowarki, aby naładować akumulator drona. ** Do ładowania akumulatorów drona należy używać WYŁĄCZNIE ładowarki załączonej w zestawie. Ładowanie akumulatora powinno odbywać się zawsze pod nadzorem osoby dorosłej. Wskaźnik LED Czerwony i zielony - świeci Czerwony –... - Page 13 Krok 3 Krok 4 Odkręć śrubkę i otwórz pokrywę baterii. Nstępnie Włącz X-Bee Drone 7.1 używając włącznika, umieść baterię w urządzeniu podłączając wtyczkę znajdującego się na górze urządzenia. Diody baterii do gniazda drona. Zamknij pokrywę LED zaczną migać. i przykręć śrubkę.
- Page 14 6. KONTROLA LOTU Aby uruchomić silniki, naciśnij przycisk startu/lądowania. Aby wylądować naciśnij ten sam przycisk. Funkcji auto-lądowania można użyć jedynie jeśli dron znajduję się na wysokości poniżej 20 metrów od ziemi. Użyci funkcji na wysokości powyżej 20 metrów, grozi upadkiem drona ze znacznej wysokości i jego uszkodzeniem. Aby wyłączyć...
- Page 15 Akrobacje 360 stopni Po naciśnięciu przycisku trybu akrobacji kontroler wyda sygnał dźwiękowy informujący o gotowości drona do wykonania obrotu o 360 stopni. W trybie tym, po przechyleniu drążka kierunków w lewo, w prawo, do przodu lub do tyłu, dron wykona w wybranym kierunku obrót o 360 stopni.
- Page 16 8. TRYB POWROTU DO MIEJSCA STARTU Przed startem należy skalibrować urządzenie. Podczas kalibracji dron zaprogramuje sobie miejsce do którego ma wrócić. Po naciśnięciu przycisku powrotu do miejsca startu (niezależnie od ustawienia drona w powietrzu) urządzenie zacznie lecieć w kierunku z którego wystartowało.
- Page 17 Romana...
- Page 18 1. NOTE DE SIGURANTA ** Produsul este realizat pentru persoanele in varsta de 14 ani sau mai mari** Le sugeram celor care sunt abia la inceput in utilizarea unei drone, sa contacteze o persoana cu experienta mai mare in acest domeniu. Utilizatorii sub 18 ani pot utiliza produsul doar sub supravegherea unui adult. Scopul notelor de siguranta este de a proteja produsul si utilizatorii sai, precum si trecatorii si proprietatea lor.
- Page 19 2. DIAGRAMA CONTROLOR (TRANSMITATOR) Buton revenire acasa Buton mod viteza Start / buton de aterizare Buton foto/video (apasati si tineti apasat 3 secunde pentru a opri motoarele) Buton camera Stick de acceleratie Stick de control al directiei Tasta migratie inainte/inapoi Tasta migratie Tasta migratie dreapta/stanga dreapta/stanga...
-
Page 20: Incarcarea Bateriei
4. INCARCAREA BATERIEI Utilizati incarcatorul furnizat pentru a incarca bateria dronei. ** Utilizati DOAR incarcatorul furnizat pentru incarcare. Incarcarea bateriilor ar trebui facuta sub supravegherea unui adult de fiecare data Indicator LED Rosu si verde - aprins Rosu - aprins Incarcare completa Incarcare... - Page 21 Utilizati o surubelnita pentru a deschide capacul bateriei. Plasati bateria compartimentul Porniti X-Bee Drone 7.1 utilizand comutatorul bateriei al dronei si conectati mufa bateriei la situat pe partea superioara a dronei. LED-urile slotul de baterie al dronei. Inchideti capacul si incep sa clipeasca.
- Page 22 6. CONTROLUL ZBORULUI Apasati butonul de start/aterizare pentru a porni motoarele. Apasati acelasi buton pentru aterizare. Auto-aterizarea poate fi utilizata numai in cazul in care drona se afla la o inaltime mai mica de 20 de metri de sol. Utilizand functia la o inaltime mai mare de 20 de metri, drona este in pericol sa cada de la o inaltime considerabila si sa sufere daune.
- Page 23 Cascadorii la 360 de grade Cand apasati butonul Mod Flip controlorul emite un semnal sonor indicand ca drona este in modul 3D flip. In modul 3D flip, mutati stick-ul de directie inainte, inapoi, stanga sau dreapta pentru a rostogoli drona in directia dorita Nota: Inainte de a incepe sa faceti cascadorii asigurati-va ca aveti suficient spatiu liber in zona.
- Page 24 8. MODUL “BACK HOME” Inainte de zbor, drona trebuie sa fie calibrata. In timpul calibrarii, dispozitivul memoreaza pozitia de pornire (acasa). Apoi, odata ce apasati butonul "Back home", drona incepe sa zboare inapoi catre punctul de start indiferent de pozitia si locatia curenta. Pentru a renunta la modul "Back home”...
- Page 25 Magyar...
-
Page 26: Biztonsági Figyelmeztetések
1. BIZTONSÁGI FIGYELMEZTETÉSEK ** A termék 14 éven felülieknek készült ** • Ha még nem tudja, hogy repül a készülék, kérjük, vegye fel a kapcsolatot olyan személlyel, aki tudja és mindig szülői felügyelet alatt használják a készüléket. 18 év alattiak mindig szülői felügyelet mellett használják a készüléket •... - Page 27 2. TÁVIRÁNYÍTÓ (TRANSMITTER) “Gyere haza” gomb Sebseség mód gomb Start / landoló gomb Kép / video gomb (tartsa nyomva 3 másodpercig a motor leállításához) Kamera navigációs gomb Gázkar Iránykar Előre / hátra vezérlő gomb Bal / jobb vezérlő gomb Bal / jobb vezérlő gomb Fény gomb Headless mód 3D flip gomb...
- Page 28 4. ELEMEK TÖLTÉSE Használja a mellékelt töltőt a drón elemeinek töltéséhez. ** CSAK a mellékelt töltőt használja a töltéshez. Az elemek töltését mindig szülői felügyelet alatt és gyermekektől távol kell végezni. LED jelzőfény Piros és zöld fény – világít Piros fény – világít Töltés befejeződött Töltés Töltési specifikációk...
- Page 29 Helyezze a drón sima és egyenletes felületre. hangjelzést fog adni, majd a drónnal való kapcsolat létrejöttét jelzi. A LED fények elkezdenek folyamatosan égni és az X-Bee Drone 7.1 kész a repülésre. Automatikus kalibrálás Váltson a „gyors” sebességmódba (3 mód/Mode 3). Tegye a drónt sima és egyenletes felületre. Mozgassa mindkettő...
- Page 30 6. REPÜLÉS IRÁNYÍTÁSA Nyomja meg a start/landolás gombot a motor elindításához. Nyomja meg újra ugyanazt a gombot a landoláshoz. Automatikus landolást csak akkor használja, ha a készülék kevesebb, mint 20 méterre van a talajtól. A 20 méteres magasság feletti magasságból a drón nagyon eshet és kár keletkezhet.
- Page 31 360-fokos mutatvány Nyomja meg a Flip mód gombot és a távirányító beep hangot fog kiadni, ami jelzi, hogy a drón 3D flip módban van. 3D flip módban mozgassa az iránykart előre, hátra, balra vagy jobbra és a drón a kiválasztott irányba repül. Megjegyzés: Mielőtt elkezdi mutatványokat csinálni, győződjön meg róla, hogy elegendő...
- Page 32 8. GYERE HAZA /BACK HOME/ MÓD A drón repülésének elkezdésekor, szükséges azt kalibrálni. Kalibráláskor a készülék elmenti a kiindulási (haza) pozícióját. Majd, ha megnyomja a „Gyere haza” gombot a drón elkezd visszafelé repülni a kiindulási helyéhez függetlenül az aktuális pozíciójától és helyétől. A „Gyere haza”...
-
Page 33: Declaration Of Conformity
Declaration of Conformity Product details For the following Product : Drone Model(s) : OV-X-BeeDrone 7.1 Declaration & Applicable standards We, BrandLine Group Sp. z o.o., hereby declare under our sole responsibility that the of the above referenced product complies the following directives: R&TTE Directive 1999/5/EC EMC Directive...
Need help?
Do you have a question about the X-Bee Drone 7.1 and is the answer not in the manual?
Questions and answers