Table of Contents
Advertisement
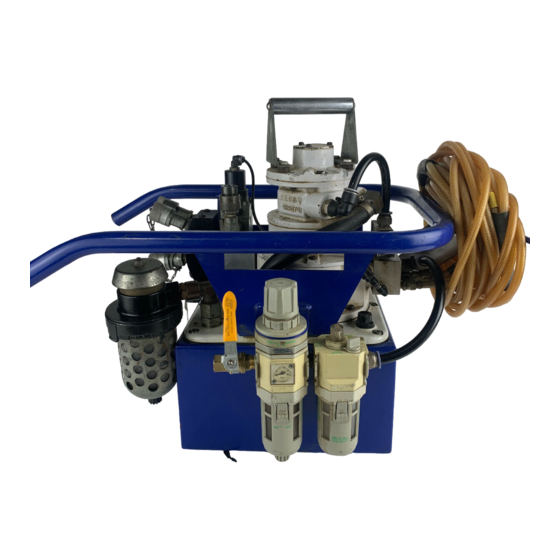
SPX Hydraulic Technologies
5885 11th Street
Rockford, IL 61109-3699 USA
powerteam.com
TWO-STAGE HYDRAULIC PUMP
3S-6224
8S-8033
110-000251E-*
4060 SERIES
4070
4080 SERIES
60014-AMP
60018-AMP
60208
61217
61217-50-220
61217-575
© 2014 SPX CORPORATION
Tech Services: +1 800 477 8326
Fax: +1 800 765 8326
Order Entry: +1 800 541 1418
Fax: +1 800 288 7031
AIR, ELECTRIC, OR GAS-POWERED
5,000 OR 10,000 PSI
Operating Instructions for:
65804
66027
66027-230
66105
100220
100220-230
AHC-10E
EP-720-G
EP-720-G-230
HWP*-JR
JT07192
NTW-HPE310
PA550
PA90A
PE55 SERIES
PE90 SERIES
PE120M
SERIES
PG55 SERIES
PLA6014
PLE6014
PLE6014-220
RSST-20
SST-200T
1
X1A1
X1E1
X1E1-TDS
X1E1C
X1E2
X1E3
Y26 SERIES
Y60 SERIES
Y70 SERIES
X1A1-PT
X1E1-PT
Form No. 102463
Rev. 9 February, 2015
Advertisement
Table of Contents

Related Manuals for SPX POWER TEAM 3S-6224


Summary of Contents for SPX POWER TEAM 3S-6224
- Page 1 Fax: +1 800 765 8326 Rockford, IL 61109-3699 USA Order Entry: +1 800 541 1418 powerteam.com Fax: +1 800 288 7031 AIR, ELECTRIC, OR GAS-POWERED TWO-STAGE HYDRAULIC PUMP 5,000 OR 10,000 PSI Operating Instructions for: 3S-6224 65804 PA550 X1A1 8S-8033 66027 PA90A X1E1 110-000251E-*...
-
Page 2: Table Of Contents
CONTENTS SAFETY DEFINITIONS SAFETY PRECAUTIONS HYDRAULIC PUMP SET-UP PROCEDURE Motor Hook-up and Operation Electric line connection (for electric motor units only) SET-UP AND OPERATION Filling The Reservoir Hydraulic Connections Valve Options Hydraulic Gauge (Optional) Adjusting The Hydraulic Gauge Reservoir Vent Air Filter (Optional) Priming The Pump Adjusting The Pressure Regulating Controls Adjusting The Pressure Regulating Valve... -
Page 3: Safety Definitions
SAFETY DEFINITIONS Safety symbols are used to identify any action or lack of action that can cause personal injury. Your reading and understanding of these safety symbols is very important. DANGER Danger is used only when your action or lack of action will cause serious human injury or death. - Page 4 • Hose material and coupler seals must be compatible with the hydraulic fluid used. Hoses also must not come in contact with corrosive materials such as creosote-impregnated objects and some paints. Consult the manufacturer before painting a hose. Never paint the couplers. Hose deterioration due to corrosive materials can result in personal injury.
- Page 5 • Circuit Breakers: If motor stops due to an overload or power outage, Universal Motor: Move motor switch to OFF and control valve to neutral. Let motor cool or wait until power is restored. Reset circuit breaker switch in power panel. (The pump motor doesn’t have a circuit breaker.) Single-phase Motor: Thermal overload switch will break circuit to the motor.
- Page 6 NOTE • Carefully inspect the pump upon arrival. The carrier, not the manufacturer, is respon- sible for any damage resulting from shipment. • Read and carefully follow these instructions. Most problems with new equipment are caused by improper operation or installation. •...
-
Page 7: Hydraulic Pump Set-Up Procedure
HYDRAULIC PUMP SET-UP PROCEDURE 1. Motor Hook-up and Operation Universal Motor The universal motor is wired for 115 or 230 volts, 50/60 cycles according to the customer’s request. This motor cannot be rewired. Jet Motor, Single-phase The single-phase jet motor is wired for 115 or 230 volts, 50/60 cycles according to the customer’s request. - Page 8 Form No. 102463 © 2014 SPX CORPORATION Rev. 9 February, 2015...
-
Page 9: Set-Up And Operation
IMPORTANT Seal all external pipe connections with a high-quality, nonhardening thread sealant. Teflon tape can be used to seal hydraulic connections if only one layer of tape is used. Apply the tape carefully, two threads back, to prevent it from being pinched by the coupler and broken off inside the system. -
Page 10: Hydraulic Connections
2. Hydraulic Connections Clean all the areas around the oil ports of the pump and cylinder. Inspect all threads and fittings for signs of wear or damage, and replace as needed. C. Clean all hose ends, couplers or union ends. D. - Page 11 “Posi-Check” Valves If a “Posi-Check” valve is used, a hydraulic gauge shows zero pressure when the valve is switched to the neutral (hold) position. Cylinder pressure, however, is held without loss. (1) Installation of the hydraulic gauge (refer to Figure 3): (a) Remove the pipe plug from the valve’s gauge port.
-
Page 12: Adjusting The Hydraulic Gauge
5. Adjusting The Hydraulic Gauge A. Locate the adjustment screw on the gauge (see Figure 4) and make adjustments as needed with a screwdriver. The adjustment screw is located on the lower right back rim of the gauge. You must reach under the portion of the shroud that the gauge is mounted in. 5000 4 000 6000... -
Page 13: Adjusting The Pressure Regulating Controls
D. Run cylinder out to its full travel several times to eliminate air from the system. For more complete instructions, refer to the section titled “Bleeding Air From The System” in PRE- VENTIVE MAINTENANCE section. The pump is ready to be put into regular operation. IMPORTANT After eliminating trapped air from a large work-holding system, retract the cylinders and refill the pump reservoir to 1/2”... -
Page 14: Adjusting The Pressure Switch
Loosen the locknut on the pressure regulating valve (C), and back the adjusting screw (B) out a few turns with a screwdriver by turning in a counterclockwise direction. This will de- crease the setting to a lower than desired pressure. The pump must be completely connected. -
Page 15: Preventive Maintenance
PREVENTIVE MAINTENANCE WARNING To help prevent personal injury, • Disconnect the pump from the power supply before performing maintenance or repair procedures. • Repairs and maintenance are to be performed in a dust-free area by a qualified technician. Bleeding Air From The System Air can accumulate in the hydraulic system if the reservoir oil level is too low. -
Page 16: Draining And Flushing The Reservoir
Draining And Flushing The Reservoir IMPORTANT Clean the pump exterior before the pump interior is removed from the reservoir. Remove the ten screws fastening the motor and pump assembly to the reservoir. IMPORTANT Do not damage the gasket or pump the filter or pressure regulating valves when lifting the pump and motor off the reservoir. -
Page 17: Sound Reduction
Sound Reduction The electrically-powered hydraulic pump operates in the 90-95 dBA range. If further sound reduction is desirable, any of the following options will help reduce the sound level. Install a pressure switch. It shuts the motor off automatically when maximum pressure is reached (holding cycle). -
Page 18: Needle Bearing Installation Specifications
NEEDLE BEARING INSTALLATION SPECIFICATIONS TROUBLESHOOTING GUIDE WARNING • To help prevent personal injury, any repair work or troubleshooting must be done by qualified personnel familiar with this equipment. • Use the proper gauges and equipment when troubleshooting. NOTE • Depending on the type of pump, it is often best to check for leaks by using a hand pump and applying pressure to the suspect area without the motor running. - Page 19 PROBLEM CAUSE SOLUTION Electric motor does not run 1. Pump not turned ON. 1. Flip toggle switch to “Run” position. 2. Unit is not plugged in. 2. Plug in unit. 3. No voltage supply. 3. Check line voltage. Check reset button on power panel.
- Page 20 PROBLEM CAUSE SOLUTION Pump is not delivering oil or 1. Oil level too low. 1. Fill reservoir to 1/2” from top delivers only enough oil to of filler hole with all advance cylinder(s) partially cylinders retracted. or erratically. 2. Loose-fitting coupler to 2.
- Page 21 PROBLEM CAUSE SOLUTION Pump builds pressure but 1. Check to see if there are 1. Seal leaking pipe fittings cannot maintain pressure. any external leaks. If no oil with pipe sealant. leakage is visible, the problem is internal. If using a double-acting cylinder, remove it from the system to ensure that the leak is not in the cylinder.
- Page 22 PROBLEM CAUSE SOLUTION Pump will not build full pres- 6. Inspect the pump for 6. Same procedure as sure. (Continued) internal leakage. Check above, but look for leaks high pressure pump inlet or around the entire inner outlet ball checks. mechanism.
-
Page 23: Power Team Facilities
POWER TEAM FACILITIES Form No. 102463 © 2014 SPX CORPORATION Rev. 9 February, 2015... -
Page 24: Declaration Of Incorporation
DECLARATION OF INCORPORATION Form No. 102463 © 2014 SPX CORPORATION Rev. 9 February, 2015...
Need help?
Do you have a question about the 3S-6224 and is the answer not in the manual?
Questions and answers