
Related Manuals for Puretec HYBRID Series


Summary of Contents for Puretec HYBRID Series
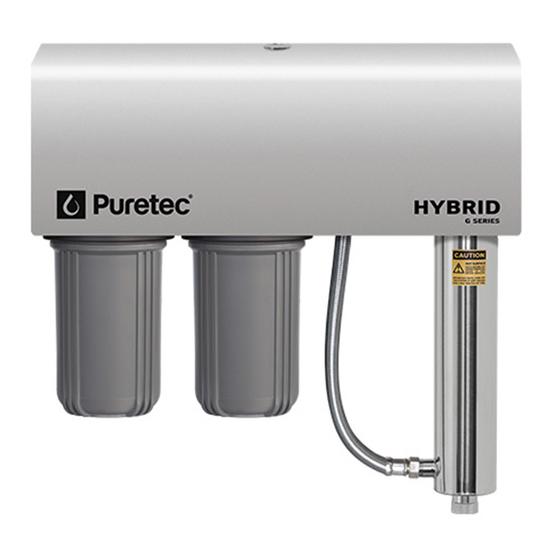
- Page 1 User Guide Hybrid Series WMTS103:2016 Certificate No. WM 74593 Filtration & Ultraviolet All-in-One Unit Australian Certification Services For correct operation & installation, it is essential to observe these instructions. JUL2020...
-
Page 2: Table Of Contents
Cartridge Replacement Procedure ................15 Lamp Replacement Procedure ..................16 Quartz Sleeve Maintenance/Replacement Procedure ........18 Troubleshooting Guide ...................... 21 Warranty ............................ 23 Product Information Distributor: Installer: Phone: Date Installed: Installation & Operation Manual Copyright © Puretec Pty Ltd 2020... -
Page 3: Puretec Customer Service
Introduction Puretec Customer Service Thank you for purchasing a Puretec Hybrid Series Whole House UV Water Treatment System. Your system is a proven performer manufactured from quality materials and components and will give years of ‘spring like’ water, free of impurities, if maintained and installed properly (refer installation requirements p.6). -
Page 4: Preparing Your System
Preparing the system Preparing Your System Puretec systems are designed to run economically for many years, dependent on the initial installation and periodical maintenance. Please read all instructions carefully as failures caused by incorrect installation or operation are not covered by warranty. -
Page 5: Positioning Your System
(non-replaceable) to protect the circuit. The fuse is not a lightning arrester and may not protect the Radfire if lightning or a very powerful surge hits the unit. A suitable surge protection device has been provided with this product. Puretec recommends the use of a surge protector (the one supplied or otherwise) or warranty may be voided. -
Page 6: Installation Requirements
Hybrid R models are intended for indoor installation (must be protected from weather, frost, water and have adequate ventilation). • All Puretec Hybrid models should be protected from harsh environments where overexposure to salt or aggressive chemicals can occur. •... - Page 7 INSTALLATION SHOULD BE COMPLETED BY QUALIFIED TRADESPEOPLE. FAULTY OPERATION DUE TO UNQUALIFIED PERSONS WILL RESULT IN VOIDED WARRANTY COVERAGE. HYBRID SERIES | Filtration & Ultraviolet Disinfection All-in-One Unit...
-
Page 8: Initial Installation Procedure
Installation Procedure Initial Installation Procedure The Puretec Hybrid Series has 1" [25mm] plumbing connections. Before attempting installation check the unit to ensure the quartz sleeve is intact within the Radfire UV Unit. Locate a suitable position for the Hybrid system remembering to allow 120mm under units with 20"... - Page 9 700mm clearance 700mm clearance allow min. 120mm clearance from the ground HYBRID R2 / R4 MODEL HYBRID R1 / R3 MODEL 700mm clearance 700mm clearance allow min. 120mm clearance from the ground HYBRID SERIES | Filtration & Ultraviolet Disinfection All-in-One Unit...
- Page 10 Drill the holes and install the anchors (fixing anchors not included). Position the Hybrid. Hybrid G: Position on the wall and tighten the fixings to hold the system securely to the wall. 10 Installation & Operation Manual Copyright © Puretec Pty Ltd 2020...
- Page 11 14. If you have a Hybrid G model, close and lock the lid. Note: Your cabinet comes with 2 keys for your convenience. Please store them safely as lost or misplaced keys are not covered by warranty. HYBRID SERIES | Filtration & Ultraviolet Disinfection All-in-One Unit...
-
Page 12: Operation
To silence the 'lamp life end' alarm for 7 days, press and hold on the silver button until 'delay' appears on the screen. Lamp Ballast Specifications AC 240V | 50Hz Lamp Power: 35W~95W Lamp Current: 0.8A~0.9A Ambient Temperature: 4~40°C Lamp Rated Life: 365 days Caution: Ground the ballast casing to avoid possible high voltage shock hazard 12 Installation & Operation Manual Copyright © Puretec Pty Ltd 2020... -
Page 13: Lamp Ballast Diagram
Lamp Ballast Diagram Fig. 5 Water Inlet Stainless Steel Quartz Chamber Sleeve O-Ring O-Ring Aluminium Water Outlet HYBRID SERIES | Filtration & Ultraviolet Disinfection All-in-One Unit... -
Page 14: Replacement Parts Guide
To maintain a high quality of purified water, the cartridges will need changing periodically (dependent on water quality and usage). You can obtain replacement cartridges from your local Puretec dealer. To maintain performance, warranty and Australian Standards use genuine Puretec replacements. -
Page 15: Cartridge Replacement Procedure
Close down stream tap and check the Hybrid system for leaks. Flush system for 1-2 minutes after any period of non-use more than 2 weeks. For a period of non-use of 6 months or more, it may be necessary to replace the cartridges. HYBRID SERIES | Filtration & Ultraviolet Disinfection All-in-One Unit... -
Page 16: Lamp Replacement Procedure
6 the LED will turn green). Restore water supply and check the unit for leaks. Re-check the unit after 1 hour. Replacing UV Lamp Note: For initial use, wait 3-5 minutes to allow water to pass through the whole unit. Turn on a downstream tap to let water flow through the unit for 2-3 minutes to release air and impurities from system. O Ring 16 Installation & Operation Manual Copyright © Puretec Pty Ltd 2020... - Page 17 We recommend replacing UV lamp annually to ensure high sterilising rate with best water quality. Always keep UV lamp on, as power fluctuation will shorten the service life of the UV lamp. HYBRID SERIES | Filtration & Ultraviolet Disinfection All-in-One Unit...
-
Page 18: Quartz Sleeve Maintenance/Replacement Procedure
Aluminium Nut Replacing UV Lamp is removed, hold the bottom of the Quartz Sleeve and remove the bottom O-Ring. O Ring cont. over page. O Ring Replacing UV Lamp 18 Installation & Operation Manual Copyright © Puretec Pty Ltd 2020... - Page 19 Plug in the ballast power connector. The RED LED will be illuminated (when the lamp life timer is reset in step 12 the LED will turn green). cont. over page. Replacing UV Lamp valve HYBRID SERIES | Filtration & Ultraviolet Disinfection All-in-One Unit...
- Page 20 12. If you have a Hybrid G model, close and lock the lid. Your cabinet comes with 2 keys for your convenience. Please store them safely. Note: Lost or misplaced keys are not covered by warranty. 20 Installation & Operation Manual Copyright © Puretec Pty Ltd 2020...
-
Page 21: Troubleshooting Guide
10. distribution lines post-UV. • Remove any pipe dead-ends • Lamp reached the maximum and flush with chlorine. lamp life. • Replace lamp on or before lamp counter reached 0. cont. over page. HYBRID SERIES | Filtration & Ultraviolet Disinfection All-in-One Unit... - Page 22 Display flashing. • Power interruption. • Reset ballast. Error Code ‘A3’ on • Ballast countdown has • Replace lamp. ballast. reached 0, lamp life expired. 22 Installation & Operation Manual Copyright © Puretec Pty Ltd 2020...
-
Page 23: Warranty
Applicable to all above, is that the warranties need to be approved by Puretec to ensure product was not incorrectly used, installed or claimed. False and incorrect claims will be pursued at Puretec’s discretion, including chargeable inspection and labour costs...
Need help?
Do you have a question about the HYBRID Series and is the answer not in the manual?
Questions and answers
Purtec hybrid g showing 7 and red error light blinking
A blinking red lamp and a buzzer on the Puretec HYBRID Series indicate that the lamp has reached or is nearing the maximum lamp life. The lamp should be replaced on or before the lamp counter reaches zero. Additionally, if the display shows error code 'A3', it means the ballast countdown has reached zero, and the lamp life has expired, requiring a lamp replacement.
This answer is automatically generated