
Related Manuals for LEGRAND MRD6 v2


Summary of Contents for LEGRAND MRD6 v2
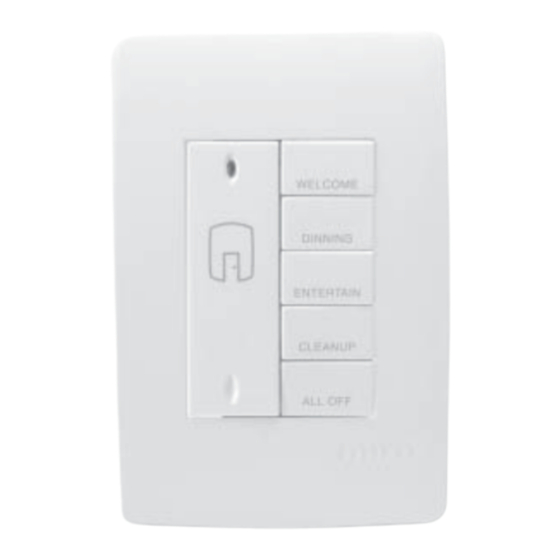
- Page 1 MRD6 v2 Wireless Room Scene Controller Specifications Operating Voltage .........120/277VAC, 60Hz Operating Temperature ....32°F to 104°F (0°C to 40°C) Patents pending...
-
Page 2: Unit Description
UNIT DESCRIPTION The Miro MRD6 Wireless Room Scene Controller is a room level scene controller. It provides instant recall of fi ve user-recorded lighting scenes (or presets) assigned to a room or designated area. It also provides off and on functions and overall control of the room’s light level. -
Page 3: Installation
INSTALLATION 1. Disconnect power to circuit by turning circuit breaker OFF. CAUTION TURN THE POWER OFF AT THE CIRCUIT BREAKER BEFORE INSTALLING THE DEVICE. Install only using a UL Listed Miro cover plate and subplate assembly. If you do not have the proper Miro subplate for your application, obtain one from any supplier of Miro devices. - Page 4 SET HOUSE ID All Miro wireless devices installed in the same home must acquire the same unique House ID before use. This process is known as house binding. Each Miro wireless device is bound to all other Miro wireless devices in the house. New Installation 1.
- Page 5 ROOM BINDING After the House ID is set in the MRD6, you create a room by binding devices to the MRD6. You can also add the MRD6 to an existing room. When a new MRD6 is added to a room, its scene buttons execute the same scenes as other room scene controllers with the same scene set assignment (see MORE SCENES).
-
Page 6: Standard Operation
STANDARD OPERATION The MRD6 is shipped with most functions preprogrammed for ease of installation and initial use. This section summarizes the default operation of the MRD6. To make changes from this standard operation, such as changing light levels and including or excluding devices from specifi c scenes, see CUSTOMIZING OPERATION. -
Page 7: Customizing Operation
CUSTOMIZING OPERATION Modify and Save the Light Levels of a Scene 1. Change lighting levels as desired by pressing on individual devices. 2. Press and hold the scene button until the LED fl ashes (about 2 seconds) to save the new settings. Removing or Adding Devices to a Scene 1. - Page 8 MORE SCENES Up to 15 scenes are available per room. Each room level controller can access a set of 5 scenes. The MRD6 is assigned to scenes 1-5 when shipped. Changing to scene set 6-10 lets you record 5 more scenes; changing to scene set 11-15 lets you record another 5 scenes.
-
Page 9: Troubleshooting
TROUBLESHOOTING During house ID binding, the LED is not fl ashing on some devices. • If LED is solid green before initiating house ID binding: The device already has another house ID. Reset it to the factory default so that it can be bound to the desired house ID. Resetting to factory defaults is described in “I made a confi... -
Page 10: Fcc Notice
POWER FAIL MEMORY After a power failure, all Miro devices automatically return to the state that they were in immediately prior to loss of power. All house binding and scene control information is preserved. FCC NOTICE This equipment has been tested and found to comply with the limits for a Class B digital device, pursuant to part 15 of the FCC Rules.
Need help?
Do you have a question about the MRD6 v2 and is the answer not in the manual?
Questions and answers