Table of Contents
Advertisement
Quick Links
W ARNING
PLEASE READ CAREFULLY – EU and EEA (Norway, Iceland and Liechtenstein) only
This symbol indicates that this product is not to be disposed of with your household
waste, according to the WEEE Directive ( 2202/96/EC) and your national law.
This product should be handed over to a designated collection point, e.g., on an
authorized one-for-one basis when you buy a new similar product or to an authorized
collection site for recycling waste electrical and electronic equipment (WEEE) .
Improper handling of this type of waste could have a possible negative impact on the
environment and human health due to potentially hazardous substances that are
generally associated with EEE. At the same time , your cooperation in the correct
disposal of this product will contribute to the effective usage of natural resources.
For more information about where you can drop off your waste equipment for
recycling , please contact your local city office , waste authority , approved WEEE
scheme or your household waste disposal service.
Contents and images shown on this manual can be changed without any notice.
Please visit our website
www.soundsationmusic.com
DESIGNED IN ITAL Y BY SOUNDSATION®
All the Trademarks are property of their respective owners
SOUNDSATION® is a registered trademark of
FRENEXPORT SPA – Via Enzo Ferrari, 10 - 62017 Porto Recanati – Italy
© SOUNDSATION 2012 – All rights reserved – All total or partial reproduction of this
manual by any other company or person without express authorization of
SOUNDSATION is strictly forbidden.
to check latest version.
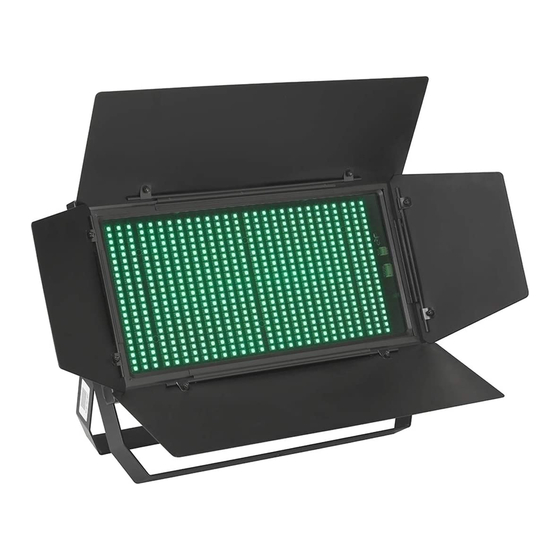
LIGHTBLASTER 616 LED
USER MANUAL
PRO-LIGHTIN
G
Advertisement
Table of Contents

Related Manuals for soundsation Lightblaster 616 LED


Summary of Contents for soundsation Lightblaster 616 LED
-
Page 1: User Manual
FRENEXPORT SPA – Via Enzo Ferrari, 10 - 62017 Porto Recanati – Italy USER MANUAL © SOUNDSATION 2012 – All rights reserved – All total or partial reproduction of this PRO-LIGHTIN manual by any other company or person without express authorization of... - Page 2 Alternatively you can send the product to incorrect operation can cause damages to you and to the unit. Take SOUNDSATION SERVICE CENTER – Via Enzo Ferrari , 10 – 62017 care! Porto Recanat i - Italy . In order to send a product to service center you need an RMA number.
- Page 3 Machine Specification Display:LED Display If any foreign objects enter the instrument, please contact DMX: 3 pin or 5 pin your dealer or an authorized SOUNDSATION center. 4 barn-door: movable IP: IP20 The serial number, electrical features and international standards are printed on a label located in the bottom Net weight:4.5kg...
- Page 4 Contents Dimmer Curves : Section 1.Getting Started ² Unpacking ² Safety Instruction Section 2. Set Up Installation ² Controlling Board ² Machine Connection ² Section 3. troubleshooting Troubleshooting ² Section 4. Reference ² Control Menu Ramp Effect Menu Tup(ms) Tdown(ms) ²...
- Page 5 Unpacking 7CH: Function Specification 1pc Fixture DIMMER 0-255:dimmer linear adjustment,from dark to bright。 1pc User Manual W1dimmer 0-255:W1 linear adjustment,from dark to bright Thanks for choosing our LED strobe serial products. Carefully unpack the box and W2dimmer 0-255:W2 linear adjustment,from dark to bright check the contents to ensure that all parts are present and in good conditions.
- Page 6 DMX protocol Ÿ Always disconnect from the power source before servicing or replacing fuse/lamp and be sure to replace with same fuse/lamp size and type. Cut off power before 9CH: moving, repairing and cleaning the machine. Function Specification Ÿ To avoid electric shock, all fixtures must be connected to circuits with a suitable DIMMER 0-255:dimmer linear adjustment,from dark to bright。...
- Page 7 Section 4. Reference Controlling Board ² Control Menu ² DMX Protocol ² Dimmer Curve Specification ² Control Menu Menu Function MENU DOWN ENTER D9-- DMX 9 channel control(need connecting controller) Front display panel D.7-- DMX 7 channel control(need connecting controller) A2-- LED Display Panel DMX 2 channel control(need connecting controller)
- Page 8 Section 3. Troubleshooting Cable Connectors Problem Probable Cause(s) Remedy Cables must have a male XLR connector on one end and a female XLR connector on the other No power to fixture Check power cables No response from end. Primary fuse blown Replace fuse fixture when power Secondary...
Need help?
Do you have a question about the Lightblaster 616 LED and is the answer not in the manual?
Questions and answers