Table of Contents
Advertisement
Quick Links
Advertisement
Table of Contents

Related Manuals for Rose electronics The Bruce


Summary of Contents for Rose electronics The Bruce
- Page 1 OWNER‘S MANUAL...
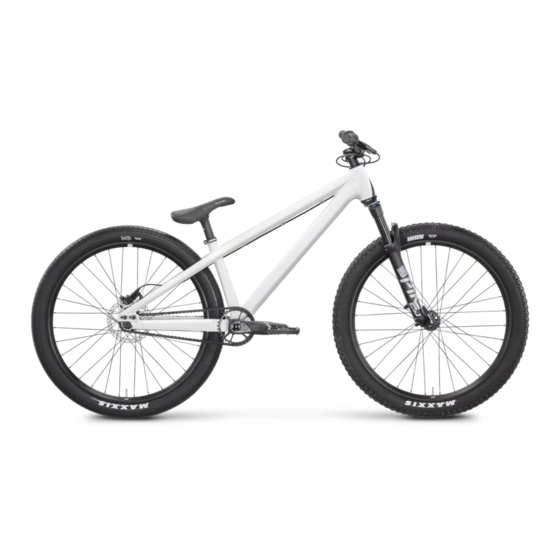
- Page 2 Frame Pedal Saddle Handlebar with grips and brake lever Seat post Suspension fork Saddle clamp Tyre Brake caliper Disc rotor Adjustable dropout Spoke Chain Crankset with chainring and bottom bracket...
-
Page 3: Table Of Contents
1. General information ........................ 5 Explanation of symbols used ......................5 Target group.............................5 Owner’s manuals supplied by component manufacturers ..........5 Tools..............................5 Installation of components and accessories................5 Warranty and guarantee.......................6 Wearing parts...........................6 Weight limit............................6 Exclusion of liability ........................6 2. Safety ............................7 General safety..........................7 The rider’s duty of care.........................7 Intended use .............................8... - Page 4 Congratulations on the purchase of your THE BRUCE! Your bike is unique – before it has found its way to your home, this bike was individually assembled by hand by a skilled mechanic and carefully inspected by another specialist to ensure it meets our highest quality standards. We thus guarantee that your bike offers reliability and state-of-the-art technology.
-
Page 5: General Information
General information This manual is the most important element to prevent any damages and risks during the assembly, use and servicing of your new bike. It is provided to give you the most important technical information on your bike, to support you during bike assembly and to give you helpful tips over the entire life of your bicycle. -
Page 6: Warranty And Guarantee
• Stickers and paintwork Weight limit The ROSE THE BRUCE is designed for a maximum weight of 120 kg. The maximum weight is derived from the weight of the rider, bicycle, gear (helmet, backpack, shoes, clothes) and luggage. Exclusion of liability The tasks described in this manual require special knowledge and should only be carried out by people with sufficient expertise. -
Page 7: Safety
Risk of accident due to insufficient equipment for use on public roads! The ROSE THE BRUCE is not intended for use on public roads. If you nevertheless want to ride your bike on public roads, you will have to consult a qualified bicycle mechanic to retrofit all components required according to the national road traffic regulations (lighting system, reflectors etc.). -
Page 8: Intended Use
Intended use The intended use of ROSE bikes is divided into five different categories – ranging from the use on paved roads through to downhill or freeride use. The bikes must only be used in accordance with their intended purpose/use. Otherwise, the user takes responsibility. -
Page 9: Bike Assembly
Bike assembly This chapter aims at helping you remove your bike from the ROSE bike box and re-assemble it. Front wheel, handlebar and seat post have been removed for shipping. In addition, you have to fit the pedals and check whether your bike is in a roadworthy condition. -
Page 10: Installing And Adjusting The Handlebar
Installing and adjusting the handlebar Installing the handlebar and adjusting the angle 1. Remove the stem clamp and fit the handlebar to the stem. 2. Install the clamp and tighten the bolts by hand. 3. Centrally align the handlebar and adjust the angle. 4. -
Page 11: Installing The Front Wheel
Installing the front wheel DANGER Risk of accident due to improperly fitted quick release axles and threaded axles! Improperly fitted thru axles might loosen during the ride, which may loosen or block the wheel! • Only tighten quick release axles by hand and without using any tools. •... -
Page 12: Adjusting Saddle Height And Angle
Adjusting saddle height and angle DANGER Risk of accident and damage due to the extension of the seat post beyond the minimum insertion mark! If the seat post is not inserted to the minimum insertion mark, it may break or damage the frame while riding. •... -
Page 13: Installing The Pedals
Installing the pedals One of the pedals has a right- and the other a left-hand thread. Most pedals have the letter “L” and “R” stamped on the end of the thread. Some pedals come with a groove in the flange of the left pedal. For more information see the manufacturer‘s manual. -
Page 14: Adjustable Dropouts
Adjustable dropouts The frame of THE BRUCE features adjustable dropouts allowing you to tension the chain without a chain tensioner. Your bike was delivered with perfect chain tension. If you want to carry out maintenance works on your bicycle yourself, please follow the steps below to tension and release the chain. -
Page 15: Before And After Your Ride
Before and after your ride Getting started for your first ride and getting used to your new bike Make yourself familiar with the handling, brakes and suspension fork of your bike away from public roads. Do not forget to wear a helmet! Only slowly increase the difficulty of the terrain or manoeuvres. Requirements: •... - Page 16 Check that the wheels are straight. Lift the wheels one after the other and spin them. The wheels must spin smoothly. The wheels must run true, without moving up and down or from side to side. The tyres must not rub against the frame. Check the wheels for play in the hubs.
-
Page 17: After Your Ride
After your ride DANGER Brake failure or reduced braking power due to dirty brake pads or disc rotors! Brake pads and disc rotors must be free from lubricating substances such as grease, oil (also skin oil), wax, silicon etc.! Brake pads or disc rotors contaminated in this way must no longer be used! 4.3.1 Cleaning your bike After your ride, you should clean your bike thoroughly using a soft cloth and clear water. -
Page 18: Bike Transport And Storage
Bike transport and storage Transport by car The best and safest way to transport your bike is by car. Here, your bike is perfectly protected from the elements and from theft. When removing the wheels, make sure to fit a transport lock between the dropouts of the frame or fork. Transport on a hitch or roof rack Rims must be padded before fitting lashing straps or ratchet systems. -
Page 19: Maintenance
Maintenance Regular care and maintenance will prolong the life of your new bicycle. You should carry out easy cleaning, servicing and repair tasks yourself (see “4. Before and after your ride“ on page 15). Bike servicing DANGER Risk of accident due to overdue maintenance and service! When neglecting maintenance and servicing, worn components may cause accidents. - Page 20 ROSE Bikes GmbH Schersweide 4 46395 Bocholt Germany...
Need help?
Do you have a question about the The Bruce and is the answer not in the manual?
Questions and answers