Table of Contents
Advertisement
Advertisement
Table of Contents

Related Manuals for John Lewis JLWD 1613


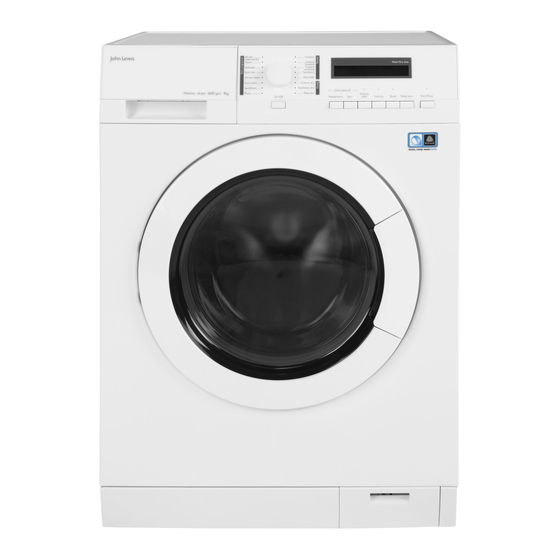
Summary of Contents for John Lewis JLWD 1613
- Page 1 Washer Dryer JLWD 1613 User Manual...
-
Page 2: Table Of Contents
Contents Safety information Daily Use - Washing only Children and vulnerable people safety Before first use General Safety Loading the laundry Filling the detergent and other treatments Safety instructions Checking the position of the flap Installation Activating the appliance Electrical Connection Setting a programme Water Connection Starting a programme without the delay start... - Page 3 Water hardness Cleaning the detergent dispenser Drying hints Cleaning the drain filter Items not suitable for drying Cleaning the inlet hose and the valve filter Garment labels Emergency drain Drying cycle duration Frost precautions Additional drying Troubleshooting General Tips Introduction Care and cleaning Possible failures External cleaning...
-
Page 4: Safety Information
Safety information Before the installation and use of the appliance, carefully read the supplied instructions. The manufacturer is not responsible for any injuries or damages that are the result of incorrect installation or usage. Always keep the instructions in a safe and accessible location for future reference. -
Page 5: General Safety
General Safety Do not change the specification of this appliance. • The appliance shall be installed as a freestanding product or below • the kitchen worktop if space margins permit. Do not install the appliance behind a lockable door, a sliding door •... - Page 6 Items that have been soiled with substances such as vegetable or • mineral oil, acetone, alcohol, petrol, kerosene, spot removers, turpentine, waxes and wax removers should be washed separately with an extra amount of detergent before being dried in the washer dryer.
-
Page 7: Safety Instructions
Safety instructions • Always use a correctly installed shockproof Installation socket. • Do not use multi-plug adapters and extension The installation must comply with cables. relevant national regulations. • Do not pull the mains cable to disconnect the appliance. Always pull the mains plug. •... -
Page 8: Disposal
• If laundry has been washed with a stain remover, carry out an additional rinse cycle before starting a drying cycle. • Make sure that all metal objects are removed from the laundry. • Only dry fabrics that are suitable to dry in the washer dryer. -
Page 9: Product Description
Product description Appliance overview 1. Worktop 2. Detergent dispenser 3. Control panel 4. Door handle 5. Rating plate 6. Drain pump filter 7. Feet for levelling the appliance How to activate the child Installation on suspended safety device flooring This device prevents children or pets from being Suspended wooden floors are particularly closed in the drum. -
Page 10: Accessories
Accessories Spanner To remove the transit bolts. Plastic hose guide To connect the drain hose on the edge of a sink. Plastic caps To close the holes on the rear side of the cabinet after the removal of the transit bolts. Inlet hose To connect the appliance to the cold water tap. -
Page 11: Control Panel
Control panel Control panel description 1. On/Off button 7. Time dry button 2. Programme dial 8. Dryness level button 3. Display 9. Spin selection button 4. Start/Pause button 10. Temperature selection button 5. Delay start button 6. Quick button (Reduced wash time) Display Washer Dryer User Manual... - Page 12 Temperature indicators: Temperature indicator Cold water indicator Spin indicators: Spin speed indicator No Spin indicator Rinse Hold indicator 1) Only available for Spin/Drain programme. Dryness level symbols Iron dry Cupboard dry Extra dry Display indicators Door locked - You cannot open the door when this symbol is on. Washing phase Drying phase Child safety lock...
- Page 13 Time indicators: Programme duration (washing and/or drying phase) When the programme starts, the time decreases in one minute steps. Delay start When you press the delay start button, the display shows the delay start time. Alarm codes If the appliance has a malfunction, the display shows alarm codes. Refer to "Trouble- shooting"...
-
Page 14: Programmes
Programmes Programme Chart Programme Maximum load Programme description Temperature range Maximum spin speed (Type of load and soil level) Textiles 9 kg White cotton and coloured cotton. 1600 rpm Normal soil and light soil. Cottons 95°C - Cold 9 kg White cotton and coloured cotton. - Page 15 Programme Maximum load Programme description Temperature range Maximum spin speed (Type of load and soil level) 9 kg To rinse and spin the laundry. All fabrics, 1600 rpm except woollens and very delicate fabrics. Rinse Reduce the spin speed accordingly to the Cold type of laundry.
-
Page 16: Automatic Drying
Programme options compatibility Programme Extra Spin Delay start Quick rinse ■ ■ ■ ■ ■ Cottons Cottons + Prewash ■ ■ ■ ■ ■ Cottons economy ■ ■ ■ ■ ■ Synthetics ■ ■ ■ Wool/Silk ■ ■ Rinse ■ ■... -
Page 17: Timed Drying
Dryness Level Type of fabric Load Cottons and Linen up to 6 kg Cupboard Dry (bathrobes, bath towels, etc) For items to be stored Synthetics and mixed fabrics up to 3 kg (jumpers, blouses, underwear, household and bed linen) Silk items (blouses, shirts, cloth- up to 1 kg ing..) Wool items (woollen jumpers) - Page 18 Dryness Level Type of fabric Load (kg) Spin Suggested speed duration (rpm) (mins) Iron Dry Cottons and Linen 1600 185 - 205 Suitable for ironing (sheets, tablecloths, shirts, etc) 1600 95 - 115 1600 75 - 85 Washer Dryer User Manual...
-
Page 19: Consumption Values
Consumption values Stated values are obtained in laboratory conditions with relevant standards. Different causes can change the data: the quantity and type of laundry and ambient tempera- ture. Water pressure, the supply voltage and the temperature of inlet water may also affect the washing programme duration. -
Page 20: Options
Options Additional spin options: On/Off No Spin Press this button to activate or deactivate the • Set this option to remove all spin phases. appliance. A tune sounds when the appliance is • Recommended for very delicate fabrics. activated. • To compensate for the absence of spinning, the The Auto Stand-by function automatically rinse phase uses more water for some washing deactivates the appliance to decrease the energy... -
Page 21: Time Dry
Time dry Press this button to set the time that suits the fabrics you have to dry. The display shows the set value. Each time you press this button the time value increases by 5 minutes. Drying durations may be restricted by the programme selected. -
Page 22: Settings
Settings Acoustic signals The acoustic signals operate when: • You activate the appliance. • You deactivate the appliance. • You press the buttons. • The programme is completed. • The appliance has a malfunction. To deactivate/activate the acoustic signals, press the Dryness level button and the Time dry button simultaneously for 6 seconds. -
Page 23: Daily Use - Washing Only
Daily Use - Washing only Warning! Refer to Safety Caution! Make sure that no chapters. laundry becomes trapped between the seal and the door. There is a risk of water Before first use leakage or damage to the laundry. 1. Pour 2 litres of water into the detergent compartment for washing phase. -
Page 24: Checking The Position Of The Flap
Checking the position of the With the flap in the down position: flap • Do not use gelatinous or thick liquid detergents. 1. Pull out the detergent dispenser until it stops. • Do not pour more liquid 2. Press the lever down to remove the dispenser. detergent than the limit shown on the flap. -
Page 25: Behaviour Of The Appliance
The relevant indicator stops flashing and stays 2. Press the Delay start button repeatedly until the display shows . On the display the indicator of the phase in 3. Press the Start/Pause button again to start the operation starts to flash. programme immediately. -
Page 26: End Of Cycle
3. Close the door and press the Start/Pause Draining water out after end button. of cycle The programme or the delay start continues. The washing programme is completed, End of cycle but there is water in the drum: When the programme has finished, the The drum turns regularly to reduce creasing. -
Page 27: Daily Use - Drying Only
Daily use - Drying only Warning! Refer to Safety • : IRON DRY level indicator for cotton chapters. items • : CUPBOARD DRY level indicator for This appliance is an automatic cotton, synthetic, wool and silk items washer dryer. • : EXTRA DRY level indicator for cotton items Drying setting... -
Page 28: End Of The Drying Programme
• Clean the empty drum, the gasket and the door • The drying indicator starts to flash. with a wet cloth after the drying phase. • The display shows the door locked indicator If you set only 10 minutes of drying, the appliance performs only a cooling phase. -
Page 29: Daily Use - Washing & Drying
Daily use - Washing & Drying Warning! Refer to Safety • : EXTRA DRY level indicator for chapters. cotton items The display shows the indicator . The time This appliance is an automatic value on the display is the duration of the washer dryer. -
Page 30: End Of The Drying Programme
3. Set the rinse programme. If you set only 10 minutes of drying 4. Press the Spin button and the Time dry button after washing, the appliance simultaneously to activate the cleaning function calculates also the duration of the until the display shows CLE. anti-crease and the cooling phases. -
Page 31: Hints And Tips
Hints and tips Stubborn stains Warning! Refer to Safety chapters. For some stains, water and detergent is not sufficient. The laundry load We recommend that you pre-treat these stains before you put the items in the appliance. • Divide the laundry into: white, coloured, Special stain removers are available. -
Page 32: Water Hardness
Water hardness • = The item can not be tumble dried. If the water hardness in your area is high or Drying cycle duration moderate, we recommend that you use a water softener for washing machines. In areas where The drying time can change depending on: the water hardness is soft it is not necessary to •... -
Page 33: Care And Cleaning
Care and cleaning Maintenance wash Warning! Refer to Safety chapters. With the low temperature programmes it is possible that some detergent stays in the drum. Perform a maintenance wash regularly. To do External cleaning this: Clean the appliance with soap and warm water •... -
Page 34: Cleaning The Detergent Dispenser
Cleaning the detergent dispenser Cleaning the drain filter Do not clean the drain filter if the water in the appliance is hot. Regularly check the drain pump filter and make sure that it is clean. Repeat the steps 2 and 3 until the water stops flowing out. Washer Dryer User Manual... - Page 35 180° Washer Dryer User Manual...
-
Page 36: Cleaning The Inlet Hose And The Valve Filter
Always keep a rag nearby to dry up Make sure that the impeller of the any water spillage. pump can rotate. If it does not rotate, contact the Authorised Service Centre. Make sure also that you tighten the filter correctly to prevent leakages. -
Page 37: Emergency Drain
45° 20° Emergency drain Warning! Make sure that the temperature is higher than 0 Because of a malfunction, the appliance cannot °C before you use the drain the water. appliance again. If this occurs, do steps (1) through (8) of The manufacturer is not 'Cleaning the drain filter'. -
Page 38: Troubleshooting
Troubleshooting • - The appliance door is open or not Warning! Refer to Safety closed correctly. Please check the door! chapters. • - The mains supply is unstable. Wait until the mains supply is stable. Introduction • - No communication between electronic elements of the appliance. - Page 39 Problem Possible solution The appliance does not fill with • Make sure that the drain hose is in the correct position. The hose may be water and drain immediately. too low. The appliance does not drain • Make sure that the sink spigot is not clogged. the water.
-
Page 40: Emergency Door Opening
Problem Possible solution You cannot set an option. • Make sure that you press only the desired button(s). The appliance does not dry or • Turn the water tap on. does not dry correctly. • Make sure the drain filter is not clogged. •... - Page 41 5. Take out the laundry and then close the appliance door. 6. Close the filter flap. Washer Dryer User Manual...
-
Page 42: Technical Data
Technical Data Dimension Width/ Height/ Depth/ Total 600 mm/ 850 mm/ 605 mm/ 639 mm depth Electrical connection Voltage 230-240 V Overall power 2200 W Fuse 13 A Frequency 50 Hz Level of protection against ingress of solid particles and moisture IPX4 ensured by the protective cover, except where the low voltage equipment has no protection against moisture... -
Page 43: Repairs - After Sales Service
Shopping is easy with John Lewis Shops manual, the next step is to contact John Lewis John Lewis, Aberdeen 01224 625 000 technical support on: John Lewis, Basingstoke 01256 406200... - Page 44 John Lewis, Croydon 020 8662 4730 John Lewis, Stratford 020 8532 3500 John Lewis, Horsham 01403 214 740 John Lewis, The Trafford Centre 0161 491 4040 John Lewis, Ipswich 01473 275 850 John Lewis, Watford 01923 244 266 John Lewis, Newbury 01635 263 980...
- Page 45 ENVIRONMENTAL CONCERNS marked with the symbol with the household Recycle materials with the symbol . Put the waste. Return the product to your local packaging in relevant containers to recycle it. recycling facility or contact your municipal office. Help protect the environment and human health by recycling waste of electrical and electronic appliances.
- Page 46 Washer Dryer User Manual...
- Page 47 Washer Dryer User Manual...
- Page 48 132895212-A-442017 ( Subject to change without notice. )
Need help?
Do you have a question about the JLWD 1613 and is the answer not in the manual?
Questions and answers
Unable to rotate anti clockwise to extract 1 and clean 2 drain filter
To rotate the drain filter anti-clockwise on a John Lewis JLWD 1613 for extraction and cleaning, follow these steps:
1. Ensure the water in the appliance is not hot before starting.
2. Place a rag nearby to absorb any water spillage.
3. Turn the drain filter anti-clockwise to loosen it.
4. Pull out the filter carefully.
5. Clean the filter thoroughly.
6. Check that the pump impeller can rotate freely. If it does not, contact an authorised service centre.
7. Reinsert the filter and tighten it properly to prevent leaks.
This answer is automatically generated
@Liz Saines I had the same problem. I got an adjustable spanner put the jaws on either side of the closed drain filter. I gently turned the drain filter anti-clockwise a quarter turn to loosen it. Removed the drain filter with my fingers by turning and pulling. Do not use much force with the adjustable spanner you are only loosening a plastic thread.
How do I re fit the spring around the rubber seal thats around the mouth of the machine?
Error code 73