Advertisement
Quick Links
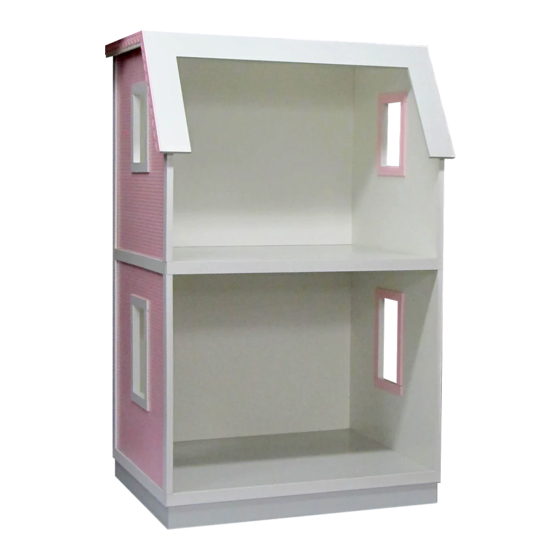
Instructions for
Real Good Toys'
My Dreamhouse Add
This kit will add an additional level to your 'My Dreamhouse' dollhouse. The ideal time to include this Add A Room in
your build is while you are building the 'My Dreamhouse' dollhouse, but you can also add this to the completed dollhouse
with some dis-assembly.
Before you begin -
You have already opened the box and
see all the parts organized and tidy. For the moment, keep
them that way. There are important things to do before you
open your glue bottle.
Choose your paint. Semi-gloss interior latex paint is recom-
mended for all dollhouses. If you are building this Add A
Room afterward and the original paint choices are unknown,
your paint store may be able to scan a part of the dollhouse
for color matching.
Prepare your space
:
This kit will spread out over a large
area while it is being built. You will need a full-sized table
for organization and painting, and enough cardboard, paper,
or plastic to protect it from paint.
A snap-lid box will keep your tools and supplies handy
between building sessions.
Real Good Toys • 10 Quarry St • Barre, VT 05641 • 802-479-2217 • www.realgoodtoys.com
A
-
Measure and identify the parts
The kit is organized in the box to protect the parts, and the
Parts List is in the same order. As you measure and identify
the parts, label them with sticky notes using the names from
the parts list, and check them off the parts list so you know
you have everything. Taking the time now to identify and
organize the parts also makes their names familiar so you will
understand what the instructions intend as you read ahead.
• Plan ahead so you know where you are going
• Read ahead so you know how to get there
• Paint ahead so the parts will be ready when you need them
Tools and Supplies:
Tape measure or ruler, Pencil, Sticky notes
Tacky white glue
(like Aleene's Tacky Glue®)
Masking tape, Painting Supplies, Sandpaper
PostIts
®
, and Aleene's
®
are trademarks of their manufacturers and have no affi liation with Real Good Toys
Kit #AG185
Room
-
:
(like PostIts®)
for all construction
(especially 320gr)
©10/15
Advertisement

Related Manuals for Real Good Toys My Dreamhouse


Summary of Contents for Real Good Toys My Dreamhouse
- Page 1 Room This kit will add an additional level to your 'My Dreamhouse' dollhouse. The ideal time to include this Add A Room in your build is while you are building the 'My Dreamhouse' dollhouse, but you can also add this to the completed dollhouse with some dis-assembly.
- Page 2 (see page 7). worry if they have been damaged in shipping (see page 7). Trim, Floor Trim, Floor Accessories that fi t ‘My Dreamhouse’ scale (18”) www.realgoodtoys.com or 802-479-2217 #AG185 Add A Room Kit for an additional story (or two!) ™...
- Page 3 My Dreamhouse Instructions - Paint page 3 A word about primer: Primer is designed to help paint stick Do not stack painted parts - even when they feel dry to an impervious surface or to join layers of dissimilar paints.
- Page 4 My Dreamhouse Instructions - Painting, sanding, and cleaning page 4 Assembly: Continue to step 5 without stopping Note: Many of these photos are of un-painted parts, Use enough glue so some squeezes out of every joint. Use enough glue so some squeezes out of every joint.
- Page 5 My Dreamhouse Instructions - Assembly page 5 □ Step 4 4. Turn the assembly over. Glue and tape the other Side to the assembly. □ Stabilize Stabilize 5. Inspect the joints and tighten if necessary... these photos show one good way to hold a joint tight while the glue dries - Once the glue is dry the shape will be permanent.
- Page 6 □ 6. If the Foundation is glued to the House on the "My Dreamhouse" it will have to be removed. To do this you will use a heat source (hot-air gun, hair dryer, heat lamp, iron if the parts aren't painted) and a slender spatula (shown is a cake icing knife).
- Page 7 My Dreamhouse Instructions - Assembly page 7 Stack all the levels of your house on the Foundation, Step 7 Step 7 lined up on the corners. Horizontal Trim Horizontal Trim □ 7. Attach Trim: Glue and tape the Horizontal Trim to the Foundation only*, lined up with the Floor on top, and straight front-to-back (use the clapboard profi...
- Page 8 My Dreamhouse Instructions - Assembly page 8 8A. Glue and tape the Floor Trim to the Foundation only*. Two Packers, taped together so they are longer, 8A. Glue and tape the Floor Trim to the Foundation only*. Two Packers, taped together so they are longer, can be taped to the Floor if pressure is needed to pull the Floor Trim fl...
- Page 9 My Dreamhouse Instructions - Lighting and Wiring page 9 □ Floor Floor 10. LED Backer: Glue and tape the LED Backer to the Trim Ceiling Liner and Floor Trim, centered side-to-side. Ceiling Liner LED Backer If you wire your dollhouse with tapewire and illuminate with ExtraBrite LEDs on the Backer, Run Tapewire on the backer fi...
- Page 10 Duplicate this page to test your painting plan Also printable from the www.RealGoodToys.com website...
Need help?
Do you have a question about the My Dreamhouse and is the answer not in the manual?
Questions and answers