Table of Contents

Related Manuals for Universal Flow Monitors FlowStream OFS


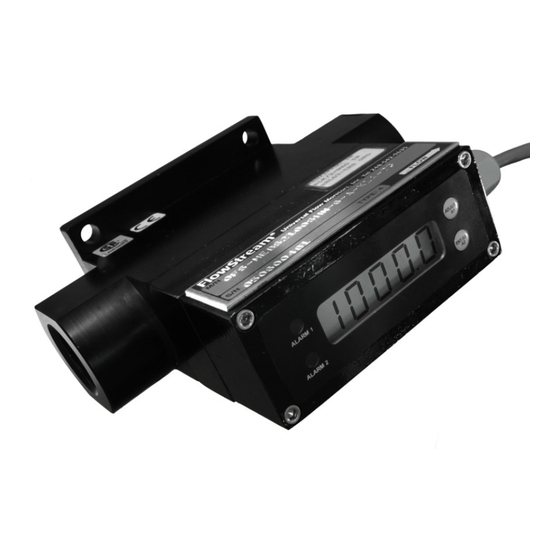
Summary of Contents for Universal Flow Monitors FlowStream OFS
- Page 1 ™ Laminar Mass Flowmeters User Manual Series: OFS Firmware Revision 5.79 UNIVERSAL FLOW MONITORS, INC. 1755 East Nine Mile Road PO Box 249 Hazel Park, MI 48030-0249 TEL (248) 542-9635 FAX (248) 398-4274 http://www.flowmeters.com FSMAN.6 081214 Page 1...
-
Page 2: Table Of Contents
TABLE OF CONTENTS PROPRIETARY NOTICE ......................3 NAMEPLATE EXAMPLE ......................4 GENERAL SPECIFICATIONS ....................5 ELECTRICAL SPECIFICATIONS ....................6 OPERATION ..........................7 Figure 1. Laminar Flow Illustration ................... 7 APPLICATIONS ........................... 7 Using FlowStream at Varying Temperatures ................7 Using FlowStream with Different Gases ................... 8 Reference Conditions for Mass Flow Measurement .............. -
Page 3: Proprietary Notice
Universal Flow Monitors, Inc. reserves the right to change the information contained in this publication at any time and without prior notice. -
Page 4: Nameplate Example
NAMEPLATE EXAMPLE Intrinsically Safe Firmware revision flowmeters must include “X2A” or “Z2A” in the Model Code Model Code The Intrinsically Safe flow transmitters have the following label: FSMAN.6 081214 Page 4... -
Page 5: General Specifications
GENERAL SPECIFICATIONS Flow Ranges: 500 SCCM full-scale to 1,000 SLPM full-scale 1 SCFH full-scale to 2,100 SCFH full-scale Turndown Ratio: 100:1 Maximum Operating Pressure: 100 PSIG Burst Pressure: 200 PSIG Pressure Effect on Accuracy: Less than 0.03% F.S. / PSI Maximum Operating Temperature: 176 °F (80 ºC) Minimum Operating Temperature: -13 °F (-25 ºC) -
Page 6: Electrical Specifications
ELECTRICAL SPECIFICATIONS Accuracy (Including Linearity and Repeatability) Flow: ± 1% of full-scale for flowmeters sized from 15-566 SLPM (31-1200 SCFH) of Air ± 2% of full-scale for flowmeters sized for lower than 15 SLPM (30 SCFH) of Air ± 2% of full-scale for flowmeters sized for higher than 566 SLPM (1201 SCFH) of Air Pressure: ±... -
Page 7: Operation
OPERATION FlowStream flowmeters accurately measure the mass flow rate of most gases. The flow rate is determined by measuring the pressure drop across a unique internal restriction, known as Laminar Flow Element (LFE). The restriction is designed such that the gas molecules are forced into moving in parallel paths along the entire length of the passage for the entire range of operation of the device. -
Page 8: Using Flowstream With Different Gases
The internal temperature sensor is located above the inlet port, very close to where the gas enters the meter. This ensures accurate measurement of the gas temperature. However, because the temperature sensor is embedded inside the flowmeter body, if ambient temperature is different from gas temperature, there would be a discrepancy between what the sensor reads and the true gas temperature. -
Page 9: Wiring Diagram
WIRING DIAGRAM Wiring for 4-20mA Transmitters Figure 2 shows a typical 2-wire, 4-20mA transmitter wiring for use with FlowStream flowmeters. Maximum loop resistance is related to the available supply voltage. Since the flowmeter requires 10 volts to operate, the voltage drop across the loop resistance at full-scale flow output (20mA) must be added in to determine the minimum supply voltage. -
Page 10: Hazardous Environment Wiring
Figure 3. Required Supply Voltage vs. Loop Resistance Hazardous Environment Wiring Intrinsically Safe wiring must be installed in accordance with Article 504 of NEC, ANSI NPF 70 and Control Drawing Number 7577, Revision 00 (Figure 4, below). The transmitter approval by the Canadian Standards Association for installation in Hazardous environments is based on installation through an Intrinsic Safety Barrier. -
Page 11: Figure 4. Intrinsically Safe Installation
Figure 4. Intrinsically Safe Installation FSMAN.6 081214 Page 11... -
Page 12: Wiring For Voltage Output Models
Wiring for Voltage Output Models Figure 5 shows the wiring for voltage output models. (Optional wiring is also shown for alarm outputs.) For 0-5V models, the supply voltage can be 10-30VDC. Note: Output voltage range must be specified at the time of ordering. They cannot be interchanged by the user. -
Page 13: Wiring For Frequency Or Pulse Output Models
Wiring for Frequency or Pulse Output Models Figure 6 shows the wiring for either frequency output or pulse output models. (Optional wiring is also shown for alarm outputs.) Note: “Frequency” or “Pulse Output” model must be specified at the time of ordering. They cannot be interchanged by the user. -
Page 14: Power-Up
POWER-UP At power-up, the following appears on the LCD: Firmware Revision 5.67 or Higher Electronics Revision It takes 2 seconds for these messages to be displayed, during which time the output of the flowmeter is clamped at zero flow. After 2 seconds, the output signal starts indicating actual flow. -
Page 15: Flow Rate
Flow Rate Available with: All models in Low- Speed mode Not Available with: High-Speed mode In Run Mode: 1. Press A2 (or press and release a few times) until “rATE” is displayed. 2. Release A2. The flowmeter will display Flow Rate. Press until “rATE”... - Page 16 Viewing the Totalizer The Totalizer value is displayed in three 3-digit groups (9 digits total) as shown. This is the low-order 3 digits (000 through 999), as indicated by the one horizontal bar on the left of the LCD. The low-order digits may or may not include a decimal point. This depends on the displayed units in rate mode.
-
Page 17: Pressure
When the Totalizer readout exceeds 9 digits (inclusive of the decimal places), the display shows two lower vertical bars on the left side to indicate overflow. The leftmost display segments will look like the following patterns: Low order digits in overflow: Middle order digits in overflow: High order digits in overflow: The count shown on the display remains accurate until a second overflow occurs (2,000,000,000... - Page 18 Available with: All models in Low- Speed mode Not Available with: High-Speed mode 1. Press A2 until “Pr” is displayed, then release A2. Press until “Pr” is displayed, then release Pressure mode indicator Note 1: Pressure is displayed in PSIA. There is no output signal for pressure. Note 2: Alarm 1 LED flashes to indicate that the LCD readout corresponds to line pressure and not flow.
-
Page 19: Temperature
Temperature Available with: All models in Low- Speed mode Not Available with: High-Speed mode 1. Press A2 until “t” is displayed, then release A2. Press until “t” is displayed, then release Temperature mode indicator Note 1: Temperature is displayed in degrees Fahrenheit. There is no output signal for temperature. -
Page 20: User Menu
USER MENU The following features and options can be selected, viewed and changed by the user. Response Time – Select between high-speed (5 msec) and low-speed (up to 50 msec) Sample Delay – Sampling delay from 0-9 msec ... - Page 21 OFS Menu Structure and Feature Compatibility Mode Response Time Low Speed Done High Speed (Low-Speed settings) Done Sampling Delay Add additional delay of 0-9 msec (Low-Speed settings) Done Signal Averaging Select array size of 1-16 Done High Flow Alarm Use A1 and A2 to set value Done Low Flow Alarm Use A1 and A2 to set value...
-
Page 22: Select Response Time
Select Response Time Available with: High-Speed Low-Speed Single-Gas Multi-Gas 4-20mA 0-5V (1-5V) 0-10V (2-10V) Bi-directional Not Available with: 0-1000 Hz 200-1200 Hz Pulse output Battery-operated Press and release 1. Press A1 until “rESP” is displayed, then release A1. 2. Press A2. Either “HS” (high-speed) or “LS” is displayed, showing the current setting. 3. -
Page 23: Sampling Delay
Sampling Delay Available with: Low-Speed Single-Gas Multi-Gas 4-20mA 0-5V (1-5V) 0-10V (2-10V) Bi-directional Not Available with: 0-1000 Hz 200-1200 Hz Pulse output Battery-operated Press and release 1. Press A1 until “dELY” is displayed, then release A1. 2. Press A2. The current setting will be shown. This is a value between 0-9, in milliseconds. -
Page 24: Signal Averaging
Signal Averaging Available with: Low-Speed Single-Gas Multi-Gas 4-20mA 0-5V (1-5V) 0-10V (2-10V) Bi-directional Not Available with: 0-1000 Hz 200-1200 Hz Pulse output Battery-operated Press and release 1. Press A1 until “AvG” is displayed, then release A1. 2. Press A2. The current setting will be shown. This is a value between 1-16, and indicates how many flow samples are averaged (moving average window size) to calculate the output. - Page 25 Step Response Examples: Response = LS Response = HS Delay = 0 Delay = N/A AVG = 1 AVG = N/A 10 ms/div 10 ms/div Response = LS Response = LS Delay = 0 Delay = 9 AVG = 4 AVG = 8 10 ms/div 50 ms/div...
-
Page 26: Set High Flow Alarm
Set High Flow Alarm Available with: High-Speed Low-Speed Single-Gas Multi-Gas 4-20mA 0-5V (1-5V) 0-10V (2-10V) 0-1000 Hz 200-1200 Hz Pulse output Battery-operated Not Available with: Bi-directional Press and release 1. Press A1 until “HFLo” is displayed, then release A1. 2. Press A2 and hold until the setpoint is displayed on the LCD (in this example, high flow alarm is set at 80.0). - Page 27 Release Note 1: Valid setpoint range is 0-100% of full-scale flow. If the alarm value is set higher than full-scale, it is clamped at full-scale upon exiting this menu. Note 2: To disable the alarm, set its value to zero. Note 3: The red ALARM 1 LED comes on when flow exceeds this setpoint.
-
Page 28: Set Low Flow Alarm
Set Low Flow Alarm Available with: High-Speed Low-Speed Single-Gas Multi-Gas 4-20mA 0-5V (1-5V) 0-10V (2-10V) 0-1000 Hz 200-1200 Hz Pulse output Not Available with: Battery-operated Bi-directional 1. Press A1 (or press and release a few times) until “LFLo” is displayed, then release A1. Use the same method as explained above (“Set High Flow Alarm”) to set the low flow alarm as follows: 2. -
Page 29: Tare (Re-Zero) The Flowmeter
Tare (Re-Zero) the Flowmeter Available with: ALL MODELS Important Notice: Because of the excellent sensitivity of these flowmeters, small readings may actually indicate leaks in the system and should not be zeroed out. Ensure that there is no flow through the device when attempting to tare the output. The flowmeter can be tared in two ways: ... - Page 30 USING the external Tare wire: Refer to Figure Figure 5 Figure 6, showing the proper connection between the external Tare wire and ground. Short this wire to ground for a minimum of 5 seconds. “Tare” will be displayed as soon as the wire is grounded and remains displayed until the internal tare is successfully completed, upon which time “SEt”...
-
Page 31: Scaling The Output Span
Scaling the Output Span Available with: Low-Speed Single-Gas Multi-Gas 4-20mA 0-5V (1-5V) 0-10V (2-10V) Not Available with: High-Speed 0-1000 Hz 200-1200 Hz Pulse Output Battery-Operated Bi-directional This feature is for scaling the analog output to a value other than the factory calibration. For example, for a 100 SLPM flowmeter with 4-20mA output, the output can be spanned to 20mA at 75 SLPM. -
Page 32: Selecting The Gas
Selecting the Gas Available with: High-Speed Low-Speed Single-Gas Multi-Gas 4-20mA 0-5V (1-5V) 0-10V (2-10V) 0-1000 Hz 200-1200 Hz Pulse output Battery-operated Bi-directional Not Available with: Single-Gas 1. Press and release A1 until “GAS” is displayed. Then release A1. 2. Press A2, the current selection will be displayed as shown 3. -
Page 33: Totalizer On/Off
Totalizer ON/OFF Available with: Low-Speed Single-Gas Multi-Gas 4-20mA 0-5V (1-5V) 0-10V (2-10V) 0-1000 Hz Battery-operated Not Available with: High-Speed 200-1200 Hz Pulse output Bi-directional 1. Press and release A1 until “tot” is displayed. 2. Release A1. 3. Press A2. If the Totalizer is running the LCD will show “on”. 4. -
Page 34: Pulse Output Setting
Pulse Output Setting Available with: Low-Speed Single-Gas Multi-Gas Pulse Output Not Available with: High-Speed 200-1200 Hz 4-20mA 0-5V (1-5V) 0-10V (2-10V) 0-100 Hz Battery-operated Bi-directional The pulse output rate is typically 5000 pulse per minute for all models. Pulse width is 2 msec for all models. -
Page 35: Checking Battery Voltage
Checking Battery Voltage Available with: Battery-operated Not Available with: All Other Models 1. Press and release A1 until “bAtt” is displayed. 2. Press and hold A2 to read the battery voltage. 3. Release A2 when done. This feature is intended for checking how much battery life is left. Typically, when a 9V alkaline battery voltage drops to 7.5V, it should be replaced. -
Page 36: Special Features
SPECIAL FEATURES Factory Reset This feature is provided to override all user-configurable parameters, and replacing them with the original factory settings. It is a useful tool if the user is unsure how he/she has programmed some of the parameters. To enter the Factory Reset mode: 1. -
Page 37: Low Supply Voltage Indicator
Low Supply Voltage Indicator If the supply voltage drops below acceptable levels, the two Alarm LEDs will either flash or turn on (solid). If the alarm outputs are wired, the signal will track the LED states to indicate that the operation of the flowmeter is unreliable. -
Page 38: Diagnostic Mode
Diagnostic Mode This feature is provided to observe the state of the internal sensors. It is strictly a passive troubleshooting tool. THERE ARE NO USER-SERVICEABLE PARTS INSIDE THE FLOWMETER. If any parts of the flowmeter are removed or unscrewed, the warranty becomes void and UFM assumes no responsibility for the proper operation and/or safety of the unit. - Page 39 9. Press A2 until “dP” is displayed, then release A2. 10. The LCD will show a 3- or 4-digit reading. 11. Observe this reading for about 10 seconds to make sure it is stable. Then record the low and high values encountered during the 10 seconds. Differential pressure sensor reading is displayed 12.
-
Page 40: How To Order A Single-Gas Flowmeter
HOW TO ORDER A SINGLE-GAS FLOWMETER FSMAN.6 081214 Page 40... - Page 41 FSMAN.6 081214 Page 41...
-
Page 42: Dimensions Of Ofs Series
DIMENSIONS OF OFS SERIES Approximate in inches (mm) Flow Rate “H” Height “C” Height “P” Port Maximum Overall to Port Connections 120 SCFH 2.45” [62mm] 0.68” [17mm] 1/4-18 NPT 280 SCFH 2.59” [66mm] 0.93” [24mm] 1/4-18 NPT 520 SCFH 2.98” [76mm] 0.55”... -
Page 43: Return Material Authorization
NOTICE RETURN MATERIAL AUTHORIZATION Please read the following UFM policy information carefully. By following the guidelines outlined below you will assist in providing a timely evaluation and response regarding the status of your flowmeter. UFM evaluates all AUTHORIZED RETURNED MATERIALS in a timely manner and will promptly provide notification regarding the status of the related materials and/or a written quotation indicating the total charges and description of the necessary repairs. - Page 44 If no disposition is received by UFM within 30 days, the goods will be scrapped and the $90.00 evaluation fee will be billed. WARRANTY RETURNS Warranty returns must be shipped prepaid to UFM. UFM will review the goods and advise the customer of the evaluation and validity of the warranty claim. Valid warranty claims will be repaired or replaced at no charge.
-
Page 45: Warranty Information
1) ACCEPTANCE AND INTEGRATION CLAUSE: This Sales Order Acknowledgment and the sales order information that Universal Flow Monitors, Inc. ("Universal") attaches to or associates with it (herein "Acknowledgment"), constitutes an acceptance by Universal of an offer by the buyer upon the conditions and terms and at the prices stated in this Acknowledgment. - Page 46 (5) Any engineering, labor or other services involving aircraft. "Hazardous properties" include radioactive, toxic or explosive properties; "Nuclear facility" means (a) Any nuclear reactor; or (b) Any equipment or device designed or used for: (1) Separating the isotopes of uranium or plutonium; (2) Processing or utilizing spent fuel;...
Need help?
Do you have a question about the FlowStream OFS and is the answer not in the manual?
Questions and answers